Overview of the Manage Service
The Cisco Connected Mobile Experiences (Cisco CMX) MANAGE service comprises the following tabs, which help you perform a variety of tasks to effectively manage the Cisco CMX configuration, including, but not restricted to those listed here:
-
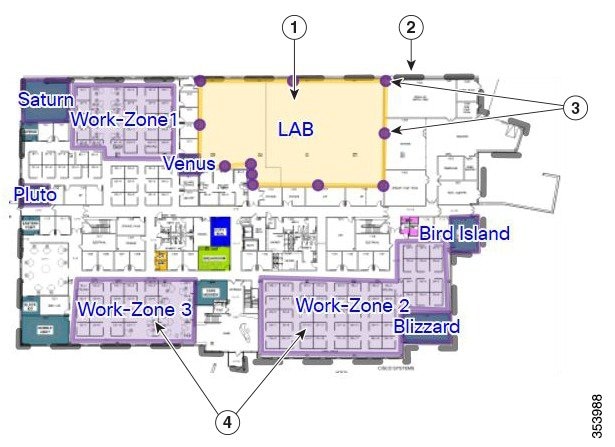
Locations—Enables you to manage and add location zones and tags. For more information, see Managing Perimeters and Zones on Location Maps.
-
Licenses—Enables you to manage and add licenses. For more information, see Managing Licenses.
-
Users—Enables you to manage and add users. For more information, see Managing Users.
-
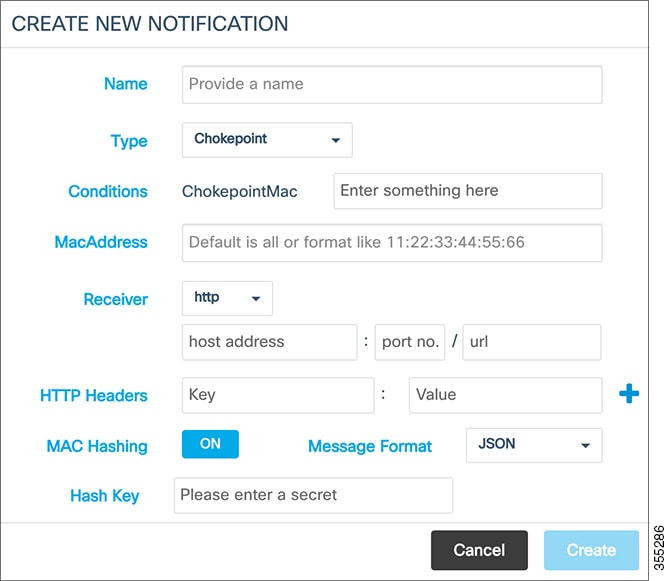
Notifications—Enables you to manage and add email and HTTP notifications. For more information, see Managing Notifications from Applications.
-
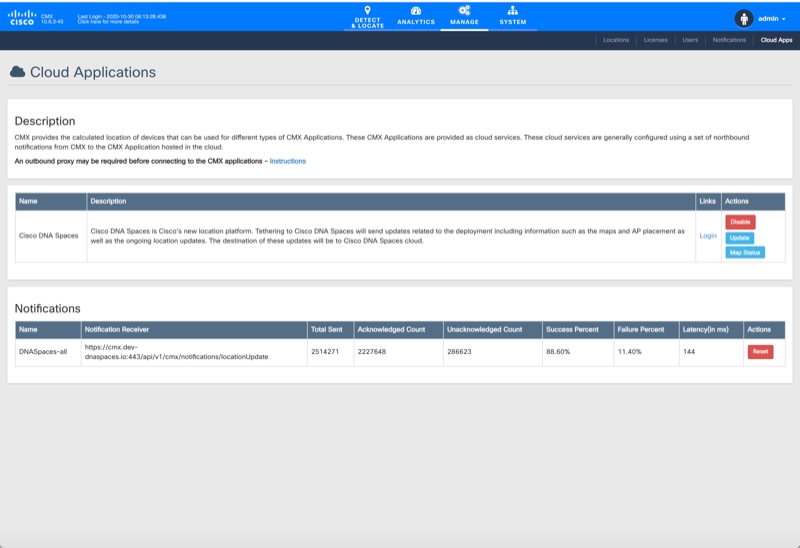
Cloud Apps—Enables you to manage Cisco CMX Cloud service. For more information, see Managing Cisco CMX Cloud Apps.
-
Verticalization—Enables you to generate vertical specific reports. For more information, see Managing Verticalization.
 Note |
All the Manage service tasks can be performed only by users with corresponding user roles. For information on user roles, see User Roles. |


 Feedback