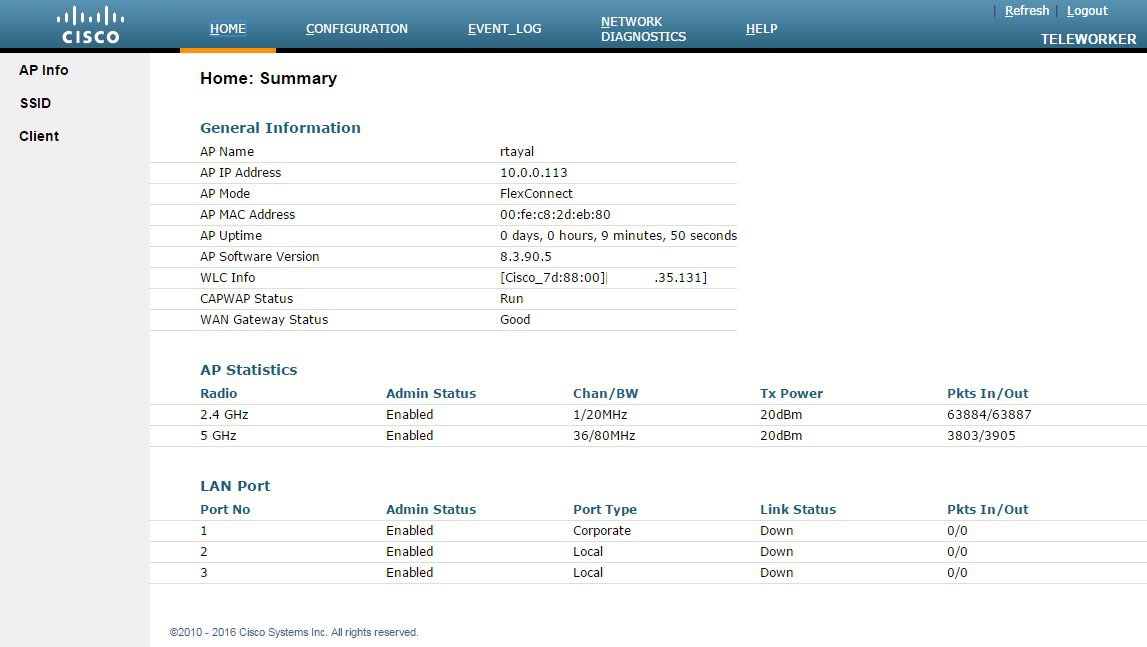
Configuring Cisco OfficeExtend Access Point 1810

The Cisco OfficeExtend Access Point 1810 requires minimal configuration by the end user. For environments where zero-touch end user deployments are required, the corporate IT department or network-integration partner should pre–configure the AIR-OEAP1810 with the address of the corporate Wireless LAN controller, as described in this procedure.


Table 1 Cisco OfficeExtend Access Point 1810 Ports
Port on OEAP 1810 Port as Noted in Figure Port Number as shown on OEAP 1810
Remote LAN Port (Corporate) 1 PSE LAN 1 and LAN 2
OEAP Local Access Port 1 LAN 3
WAN 2 WAN

Note


Starting 8.3.111.0 release, up to 4 clients are supported behind each Wired LAN interface.


Note


LAN 3 is a dedicated local port on OEAP1810. Connect your laptop to this device to access the local OEAP configuration.


Procedure
    Step 1   Connect the WAN port (as in Figure) on the back of the Cisco OfficeExtend Access Point 1810 to your home router/gateway. The Cisco OfficeExtend Access Point gets an IP address from the home router/ gateway.
    Note   

    The Cisco OfficeExtend Access Point is not designed to replace the functionality of a home router, and it should not be connected directly to the service provider gateway.

    Step 2   After the Cisco OfficeExtend Access Point has started, connect a computer to the port labeled as LAN3. LAN3 is a dedicated local port on OEAP1810. The computer gets an IP address from the default DHCP address pool of 10.0.0.0/24.
    Step 3   Navigate to the Cisco OfficeExtend Access Point by using its default IP address: http://10.0.0.1/
    Step 4   Log in to the Administration page by using the default credentials admin/admin. The summary page appears.

    Step 5   Navigate to Configuration > WAN.
    Step 6   In the Controller IP Address box, enter the outside IP address of the primary WLC, and then click Apply. (Example: 172.16.130.20)

    The Cisco OfficeExtend Access Point connects to the controller and downloads the current software image. Allow 15–20 minutes for the device to download and reboot with the new code and configuration.

    Note   

    While the access point attempts to make a connection to the WLC, LED in front of the cradle flashes red, amber, and green. Once connected, the status LED flashed yellow until the AireOS download is complete. When the download is complete, the access point restarts. After the access point connects to the controller again, the status LED is displayed as solid green.