- Introduction
- Design Overview
- Installing AIR-OEAP1810
- Understanding ports on AIR-OEAP1810
- Power Options on AIR-OEAP1810
- Software Features on AIR-OEAP1810
- Configuring WLC
- Configuring Voice or Data WLAN Connectivity
- Configuring AP Authentication
- Configuring Cisco OfficeExtend Access Point 1810
- Configuring Personal SSID on OfficeExtend Access Point 1810
Configuring
WLC
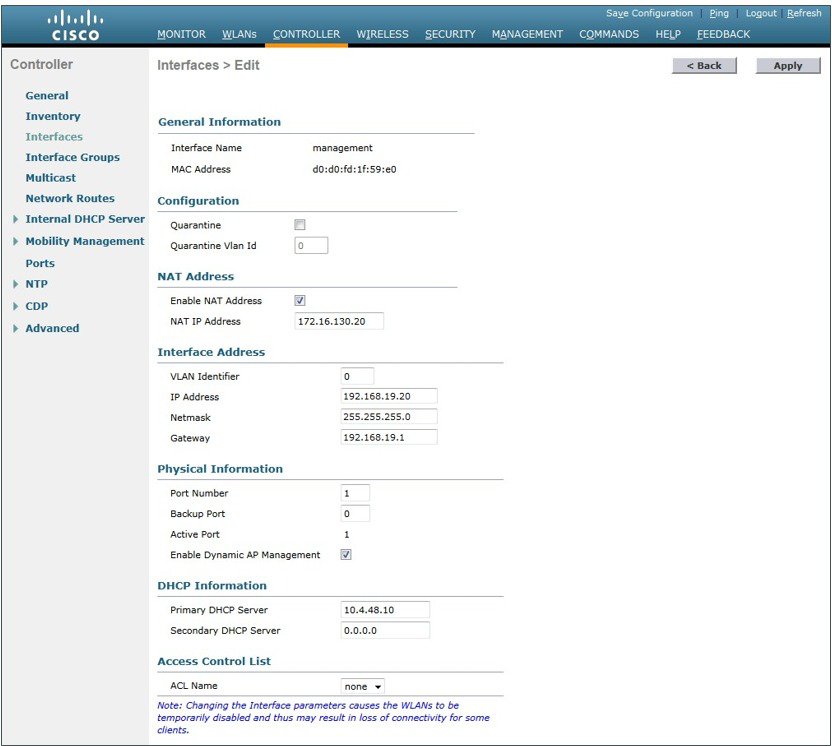
Configure the WLC for NAT
The Internet edge firewall translates the IP address of the WLC management interface in the DMZ to a publicly reachable IP address so Cisco OfficeExtend Access Points at teleworker locations can reach the WLC. However, in order for the Cisco OfficeExtend Access Points to be able to communicate with the WLC, the publicly reachable address must also be configured on the WLC management interface.
To configure the WLC for NAT, perform the following steps:
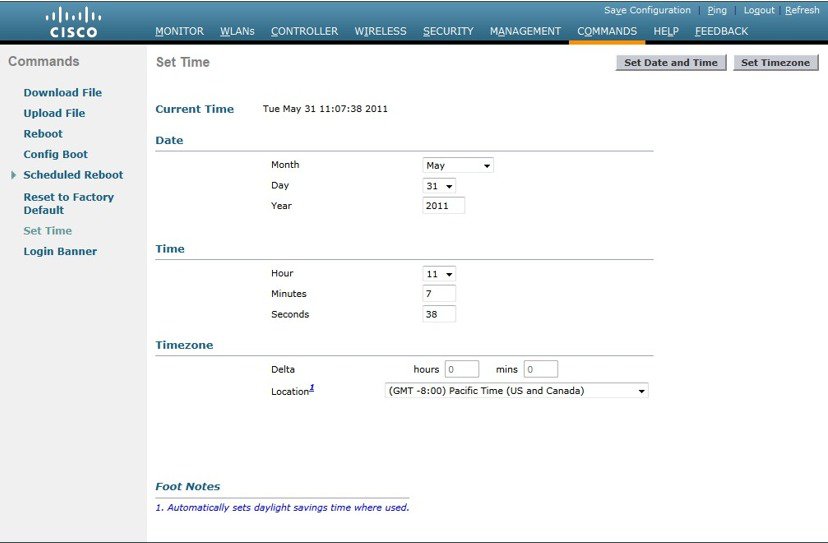
Configuring the Time Zone
To configure the time zone, perform the following steps:
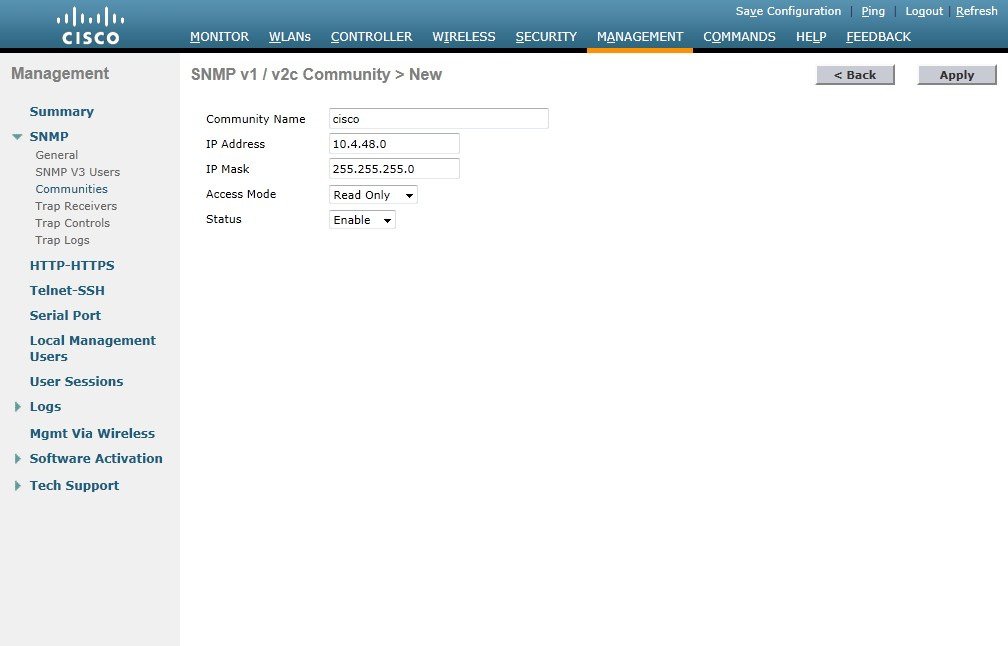
Configuring SNMP
To configure SNMP, perform the following tasks:
| Step 1 | In Management > SNMP > Communities, click New. | ||
| Step 2 | Enter the Community Name. (Example: cisco) | ||
| Step 3 | Enter the IP Address. (Example: 10.4.48.0) | ||
| Step 4 | Enter the IP Mask. (Example: 255.255.255.0) | ||
| Step 5 | In the
Status
list, choose
Enable,
and then click
Apply.
 | ||
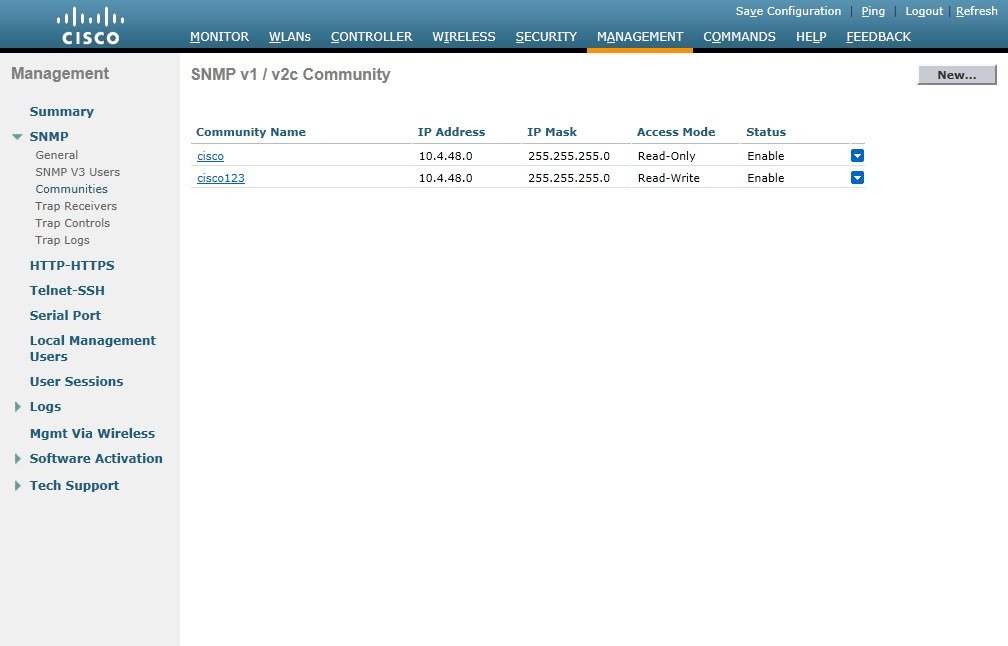
| Step 6 | In Management > SNMP > Communities, click New. | ||
| Step 7 | Enter the Community Name. (Example: cisco123) | ||
| Step 8 | Enter the IP Address. (Example: 10.4.48.0) | ||
| Step 9 | Enter the IP Mask. (Example: 255.255.255.0) | ||
| Step 10 | In the Access Mode list, choose Read/Write. | ||
| Step 11 | In the
Status
list, choose
Enable,
and then click
Apply.

| ||
| Step 12 | Navigate to Management > SNMP > Communities. | ||
| Step 13 | Point to the blue box for the public community, and then click Remove. | ||
| Step 14 | On the "Are you sure you want to delete?" message,click OK . | ||
| Step 15 | Repeat Step
13 and Step 14 for the private community.
| ||
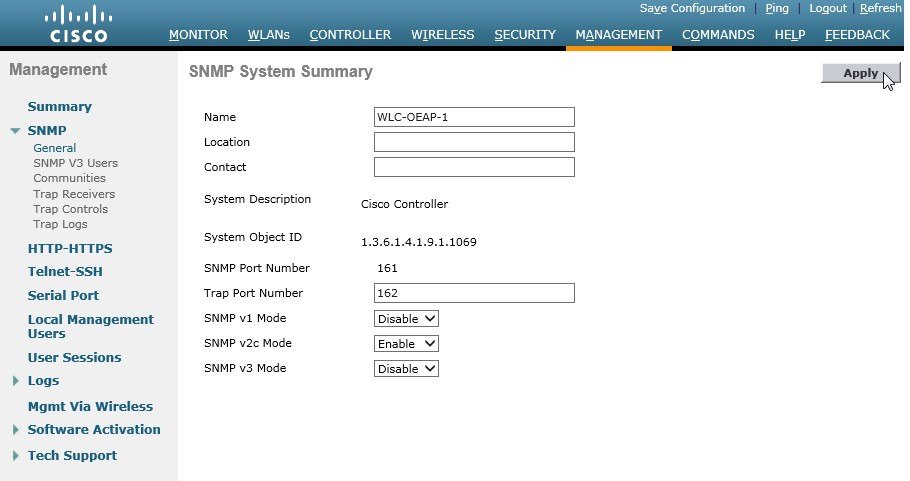
| Step 16 | Navigate to
Management
>
SNMP
>
General
and disable SNMP v3 Mode, and click
Apply.
| ||
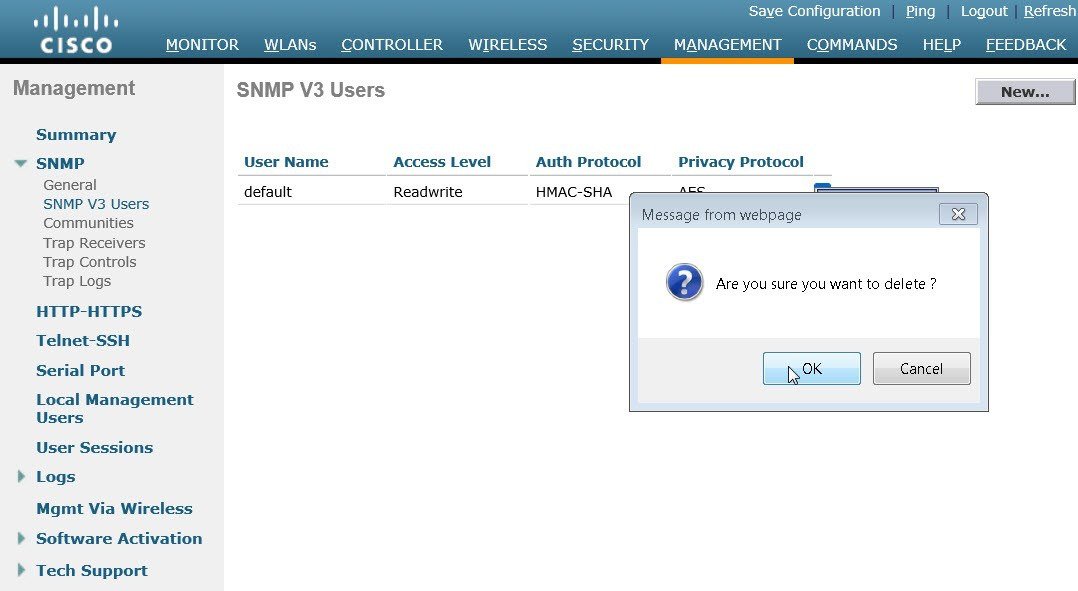
| Step 17 | Navigate to Management > SNMP Communities > SNMP V3 Users. | ||
| Step 18 | On the
right side of the default
User
Name, point and click the blue down arrow, and then click
Remove.

| ||
| Step 19 | Press
OK to
confirm that you are sure you want to delete, then press
Save
Configuration.
|
Configuring Wireless User Authentication
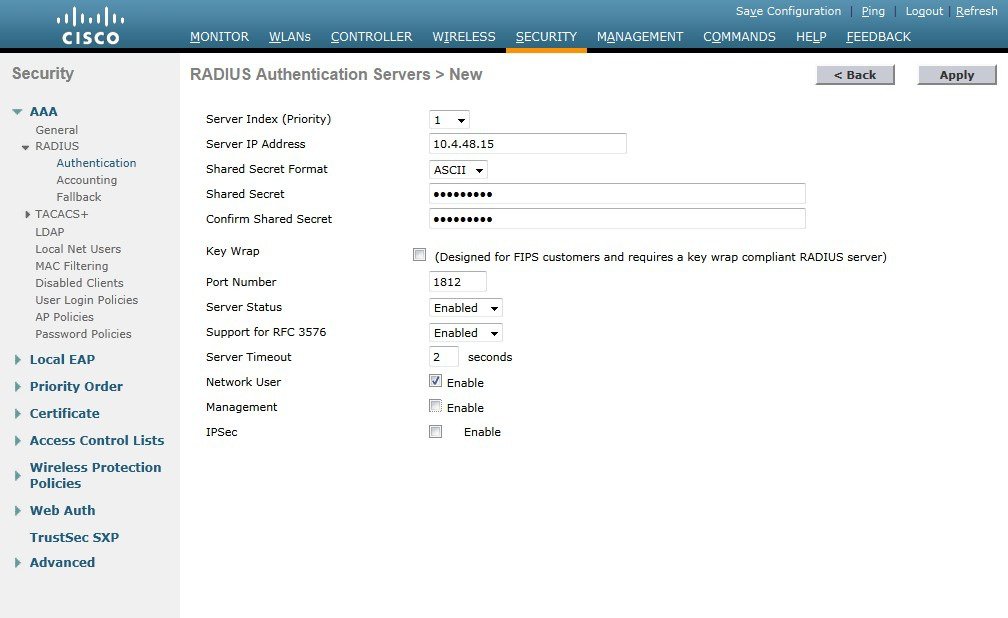
| Step 1 | In Security > AAA > Radius > Authentication, click New. |
| Step 2 | Enter the Server IP Address. (Example: 10.4.48.15) |
| Step 3 | Enter and confirm the Shared Secret. (Example: SecretKey) |
| Step 4 | To the
right of Management,
clear Enable, and
then click
Apply.
|
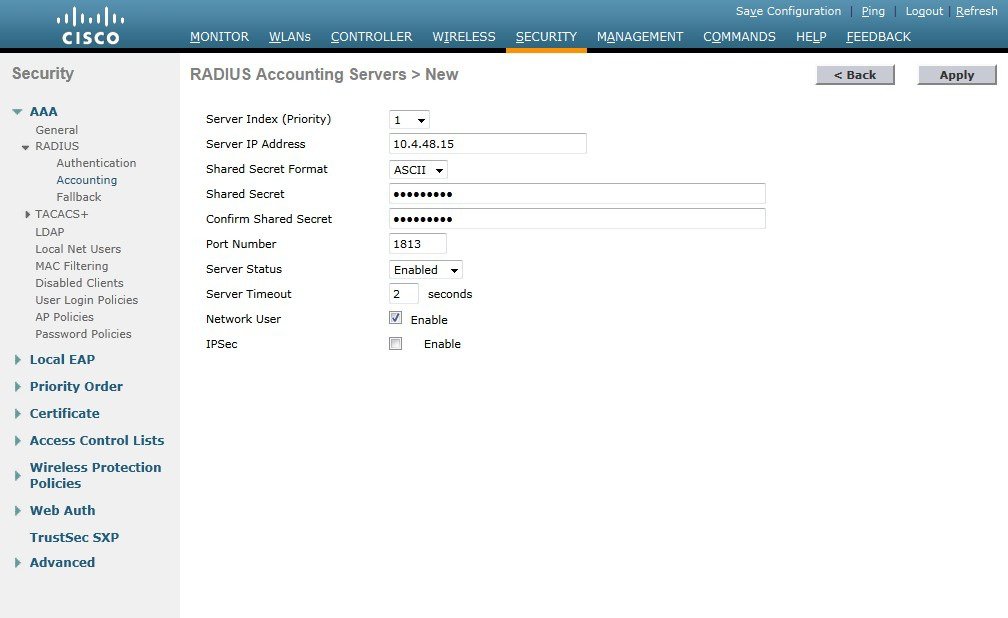
| Step 5 | To the right of Management, clear Enable, and then click Apply. |
| Step 6 | Enter the Server IP Address. (Example: 10.4.48.15) |
| Step 7 | Enter and
confirm the
Shared
Secret, and then click
Apply.
(Example: SecretKey)
|
 Feedback