Creating a New Service Class Template (SCT)
Available Languages
Table Of Contents
Creating a New Service Class Template
Starting the Service Class Template Manager
Navigating the Service Class Template Manager
Verifying SCT Files are on the Switch
Creating a New Service Class Template
Introduction
Up to this point, this document has explained how to configure the MGX 8850 using only the CLI. However, Service Class Templates can only be modified or created using the Cisco WAN Manager (CWM). The CWM is a Graphic User Interface (GUI) and must be purchased separately. This appendix explains how to use the CWM to create your own SCTs. Refer to the Cisco WAN Manager Operations Guide for detailed information on how to use the CWM.

CautionOnly network engineers who are extremely knowledgeable about ATM and its parameters should create and use their own SCTs.
Creating a new SCT involves configuring the ATM parameters for specific classes of service to suit the special needs of your customers. For example, if you have customers with special policing or nonpolicing requirements, you can create an SCT to meet those specifications.
Some service providers offer different levels of service (such as gold, silver, or bronze) at different prices. Each level of service offers a different class of service and is supported by a different SCT.
Starting Cisco WAN Manager
To start Cisco WAN manager, proceed as follows:

Note
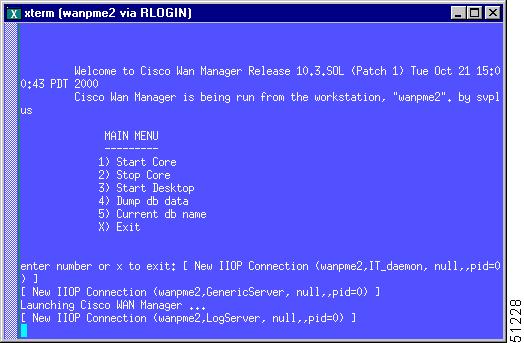
Step 1
The CWM Main Menu appears.
Figure D-1 CWM Main Menu
Step 2
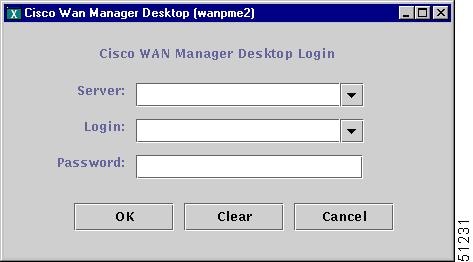
Step 3
The password prompt box appears.
Figure D-2 CWM Password Prompt
Note
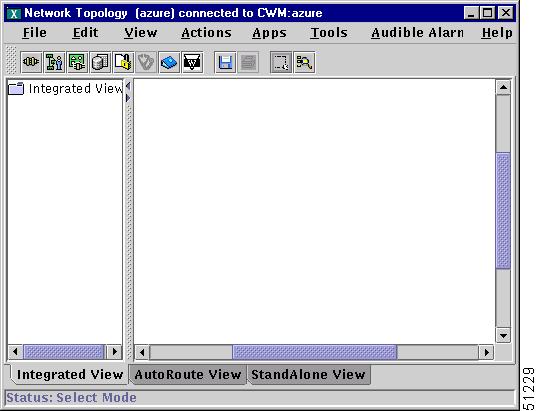
Step 4
After a few seconds, the CWM GUI application appears.
Figure D-3 Cisco WAN Manager (CWM) GUI Application Main View
Starting the Service Class Template Manager
The Service Class Template Manager can be started from the toolbar by clicking on the Service Class Template Manager icon:
Figure D-4 CWM Toolbar

Figure D-5 Close-up of Service Class Template Manager Icon

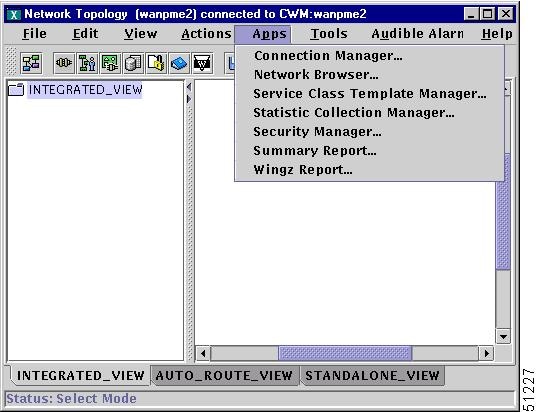
The Service Class Template Manager can also be launched from the Apps menu by clicking on Apps and selecting Service Class Template Manager:
Figure D-6 CWM Apps Menu View
Navigating the Service Class Template Manager
Figure D-7 shows the Service Class Template Manager. In the left column, under SCT File, the SCTs that are available on the card are listed. This view shows two SCTs:
•
•
PORT : AXSM_EGR0[0] is highlighted.
Figure D-7 Service Class Template Manager with Policy Selected

SCT parameters can be added or changed using either the SCT Tables or the SCT Entry Fields.
SCT Tables
The SCT Tables are the white rows and columns that appear in the upper half of the SCT Manager Window. The rows are the service types, and the columns are the parameters. Different parameter tables are displayed by selecting one of the different table tabs. The table tabs run horizontally through the middle of the SCT Manager. Figure D-7 shows the Policy Table tab selected.
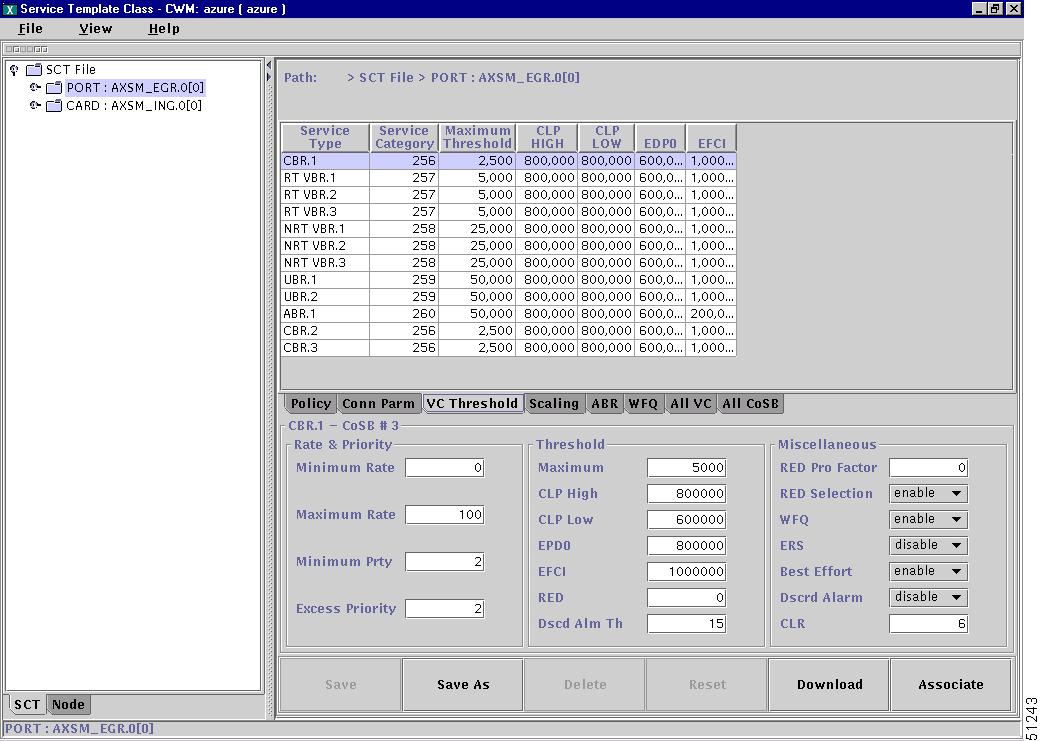
To display different parameter tables, select one of the other tabs, such as Conn Parm or VC Threshold. For example, Figure D-8 shows the Service Class Template Manager with the VC Threshold tab selected.
Figure D-8 Service Class Template Manager with VC Threshold Selected
Entry Fields
The Entry Fields appear in the gray, lower half of the SCT Manager Window. When you select a Service Type in the SCT Table, the name of the Service Type appears over the Entry Fields section and the CosB parameters for that Service Type appear in the Entry Fields.
Changing SCT Parameters
SCT Parameters can be modified using either a table or an entry field. The SCT tables contain all parameters, while the entry fields display only the most frequently accessed parameters.
Using the SCT Tables
To change an SCT parameter using the SCT Tables, select and highlight the field of the parameter you want to change by double-clicking on it. Once the field is selected you can either type a new number into the field or select a new value from a pull-down menu. Most fields have pull-down menus, but some require that the new value be typed.
Figure D-9 shows the SCT Manager with the number 257 in the Service Type field for RT VBR.1 selected. To change this value, type in a new value.
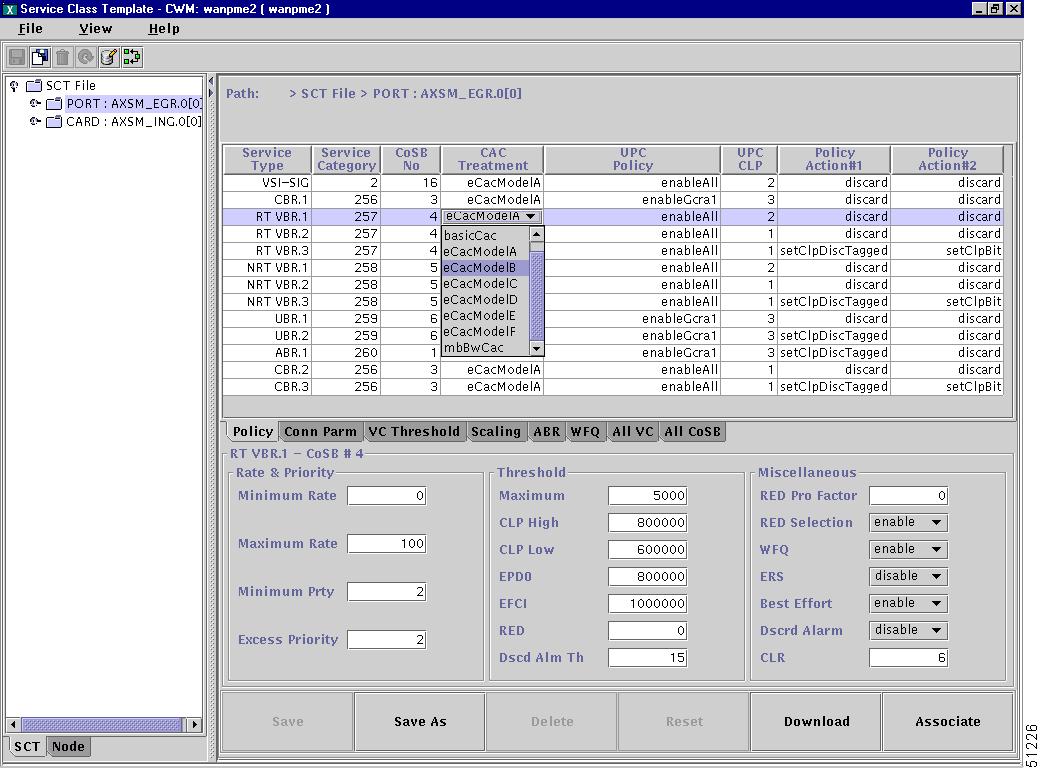
Figure D-10 shows the SCT Manager with the CAC Treatment field for RT VBR.1 selected and the pull-down menu displayed. To change this value, select a different value from the pull-down menu.
Figure D-9 SCT Manager with a Service Category Field Selected
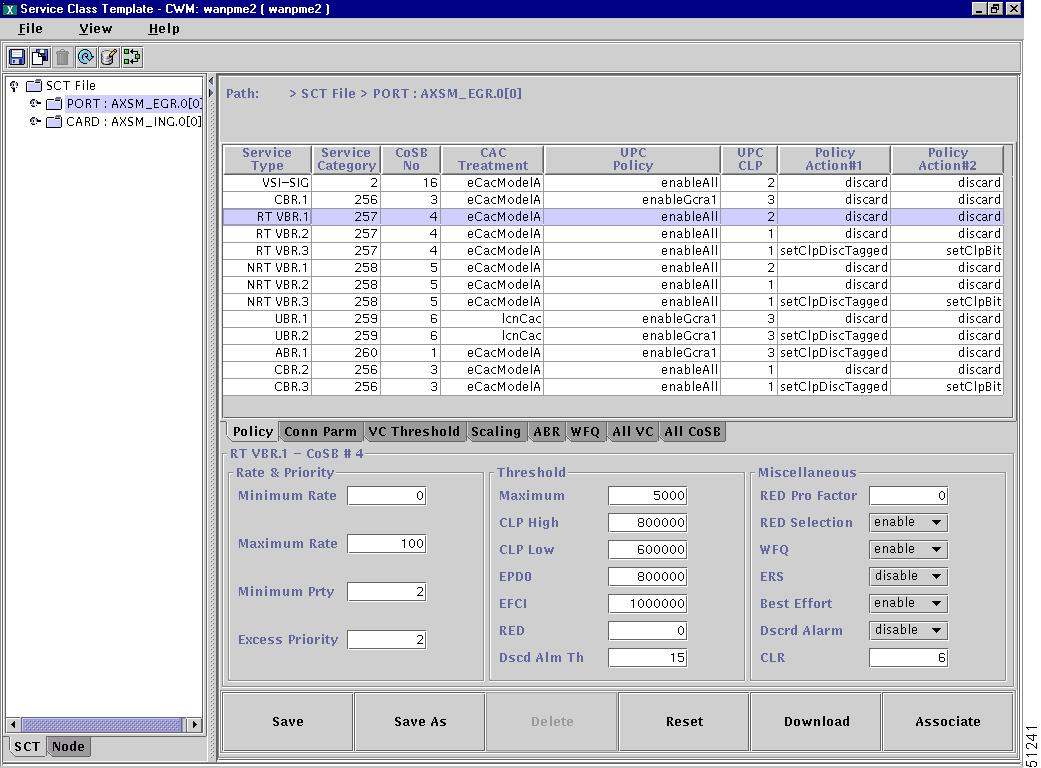
Figure D-10 SCT Manager with Service a CAC Treatment Field Selected
Using the Entry Fields
When you select a Service Type in the SCT Table, the name of the Service Type appears over the Entry Fields section and the CosB parameters for that Service Type appear in the Entry Fields.
The Entry Fields are divided into three columns:
•
•
•
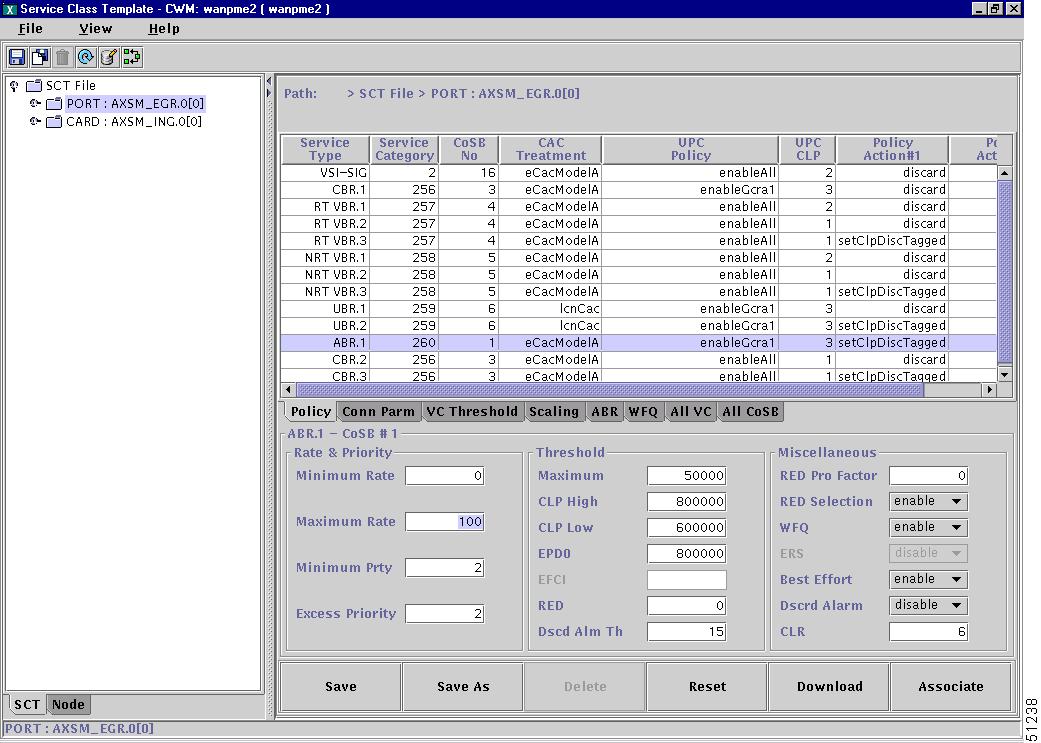
Figure D-11 shows the SCT Manager with ABR.1 selected. ABR.1 - CosB #1 appears over the Entry Fields section. 100 in the Maximum Rate field of the Rate and Priority column is highlighted in blue.
To change a parameter in an entry field, select and highlight the field of the parameter you want to change by double-clicking on it. Then, type in the new value.
Figure D-11 SCT Manager with ABR.1 Selected
Reset Button
The RESET button resets all of the SCT fields to their saved settings.
Figure D-12 SCT Manager RESET Button

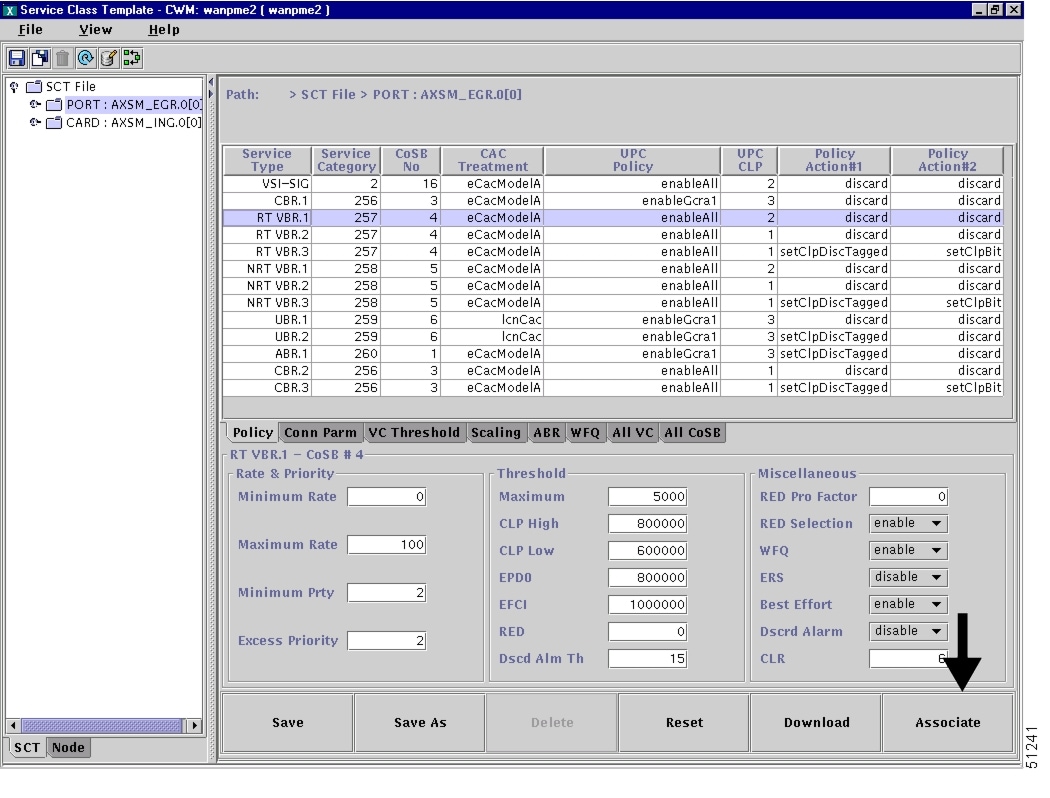
Associate Button
The ASSOCIATE button opens a dialog box and allows you to select a network.
Figure D-13 SCT Manager ASSOCIATE Button
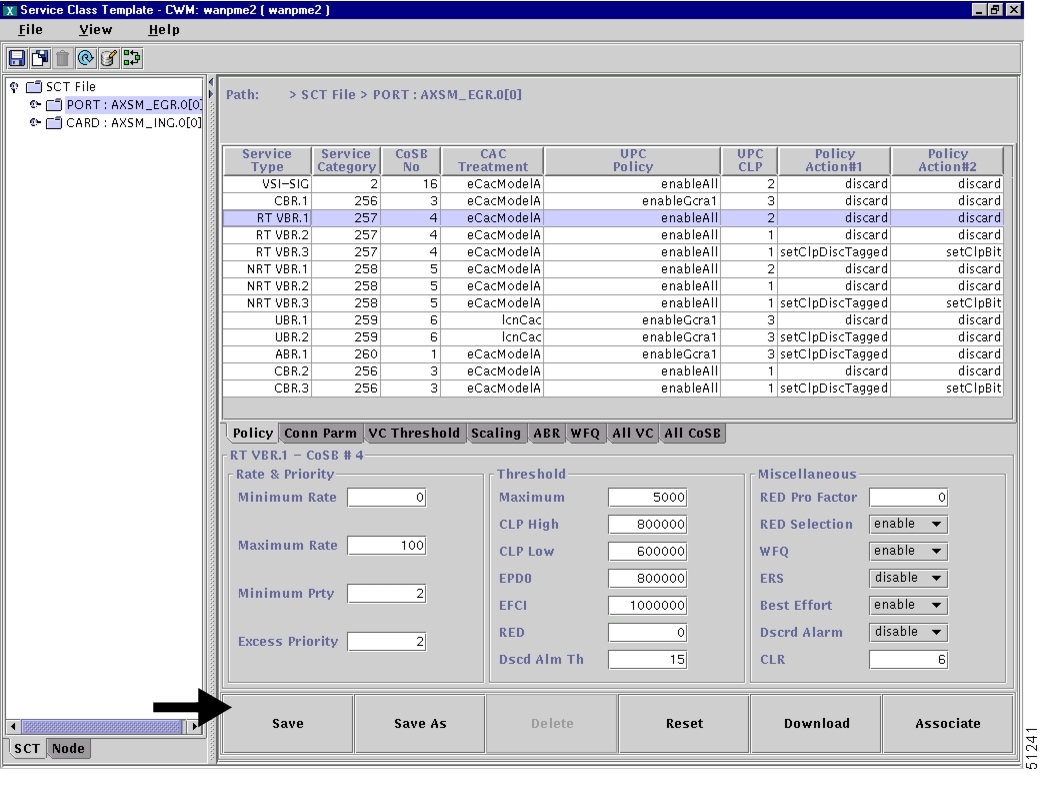
Saving a New or Modified SCT
To save a new or modified SCT, click the Save or Save As button in the lower left corner of the SCT Manager. Enter a new name and press enter.
Figure D-14 shows an arrow pointing to the SCT Manager Save button.
Figure D-14 SCT Manager SAVE Button
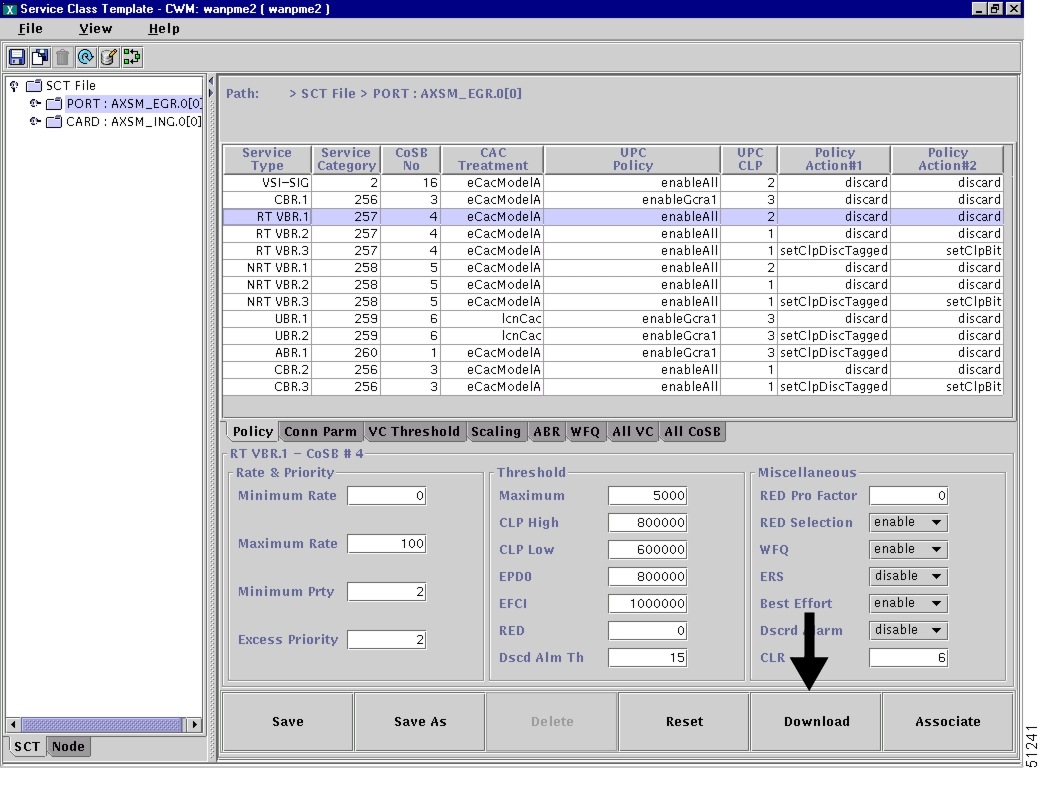
Downloading a New SCT
To download an SCT, click on the DOWNLOAD button and follow the instructions in the Download dialog box.
Figure D-15 SCT Manager DOWNLOAD Button
Verifying SCT Files are on the Switch
To verify that an SCT is properly stored on the switch, use the following procedure.
Step 1
Step 2
pop20two.7.PXM.a > pwd
C:
Step 3
pop20two.7.PXM.a > cd SCTStep 4
pop20two.7.PXM.a > cd AXSMStep 5
pop20two.7.PXM.a > ll
size date time name
-------- ------ ------ --------
512 NOV-17-2000 20:04:28 . <DIR>
512 NOV-17-2000 20:04:28 .. <DIR>
6910 NOV-17-2000 20:04:28 AXSM_SCT.CARD.7
6910 NOV-17-2000 20:04:30 AXSM_SCT.PORT.7
7212 NOV-17-2000 20:04:30 AXSM_SCT.CARD.2
7212 NOV-17-2000 20:04:30 AXSM_SCT.CARD.3
7212 NOV-17-2000 20:04:30 AXSM_SCT.PORT.2
7212 NOV-17-2000 20:04:30 AXSM_SCT.PORT.3

In the file system :
total space : 819200 K bytes
free space : 702351 K bytes
Step 6
 Feedback
Contact Cisco
- Open a Support Case

- (Requires a Cisco Service Contract)