Block an Application Using Management Center
Is this Guide for You?
This guide is for network administrators who manage Cisco Secure Firewall Threat Defense devices using Cisco Secure Firewall Management Center and have enabled Snort 3 as the inspection engine. It provides detailed steps to block an application using an access control policy rule that relies on Snort 3 application detection.
Sample scenario
Alex manages Threat Defense devices running Snort 3 and controlled by Management Center.
Video streaming applications are consuming excessive bandwidth during business hours.
Alex must:
-
Block
YouTube. -
Allow other general web browsing traffic.
Alex creates an access control policy rule using the application condition and sets the action to Block, then deploys the policy to the managed devices.
Overview
In Snort 3 deployments, application control is enforced through access control policy rules that use application conditions.
Snort 3 provides:
-
Enhanced application detection.
-
Improved encrypted traffic awareness (Server Name Indication (SNI), certificate data, QUIC protocol visibility).
-
Better performance and inspection accuracy compared to earlier engines.
Application blocking works as follows:
-
Traffic matches an access control policy rule.
-
Snort 3 performs application identification.
-
If the application matches the rule condition and the action is Block, the traffic is denied.
System Requirements
This table lists the platforms and versions for this use case.
|
Product |
Version |
Version used in this document |
|---|---|---|
|
Cisco Secure Firewall Threat Defense (formerly Firepower Threat Defense/FTD) |
6.2.3 or later |
7.6 |
|
Cisco Secure Firewall Management Center (formerly Firepower Management Center/FMC) |
6.2.3 or later |
7.6 |
Prerequisites
-
Ensure that the Threat Defense device is managed by Management Center and is online.
-
Ensure that the Threat Defense device is running Snort 3.
-
Ensure that you have the required permissions to edit and deploy policies in Management Center.
-
Identify the application you want to block (for example, YouTube, WhatsApp, BitTorrent, and so on).
Guidelines
-
Rule order: For optimal performance, place rules based on simple criteria—such as protocol, IP address, and port—at the top of the policy. Position computationally intensive rules, such as those requiring complex regex matching, at the bottom.
-
Use scope controls: Limit the rule with zones, networks, or users to avoid unexpected outages.
-
Enable logging: Logging simplifies validation and troubleshooting.
-
Test before wider customer rollout: Start with a pilot group or a limited subnet before enforcing the rule for a wider user base.
Workflow
-
Ensure that the prerequisites are in place.
-
Open the access control policy.
-
Create a new rule to block the application.
-
Configure the application matching condition.
-
(Optional) Restrict the scope of the rule.
-
(Optional) Enable logging.
-
Confirm and verify rule addition and order.
-
Deploy the configuration.
Confirm Snort 3 is enabled
Before you begin
Ensure that you review Prerequisites.
Procedure
|
Step 1 |
Choose Devices > Device Management. |
|
Step 2 |
Select the Threat Defense device. |
|
Step 3 |
In the Device tab, confirm the Inspection Engine is set to Snort 3. 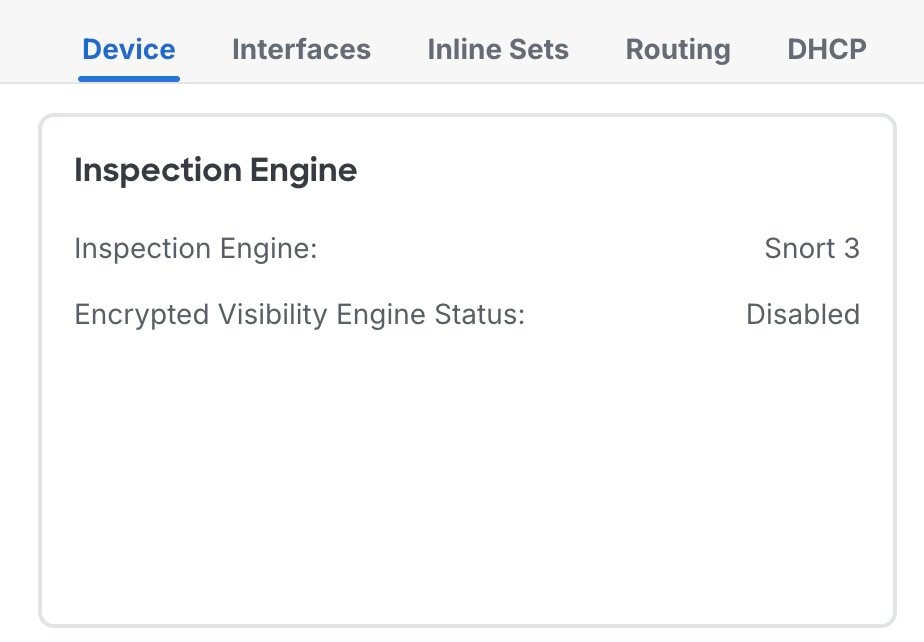 |
Open the access control policy
Procedure
|
Step 1 |
Choose Policies > Access Control. |
||
|
Step 2 |
Click the edit icon for the policy applied to the device on which you want to enforce the block. If you have not created a policy, see Creating a basic access control policy for steps on how to create one.
|
Create a new rule to block the application
Procedure
|
Step 1 |
In the Policy Editor, click Add Rule. |
|
Step 2 |
In the Name field, enter a meaningful rule name. For example: |
|
Step 3 |
Choose where you want the rule placed. We recommend placing block rules at the top. |
|
Step 4 |
Choose Block from the Action dropdown list.  |
Configure the application matching condition
Procedure
|
Step 1 |
Choose the Applications tab. |
|
Step 2 |
Use the Search Application Objects field to find the application name. 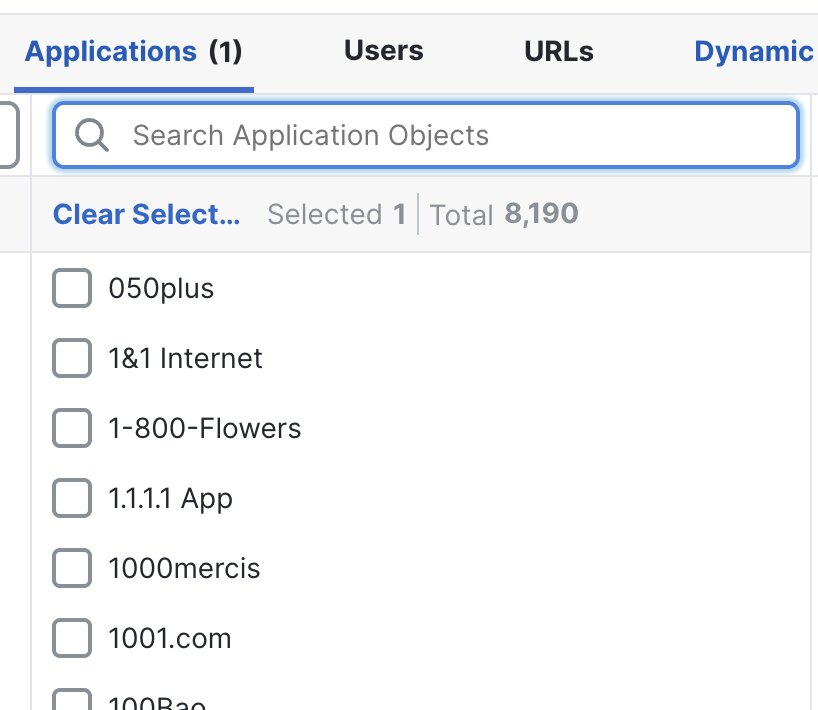 |
|
Step 3 |
Select the correct application object from the results. |
|
Step 4 |
Click Add Application. |
|
Step 5 |
Click Apply. |
(Optional) Restrict the scope of the rule
To avoid unintended impact, narrow down where the block applies.
Restrict by source (recommended)
Procedure
|
Step 1 |
In the Policy Editor window, click the edit icon for the rule that you created.  |
|
Step 2 |
In the Editing Rule window, go to Networks. 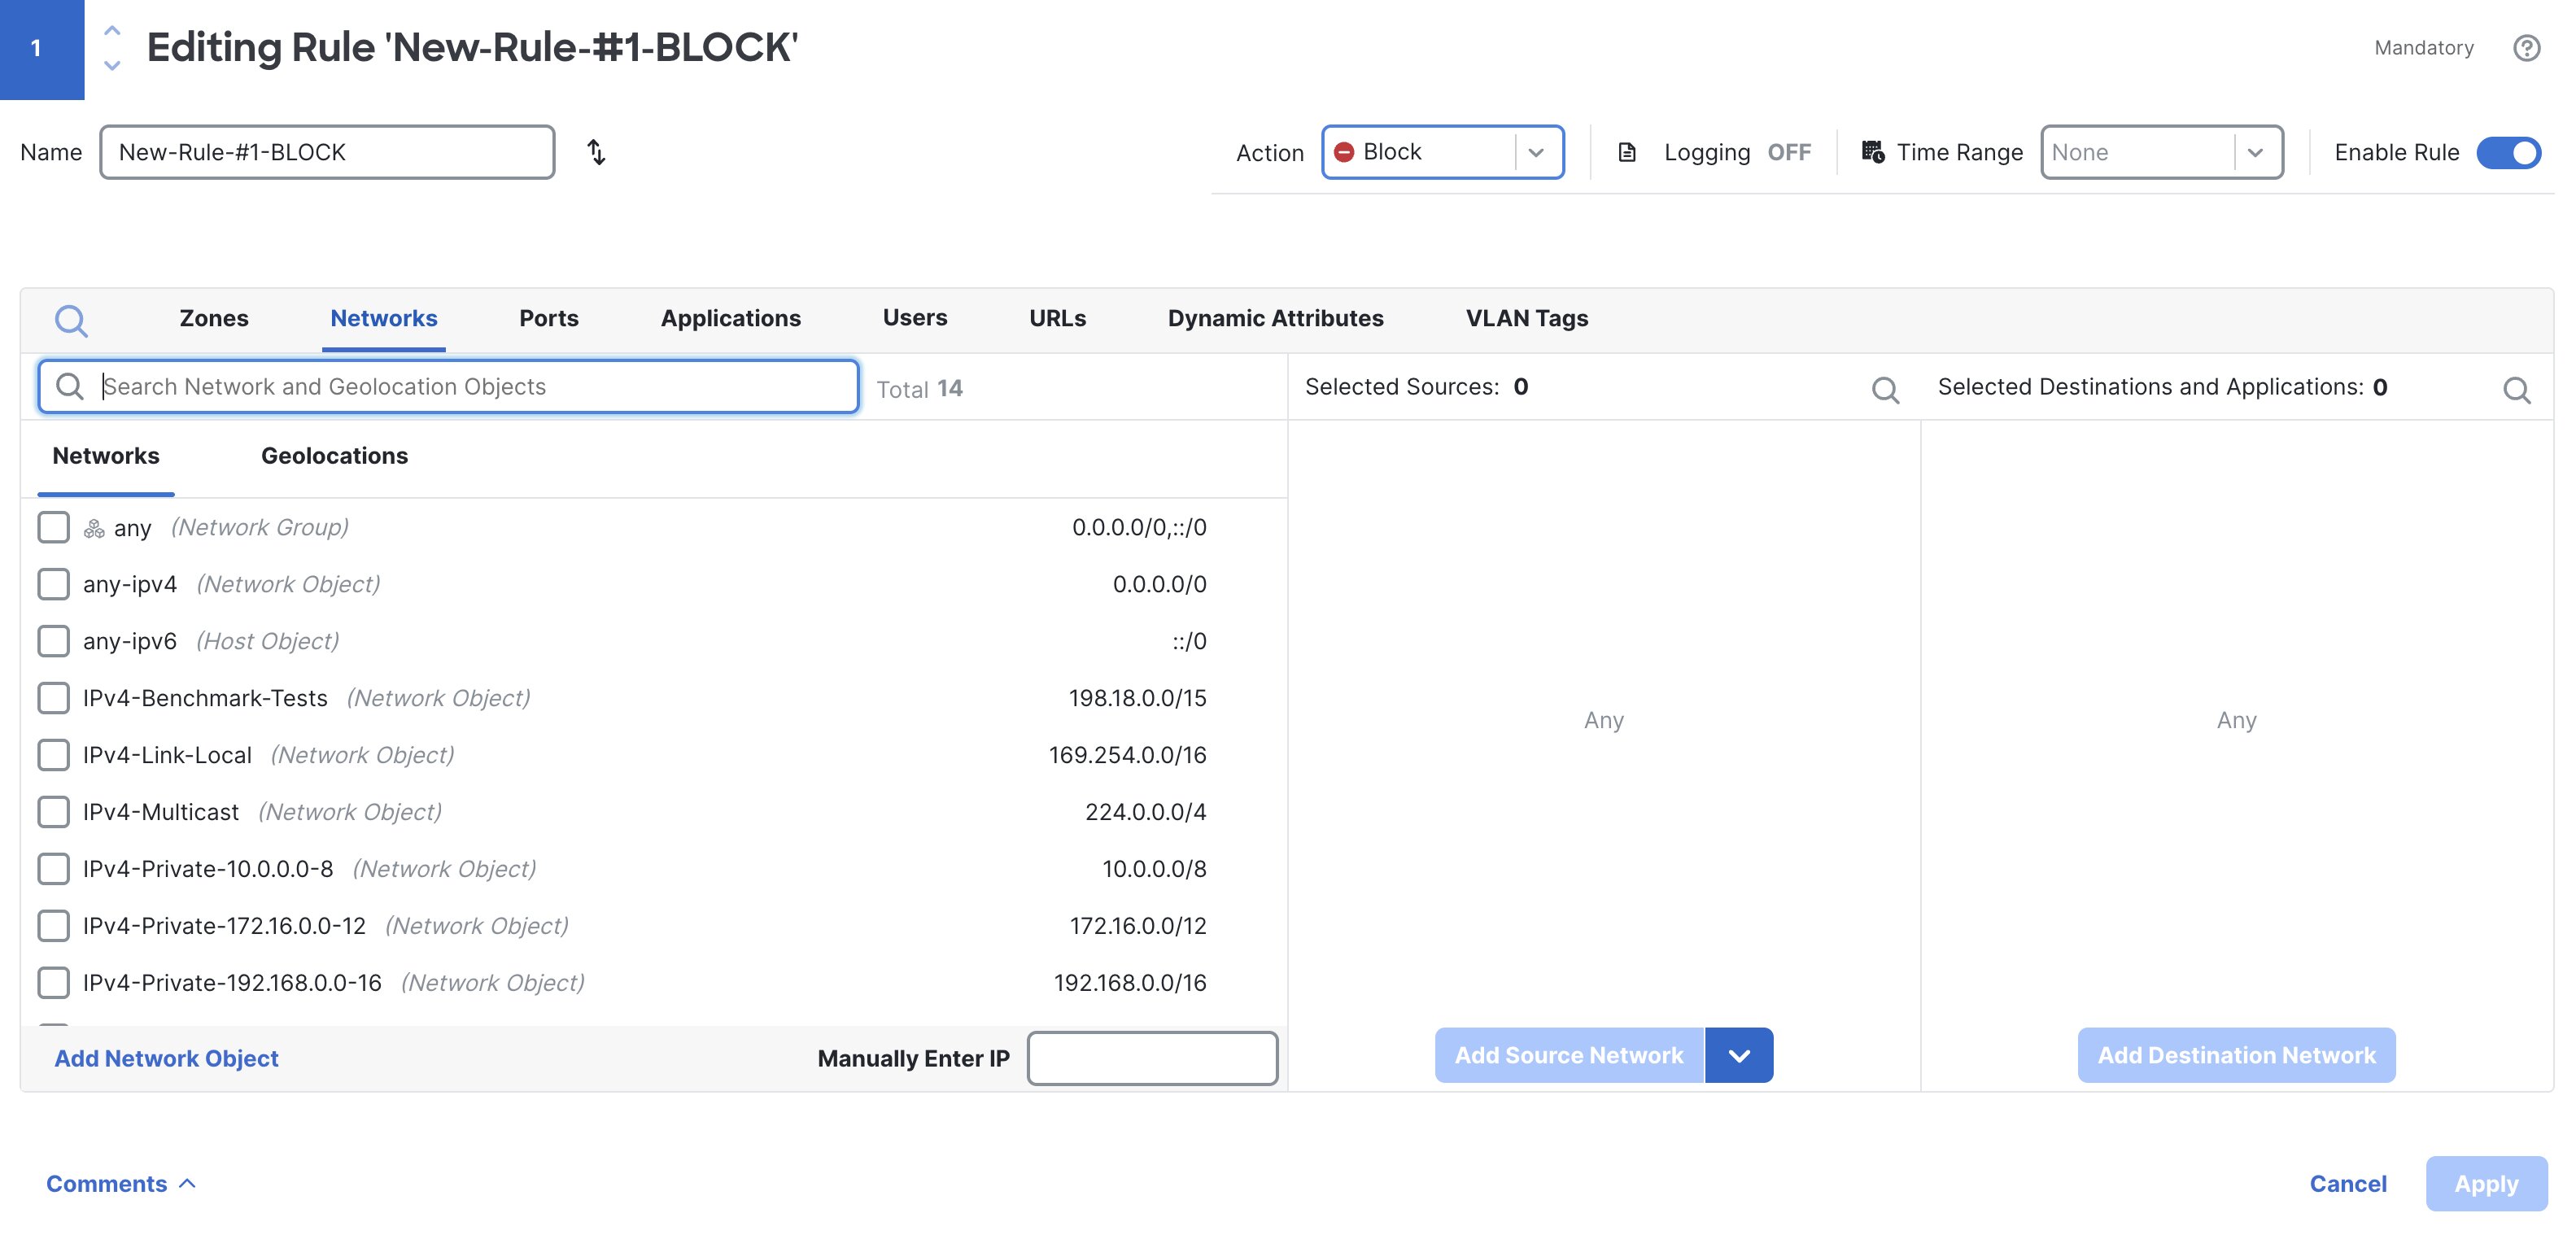 |
|
Step 3 |
In the Networks window, select the user subnets or hosts where the application must be blocked. Example: |
|
Step 4 |
Click Add Source Network. |
Restrict by destination
To avoid unintended impact, narrow down where the block applies.
Procedure
|
Step 1 |
In the same Networks window, select the destination servers or subnets if the application uses known destination ranges. |
|
Step 2 |
Click Add Destination Network. |
|
Step 3 |
Click Apply. |
Restrict by security zones
To avoid unintended impact, narrow down where the block applies.
Procedure
|
Step 1 |
In the Zones window, to add a source zone, select the zone, and click Add Source Zone. |
|
Step 2 |
In the Zones window, to add a destination zone, select the zone, and click Add Destination Zone. |
|
Step 3 |
Click Apply. |
Restrict by user
To avoid unintended impact, narrow down where the block applies.
Procedure
|
Step 1 |
Choose the Users tab. |
|
Step 2 |
Select the users or groups to which the block applies. |
|
Step 3 |
Click Add User. |
|
Step 4 |
Click Apply. |
(Optional) Enable logging
Procedure
|
Step 1 |
In the Editing Rule window, enable Logging and choose Log at beginning of connection. 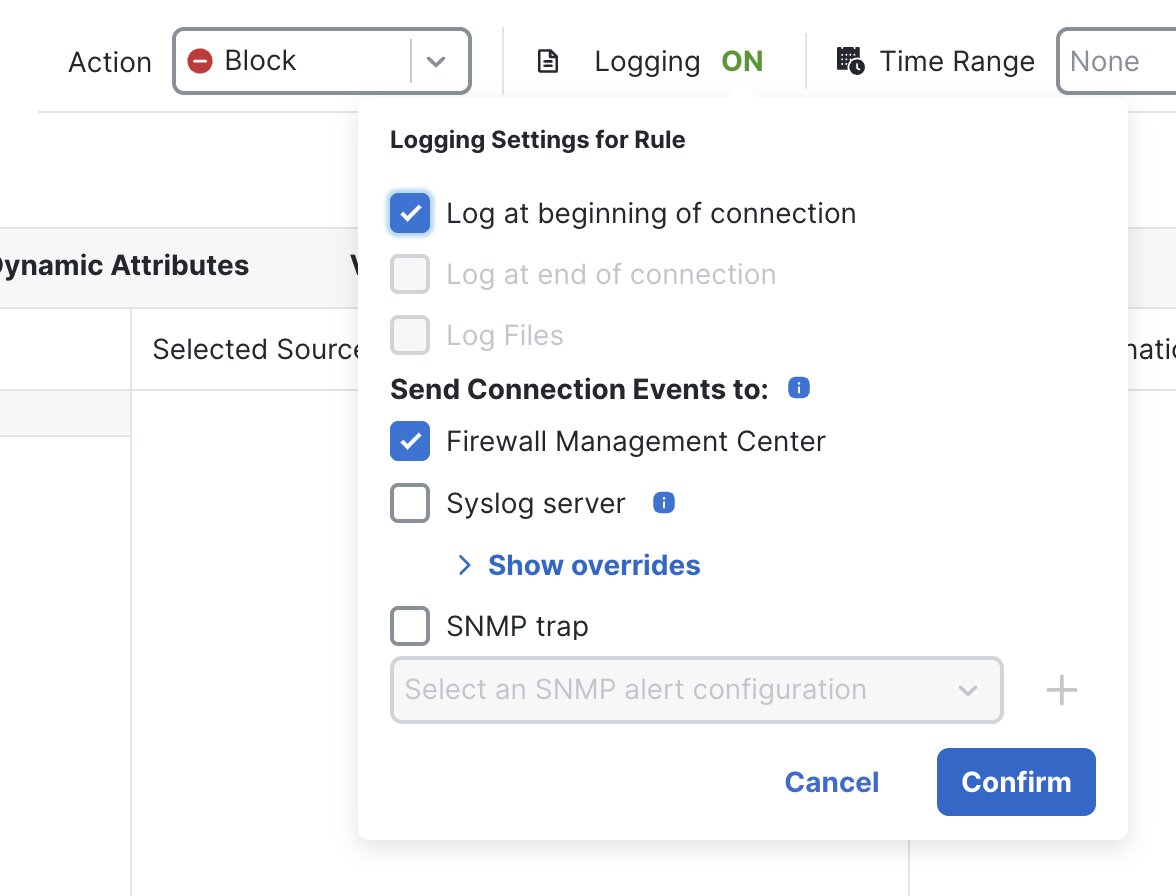 |
||
|
Step 2 |
Click Confirm.
|
Confirm and verify rule addition and order
Procedure
|
Step 1 |
Confirm that the rule appears in the Policy Editor under the Access Control tab. 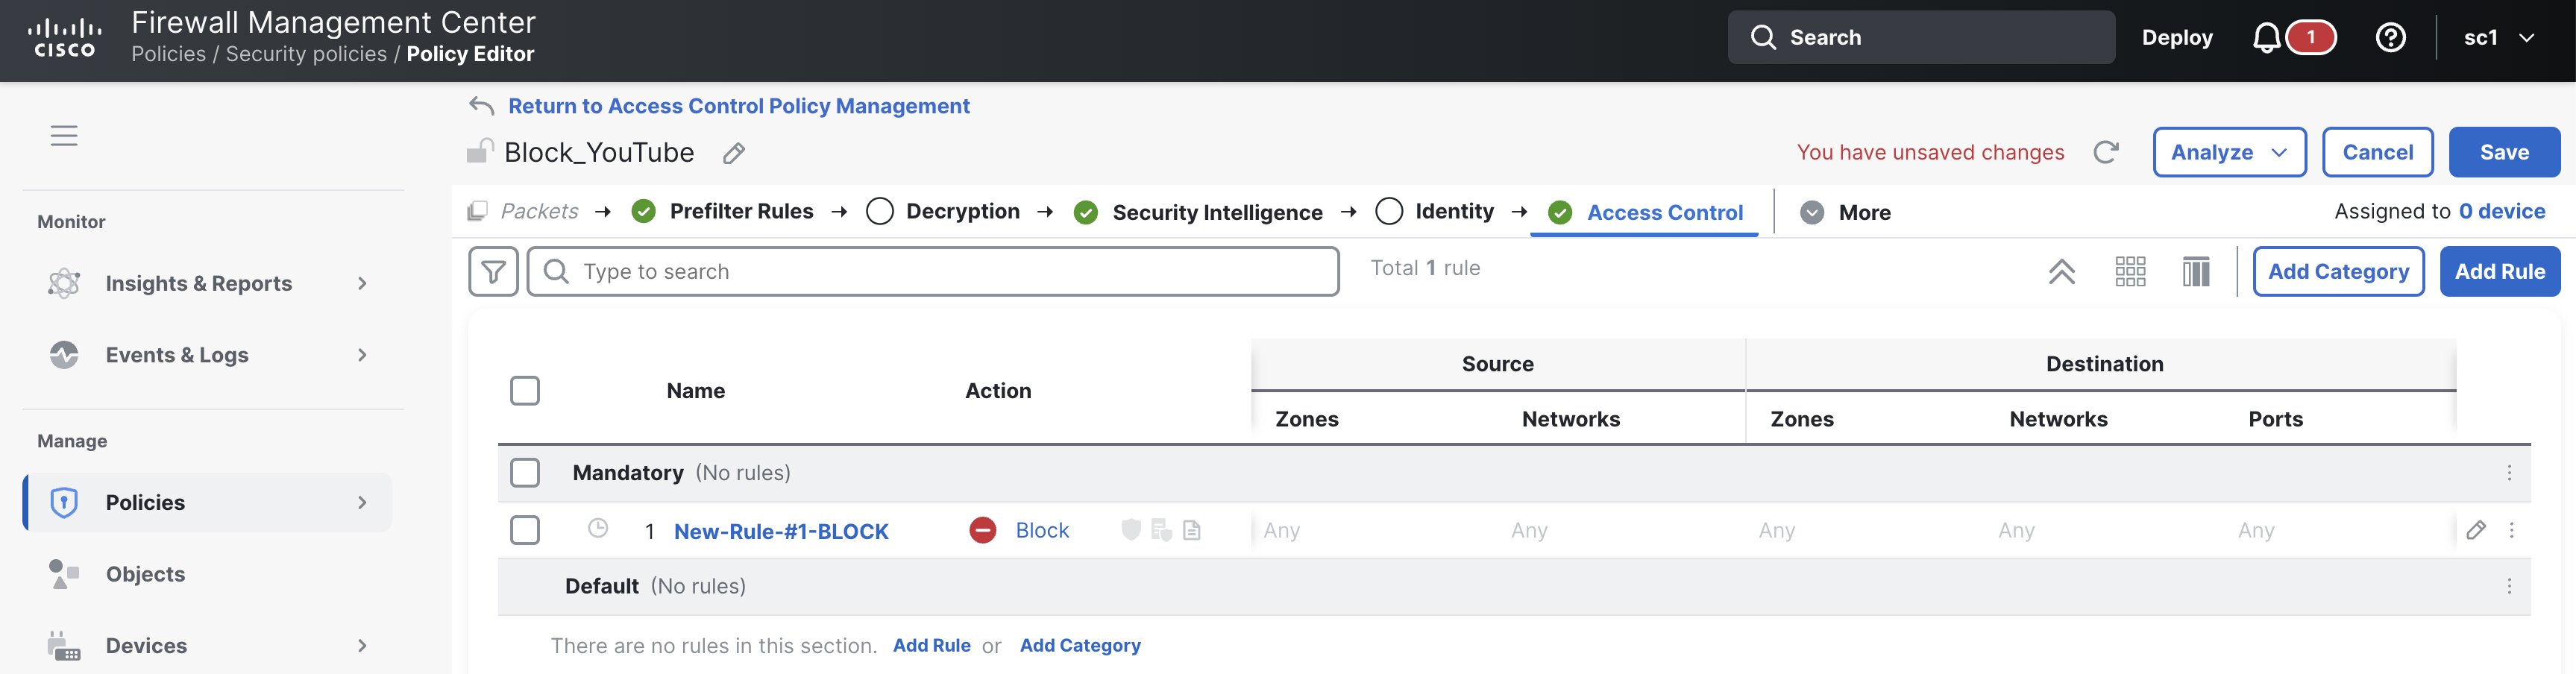 |
|
Step 2 |
Verify the rule order. Ensure that the block rule is placed above any allow rule that might match the same traffic. |
|
Step 3 |
Click Save. |
Deploy the configuration
Procedure
|
Step 1 |
In the Access Control window, click Deploy. |
|
Step 2 |
In the deployment window, select the devices on which the policy applies. 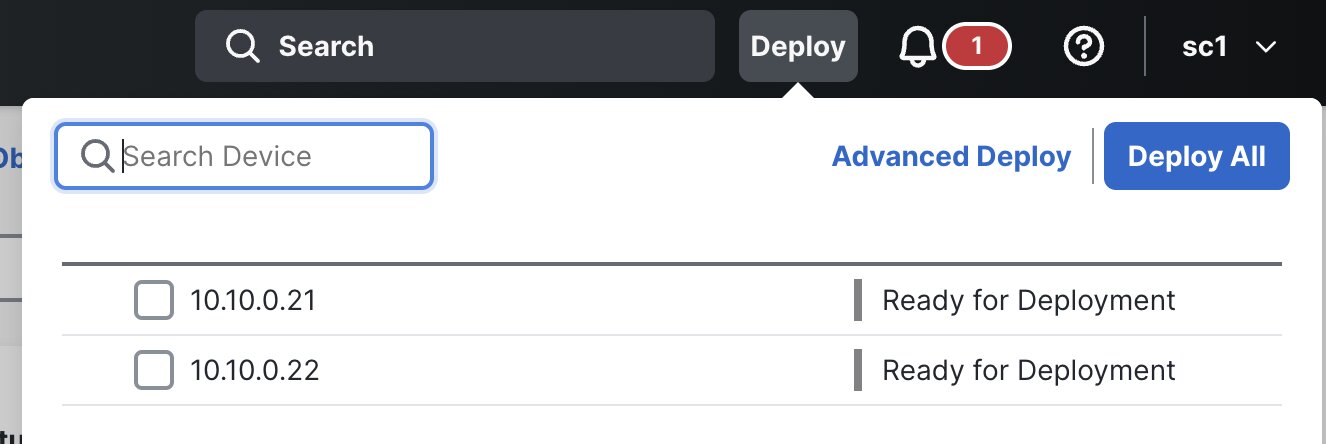 |
|
Step 3 |
Click Deploy. |
|
Step 4 |
Wait until the deployment completes successfully. |
Validating the configuration
After deployment, validate that the application block works and that the Management Center logs confirm enforcement of the block rule.
Procedure
|
Step 1 |
Generate test traffic.
|
||
|
Step 2 |
Verify the block.
|
||
|
Step 3 |
Confirm block events in Management Center. |
||
|
Step 4 |
Confirm rule hit count.
|
Troubleshooting
Use these checks if the application is not being blocked as expected.
The application is still accessible after deployment
-
Confirm if the deployment completed successfully.
-
Confirm if the correct access control policy is applied to the correct device.
-
Ensure the block rule is above any allow rule that matches the same traffic.
-
Confirm the rule conditions match your test traffic (zones, networks, users).
No connection events appear for the traffic
-
Confirm logging is enabled for the rule or policy.
-
Confirm traffic is passing through the Threat Defense device
-
Filter events by the source IP and time range to locate the session.
Application is not identified correctly
-
If traffic is encrypted, the application may not be detected reliably without SSL/TLS decryption.
-
Confirm inspection is enabled for that flow (application detection depends on Snort inspection).
-
Confirm you selected the correct application object (some applications have variants or sub-applications)
Unexpected traffic is blocked
-
Narrow the scope using zones, networks, or users.
-
Ensure you selected a specific application instead of an entire category.
-
Review rule hit counts and event details to confirm what is matching.
 Feedback