
Tenant Settings
Overview
Your Cisco Identity platform contains a range of tenant-wide settings and management features. This article provides a quick overview of each section and links to additional documents.
Dark Mode
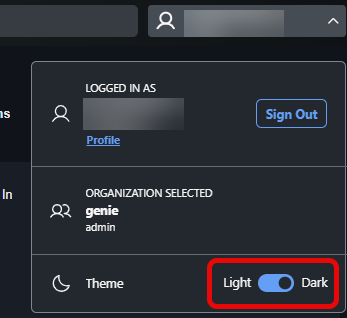
For Cisco Identity users that would prefer a Dark Mode theme, select the Dark Mode option to toggle the theme of the UI. To revert to Light Mode, simply select the drop-down menu under your name and toggle back to Light Mode.
Admin User Profile
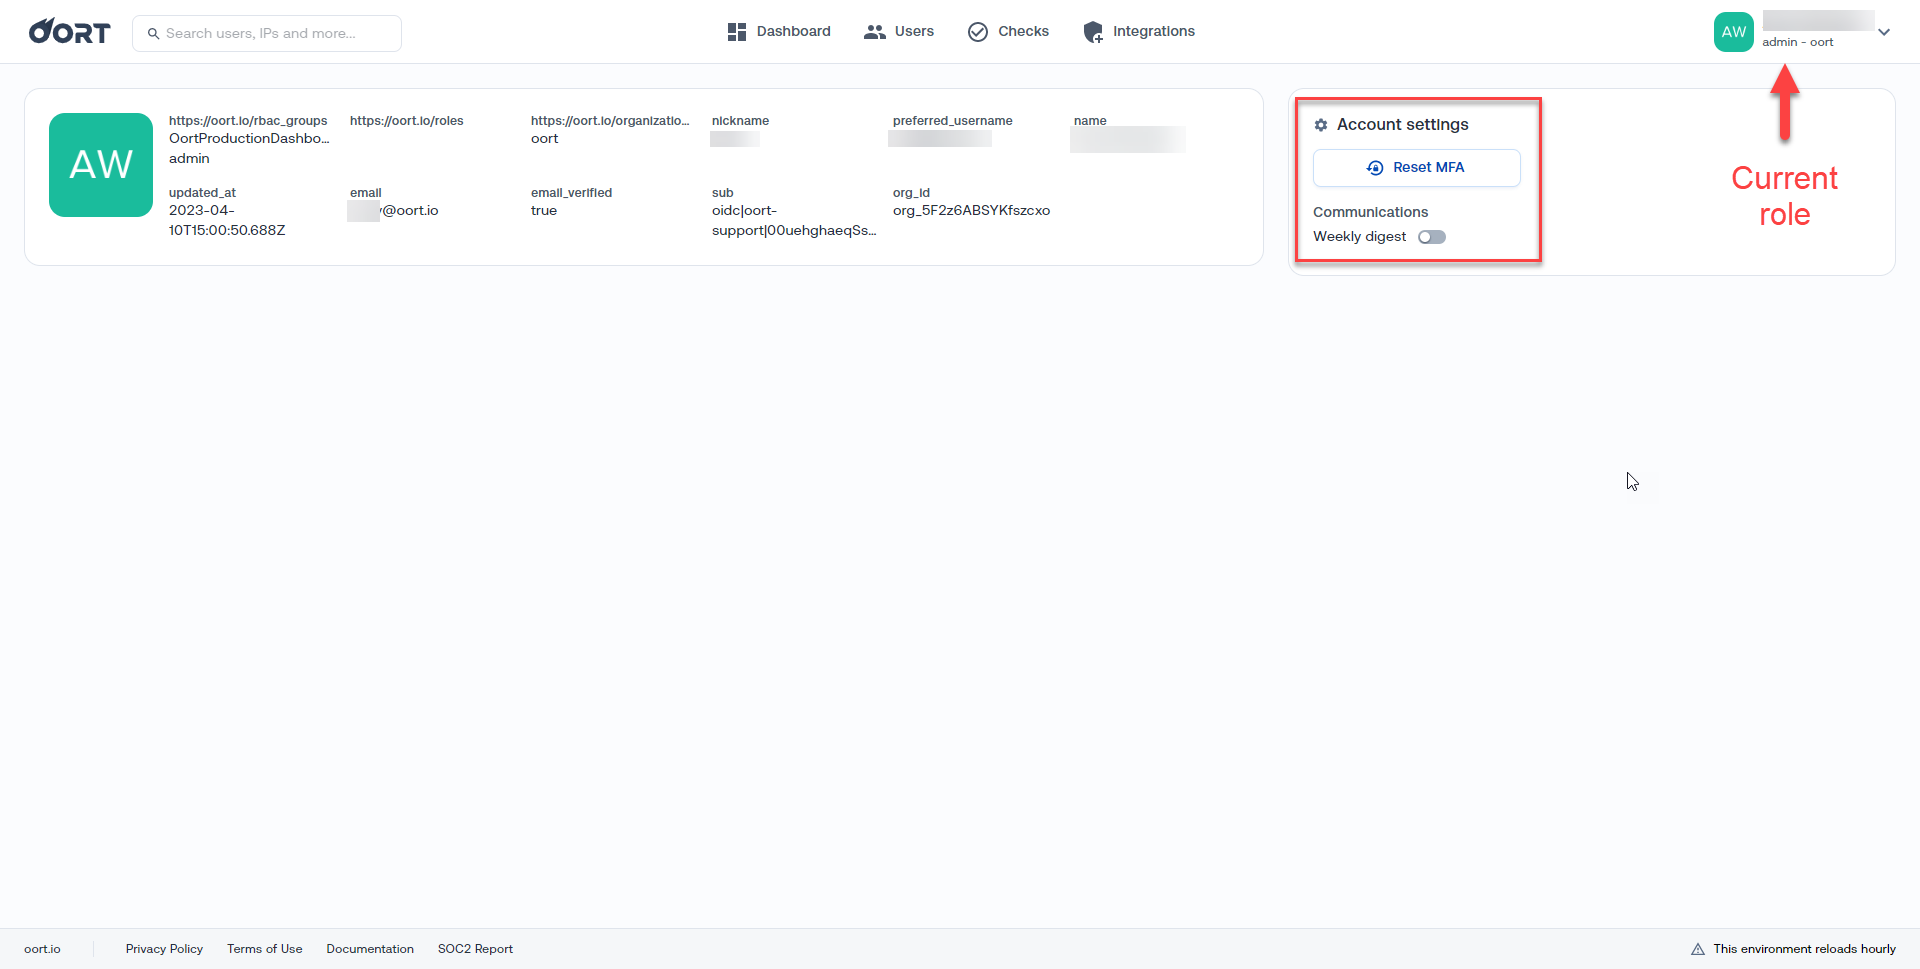
Under your name in the top right corner of the dashboard, the second menu option is Profile.
The profile section provides information about your individual user admin user profile within Cisco Identity. Actions available include:
- Toggle the Cisco Identity weekly tenant digest email on/off to manage your personal subscription to this automated email. Your changes will not impact other Cisco Identity users
- Interested in enabling the AI-powered digest for your organization? More info can be found in this article
- Reset MFA for the Cisco Identity auth platform (not your own IDP or SSO MFA platform) - see Accessing and Securing your Cisco Identity Tenant for more information
System Logs
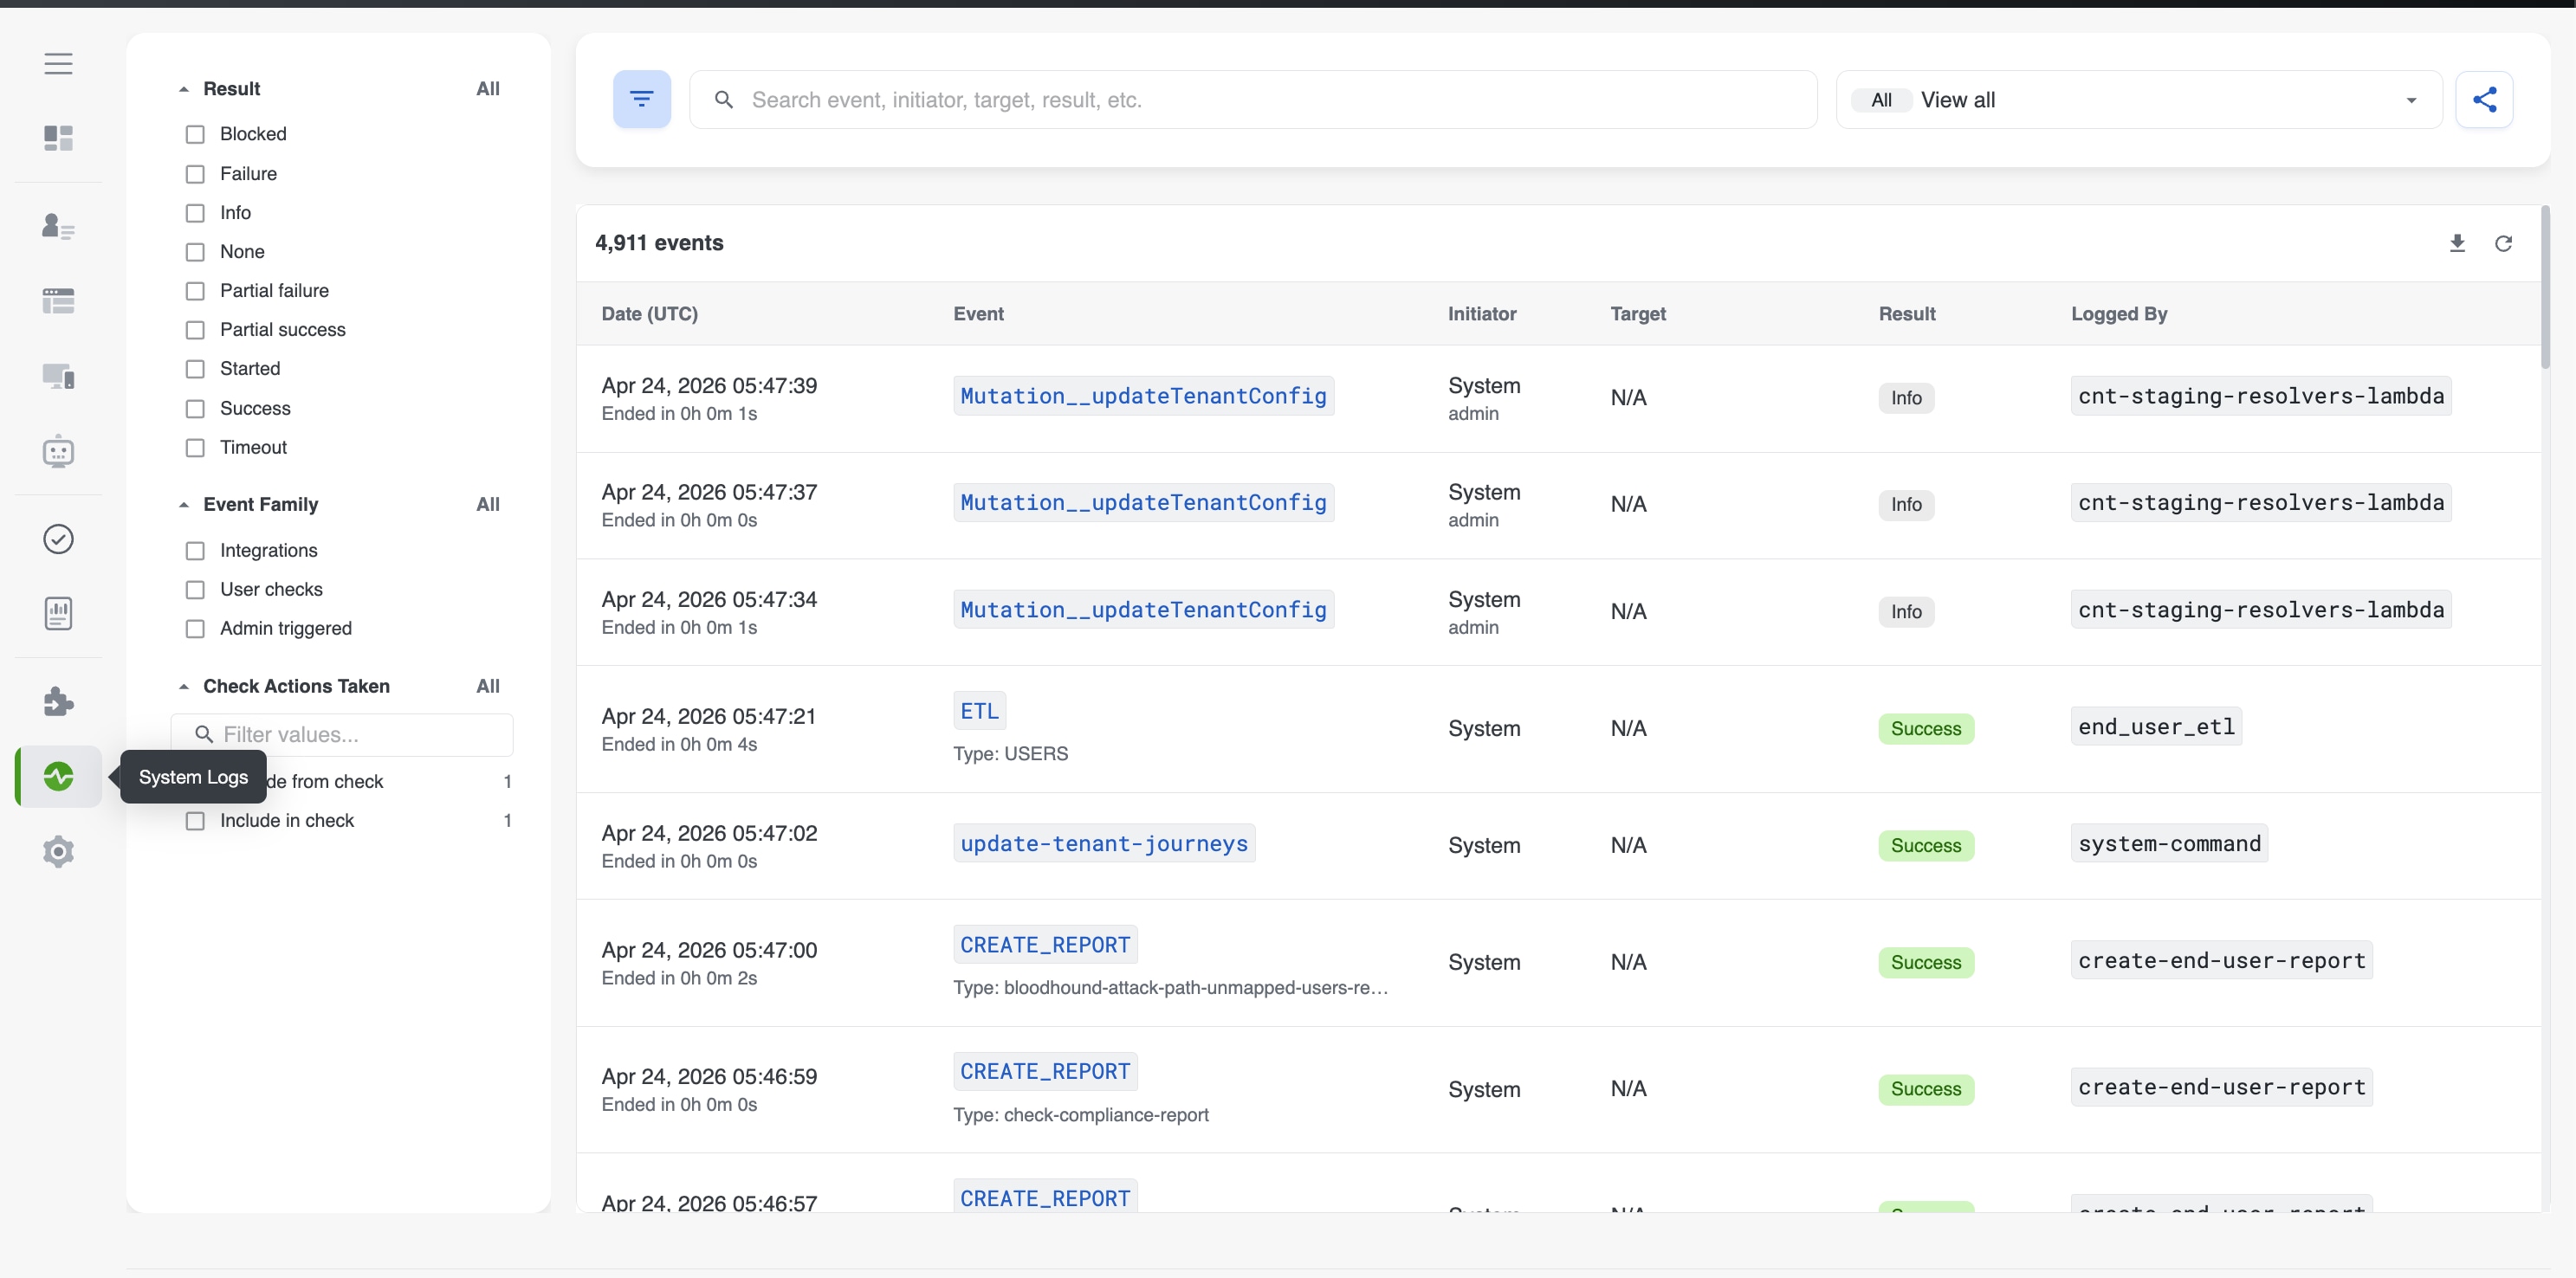
The System Logs page provides auditing events for your Cisco Identity tenant. It can be accessed using the left-hand menu bar. For more detailed information, please see the System Logs article.
Tenant Settings
The Tenant Settings page contains a number of different tenant-wide settings, including:
Landing Page
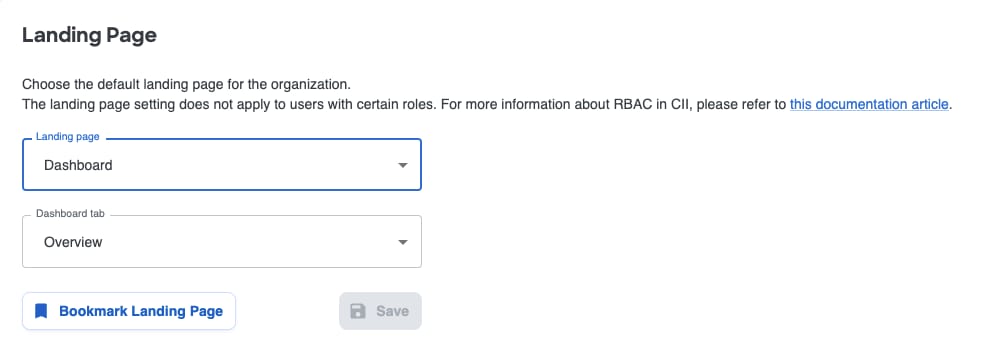
When logging into the Cisco Identity console, you can specify the landing page initial shown by selecting the desired page from the drop-down. Options include Dashboard, Users, Checks, or Integrations. You can also choose which of the Dashboard tabs to make the default.
Use the Bookmark Landing Page button to copy the URL for the selected landing page that includes your organization's tenant info so that you can create a browser based bookmark for Cisco Identity to quickly access the platform.
Timing
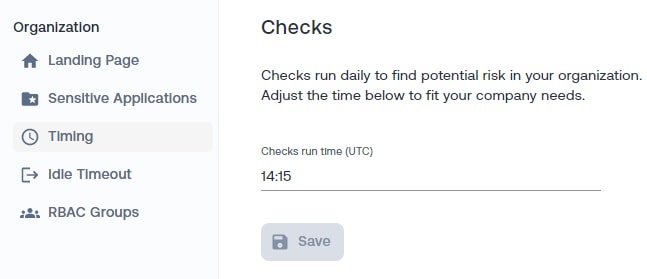
This setting controls when your Cisco Identity tenants sends daily notifications for non-event streaming enabled Checks or Observations. Note that the time is in UTC.
Idle Timeout
The default idle timeout for the Cisco Identity console is 15 min. Use this setting to change the timeout to align with your preferred security policy.
Protected Population
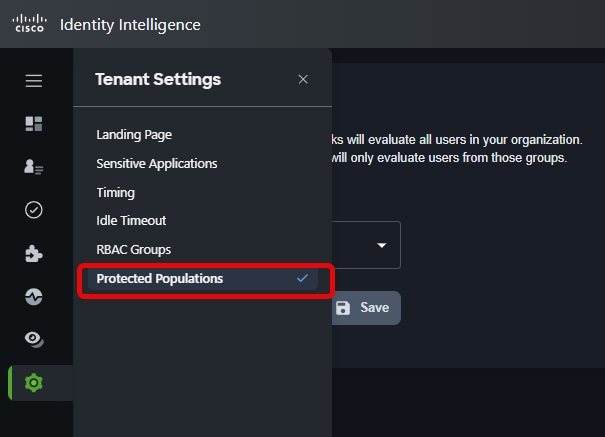
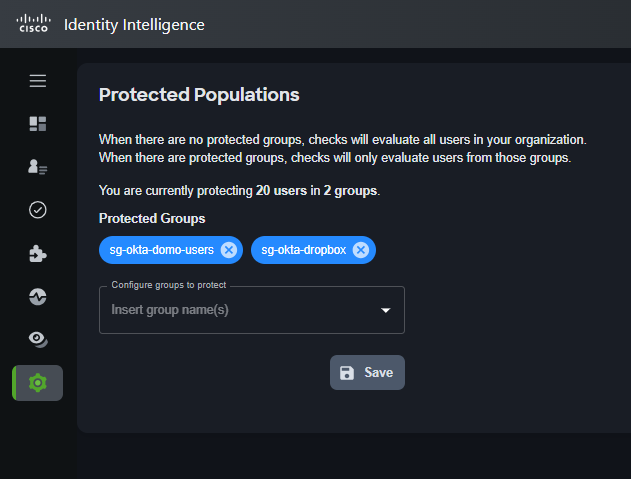
The Protected Population feature within your tenant allows you to scope the Cisco Identity Checks to only one or more specific groups from your IDPs.
Data will still be collected for user accounts that are not a member of one of those groups. However, Checks analysis will not be available and notifications will not be generated for any detections for those users, as they are unprotected by Cisco Identity.
Note: Any changes in the Protected Population configuration will be reflected in the next full collection and analysis for your tenant. To manually trigger this process, go to the Integrations page as with a full admin account and select "Collect Now" for one of your identity sources, such as Entra ID, Okta, Google, or Duo Security.
Lifecycle Events
Lifecycle events are displayed throughout the interface and indicate when a notable event has recently occurred on a user's account, as this info may be relevant to investigations. Lifecycle events can also used in the Trust Level calculation. You can learn more about what Lifecycle Events mean and how they are displayed in the User 360 Overview article where it defines what the items within a user's Summary card are.
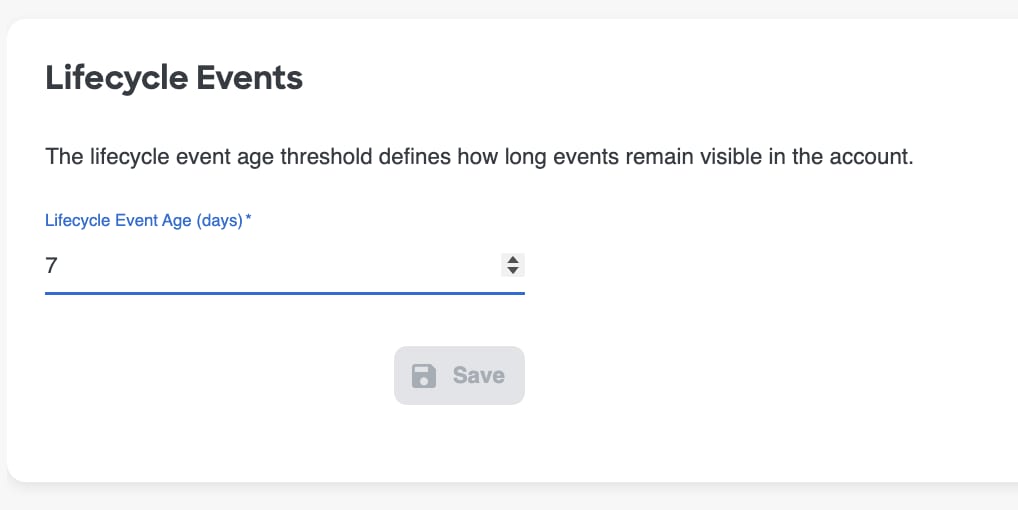
By default, a Lifecycle Event will be visible on an account for 7 days and will be no longer be displayed after that. However, you can modify this timeframe as needed via the Lifecycle Events area of the Tenant Settings menu item.
Simply update the value to your desired event age threshold and select Save.
IP Management
Under IP Management, you can manage a centralized list of Networks, ISP Domains and Restricted Territories. This provides a single place to manage multiple network signals that Cisco Identity could utilize within the detection logic or when surfacing relevant network or activity logs.
Instead of maintaining separate lists inside individual check settings, you can define your organization's known networks, trusted internet service providers (ISPs), and restricted territories once, then reference them from any Check that supports these settings.
Refer to the IP Management documentation to learn more about the different IP Management configuration options, how to configure each, and how to apply these settings to a check.
MCP Server

This functionality is not currently available in Cloud Control.
Cisco Identity provides an MCP Server endpoint to enable customers to connect their MCP-compatible clients to their Cisco Identity account.
What is MCP?
Model Context Protocol (MCP) is a standard way for AI clients to connect to tools and data through a server endpoint.
How to set it up?
Go to the Tenant Settings menu item in the left hand menu bar (visible to Cisco Identity Admins only) and select MCP Server from the list of items in the sub-menu.
Copy the endpoint provided on the screen into your desired MCP client configuration and register it as an MCP server for this tenant.
Authentication
Use your Cisco Identity account to access MCP Server tools, using the same authentication flow you use to sign in to Cisco Identity. You will be prompted to authenticate to Cisco Identity the first time the MCP server is invoked.
Weekly Digest
This functionality is not currently available in Cloud Control.
Note: The AI-powered weekly digest is currently in Beta. The content and formatting of the message is still evolving and subject to change. Before using the results, verify accuracy and completeness.
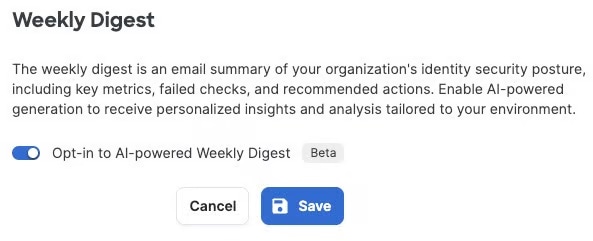
You can optionally enable the AI-powered weekly digest for your entire org to provide additional, custom insights not available with the standard weekly digest.
The standard weekly digest provides a useful snapshot of your organization's identity security posture by summarizing key metrics, failed checks, and recommended actions. The AI-powered weekly digest goes further with personalized insights and analysis tailored to your org's results.
The AI-powered Digest is designed to improve interpretation and prioritization - it helps you identify which issues are worth reviewing first, understand the significance of the findings and associated risks, and provides more tailored summaries of posture changes, risky activity, and recommended next steps.
To enable the AI-powered weekly digest for your organization's Cisco Identity tenant:
- Use the left hand menu bar to navigate to Tenant Settings, then select Weekly Digest
- Slide the toggle to Enabled as shown in the screenshot below
- Select Save
Once the AI-powered digest is enabled for your org, all Cisco Identity users who have signed in to the interface at least once will start to receive the AI version, rather than the standard version. Individual users can still manually opt in or out of receiving the digest at all via the Admin Profile settings referred to earlier in this article.
Legacy documentation
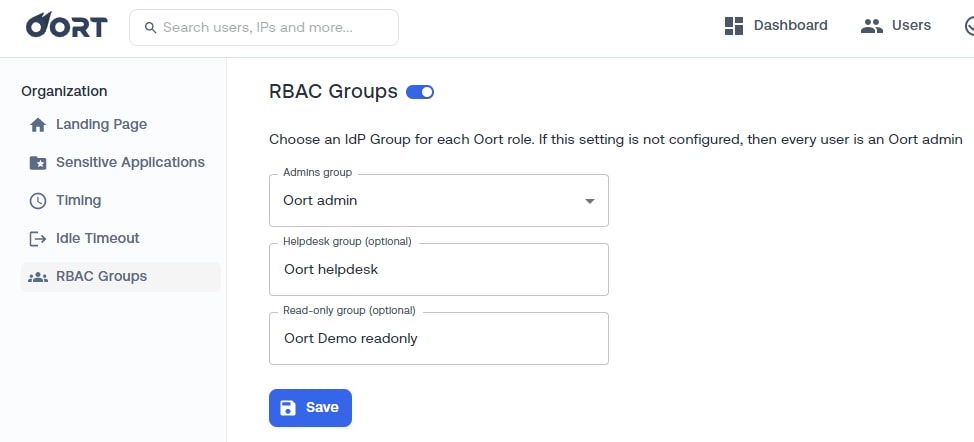
RBAC Groups (No longer relevant)
Cisco Identity leverages the configuration of the Cisco Identity Duo SSO App to configure a user's roles and permissions within Cisco Identity. Therefore this Setting page is no longer relevant, except for legacy customers.
The roles and associated permissions, as well as references to Duo documentation on how to configure RBAC via Duo SSO, are further outlined in the Role-based Access and Access Logs article.
IP Management
Overview
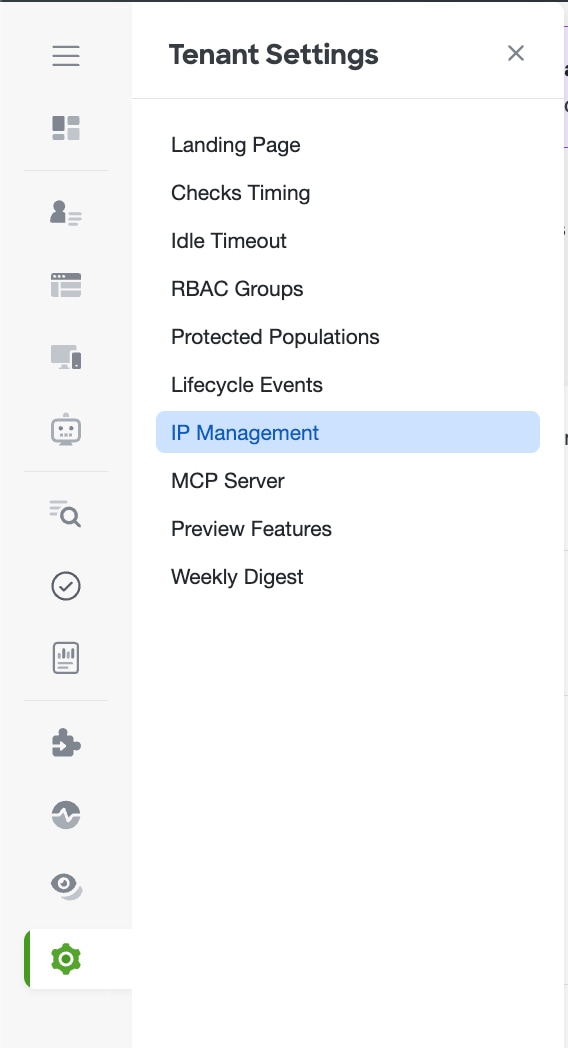
The IP Management page, found under Tenant Settings, gives you a single place to manage the network-related signals that Cisco Identity can use when evaluating Checks or to tag known-network activity in relevant activity and network logs. Instead of maintaining separate lists inside individual check settings, you can define your organization's known networks, trusted internet service providers (ISPs), and restricted territories once, then reference them from any Check that supports these settings.
Consolidating this configuration in one place makes it easier to keep your network context accurate and consistent, which reduces false positives on location and network-based Checks such as Impossible Travel, Activity from Untrustworthy ISP, and Access from Denied Territories.
Warning: Adding items via the IP Management pages does not automatically change any Check's behavior. Items you add to Trusted Networks or Trusted ISPs must still be enabled on each relevant Check's settings page before they affect that Check's results. Only Denied Territories are applied to the check automatically. See the Applying IP Management data to Checks section below for more details.
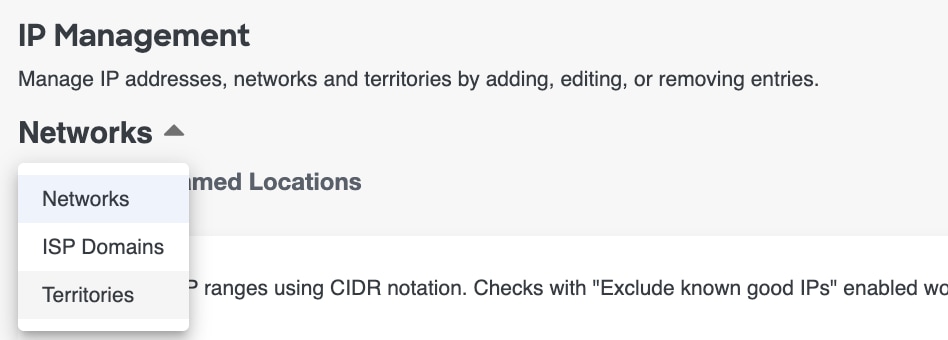
The IP Management settings page is organized into three tabs:
- Trusted Networks
- Trusted ISP Domains
- Restricted Territories
Networks
Many organizations maintain a list of known, approved networks for their organization. Trusted Networks let you define named, known network locations for your organization - for example, Corporate HQ, London Office, or Partner X Datacenter - along with the IP addresses or CIDR ranges that belong to each one. Trusted Networks can be added to Cisco Identity directly, or ingested via Named Locations from Entra.
Use Trusted Networks to tell Cisco Identity which IP ranges represent expected, low-risk locations. Checks that reference Trusted Networks use this information to avoid flagging normal activity, such as an employee signing in from an office network, as suspicious.
Warning: Only add networks and ISPs that are approved and trusted for your organization, NOT known malicious networks. If you enable a check's settings to exclude known-good IPs from the detection logic, any network added to these lists will be excluded from that check's logic, including any malicious networks that have been incorrectly added.
Managing entries
Adding IPs
There are two ways that Trusted IPs and IP ranges can be added to Cisco Identity - manually one by one, or via bulk upload.
First, select Networks from the drop down and make sure you are on the IP CIDR tab to add a new named network. Then decide if you would like to manually enter IP addresses, or upload a list and follow the respective instructions found below.

To manually enter one or more IP addresses or CIDR ranges:
- Select + Network. A new row will be added to the table
- Under the Name column, enter an easily recognizable name for the IP address/range in the blank field [eg: New York HQ]. This name will be used throughout the UI to identify activity associated with this network
- Under the IP/CIDR column, enter the desired IP address or range in the blank field
- A network can have multiple IP ranges associated under the same network "name" if needed. To add multiple IPs to the same known network identifier, select the + IP / CIDR button below the previously populated field
- When you are finished entering IPs, select Save to store your changes
[RECOMMENDED APPROACH] To upload a list of IP addresses or CIDR ranges:
- Select the Upload File button and select either Merge upload with existing networks to add new IPs to an existing network from the list, or Override existing networks with uploaded file to remove any existing networks from the list and create a new list based on the uploaded list
-
Upload the desired list of networks by dragging and dropping your file into the designated area, or selecting the designated area to find and choose the file
- The uploaded file MUST use the CIDR JSON format, with one location and description pair per line as shown in the example below. Download the following JSON sample file available here and modify it with your own known IP addresses and location tags:
{"key":"Ashburn DC","value":["206.71.192.0/24"]} {"key":"Brno","value":["85.71.228.64/28","85.93.123.96/28"]} {"key":"Eschborn","value":["193.37.158.0/24"]} -
Select Upload File to confirm the upload
- The upload will begin to process in the background. Cisco Identity will start validating the file, merge the results (if that option was selected), and the table will be refreshed once the upload modal is closed. If any entries in the file are invalid (for example, a malformed CIDR range), Cisco Identity will skips these values and display a warning summarizing what items were skipped
Important: The platform does not support a JSON array format (wrapping all records in
[ ]). Each line must be its own valid JSON object.There is a limit of 870kB for a given upload file. If your file is bigger than the allowed size, use the "Merge upload with existing networks" option to upload your file in parts.
Modifying IP addresses
To modify or remove an IP address or IP range, select the Pencil icon in the Action column for the desired IP.
Modify an individual IP address or range as needed or delete that value by selecting the Trash button icon found in either the Action column of the associated row or the specific value in the IP/CIDR column. Select Save to store any changes made.
If bulk modifications are needed, you can export a JSON file of the current list of trusted networks, in the correct IP CIDR format, using the Download button. You can modify this file and then re-upload it after to quickly modify several IPs in the list at once.
You can also select the Restore Default button to remove any custom entries from the list and revert back to the default list of Trusted Networks. (Default list is blank)
Named Locations
If you use Microsoft Entra ID, it allows your organization to define its own network locations (Named Locations). Those locations will also appear in the Named Locations tab under the Trusted Networks view.

Named Locations are sourced from your identity provider and are read-only in Cisco Identity, meaning they cannot be modified or removed within Cisco Identity. To make changes, update them via your identity provider directly.
ISP Domains
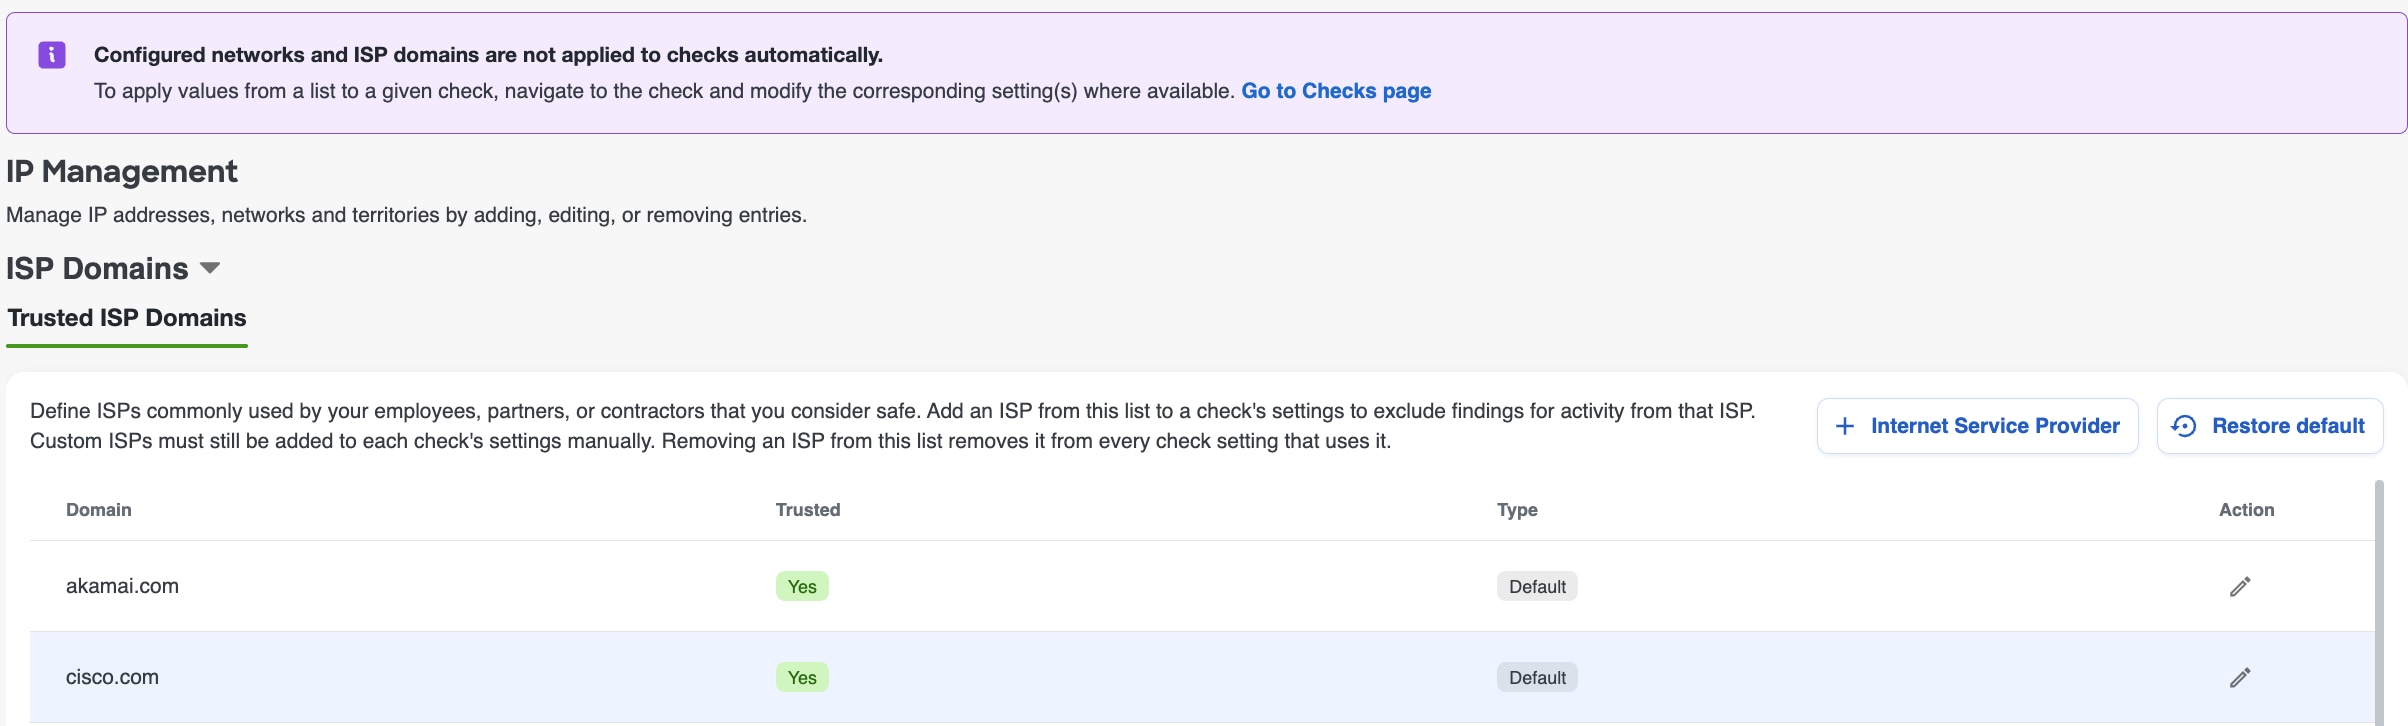
Trusted ISPs identifies internet service providers (ISPs) commonly used by your employees, partners, or contractors that you consider low-risk, such as a residential broadband provider frequently used for remote work.
Checks that evaluate the ISP associated with an activity's IP address, such as IP Threat Detected, use this list to distinguish recognized, everyday providers from anonymizers, hosting providers, or other high-risk network sources.
Cisco Identity includes a default list of commonly trusted ISPs and network-obfuscation providers out of the box, while allowing you to add your own domains based on your organization's need. Default and custom entries are labeled accordingly, so you can easily distinguish which ISPs your organization has added. You can edit or remove default entries using the same steps described below, or restore the default list at any time using the Restore Default List button.
Managing entries
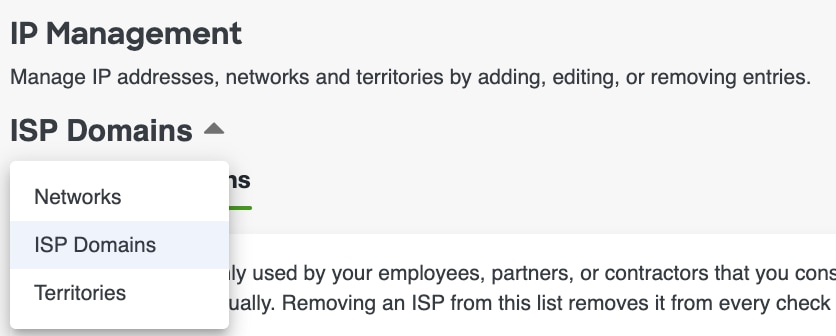
- Select ISP Domains from the drop down on the IP Management page
- Select + Internet Service Provider. A new row will be added to the table
- Under the Name column, enter the ISP Domain value in the blank field. The domain should be the value that comes after, but not including the
@. For example, a correct ISP domain iscisco.com, not@cisco.com - After you have entered your desired ISPs, select Save to store your changes
To modify or remove a domain, select the Pencil icon in the Action column for the desired domain.
Modify an individual domain as needed or delete that value by selecting the Trash button icon found in the Action column of the associated row. You can also select Restore Default to remove all custom ISP domains from the list and revert to the default Cisco Identity list.
Select Save to store any changes made.
Territories
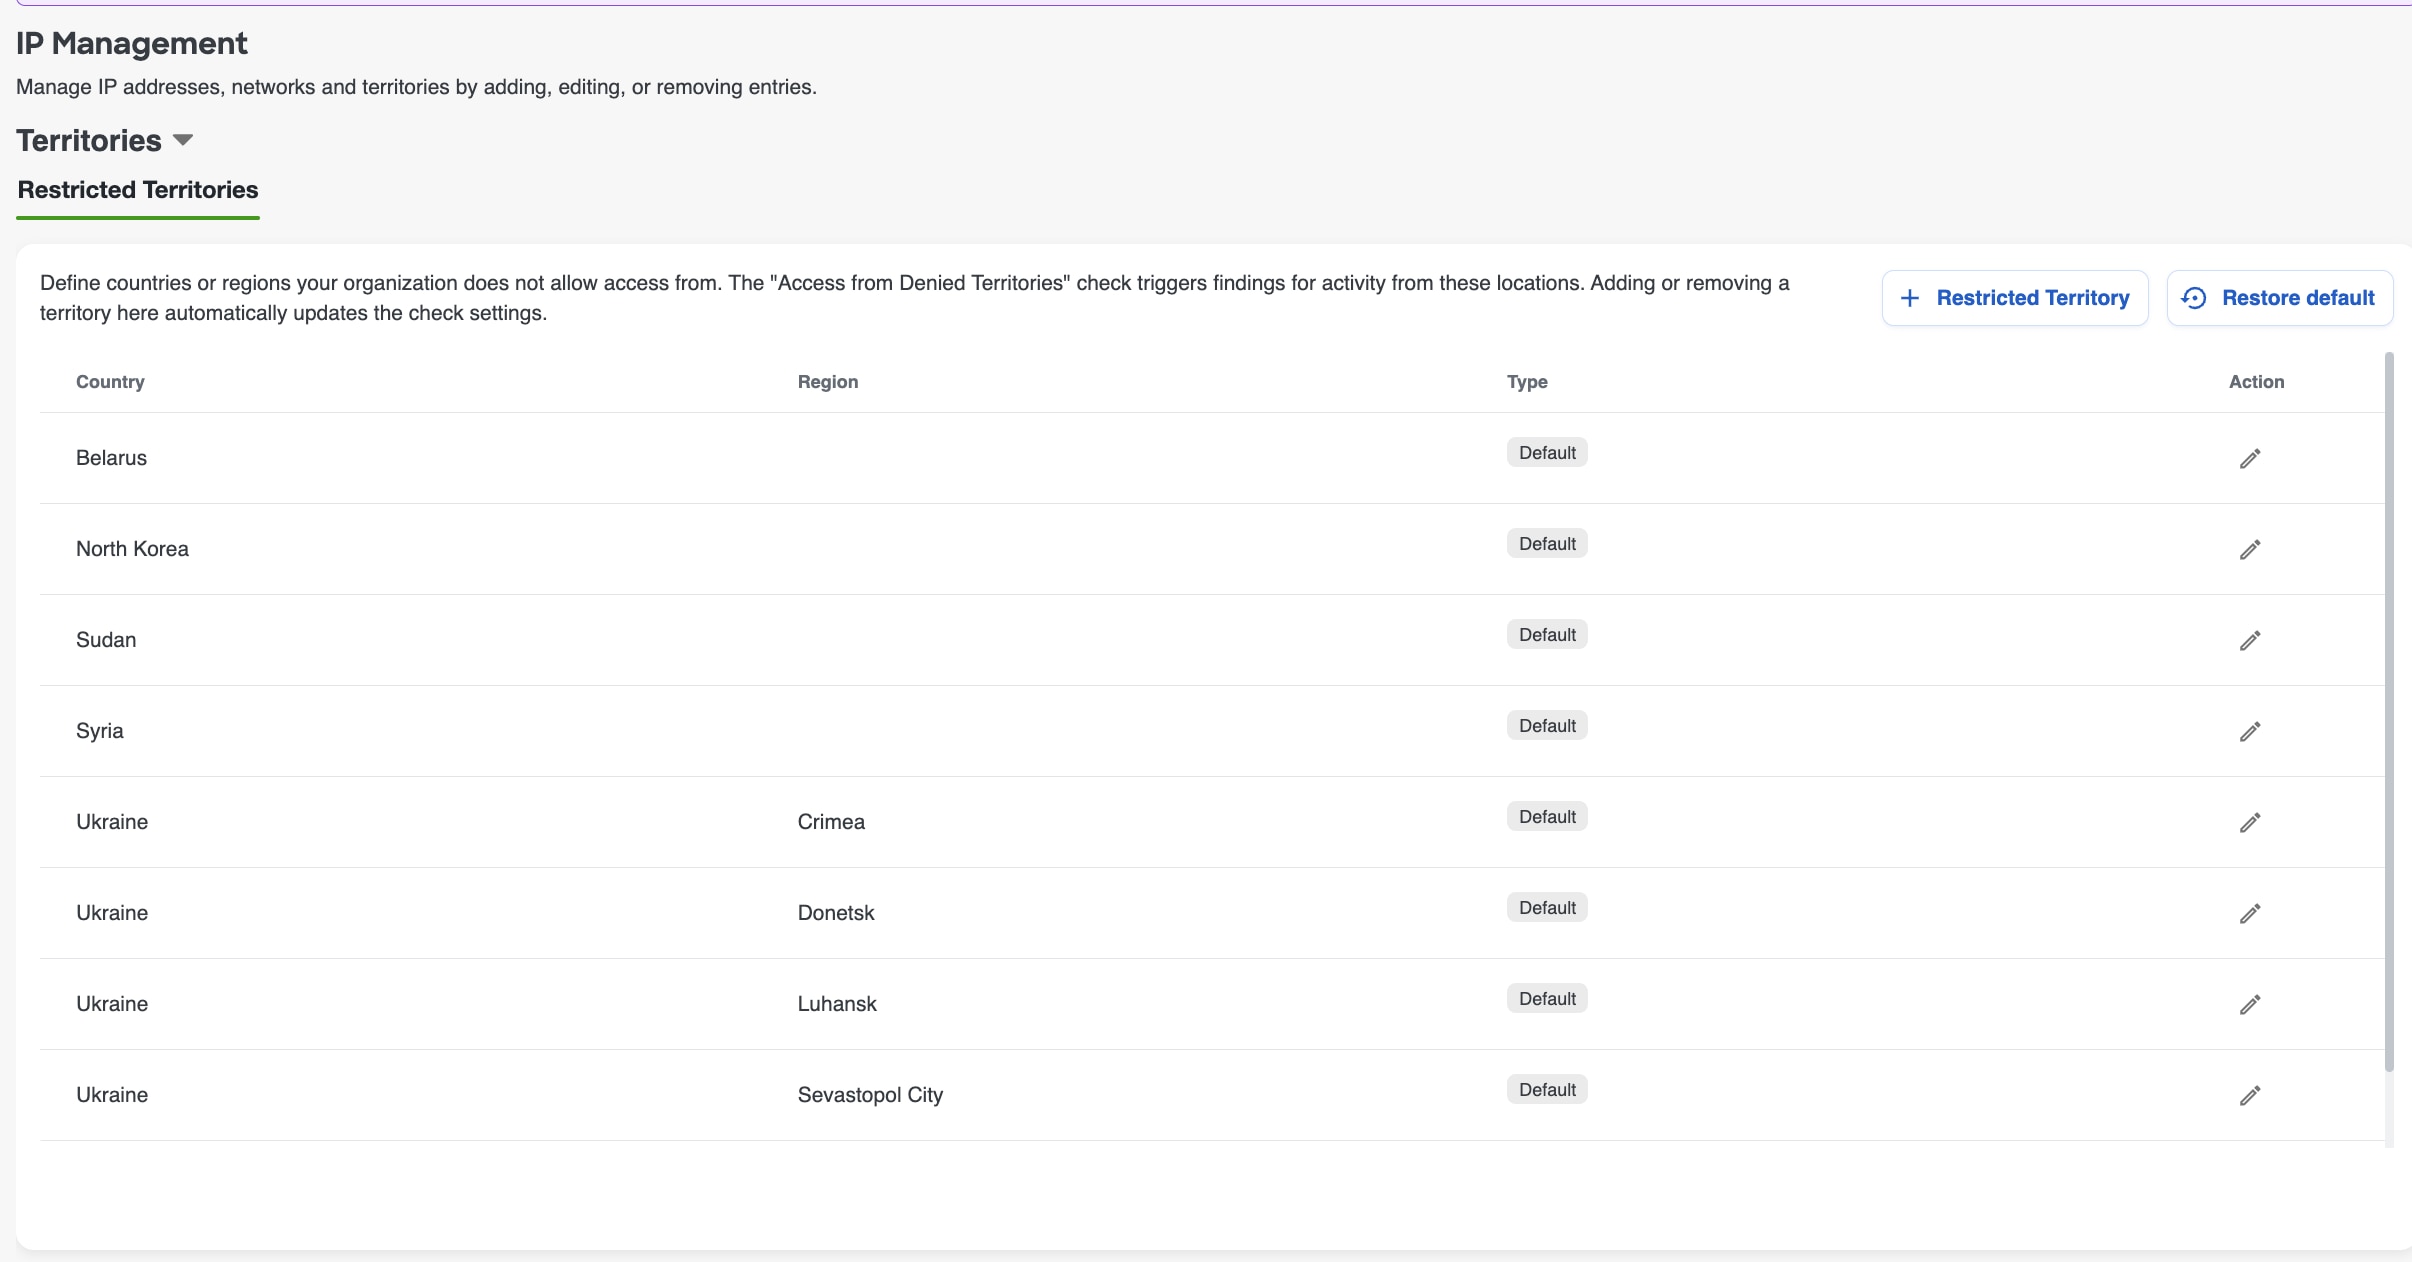
Restricted Territories defines the countries or regions that your organization considers untrusted, sanctioned, or otherwise restricted for access.
Checks such as Access from Denied Countries use this list to flag or fail activity originating from a restricted territory.
Cisco Identity provides a default list of restricted territories based on the Office of Foreign Assets Control's guidelines. Default entries are labeled accordingly, so you can tell them apart from custom territories your organization has added. You can edit or remove default entries, or restore the default list at any time.
Managing entries
- Select Territories from the drop-down menu
- Select the + Restricted Territory button to add a country or region/territory. A new row will be added to the table
- Select the desired country from the drop down menu in the Country column. If needed and available, select a region within that country from the Region column
To modify or remove a country/territroy, select the Pencil icon in the Action column for the desired location.
Modify an individual country or territory as needed, or delete that value by selecting the Trash button icon found in the Action column of the associated row. You can also select Restore Default to remove all custom countries/territories from the list and revert to the default Cisco Identity list.
Select Save to store any changes made.
Applying IP Management data to Checks
The Networks and ISP Domain pages create a centralized "approved" source of data for these various lists; however, it still allows the flexibility to customize the settings of a Check as needed rather than deciding automatically which checks will or won't use specific values.
Check settings are still managed manually, on a check by check basis - meaning you can exclude Known Good IPs on some checks but not others, or add an ISP domain to the ignore list on one check but not another, depending on your organization's needs, concerns and risk tolerance levels.
Note: Restricted Territory settings behave differently. These settings only apply to the Access from Denied Territories check and therefore are automatically applied to the check. They cannot be modified via the Check Settings directly.
To apply a Trusted Network or Trusted ISP Domain to a given check:
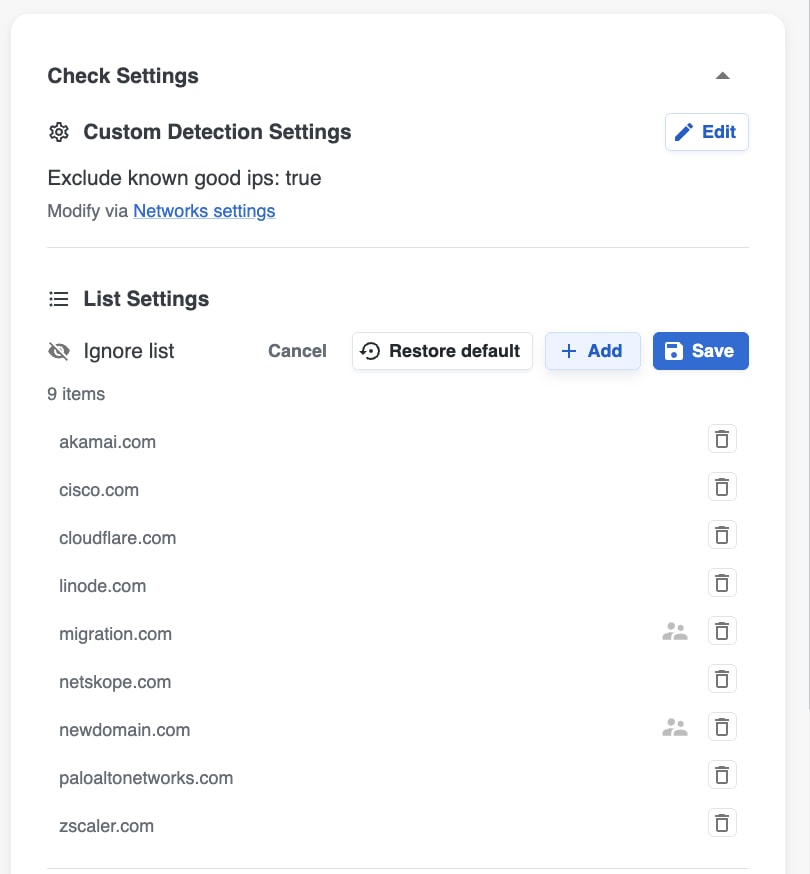
- Navigate to the relevant check and expand the Check Settings found on the right side of the page - Checks that can be modified to ignore Trusted Networks will have a setting to "Exclude Good Known IPs". Checks that can be modified to ignored Trusted ISP Domains will have an Ignore list
- Select Edit. A modal will appear that allows you to configure the respective settings accordingly - Toggle on the "Exclude Good Known IPs" setting. For an ignore list, select Add and start typing in an ISP Domain sourced from the centralized list configured in the IP Management section
- Select Save to store the changes made in the check's settings
To add additional IPs or Domains, navigate to back to the relevant IP Management page, make the necessary changes and then return to the check to apply the setting as needed.
Role-based Access (RBAC) and Tenant Access Logs
Overview
The Cisco Identity security platform provides several different roles with different permissions for access your Cisco Identity tenant dashboard.
This article describes the permissions associated with each role (listed below), as well as how to use the Tenant Access page to review recent access to the Cisco Identity console.
Warning: Role Based Access (RBAC) is fully configured and managed within the Duo Admin Panel. Please refer to their documentation for instructions on how to configure roles for the different permitted groups that have been granted access to Cisco Identity.
Roles
- Full administrator (admin)
- Read only
- Help desk
- Application manager - not currently supported
- User manager - not currently supported
- Security analyst - not currently supported
Roles and Permissions
Full Administrator
As the name suggests, full administrator (admin) can take all actions within your Cisco Identity tenant, including:
- adding or deleting integrations
- changing tenant settings
- configuring Checks settings
- excluding users from Checks
- configuring notification targets like Slack or Teams channels
- opening tickets with ITSM platforms like ServiceNOW or Jira
- all actions available within the Remediation Actions article
Read-only Role
Read-only Cisco Identity users can view all of the data and users within the console, but cannot make any changes to the configuration of the platform or take any actions related to User objects, such as opening tickets or sending notifications.
Help Desk role
Help desk users can view all data and perform a subset of actions within the console. These actions include user-related actions, such as:
- Opening tickets for investigation or remediation
- Resetting a users MFA
- Modifying specific user attributes, such as User Type
- Logging a user out of active sessions in one or more IDPs
- Refreshing user events for troubleshooting
A full list of detailed Remediation Actions and their associated details is available in this article.
| Read-only role | Help desk role | Admin role |
|---|---|---|
| Refresh user data | All read-only actions | All actions |
| Mark as suspicious | Open ticket (to ITSM platform) | |
| Mark as normal behavior | Remediation actions | |
| Failed Checks triage actions (mark as suspicious/normal, exclude from check) | ||
| Send notification (to user, manager, or notification channel in Teams, Slack) | ||
| Send push notification (Duo, Okta) |
Other Role Types
Application Manager
(Not currently supported)
The Application manager role's primary purpose is for creating and maintaining the various integrations available within Cisco Identity. These include IdP systems like Duo, Entra ID, Okta, Google, etc., as well as other notification systems like Webex, Teams, and Slack.
The Application Manager role can:
- perform any action on the Integrations page
- only access the Integrations and Profile pages
- view System Logs for analyzing integration logs
User Manager
(Not currently supported)
The User Manager role:
- can perform any operation on Users
- cannot triage failed checks ( mark as suspicious/normal, exclude user from check)
- cannot access Integrations or Dashboard page
- can view System Logs for purposes of analyzing end user logs
Security Analyst Role
(Not currently supported)
The Security Analyst role
- can perform operations on the Users table page and individual user objects page - create and modify Saved filters, create tickets, trigger End User Refresh, trigger remediation actions
- can perform operations on Checks – modify check settings and check tags, provide feedback, enable/disable checks, triage failed checks for users, (e.g. exclude/include in checks, mark as suspicious/normal)
- can update the protected population
- cannot access Integrations page
- can view System Logs for analyzing end user logs
Viewing Recent Dashboard Users and Roles
Within Cisco Identity, you can view your current role, as well as the users of the platform and their associated roles.
- Login to Cisco Identity
-
Your current role will be displayed under your profile name in the top right corner.
Note: if an account is a member of multiple groups associated with roles in the Cisco Identity console, such as both full admin and read-only admin, then the least privilege group and role with take precedence.
-
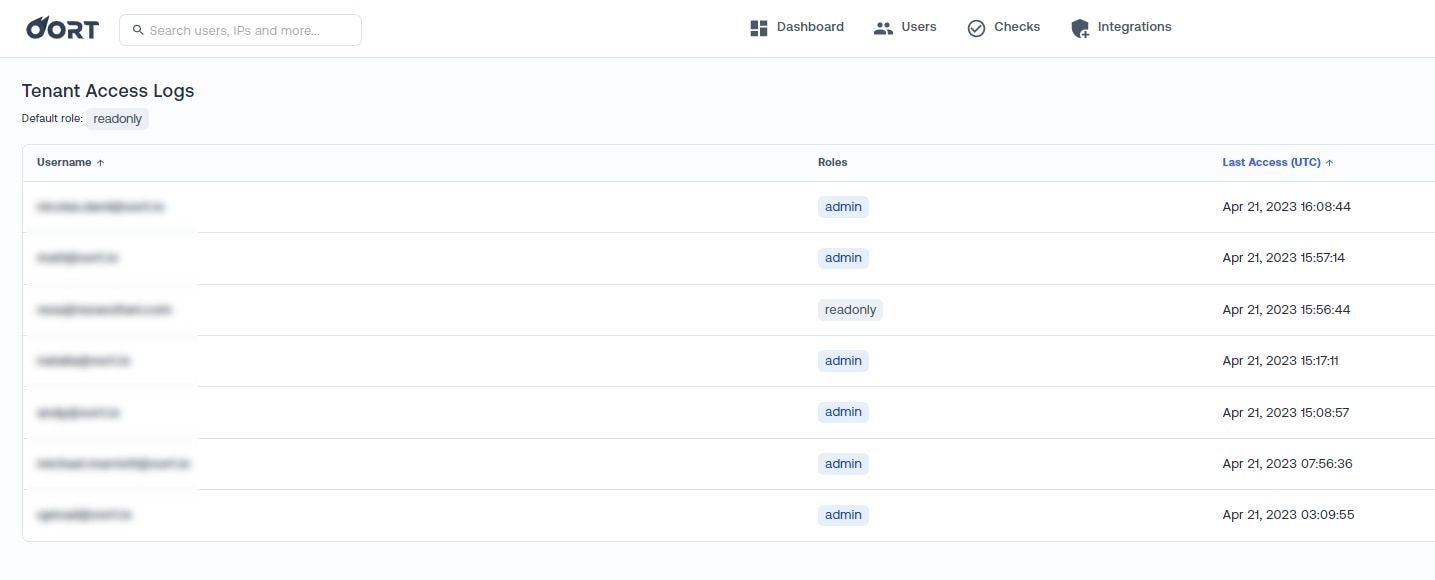
In the left menu bar, there will be an option for Tenant Access
- Select that option to view the Cisco Identity users, their role, and last login timestamp.
Note: Tenant access logs displays historical logs. This means there may be users visible in the logs that no longer have access to Cisco Identity. Because these are audit logs, Cisco Identity cannot "remove" user records from this page. If you have concerns about who currently has access to Cisco Identity, review the configuration of the Cisco Identity Duo SSO App within the Duo Admin Panel as access to Cisco Identity is fully managed via Duo SSO.
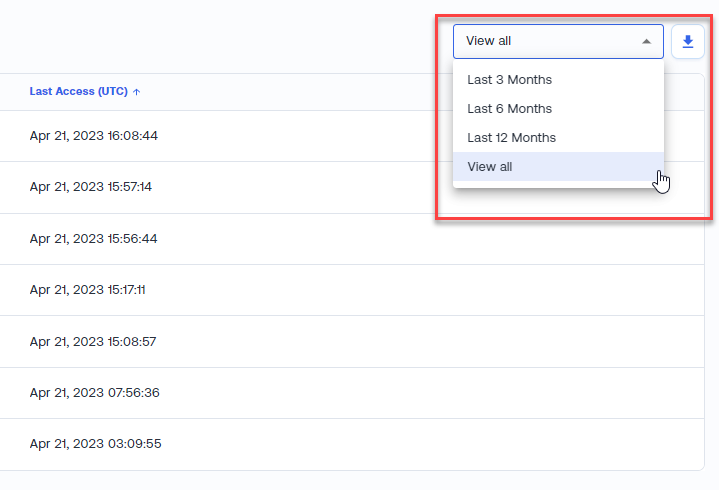
If needed, you can change the time range of the results displayed and also download the currently displayed list to a file using the down arrow.
Systems Logs
The System Logs page provides event information for all of the data collection, configuration changes, and user analytics in your Cisco Identity tenant.
Accessing System Logs
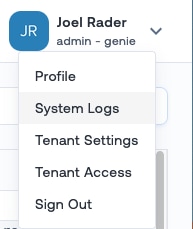
To access your tenant's System Logs, navigate using the user menu on the top-right portion of the Cisco Identity Dashboard.
Use Cases & Troubleshooting Scenarios
The System Logs are very helpful in the following scenarios:
- Initial Data Collection - After one or more identity provider (IDP) integrations are configured for the first time, such as Okta or Azure AD, and the Collect Now function is triggered, the System Logs can be used to verify the collection has started and monitor the progress of individual collection batches.
- Admin Actions or Configuration Changes - Changes to either the Cisco Identity tenant settings or individual integrations (Okta, Azure, Google, Duo, etc.) can be audited and verified using events in the System Logs, such as
Mutation__updateTenantConfigorMutation__updateIntegrationInstance.
Also, all administrator actions can be viewed using the Admin Triggered filter, available in the left-hand pane.
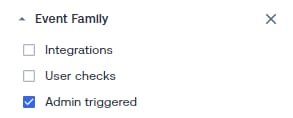
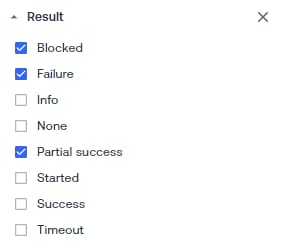
- Investigating Collection or other Failures - The system logs can provide insight into event failures in the environment, for example if an API secret expires or a API permissions change in an integration, the resulting failures can be quickly found in System logs using the filters (shown below) and/or filtering on the specific IDP in question (e.g. Okta).
- Check Failures and Notification Feedback - The system logs are another way to view both user check failures and also search for notification feedback, such as when events are marked Interesting or Normal Behavior from Teams or Slack notifications.
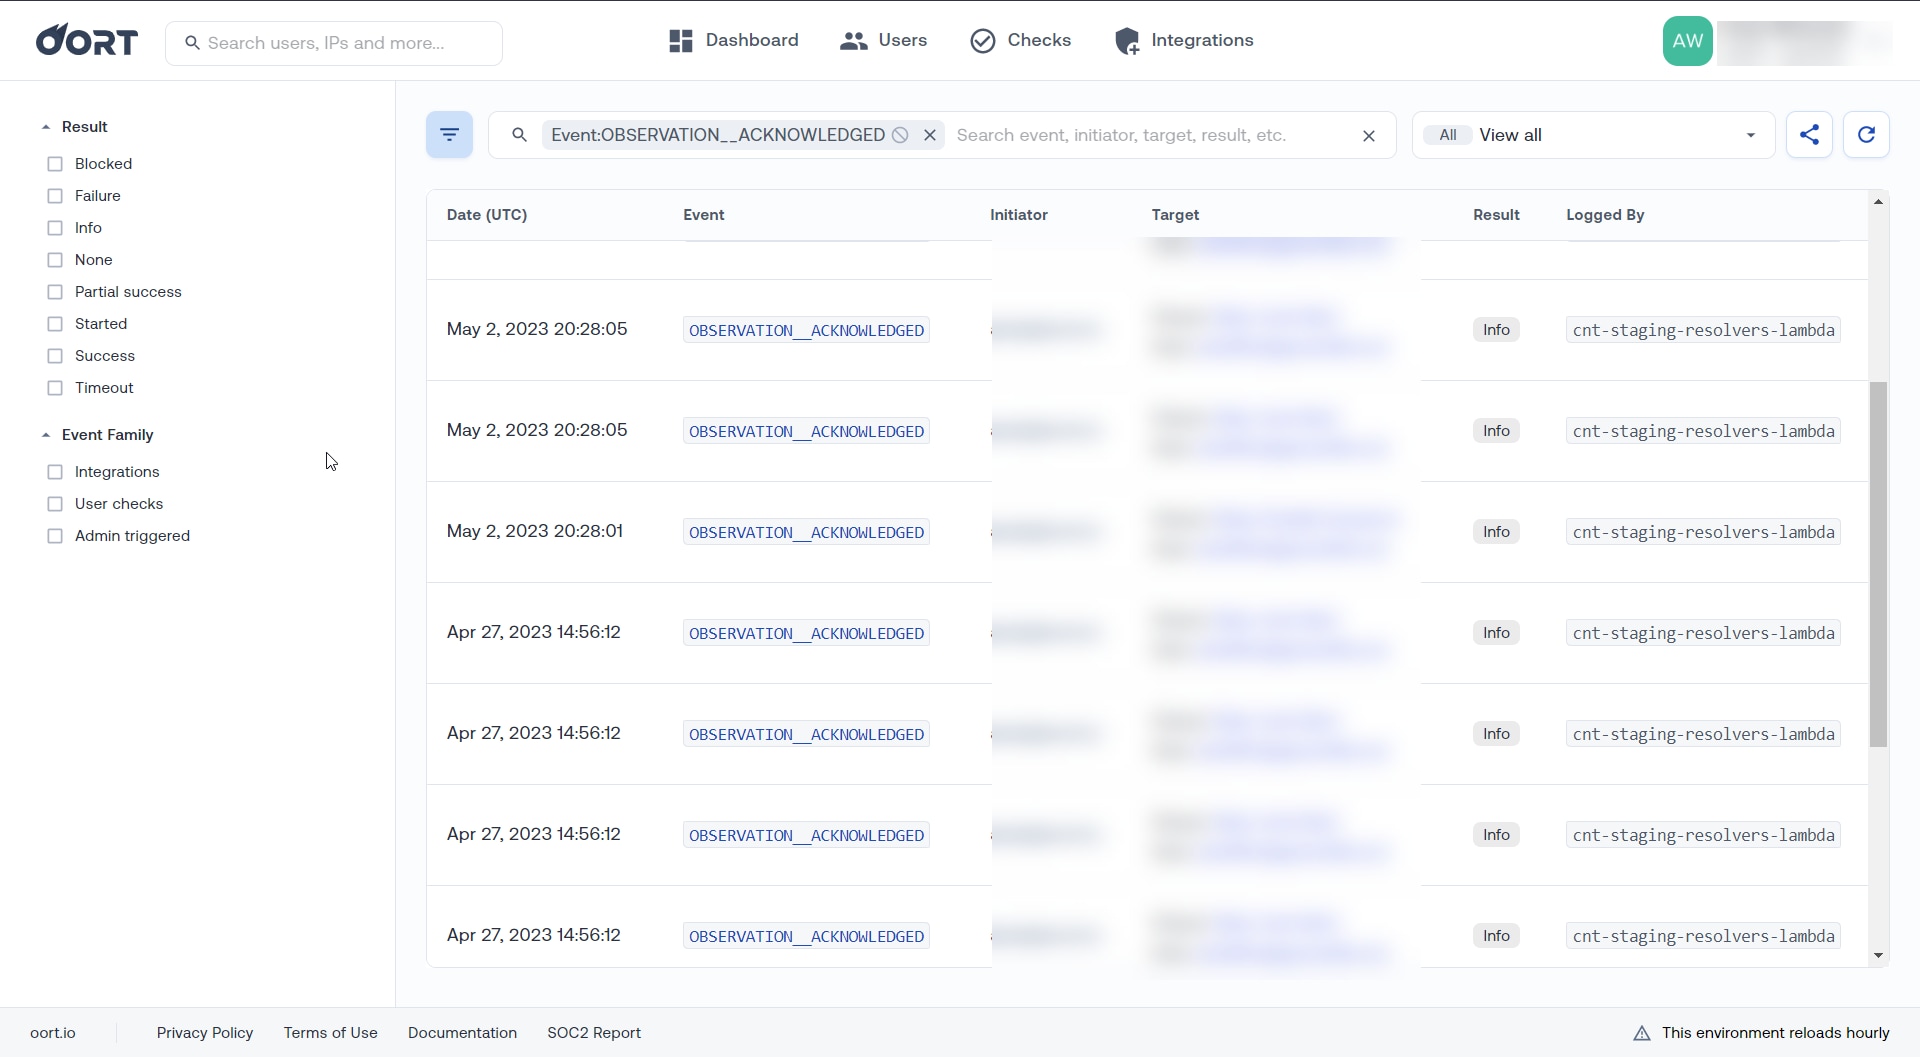
For a demonstration of how to use the System Logs page in these scenarios, please see the video tutorial below.
Frequently Used Event Types
Filtering the System Logs can be useful to quickly locate log entries of interest. In the search bar at the top of the menu you can enter text to filter by (such as the name of a target data source). You can also click on individual items in the columns to filter by that attribute type. Some examples:
- Events - click on an Event Type to filter by that specific event (e.g. Integration Data Upload)
- Target - Select the provider instance to filter by

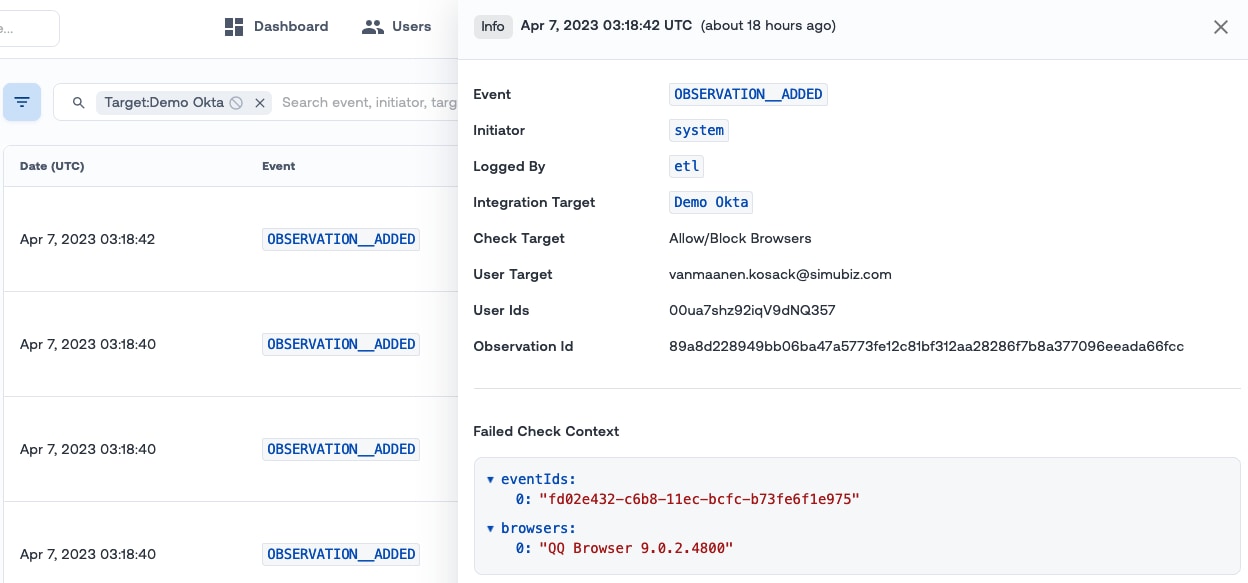
You can also click on an individual record in the System Logs to pop out a window with additional information about the specific event.
Video Tutorial
For a tutorial on how to use the System Logs, please see this video.