Deploy the Threat Defense Virtual on Hyper-V

This chapter explains how to deploy the Threat Defense Virtual using Microsoft Hyper-V.

Overview

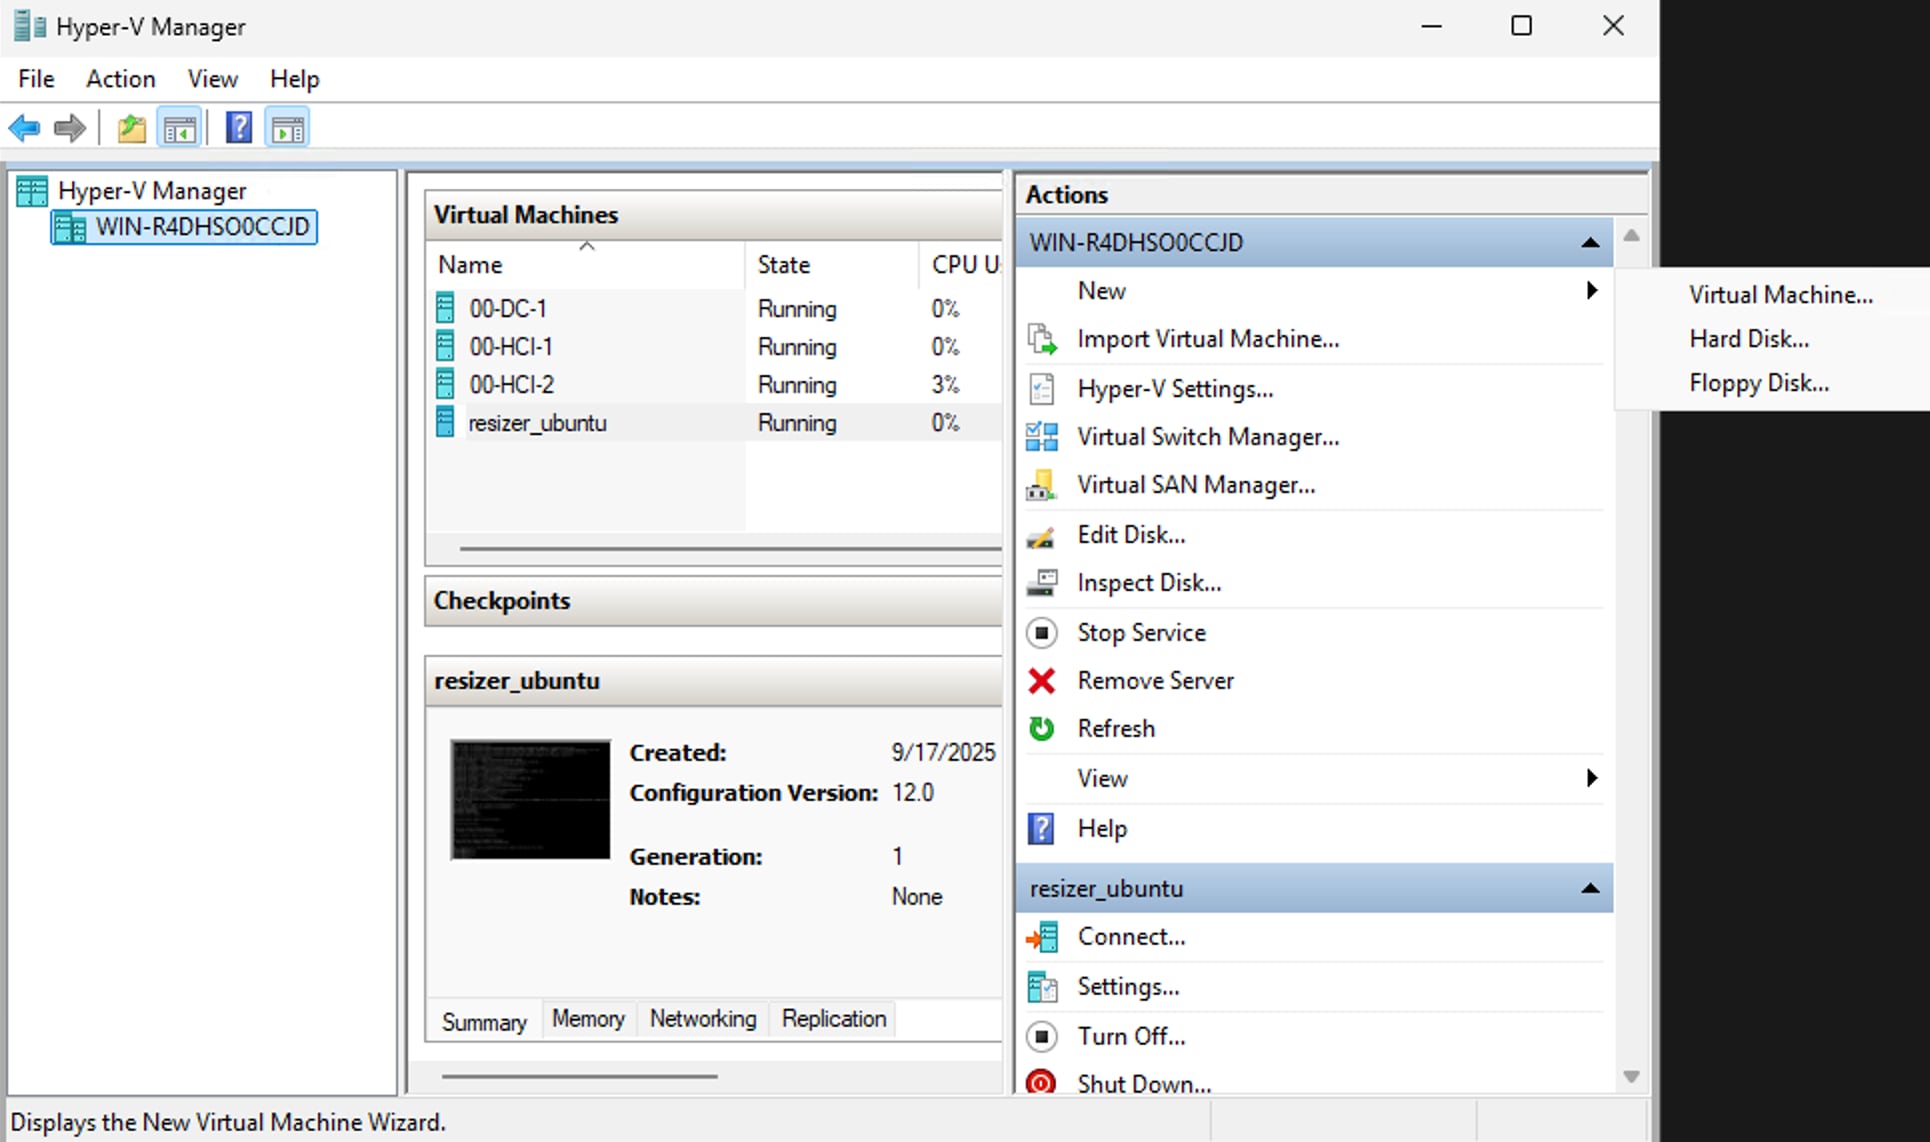
You can deploy the Threat Defense Virtual using Microsoft Hyper-V, from Release 10.0.0.

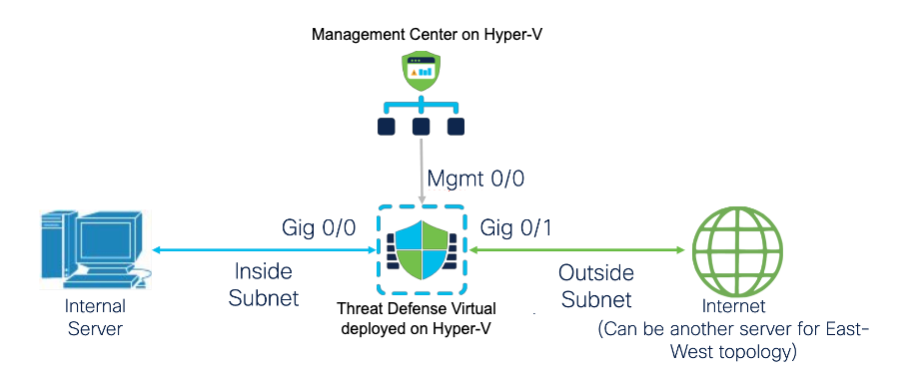
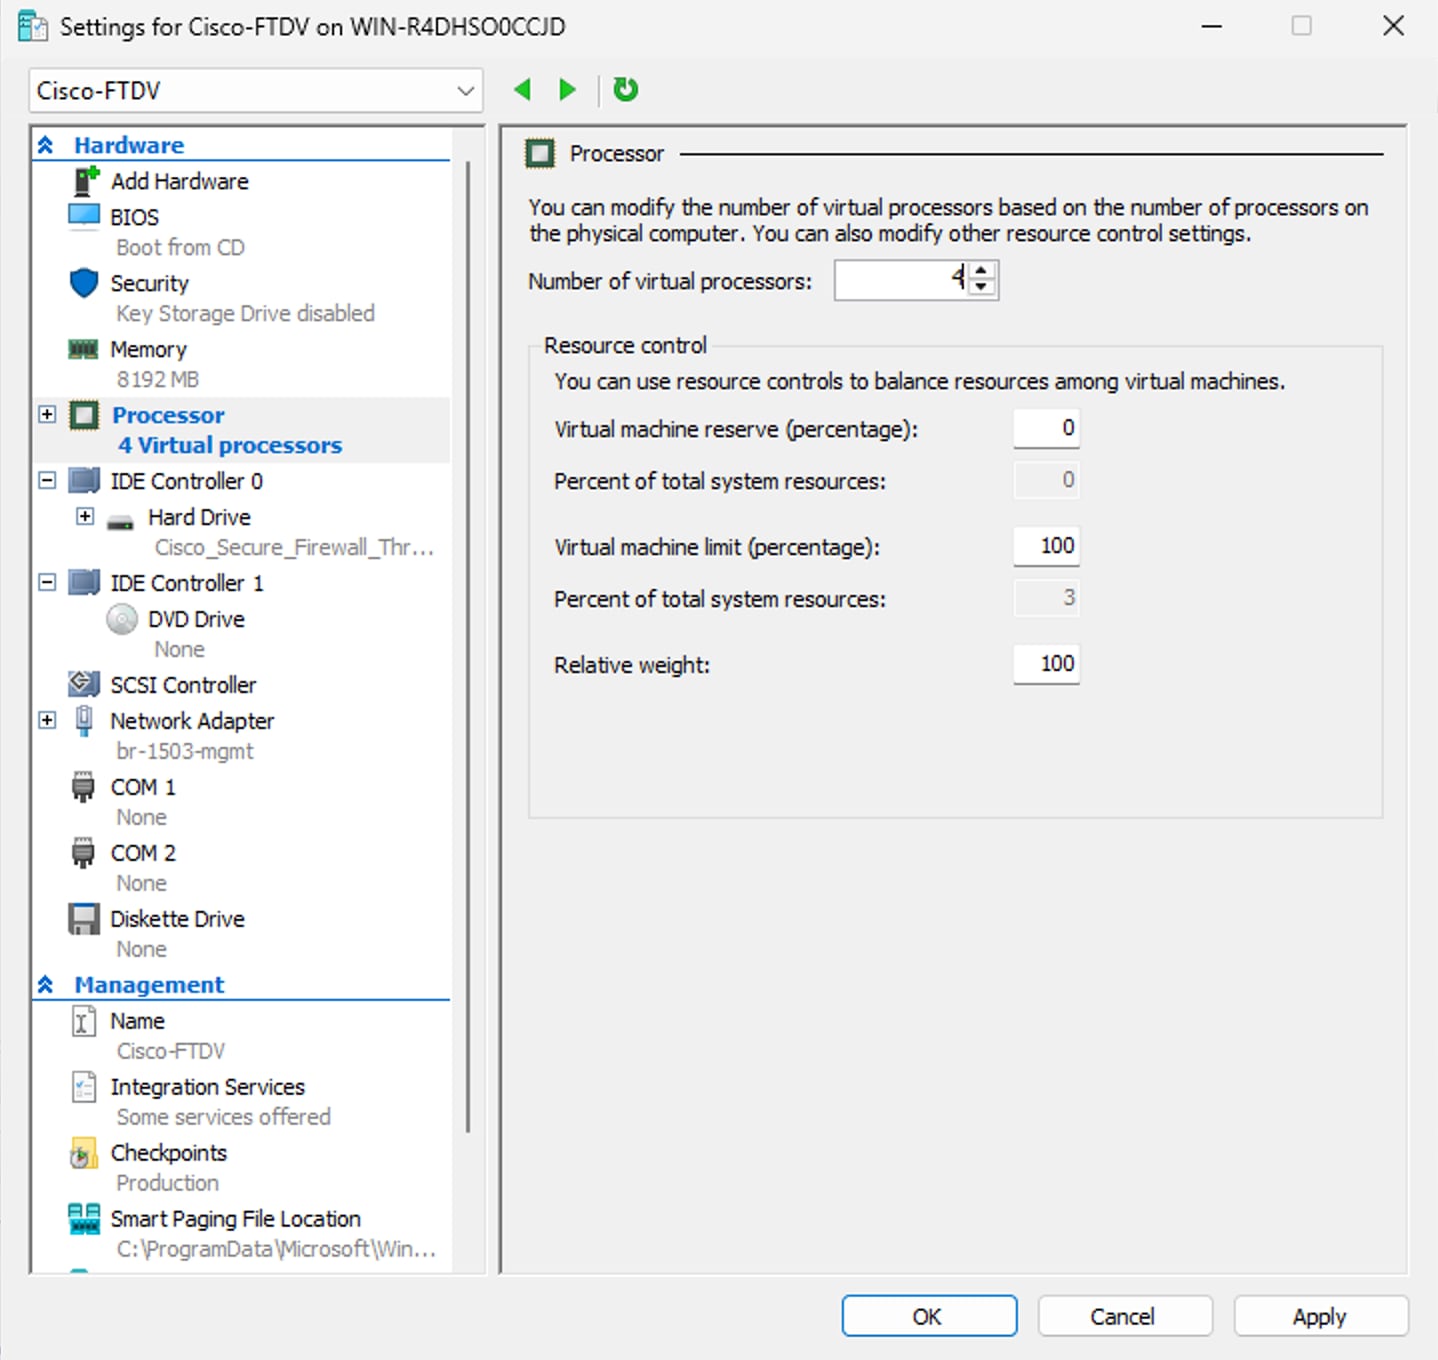
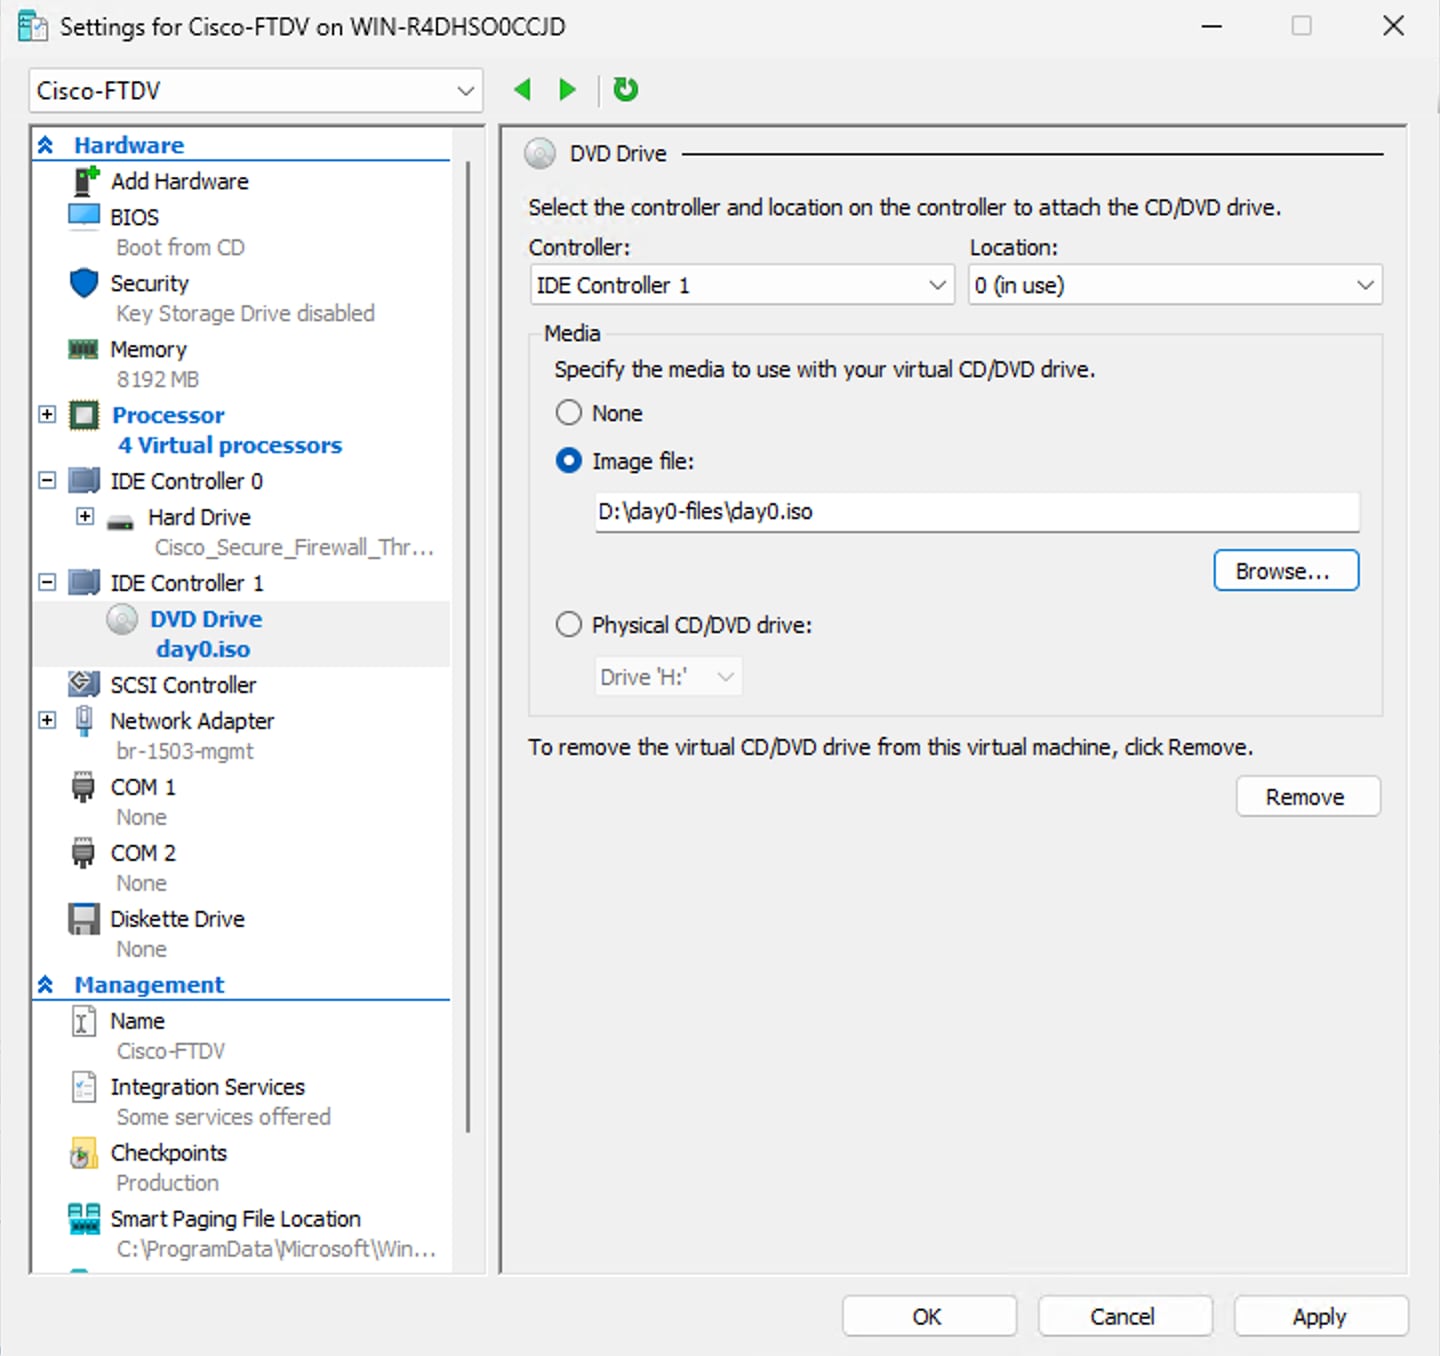
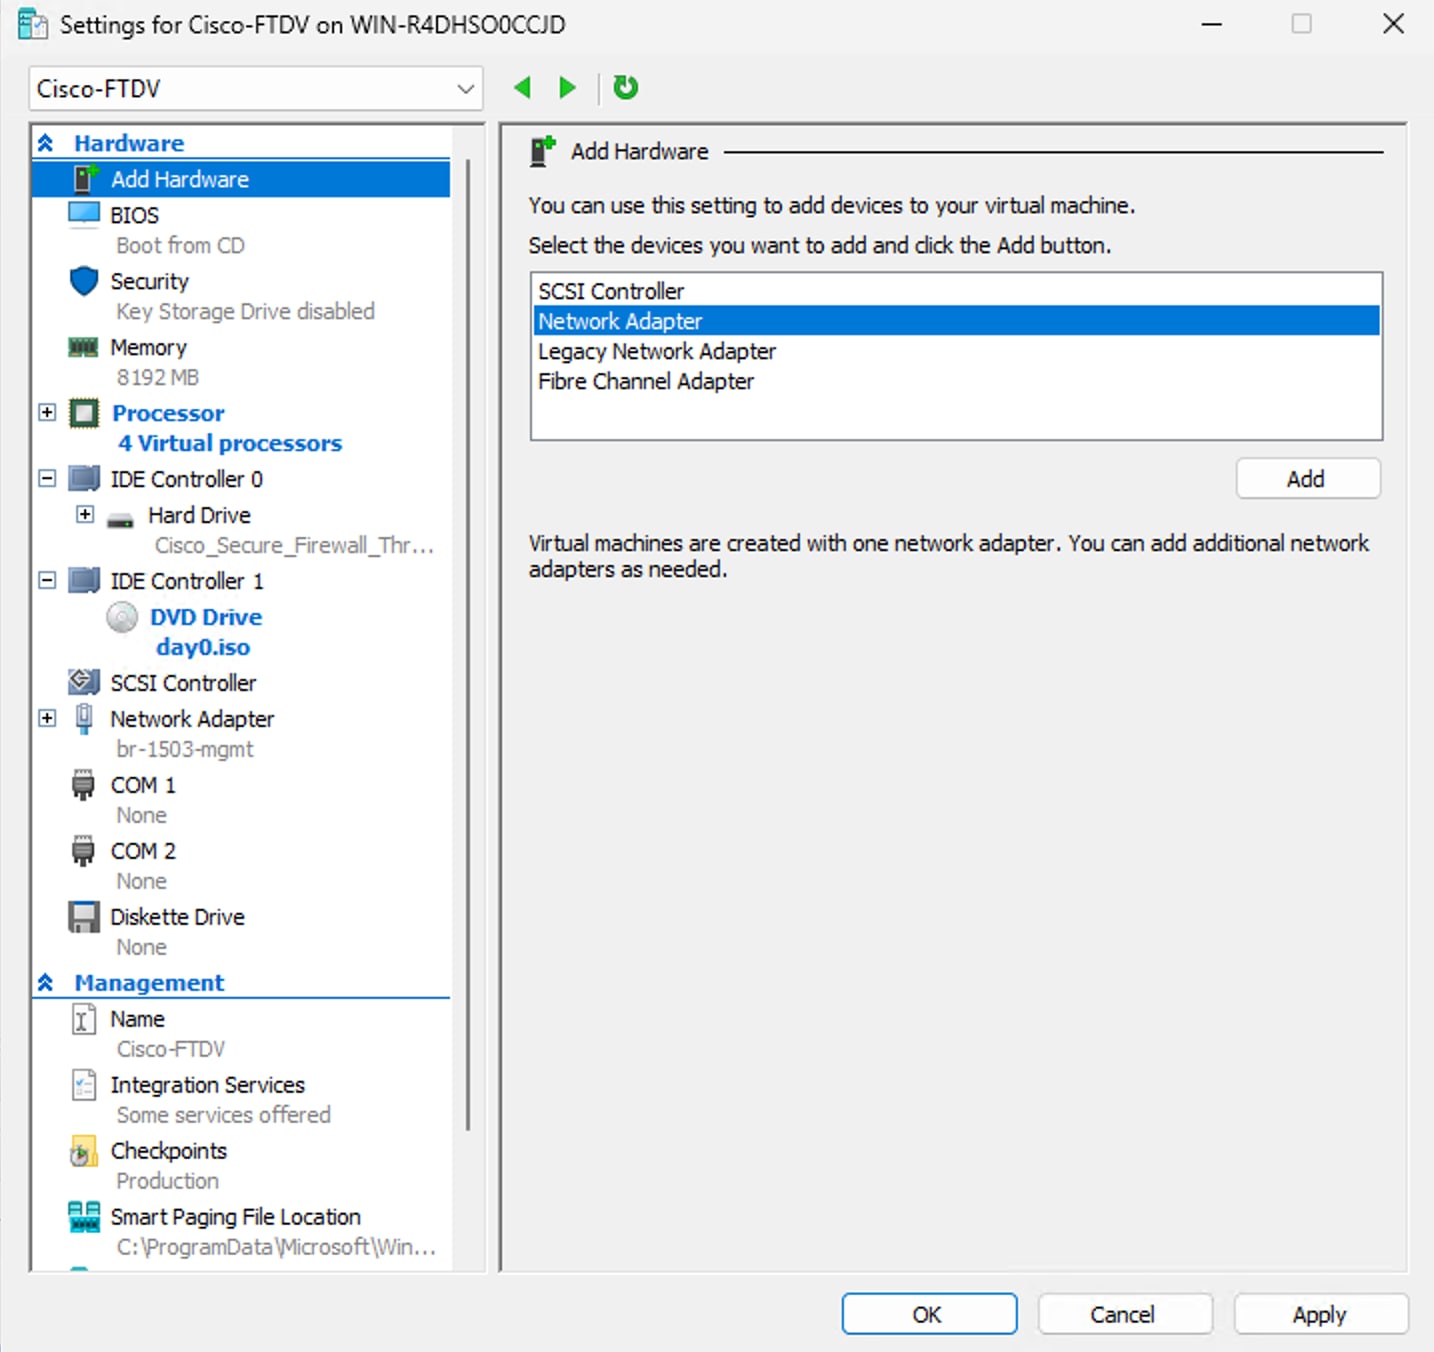
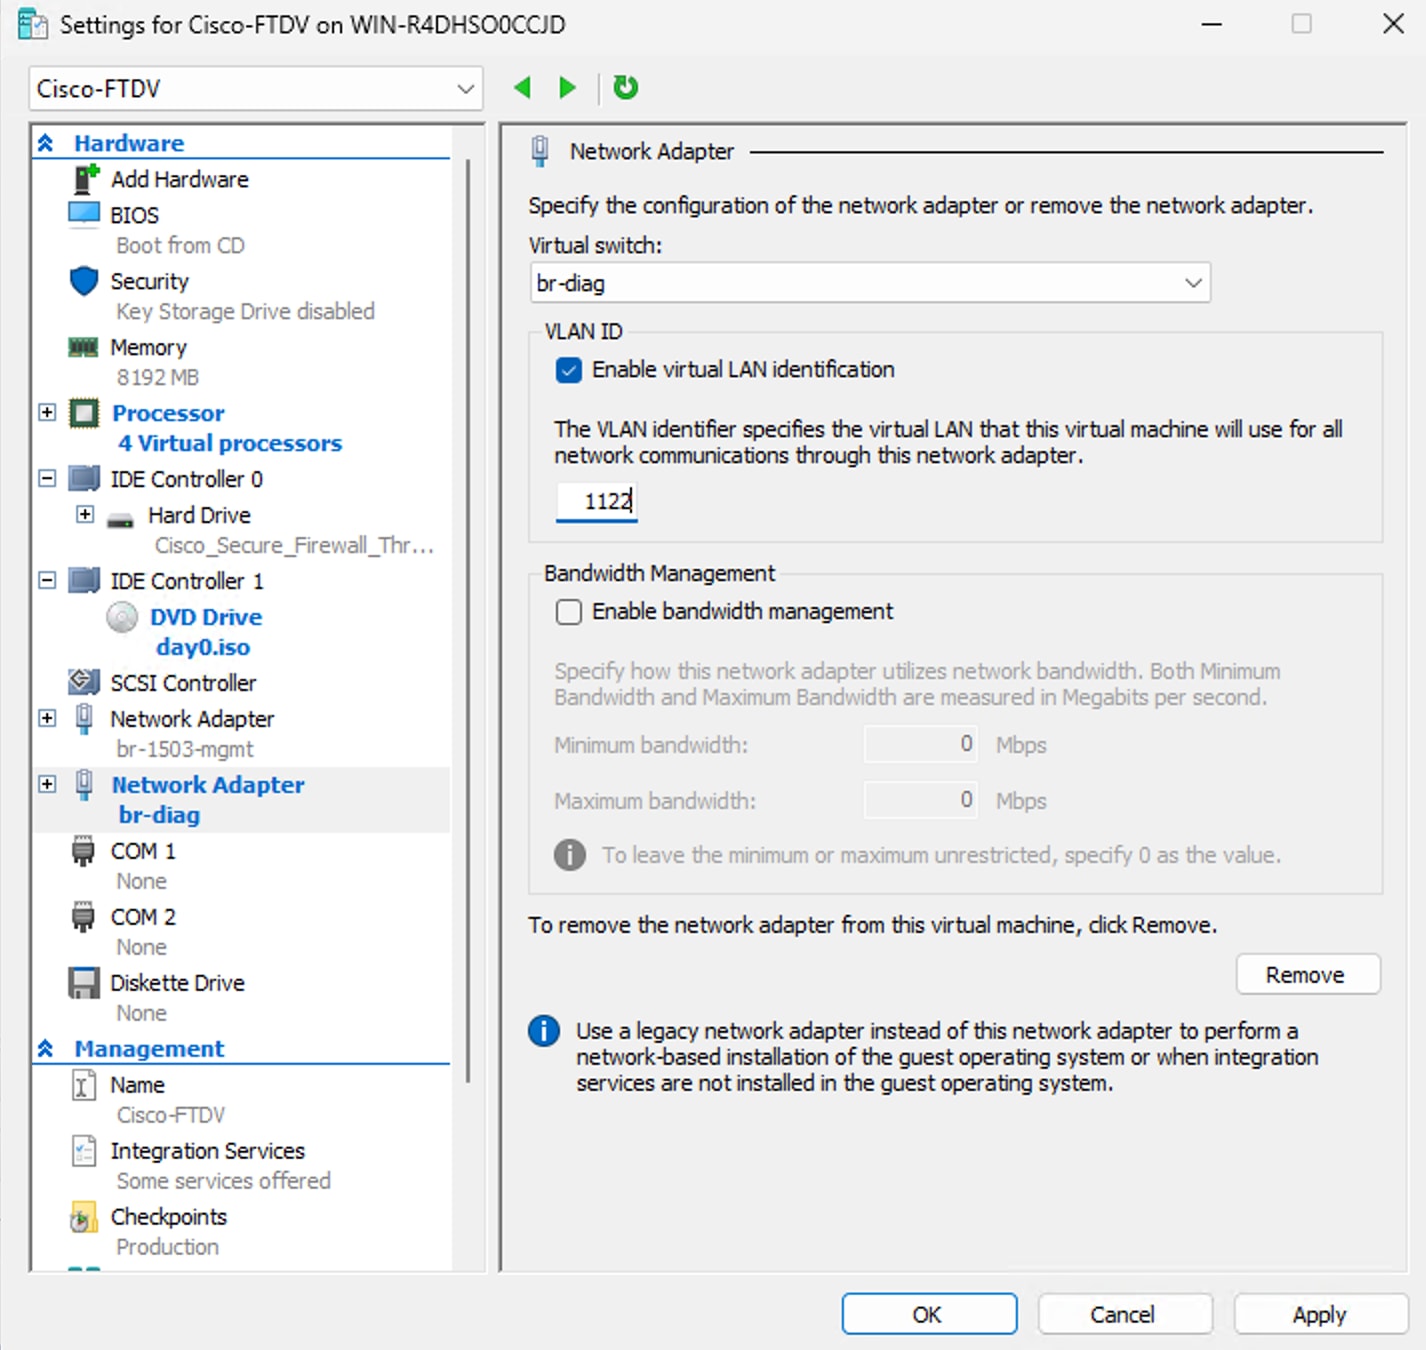
The following subnets are set up in Hyper-V for the Threat Defense Virtual:

Management Subnet → For Management Center (Mgmt 0/0).

Inside Subnet → Internal network (Gig 0/0).

Outside Subnet → External or Internet-facing network (Gig 0/1).

Diagnostic Subnet -> For diagnostics and reporting, cannot be used for traffic.

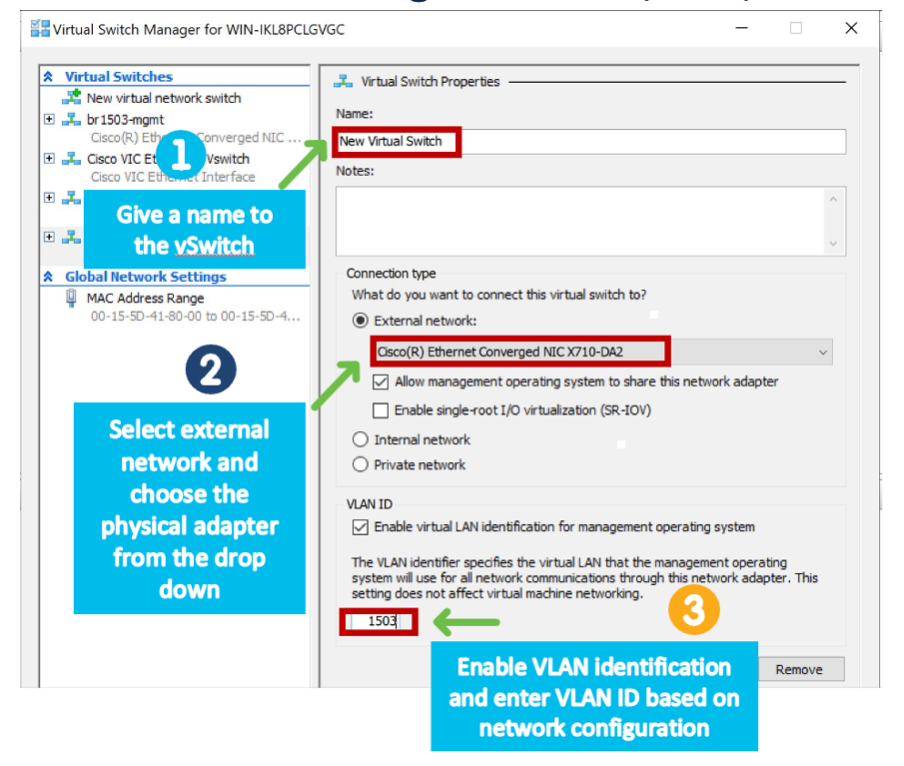
These are created using Hyper-V virtual switches.

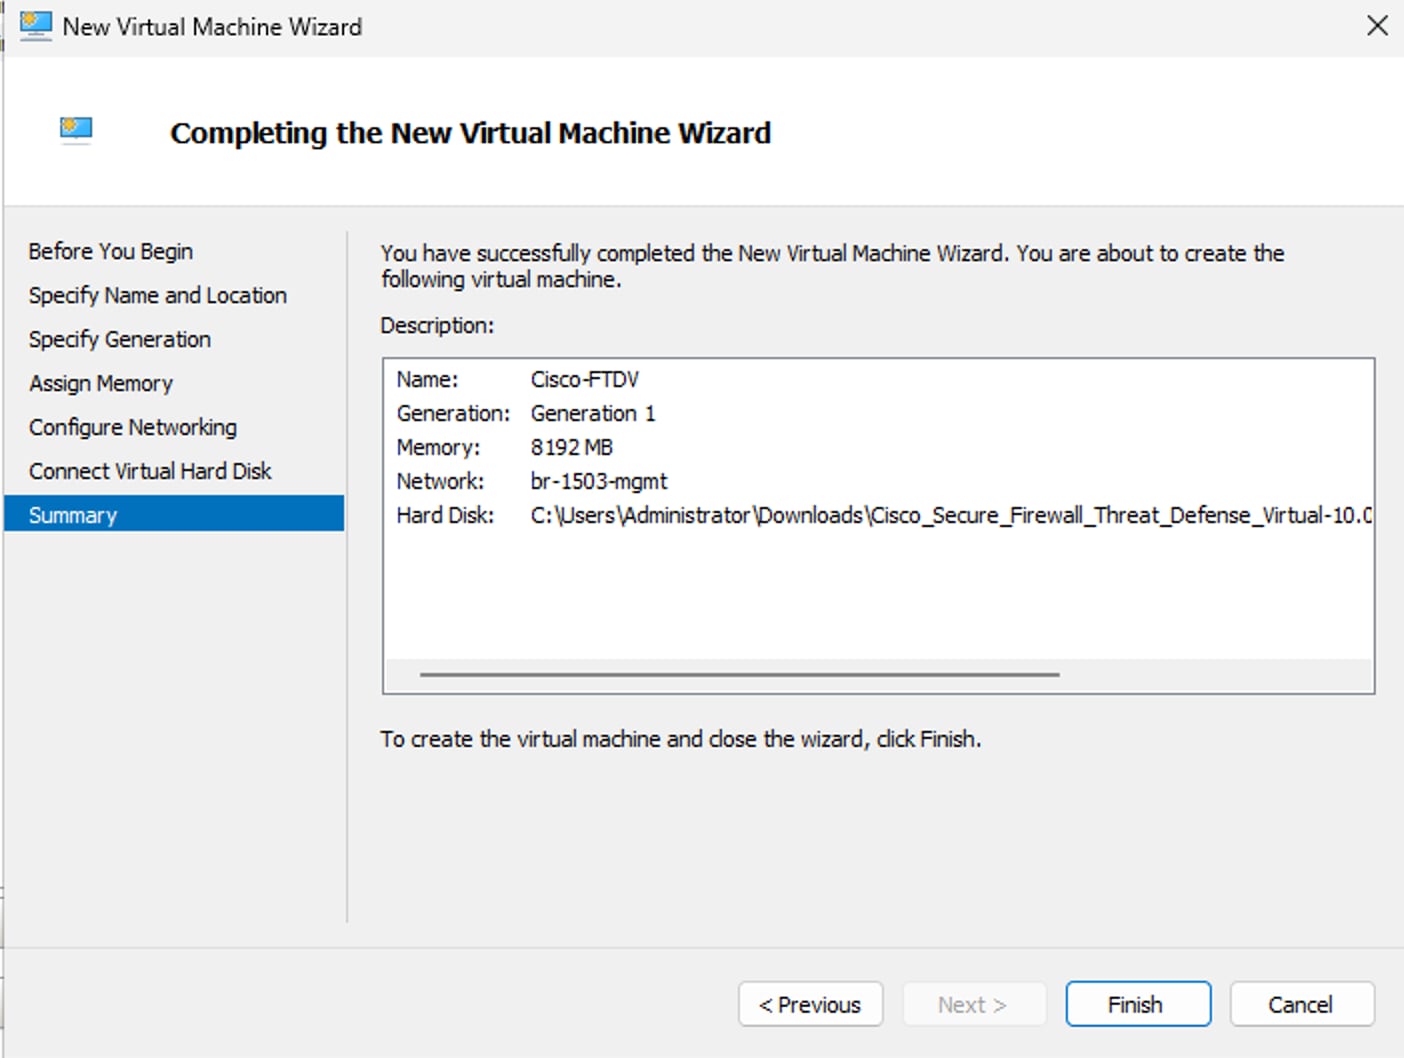
The following figure shows the Threat Defense Virtual deployed on Hyper-V, managed by Management Center.

Guidelines and Limitations

  • OS Support:

    • Windows Server 2019 or Windows Server 2025

    • Native Hyper-V

  • File format:

    Supports the VHDX format for initial deployment of the Threat Defense Virtual on Hyper-V.

  • Day 0 configuration:

    You create a text file that contains the Threat Defense Virtual CLI configuration commands that you need.

Upgrade Restrictions and Limitations

Revert upgrade restrictions


Caution


Revert upgrades are blocked.

Once upgraded to Threat Defense Virtual 10.0.0, reverting to earlier versions is not supported.

Pre-requisites

  • Host Operating System Microsoft Windows Server 2019 or Windows Server 2025 with Hyper-V role enabled.

  • Minimum Resource Requirements for Threat Defense Virtual

    • CPU: Minimum 4 vCPUs

    • RAM: Minimum 8 GB

    • Disk storage: 100 GB

  • Download the Threat Defense Virtual VHD image for Hyper-V from Cisco.com. https://software.cisco.com/download/

  • Create the Day 0 configuration file.

    You must add the Day 0 configuration if the Threat Defense Virtual is deployed for the first time.
  • Management Center for centralized management.

  • Device Manager is not supported​.

Licensing

Threat Defense Virtual supports the following license types:​

  • BYOL​ (Bring Your Own License)

    • Smart Licensing

    • SLR (Specific License Reservation)

  • Evaluation Licensing

Configure Hyper-V Virtual Switches

Procedure


Step 1

Open Virtual Switch Manager.

In Hyper-V Manager, go to the Actions pane on the right and click Virtual Switch Manager.

Step 2

Select switch type.

In the Virtual Switch Manager window, under Create virtual switch, select External.

Step 3

Create the virtual switch.

Click on Create Virtual Switch to proceed with the configuration.

Step 4

Name the virtual switch.

In the Virtual Switch Properties window, enter a meaningful name for your new virtual switch (for example: FTD-External-Switch).

This helps you identify the switch when assigning it to virtual machines.

Step 5

Select External Network and Choose the Physical Adapter.

  • Under Connection type, select External network.

  • From the drop-down menu, choose the physical network adapter (for example: Cisco® Ethernet Converged NIC X710-DA2) that you want this virtual switch to bind to.

This allows the virtual machines to communicate with the physical network.

Step 6

Enable VLAN Identification (optional, based on network configuration).

  • Check the box Enable virtual LAN identification for management operating system if VLAN tagging is required.

  • Enter the appropriate VLAN ID (for example: 1503) based on your network configuration.

Step 7

Click Apply and then OK to save the configuration.


Prepare the Day 0 Configuration File

Before you begin

You can prepare the Day 0 configuration file before you launch the Threat Defense Virtual. This file is a text file that contains the Threat Defense Virtual configuration that will be applied when the Threat Defense Virtual is launched. This initial configuration is placed into a text file named day0-config in a working directory you choose and is manipulated into a day0.iso file that is mounted and read on first boot. At the minimum, the Day 0 configuration file must contain commands that will activate the management interface and set up the SSH server for public key authentication, but it can also contain a complete Threat Defense Virtual configuration. The day0.iso file (either your custom day0.iso or the default day0.iso) must be available during the first boot.

We are using Linux in this example, but there are similar utilities for Windows.

  • If you want to deploy the Threat Defense Virtual in transparent mode, you must use a known running Threat Defense config file in transparent mode as the Day 0 configuration file. This does not apply to a Day 0 configuration file for a routed firewall.

    If you want to deploy the Threat Defense Virtual in transparent mode, you must use a known running Threat Defense config file in transparent mode as the Day 0 configuration file. This does not apply to a Day 0 configuration file for a routed firewall.If you want to deploy the Threat Defense Virtual in transparent mode, you must use a known running Threat Defense config file in transparent mode as the Day 0 configuration file. This does not apply to a Day 0 configuration file for a routed firewall.
  • You must add the Day 0 configuration file before you boot the Threat Defense Virtual for the first time. If you decide you want to use a Day 0 configuration after you have initially booted the Threat Defense Virtual, you must execute a write erase command, apply the day 0 configuration file, and then boot the Threat Defense Virtual.

Procedure


Step 1

Enter the CLI configuration for the Threat Defense Virtual in a text file called day0-config. Add interface configurations for the three interfaces and any other configuration you want.

The first line should begin with the Threat Defense Virtual version. The day0-config should be a valid Threat Defense configuration. The best way to generate the day0-config is to copy the desired parts of a running config from an existing Threat Defense Virtual. The order of the lines in the day0-config is important and should match the order seen in an existing show run command output.

Example:

{
"EULA": "accept",
"Hostname": ”FTDvhyperv",
"AdminPassword": "r2M$9^Uk69##",
"DNS1": "208.67.222.222",
"DNS2": "208.67.222.222",
"IPv4Mode": "Manual",
"IPv4Addr": "10.10.0.92",
"IPv4Mask": "255.255.255.224",
"IPv4Gw": "10.10.0.65",
"ManageLocally": ”No",
"FmcIp": "10.10.1.83",
"FmcRegKey": "ciscoadmin",
"FmcNatId": "cisco"
}

Step 2

(Optional) Download the Smart License identity token file issued by the Cisco Smart Software Manager to your computer.

Step 3

(Optional) Copy the ID token from the download file and put it a text file that only contains the ID token.

Step 4

(Optional) For automated licensing during initial Threat Defense Virtual deployment, make sure the following information is present in the day0-config file:

  • Management interface IP address

  • (Optional) HTTP proxy to use for Smart Licensing

  • A route command that enables connectivity to the HTTP proxy (if specified)

  • A DNS server that resolves tools.cisco.com to an IP address

  • Smart Licensing configuration specifying the Threat Defense Virtual license you are requesting

  • (Optional) A unique host name to make the Threat Defense Virtual easier to find in CSSM

Step 5

Generate the virtual CD-ROM by converting the text file to an ISO file:

stack@user-ubuntu:-$ sudo genisoimage -r -o day0.iso day0-config
I: input-charset not specified, using utf-8 (detected in locale settings)
Total translation table size: 0
Total rockridge attributes bytes: 252
Total directory bytes: 0
Path table size (byptes): 10
Max brk space used 0
176 extents written (0 MB)

The Identity Token automatically registers the Threat Defense Virtual with the Smart Licensing server.

Step 6

Repeat Steps 1 through 5 to create separate default configuration files with the appropriate IP addresses for each Threat Defense Virtual you want to deploy.


Deploy using Day 0 Configuration File

After you set up the Day 0 configuration file, you can deploy it using the Hyper-V Manager.

Follow these steps to deploy Cisco Threat Defense Virtual on a Hyper-V host:

Procedure


Step 1

Go to Server Manager > Tools > Hyper-V Manager.

Step 2

The Hyper-V Manager appears.

Step 3

From the list of hypervisors, right-click the desired Hypervisor in the list and choose New > Virtual Machine.

Step 4

The New Virtual Machine Wizard appears.

Step 5

Working through the wizard, specify the following information:

  • Name and location of your Threat Defense Virtual.

  • Generation of your Threat Defense Virtual.

    Choose Generation 1 for BIOS boot mode.

    Choose Generation 2 for UEFI boot mode.

  • Amount of memory for your Threat Defense Virtual.

    Minimum required: 8 GB

  • Network adapter (connects to the virtual switch you have already set up).

  • Virtual hard disk and location.

  • Choose Use an existing virtual hard disk and browse to the location of your VHDX file.

Step 6

Click Finish to complete the initial VM creation. A dialog box appears showing your Threat Defense Virtual configuration.

Step 7

Configure VM and assign vCPUs.

You must modify the vCPU value before starting up your Threat Defense Virtual. Click Settings on the right side of the Hyper-V Manager. The Settings dialog box opens. Under the Hardware menu on the left, click Processor to get to the Processor pane.

Under Number of virtual processors, enter the required vCPU count.

Minimum required: 4 vCPUs.

Step 8

Attach Day-0 Configuration File.

Click Settings on the right side of the Hyper-V Manager. The Settings dialog box opens. Under Hardware on the left, Select DVD Drive > Image file.

Browse and select the day0.iso file containing the day0 configuration and then click Apply. When you boot up your Threat Defense Virtual for the first time, it will be configured based on what is in the Day 0 configuration file.

Step 9

Add Network Adapters.

A newly deployed Threat Defense Virtual has only one network adapter. You need to add at least two more network adapters. In this example, we are adding the inside network adapter.

Before you begin

  • The Threat Defense Virtual must be in the off state.

  • Click Settings on the right side of the Hyper-V Manager. The Settings dialog box opens. Under the Hardware menu on the left, click Add Hardware, and then click Network Adapter> Add

Note


Do NOT use the Legacy Network Adapter.

Step 10

Click Add Hardware > Network Adapter > Add.

Assign a Virtual Switch to the new adapter for the diagnostic interface.

Enable VLAN identification and enter the VLAN ID.

Repeat the procedure for the inside and outside network adapters.

Note


If diag is off, the diagnostic interface addition is not required.

Step 11

Enable Secure Boot (For UEFI only).

If the VM is Generation 2 (UEFI boot), go to Security.

Enable Secure Boot (if not enabled by default).

Step 12

Start the VM.

Right-click the VM and select Start.

The VM Power State should now show Running.

Step 13

Access the Console.

Double-click the VM in Hyper-V Manager to open the console session.

Note

 
  • User has to select Generation 2 in the Specify Generation tab while creating the VM.

  • To enable secure boot, select the secure boot option before first boot.

Select the Enable Secure Boot check box.


Manage the Threat Defense Virtual

Stop the Threat Defense Virtual Instance

You can stop the Threat Defense Virtual in two ways. A graceful shutdown is highly recommended.

  • Graceful Shutdown (Recommended)

    Initiate the shutdown from the Threat Defense Virtual CLI.

    Example:
    Cisco Firepower Extensible Operating System (FX-OS) v82.18.0 (build 341i)
    Cisco Secure Firewall Threat Defense for Hyper-V v10.0.0 (build 1145)
    > shutdown
    This command will shutdown the system. Continue?
    Please enter 'YES' or 'NO': YES
    
  • Forced shutdown (Not recommended)

    From Hyper-V Manager, right-click the VM and select Turn Off.


    Note


    This performs a forced shutdown and may cause database corruption.


Reboot the Threat Defense Virtual (Graceful reboot recommended)

Always initiate a reboot from the Threat Defense Virtual CLI to ensure a clean restart.

Example:

Cisco Firepower Extensible Operating System (FX-OS) v82.14.0 (build 341i)
Cisco Secure Firewall Threat Defense for Hyper-V v10.0.0 (build 1145)
> reboot
This command will reboot the system. Continue?
Please enter 'YES' or 'NO': YES

Delete the Threat Defense Virtual

Once the Threat Defense Virtual VM is stopped, right-click on the VM in Hyper-V Manager and select Delete.


Note


Deleting the VM does not remove the attached virtual hard disk (VHD). The disk must be manually deleted from storage if no longer required.


Troubleshooting

  • Issue - Unable to start VM, could not initialize memory.

    Scenario - This issue occurs when the disk space is not enough to initialize the VM.

    Workaround - Clear up space on the disk where the VHD file is located.

  • Issue - Unable to provision or start the VM; failed to open the attachment.

    Scenario - This issue occurs when another VM is using the same image as the new VMWorkaround - Delete the old VM.
  • Issue - Failed to start the VM, not enough system memory

    Scenario - This issue occurs when not enough RAM is available on the host operating system to provision the configured memory to the VM.Workaround - Ensure that the required RAM is available on the host operating system.
  • Issue - Unable to SSH to Threat Defense Virtual or load the Threat Defense Virtual UI from an external host.

    Workaround - Allow port 22 (SSH), 443 (HTTPS), 80 (HTTP) in inbound and outbound rules in the Windows Firewall.

  • Issue - Device is unable to access the internet.

    Workaround - If the device is using an external virtual switch, ensure that the gateway of the VLAN is properly configured.