Installing Interface Cards
Available Languages
Table Of Contents
Installing Interface Cards in Cisco 1900 Series Routers
Cisco Interface Cards Installation
Installing WICs, VWICs, HWICs, and EHWICs
Installing and Removing Slot Dividers
Removing Slot Dividers from HWIC Slots on Cisco 1900 Series Routers
Installing Slot Dividers in EHWIC Slots on Cisco 1900 Series Routers
Installing Interface Cards in Cisco 1900 Series Routers
This section gets merged with Installing Cisco Interface Cards in Cisco Access Routers
http://www.cisco.com/en/US/docs/routers/access/interfaces/ic/hardware/installation/guide/inst_ic.htmlCisco Interface Cards Installation
See the individual interface card installation guides on Cisco.com to install specific interface cards in chassis slots. Interface cards supported by the Cisco 1941 integrated services routers include the following types:
•
VWIC—data mode only
•
•
•
Related Product Documentation
The following list includes documentation related to your product. These documents were not shipped with your product, but you can access them on Cisco.com.
•
Installing WICs, VWICs, HWICs, and EHWICs
This section describes how to install WICs, VWICs, HWICs, and EHWICs into Cisco 1941 routers.

Caution
The Cisco 1941 router has two interface card slots. Each slot can accommodate a Cisco WIC, VWIC (data only mode), or a single-wide high-speed WIC (HWIC).

Note
To install a card in a Cisco 1941 router, follow these steps:
Step 1
Caution
Step 2
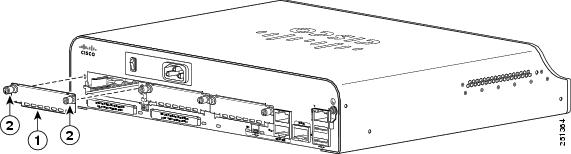
Figure 8-1 Removing an Interface Card Blank Faceplate
Step 3
Step 4
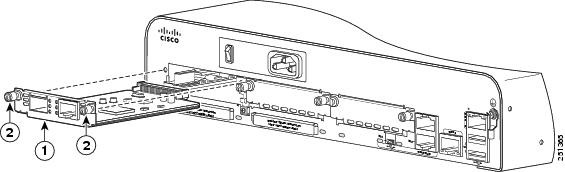
Figure 8-2 Inserting an Interface Card into the Router
Step 5
Step 6
Installing and Removing Slot Dividers
You can remove a slot divider between the single-wide EHWIC slot, converting it into one double-wide slot.
Removing Slot Dividers from HWIC Slots on Cisco 1900 Series Routers
Note
To remove slot dividers from EHWIC slots on Cisco 1900 series routers, follow these steps:
Step 1
Step 2
Installing Slot Dividers in EHWIC Slots on Cisco 1900 Series Routers
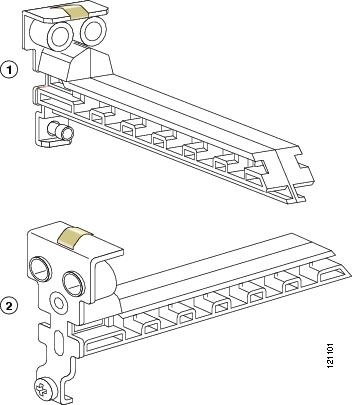
Figure 8-3 shows the EHWIC slot divider for Cisco 1900 series routers.
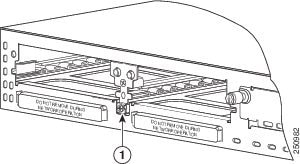
Figure 8-3 Slot Divider for EHWIC Slots on Cisco 1900 Series Routers
To install slot dividers into EHWIC slots, follow these steps:
Step 1
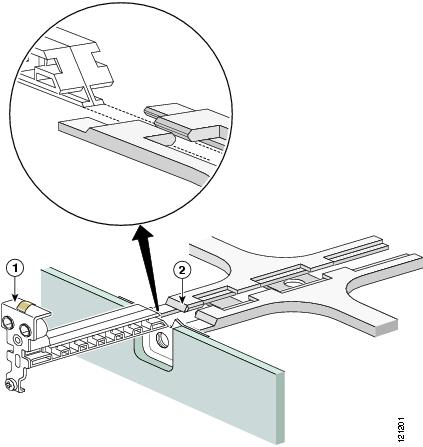
Figure 8-4 Inserting a Slot Divider into an EHWIC Slot on Cisco 1900 Series Routers
Step 2
Figure 8-5 Slot Divider Installed in an HWIC Slot on Cisco 1900 Series Routers
 Feedback
Contact Cisco
- Open a Support Case

- (Requires a Cisco Service Contract)