VPN Console: Hierarchy Tree
Available Languages
Table Of Contents
Specific Edge Device (by Site)
Audit Service Requests—for Specific Customer
Audit Service Requests—for Specific VPN (Customer Tab)
Audit Service Requests—for Specific VPN (VPN Tab)
VPN Console: Hierarchy Tree
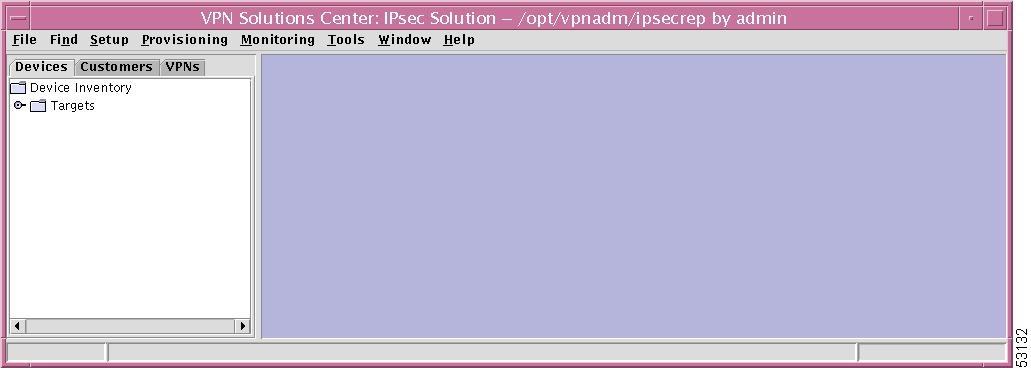
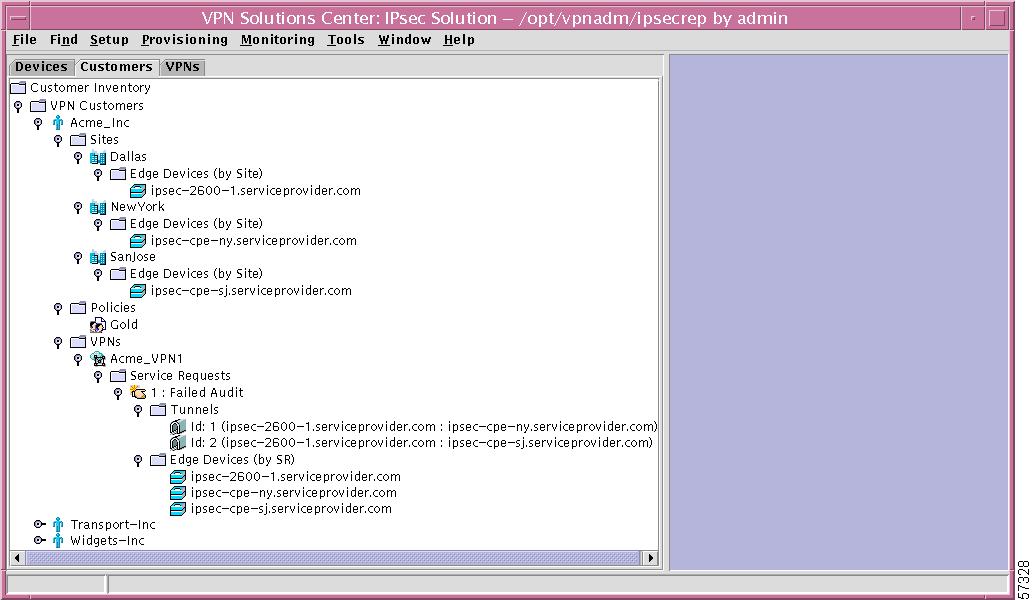
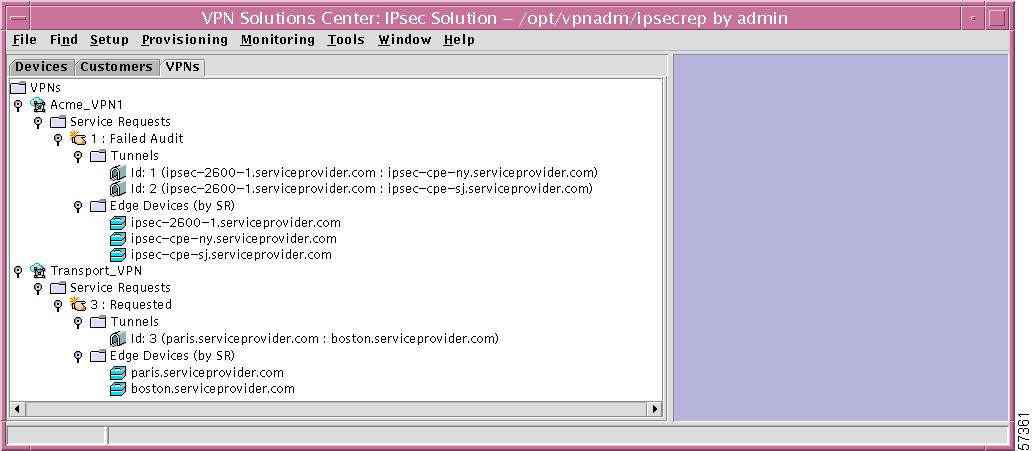
In the left pane, the hierarchy pane, of the VPN Console window is a tree of information, known as the hierarchy tree, as shown in Figure 12-1, "Hierarchy Tree in VPN Console."
Figure 12-1 Hierarchy Tree in VPN Console
The hierarchy pane in the VPN Console window has three tabs, which allow access to information about the following:
•
VPNs
Within the tree, click on the open-close icon that appears to the left of each node to toggle between the expanded and collapsed view of that node.
Devices
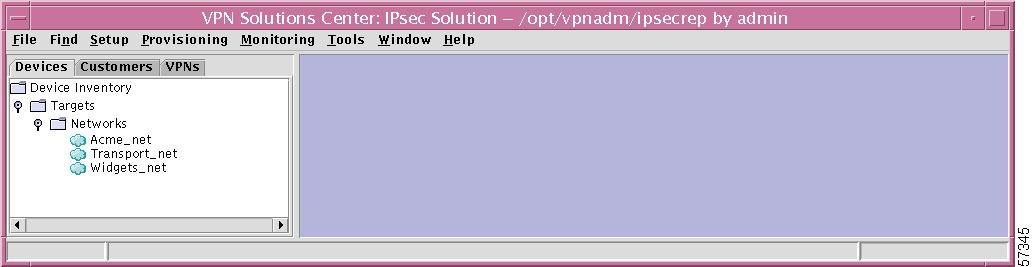
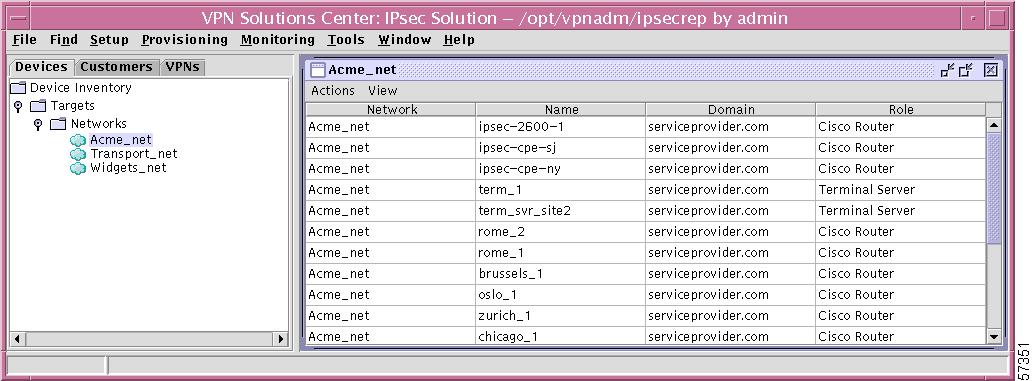
In the hierarchy pane of the VPN Console window, you can click the Devices tab and then completely expand Device Inventory. This shows all created Networks as a subset of Targets, as shown in Figure 12-2, "Device Inventory Expanded."
Figure 12-2 Device Inventory Expanded
This section is explained in detail in the following subsections:
The explanations are mapped to menu task bar explanations in other chapters. Additionally, the following subsections explain functions that are not available through the menu task bar.
Targets
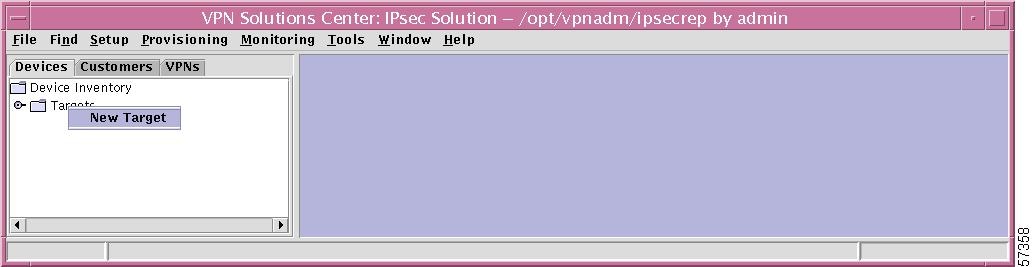
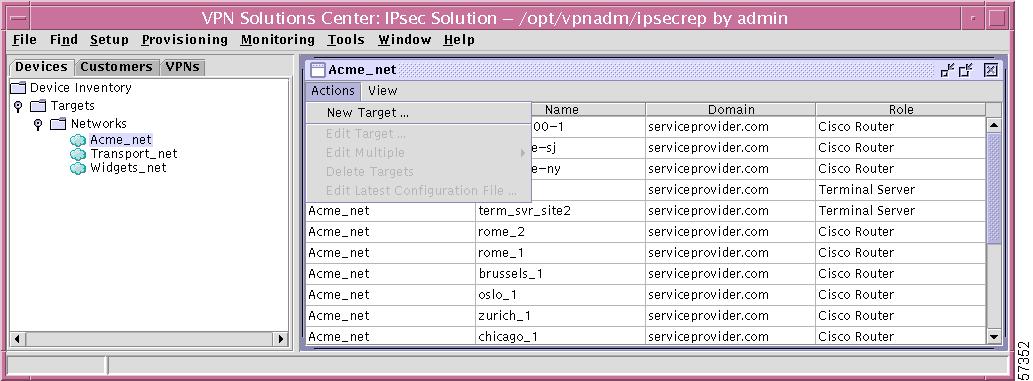
If you right-click on Targets in the hierarchy pane, you get a window as shown in Figure 12-3, "Targets Choice," which gives you the opportunity to create a New Target. This function cannot be implemented through the menu task bar. To do this, refer to the "New Target" section.
Figure 12-3 Targets Choice
Networks
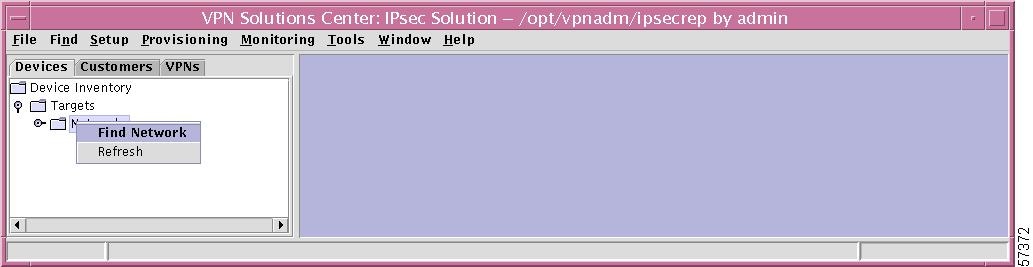
If you right-click on Networks in the hierarchy pane, you get a window as shown in Figure 12-4, "Networks Choices," which gives you the opportunity to do the following:
•
•
Figure 12-4 Networks Choices
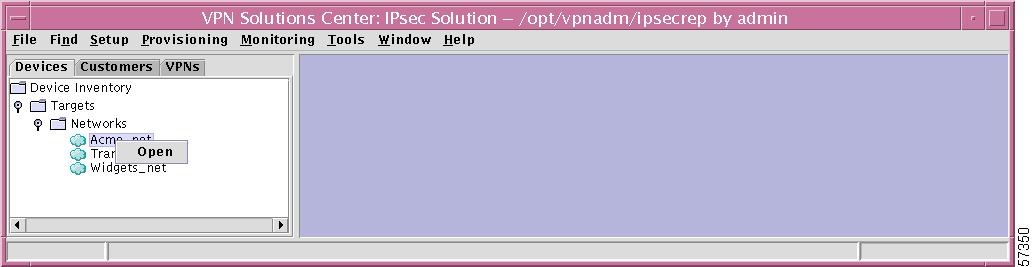
Specific Network
If you right-click on any of the networks listed under Networks in the hierarchy pane, you get a window as shown in Figure 12-5, "Specific Network Choice," which gives you the opportunity to left-click on Open to open that network for viewing or modifying. To do this, refer to the "Open Networks" section.

Note
Figure 12-5 Specific Network Choice
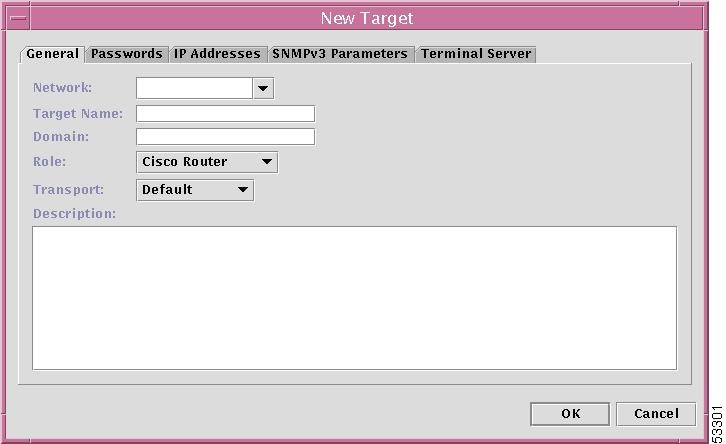
New Target
To create a single New Target and identify the network and domain that it will join, from the hierarchy pane, do the following:
Step 1
Step 2
Step 3
Note
•
•
•
•
Note
•
Note
•
Figure 12-6 New Target Window
Step 4
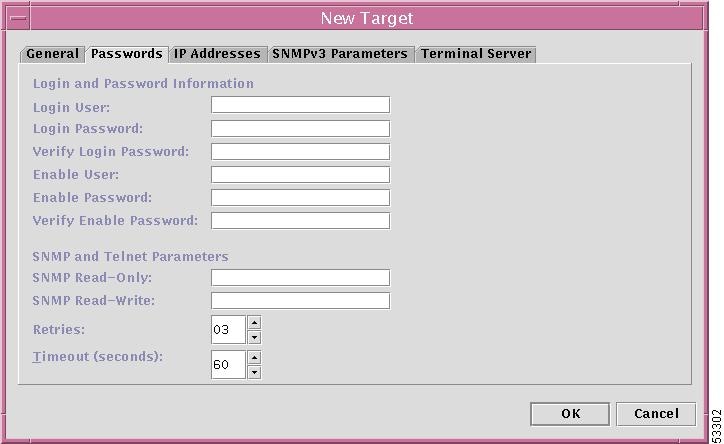
When you click OK, the result is a new Target entry. Password information is required, as explained in the next step.
Step 5
•
•
•
•
•
•
•
•
•
Note
•
Note
Figure 12-7 New Target Window—Passwords Tab
Step 6
When you click OK, the result is that the passwords are set for the target created in New Target.
Step 7
Note
Note
Figure 12-8 IP Addresses Window
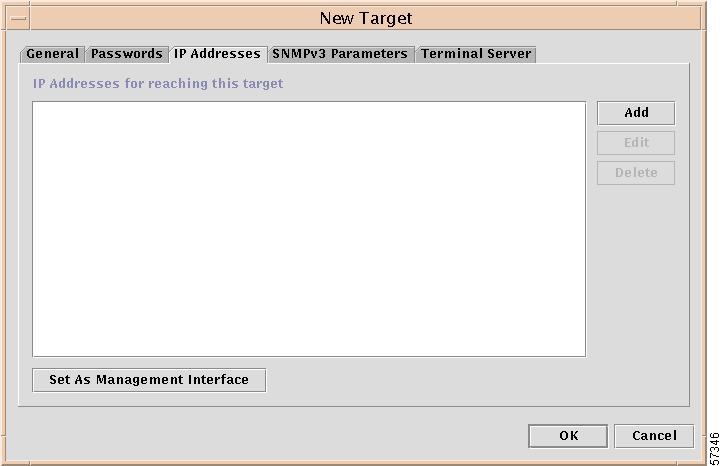
Step 8
•
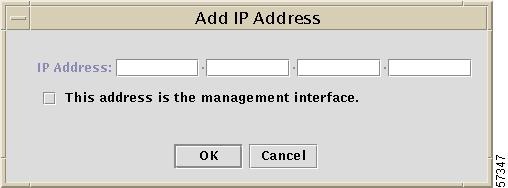
To add an IP address, click the Add button and you will receive a window as shown in Figure 12-9, "Add IP Address Window."
Figure 12-9 Add IP Address Window
a.
b.
Note
c.
The IP address is added to the field, as shown in Figure 12-10, "Result of Adding an IP Address."
Figure 12-10 Result of Adding an IP Address
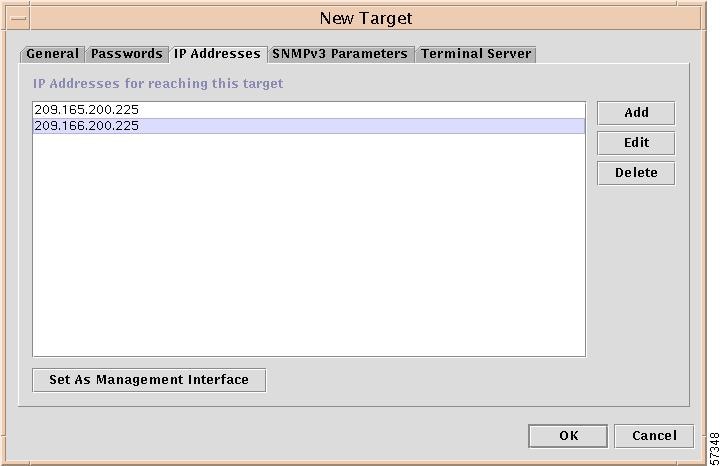
From Figure 12-10, you can select an address and click the Set As Management Interface button. This overrides any previous management interface selection.
•
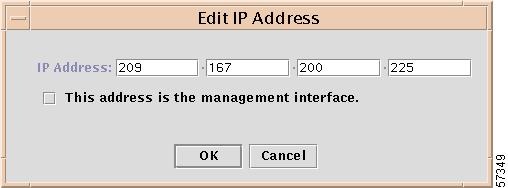
To edit an IP address, highlight an existing IP address in a field, like the field in Figure 12-10, "Result of Adding an IP Address,"and click Edit. You will receive a window as shown in Figure 12-11, "Edit IP Address Window.
Figure 12-11 Edit IP Address Window
a.
b.
Note
c.
In the field in Figure 12-10, the highlighted IP address will be changed to reflect the edits.
•
Highlight an existing IP address in the field, like the field in Figure 12-10, "Result of Adding an IP Address,"and click Delete. You will receive a window as shown in Figure 12-12, "Delete Confirmation."
Figure 12-12 Delete Confirmation
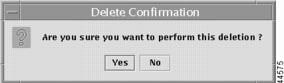
Click Yes to delete the IP address and No not to delete the IP Address.
When you click the SNMPv3 Parameters tab, you proceed to Step 9. When you click the Terminal Server tab, you proceed to Step 11. When you click the General tab, you proceed to Step 3. When you click the Passwords tab, you proceed to Step 5.
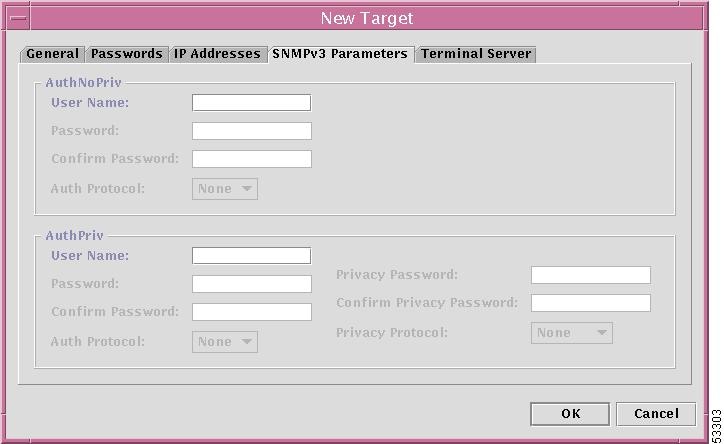
Step 9
If you want this new target to be identified with the security level Auth No Priv, enter the following information:
•
•
•
•
If you want this new target to be identified with the security level Auth Priv, enter the following information:
•
•
•
•
•
•
•
Figure 12-13 New Target Window—SNMPv3 Parameters Tab
Step 10
Step 11
Figure 12-14 New Target Window—Terminal Server Tab

The objective of this path is to associate a terminal server target to the current task.
Enter the following information:
•
•
Step 12
Open Networks
To open a specific network and perform actions on a minimum of one Cisco Router or Terminal Server, do the following:
Step 1
Figure 12-15 Choosing a Specific Network
Step 2
Figure 12-16 Network—Actions and View
From this window, you can choose one of the following:
Network Window—Actions
Step 1
Note
Step 2
Figure 12-17 Network—Actions
Step 3
•
•
•
Figure 12-18 Actions—Edit Multiple
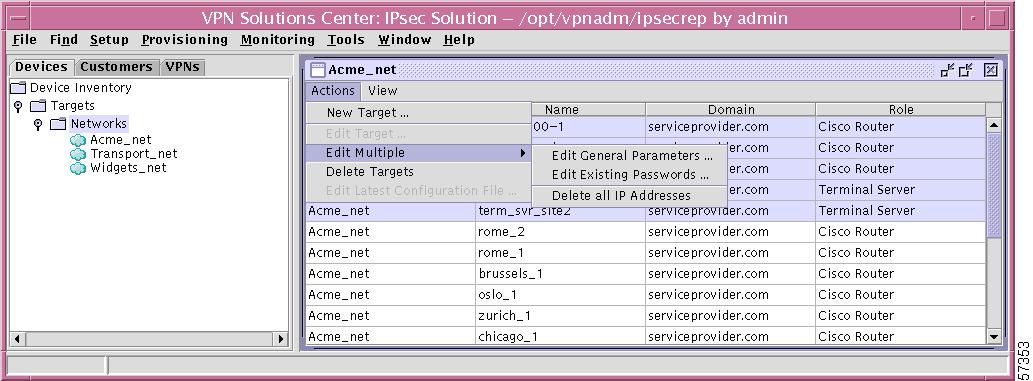
The choices are as follows:
–
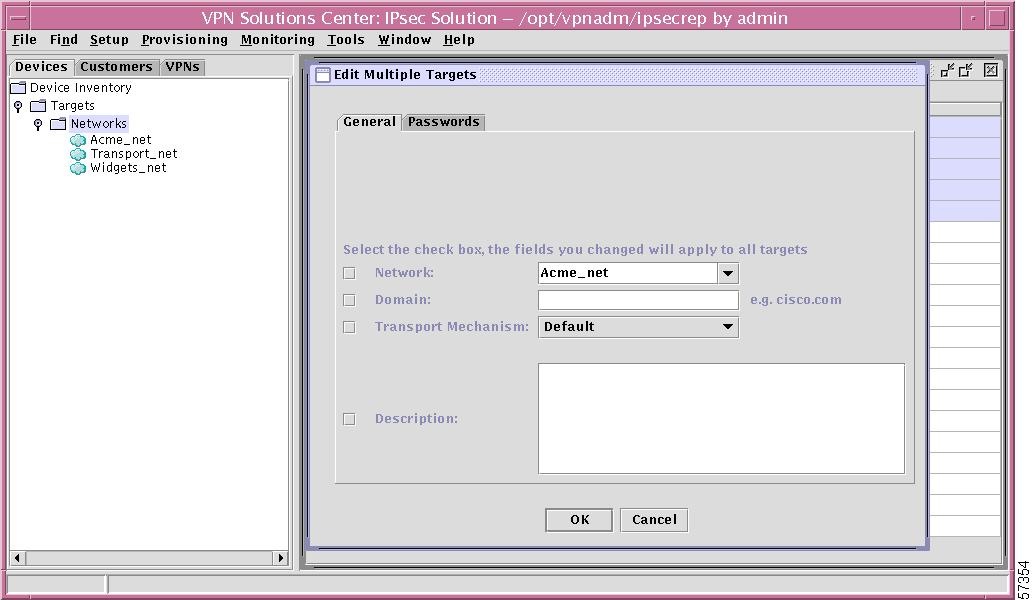
When you make this selection, a window as shown in Figure 12-19, "Edit Multiple Targets—General Tab," appears. Click on one or more of the check boxes and change that setting. Then click OK. These changes will be made for all the targets highlighted in Step 1.
Note
You can also choose the Passwords tab, which is explained in the "Edit Existing Passwords" section.
Figure 12-19 Edit Multiple Targets—General Tab
–
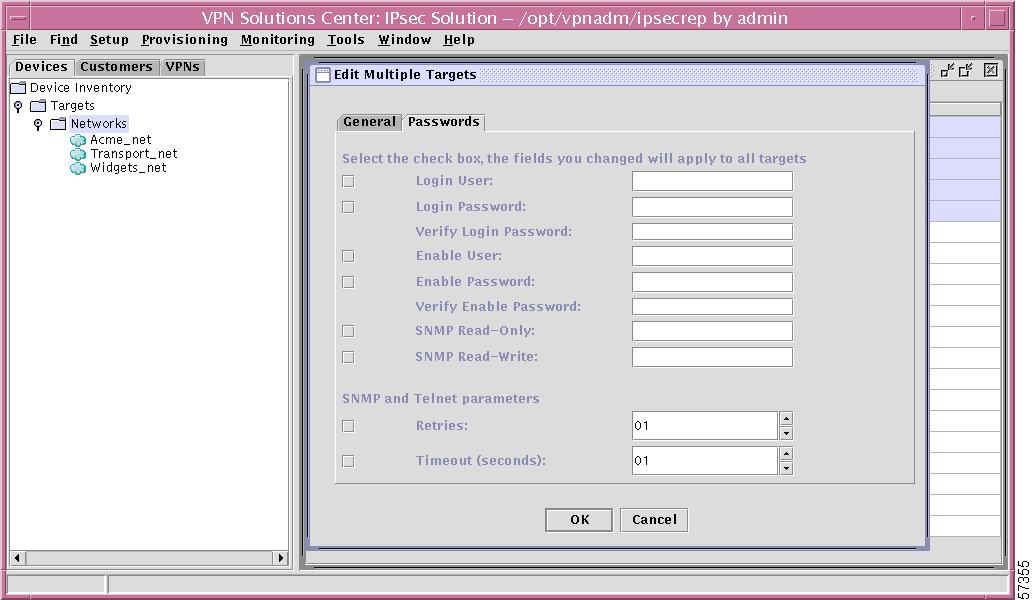
When you make this selection, a window as shown in Figure 12-20, "Edit Multiple Targets—Passwords Tab," appears. Click on one or more of the check boxes and change that setting. Then click OK. These changes will be made for all the targets highlighted in Step 1.
You can also choose the General tab, which is explained in the "Edit General Parameters" section.
Note
Figure 12-20 Edit Multiple Targets—Passwords Tab
–
When you make this selection, a window as shown in Figure 12-21, "Edit Multiple Targets—Delete All IP Addresses," appears. If you want to delete all IP addresses for the targets selected in Step 1, click Yes. Otherwise, click No.
For more information about the IP addresses, refer to the "New Target" section, Step 7 and Step 8.
Figure 12-21 Edit Multiple Targets—Delete All IP Addresses
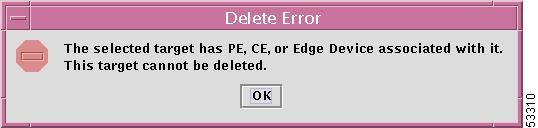
•
Click OK and you will return to the location before you attempted this unacceptable attempt to delete a target.
Figure 12-22 Delete Error—Attempting to Delete a Target
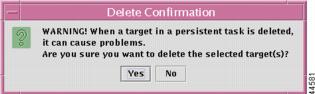
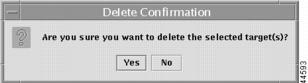
When you have chosen a target, which can successfully be deleted, you will receive a message as shown in Figure 12-23, "Delete Confirmation—Attempting to Delete a Target."
Click Yes if you want to delete the selected target or targets; or click No if you have decided not to delete the selected target or targets.
Figure 12-23 Delete Confirmation—Attempting to Delete a Target
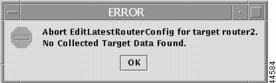
•
Click OK and you will return to the location before you attempted this unacceptable attempt to edit a configuration file.
Figure 12-24 Error—No Collected Target Data Found
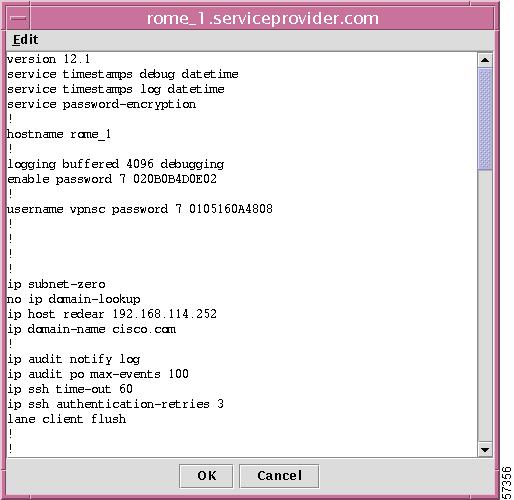
When you make this selection and collected target data is found, you will receive a window as shown in Figure 12-25, "Editing Latest Configuration File."
Figure 12-25 Editing Latest Configuration File
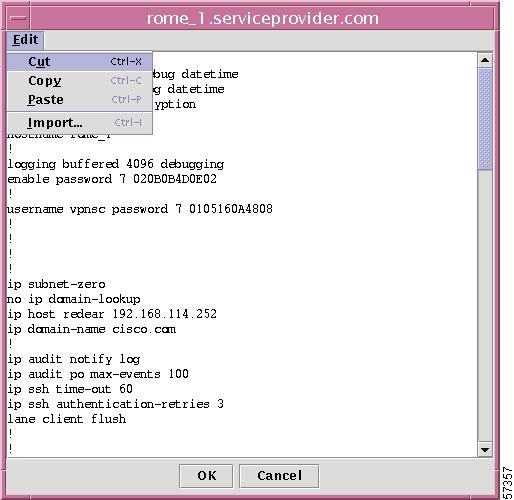
You can position your cursor anywhere within the file and make changes or you can click on Edit to get access to standard editing tasks, as shown in Figure 12-26, "Editing Functions for Editing Latest Configuration File."
Figure 12-26 Editing Functions for Editing Latest Configuration File
Once you have completed your editing, choose the OK or Cancel button. This gives you the opportunity to confirm your decision to save the edits, as shown in Figure 12-27, "Confirmation of Saving Editing Changes."
Figure 12-27 Confirmation of Saving Editing Changes
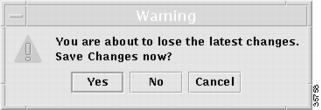
From this confirmation window, choose one of the following:
•
•
•
Network Window—View
Step 1
Figure 12-28 Network—View

Step 2
•
Note
•
•
•
Customers
In the hierarchy pane of the VPN Console window, you can click the Customers tab and then completely expand Customer Inventory. This shows all created Customers, Sites, Edge Devices (by Site), Policies, VPNs, Service Requests, Tunnels, and Edge Devices, as shown in Figure 12-29, "Customers Expanded."
Figure 12-29 Customers Expanded
This section is explained in detail in the following subsections:
•
•
The explanations are mapped to menu task bar explanations in other chapters.
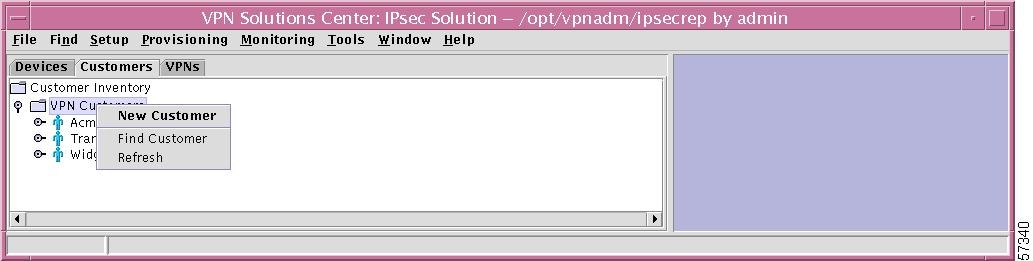
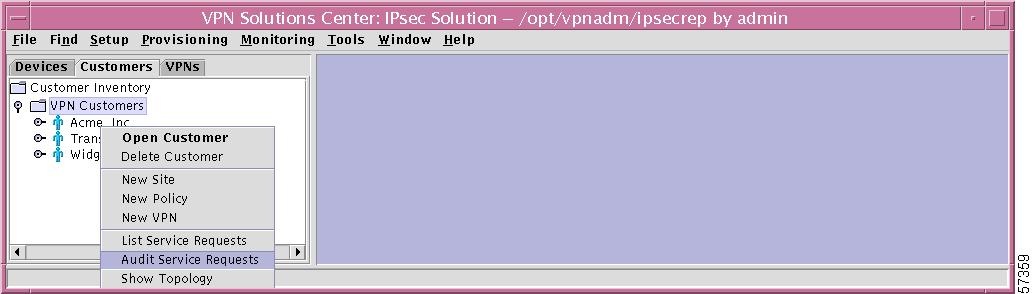
VPN Customers
If you right-click on VPN Customers in the hierarchy pane, you get a window as shown in Figure 12-30, "VPN Customers Choices," which gives you the opportunity to do the following:
•
•
•
Figure 12-30 VPN Customers Choices
Specific Customer
If you right-click on a specific Customer in the hierarchy pane, you get a window as shown in Figure 12-31, "Specific Customer Choices," which gives you the opportunity to do the following:
•
•
•
•
•
•
•
•
Figure 12-31 Specific Customer Choices

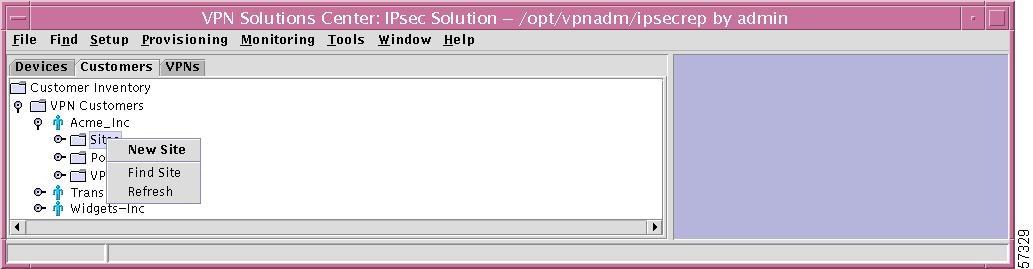
Sites
If you right-click on Sites in the hierarchy pane, you get a window as shown in Figure 12-32, "Site Choices," which gives you the opportunity to do the following:
•
•
•
Figure 12-32 Site Choices
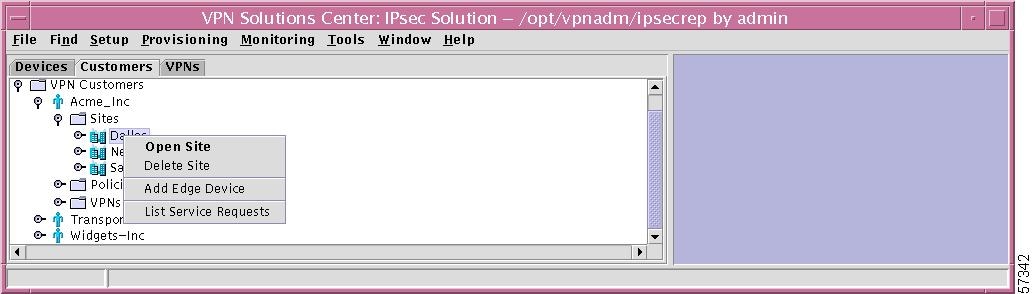
Specific Site
If you right-click on a specific Site in the hierarchy pane, you get a window as shown in Figure 12-33, "Specific Site Choices," which gives you the opportunity to do the following:
•
•
•
•
Figure 12-33 Specific Site Choices
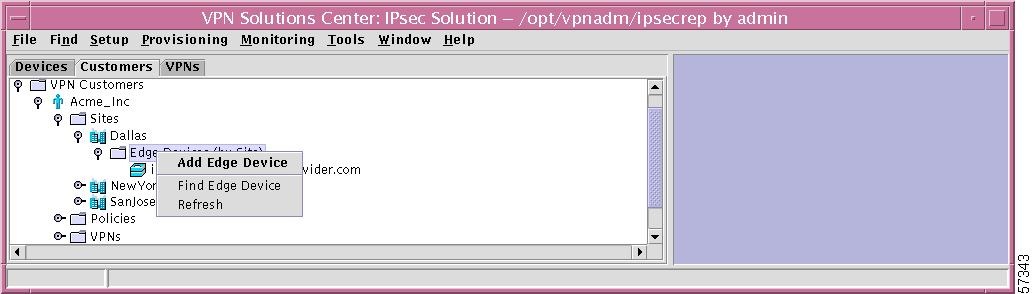
Edge Devices (by Site)
If you right-click on the selection Edge Devices (by Site) in the hierarchy pane, you get a window as shown in Figure 12-34, "Edge Devices (by Site) Choices," which gives you the opportunity to do the following:
•
•
•
Figure 12-34 Edge Devices (by Site) Choices
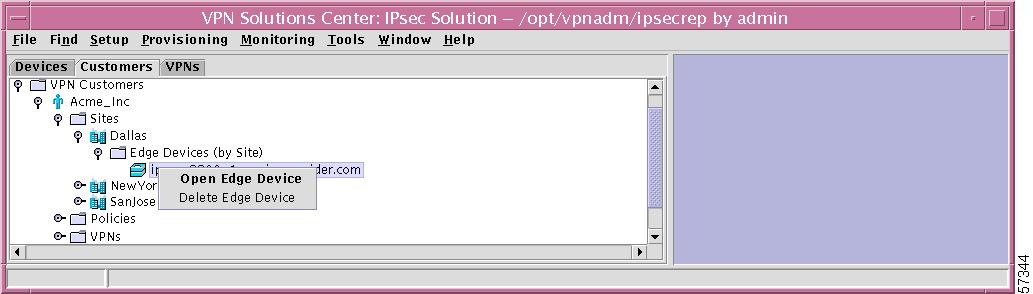
Specific Edge Device (by Site)
If you right-click on a specific Edge Device in the hierarchy pane, you get a window as shown in Figure 12-35, "Specific Edge Device Choices," which gives you the opportunity to do the following:
•
•
Note
Figure 12-35 Specific Edge Device Choices
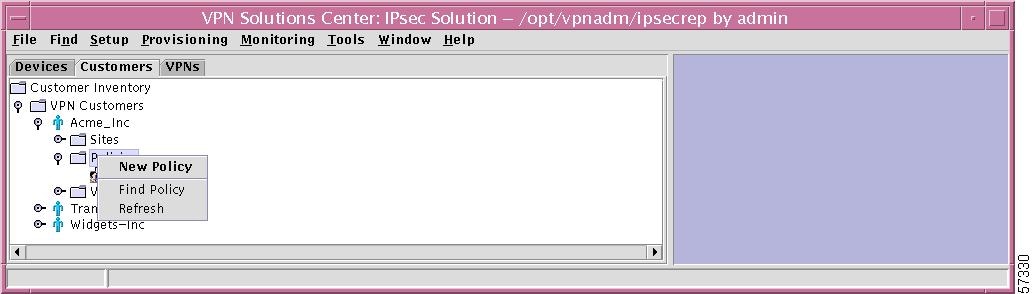
Policies
If you right-click on the selection Policies in the hierarchy pane, you get a window as shown in Figure 12-36, "Policies Choices," which gives you the opportunity to do the following:
•
•
•
Figure 12-36 Policies Choices
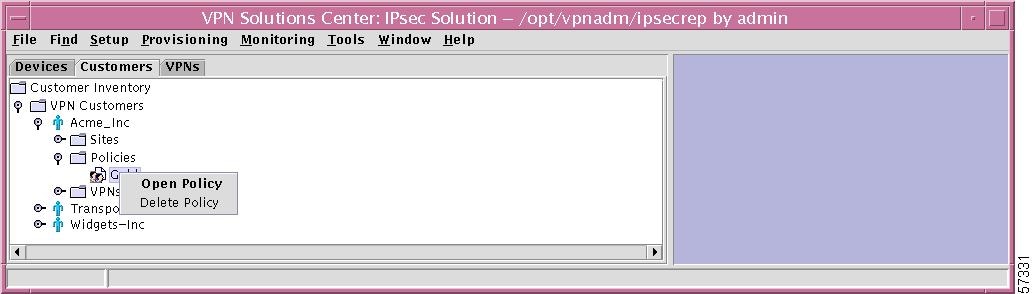
Specific Policy
If you right-click on a specific Policy in the hierarchy pane, you get a window as shown in Figure 12-37, "Specific Policy Choices," which gives you the opportunity to do the following:
•
•
Figure 12-37 Specific Policy Choices
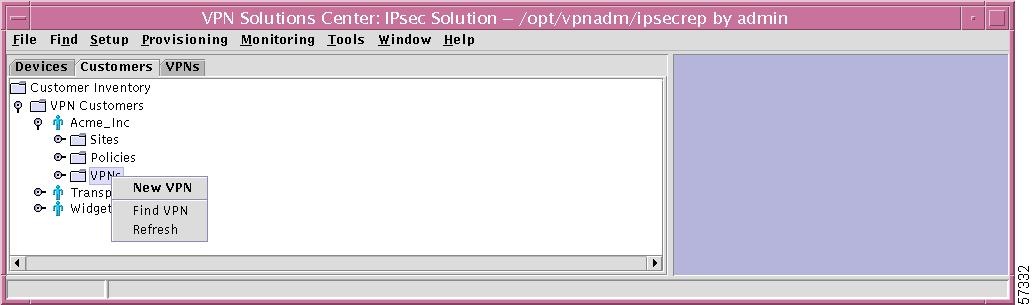
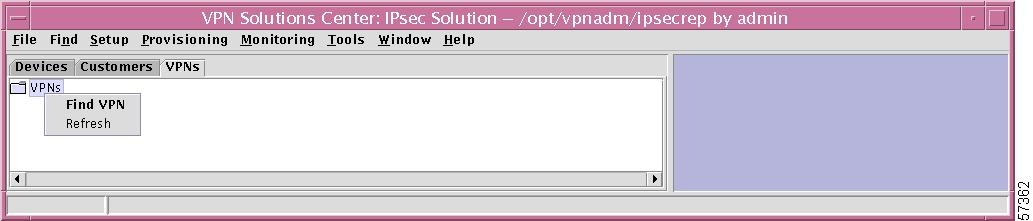
VPNs
If you right-click on VPNs in the hierarchy pane, you get a window as shown in Figure 12-38, "VPNs Choices," which gives you the opportunity to do the following:
•
•
•
Figure 12-38 VPNs Choices
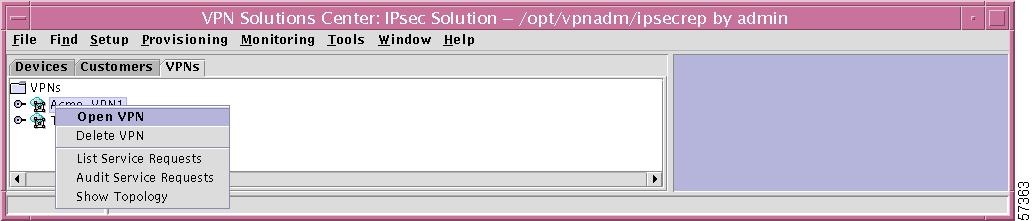
Specific VPN
If you right-click on a specific VPN in the hierarchy pane, you get a window as shown in Figure 12-39, "Specific VPN Choices," which gives you the opportunity to do the following:
•
•
•
•
•
Figure 12-39 Specific VPN Choices

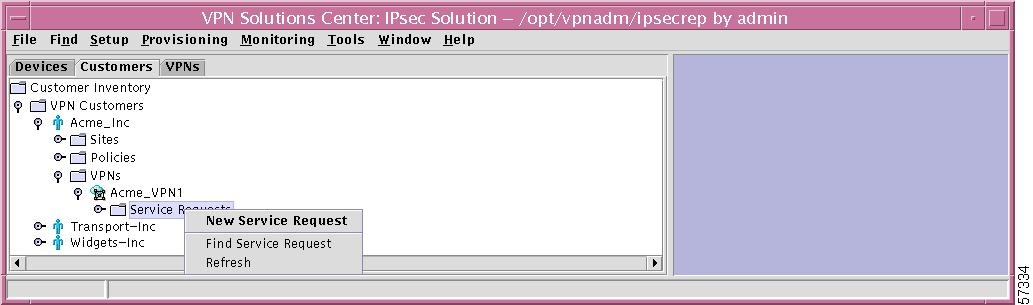
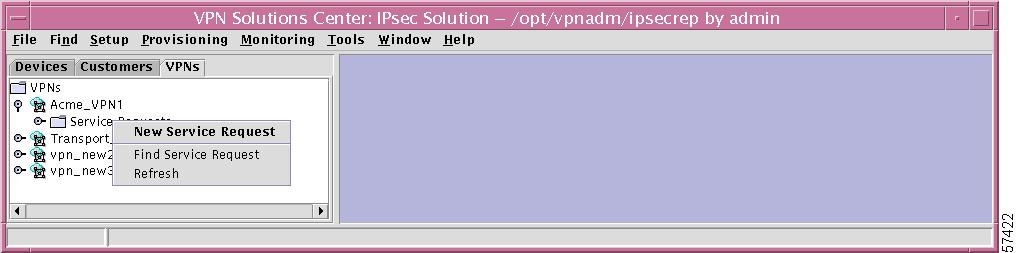
Service Requests
If you right-click on Service Requests in the hierarchy pane, you get a window as shown in Figure 12-40, "Service Requests Choices," which gives you the opportunity to do the following:
•
•
•
Figure 12-40 Service Requests Choices
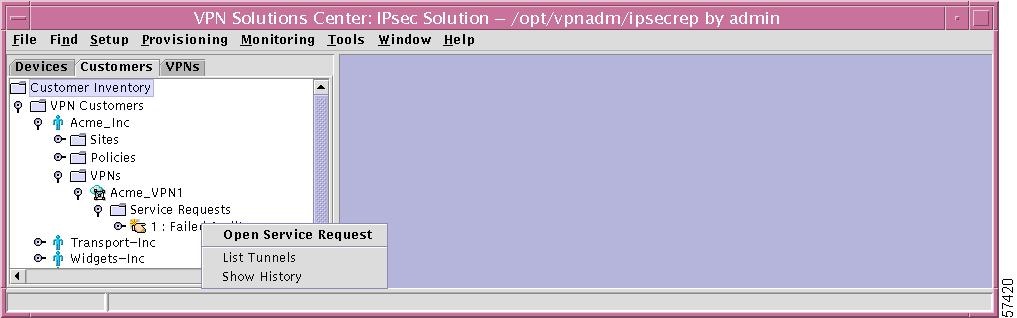
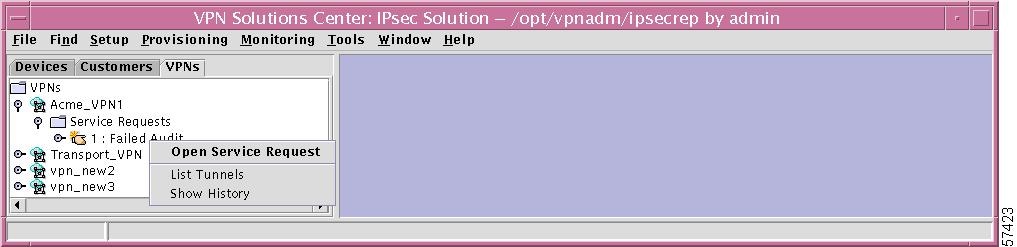
Specific Service Request
If you right-click on a specific Service Request in the hierarchy pane, you get a window as shown in Figure 12-41, "Specific Service Request Details," which gives you the opportunity to do the following:
•
•
•
Figure 12-41 Specific Service Request Details
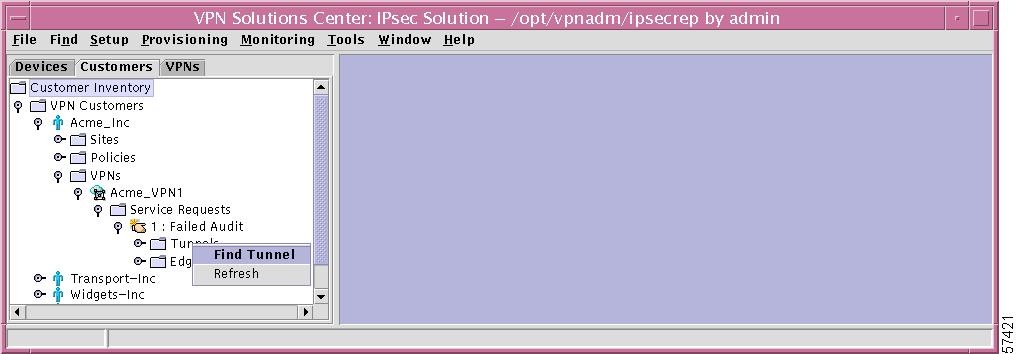
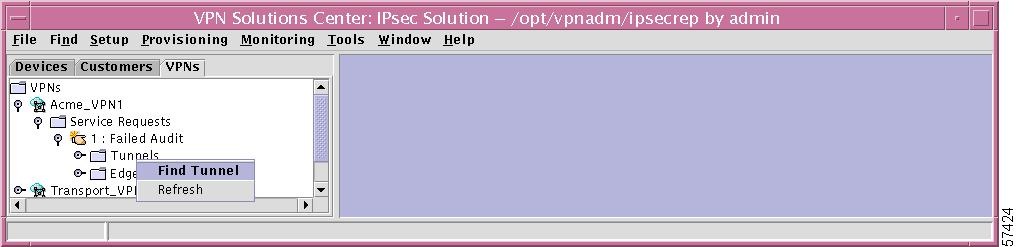
Tunnels
If you right-click on Tunnels in the hierarchy pane, you get a window as shown in Figure 12-42, "Tunnels Choices," which gives you the opportunity to do the following:
•
•
Figure 12-42 Tunnels Choices
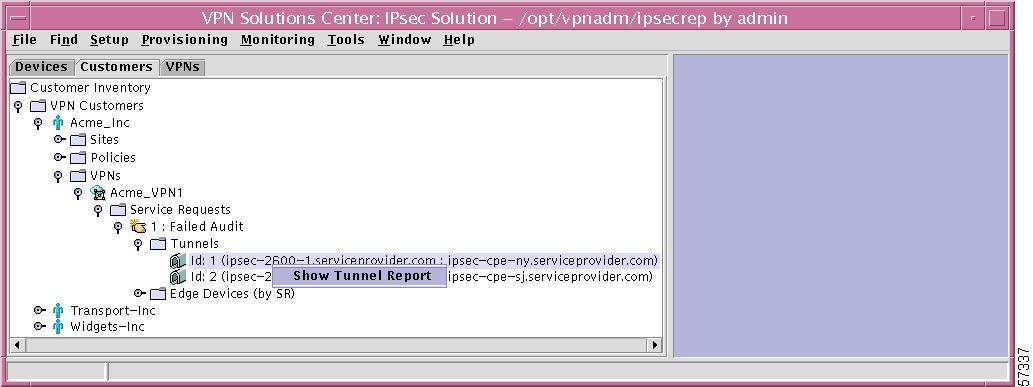
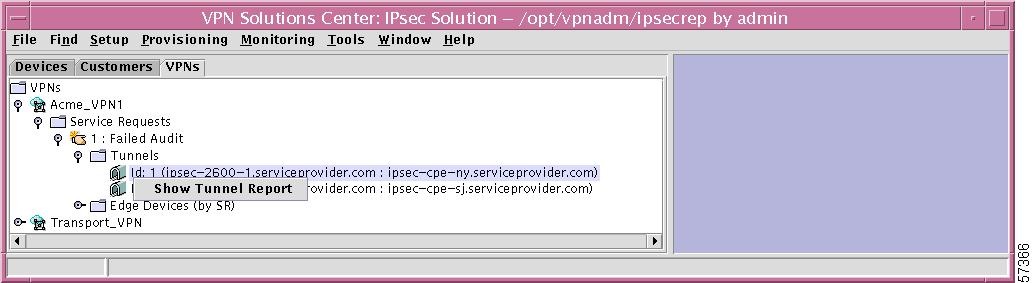
Specific Tunnel
If you right-click on a specific Tunnel in the hierarchy pane, you get a window as shown in Figure 12-43, "Specific Tunnel Choices," which gives you the opportunity to do the following:
•
Note
Figure 12-43 Specific Tunnel Choices
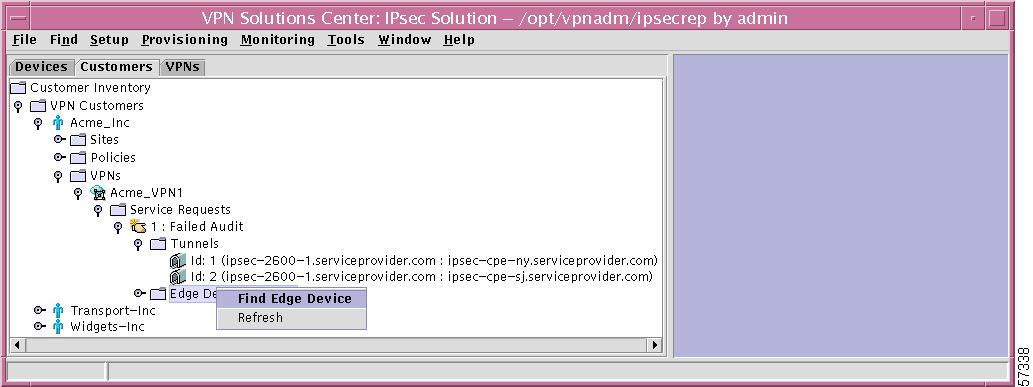
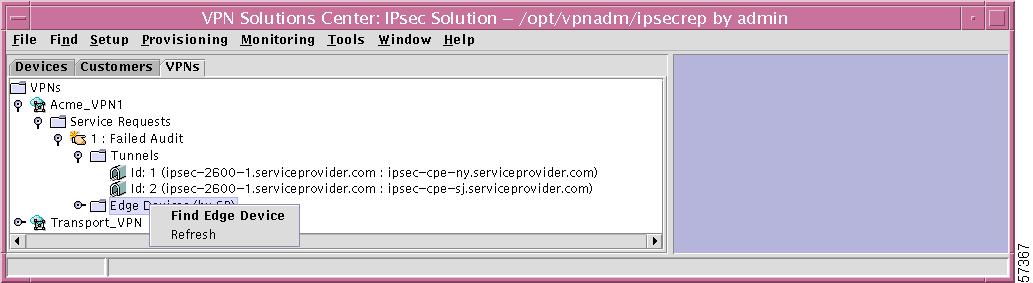
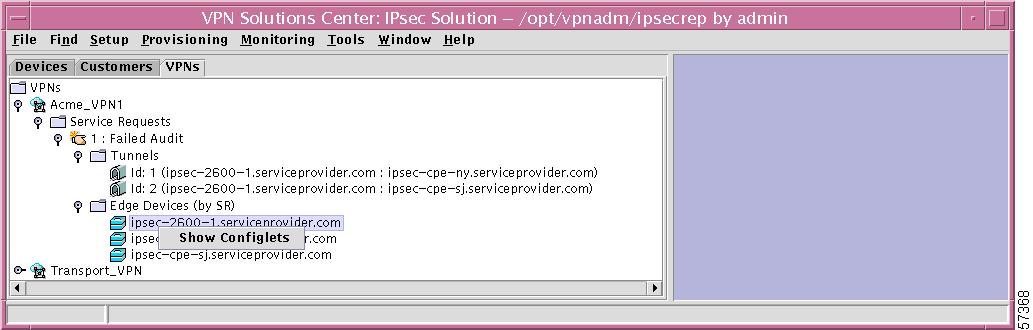
Edge Devices (by SR)
If you right-click on Edge Devices in the hierarchy pane, you get a window as shown in Figure 12-44, "Edge Devices Choices," which gives you the opportunity to do the following:
•
•
Figure 12-44 Edge Devices Choices
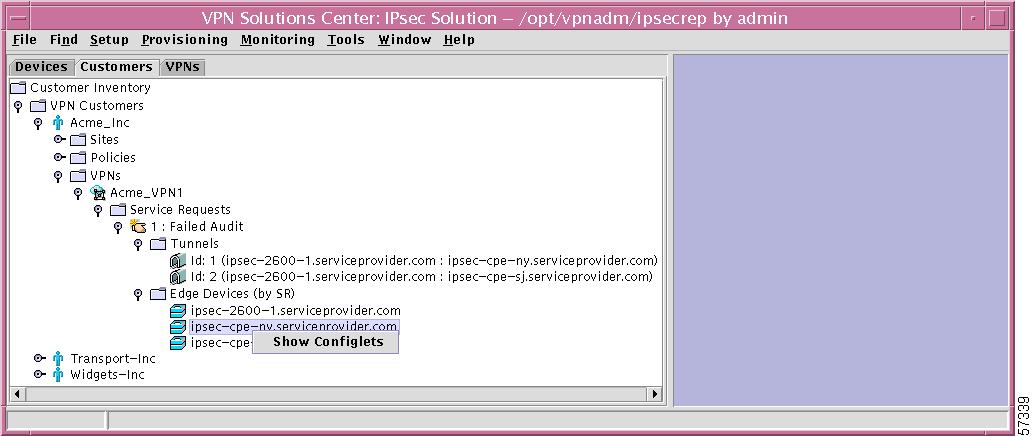
Specific Edge Device (by SR)
If you right-click on a specific Edge Device in the hierarchy pane, you get a window as shown in Figure 12-45, "Specific Edge Device Choices," which gives you the opportunity to do the following:
•
Note
Figure 12-45 Specific Edge Device Choices
VPNs
In the hierarchy pane of the VPN Console window, you can click the VPNs tab and then completely expand VPNs. This shows all created VPNs, Service Requests, Tunnels, and Edge Devices, as shown in Figure 12-46, "VPNs Expanded."
Figure 12-46 VPNs Expanded
This section is explained in detail in the following subsections:
•
The explanations are mapped to menu task bar explanations in other chapters.
VPNs
If you right-click on VPN s in the hierarchy pane, you get a window as shown in Figure 12-47, "VPNs Choices," which gives you the opportunity to do the following:
•
•
Figure 12-47 VPNs Choices
Specific VPN
If you right-click on a specific VPN in the hierarchy pane, you get a window as shown in Figure 12-48, "Specific VPN Choices," which gives you the opportunity to do the following:
•
•
•
•
•
Figure 12-48 Specific VPN Choices
Service Requests
If you right-click on Service Requests in the hierarchy pane, you get a window as shown in Figure 12-49, "Service Requests Choices," which gives you the opportunity to do the following:
•
•
•
Figure 12-49 Service Requests Choices
Specific Service Request
If you right-click on a specific Service Request in the hierarchy pane, you get a window as shown in Figure 12-50, "Specific Service Request Details," which gives you the opportunity to do the following:
•
•
•
Figure 12-50 Specific Service Request Details
Tunnels
If you right-click on Tunnels in the hierarchy pane, you get a window as shown in Figure 12-51, "Tunnels Choices," which gives you the opportunity to do the following:
•
•
Note
Figure 12-51 Tunnels Choices
Specific Tunnel
If you right-click on a specific Tunnel in the hierarchy pane, you get a window as shown in Figure 12-52, "Specific Tunnel Choices," which gives you the opportunity to do the following:
•
Figure 12-52 Specific Tunnel Choices
Edge Devices
If you right-click on Edge Devices in the hierarchy pane, you get a window as shown in Figure 12-53, "Edge Devices Choices," which gives you the opportunity to do the following:
•
•
Figure 12-53 Edge Devices Choices
Specific Edge Device
If you right-click on a specific Edge Device in the hierarchy pane, you get a window as shown in Figure 12-54, "Specific Edge Device Choices," which gives you the opportunity to do the following:
•
Note
Figure 12-54 Specific Edge Device Choices
Audit Service Requests
The Auditor verifies that a Service Request is correctly deployed or still exists on the router.
At the time of creation, the state transitions of a Service Request are performed by the provisioning system. This continues until the pending state. Beyond that it is the auditor's task to make the state transitions. It is a mechanism to monitor and report the current state of a VPN service request over its lifetime. It also provides the reasons why the service request is in its current state (audit detail). The Auditor also saves the state transition (if any) into the VPN Inventory Repository, known as the Repository. The lifetime of a VPN service request spans from the requested state to the closed state.
The valid states are: requested; pending; invalid; failed deploy; deployed; failed audit; lost; closed.
Table 12-1 describes each VPN Solutions Center service request state. They are listed in alphabetical order.
You can audit Service Requests through the following paths:
•
•
•
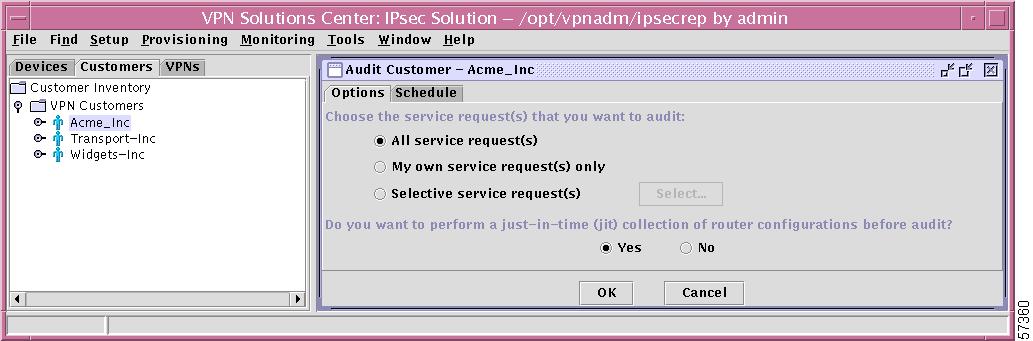
Audit Service Requests—for Specific Customer
The Auditor verifies that a Service Request for a specific customer is correctly deployed.
Step 1
Figure 12-55 Audit Service Requests—for Specific Customer
Step 2
Figure 12-56 Audit Specific Customer—Options Tab

In this window, make the following choices:
•
–
–
–
•
Click the Yes radio button if you want to upload the configuration file from the router.
Click the No radio button if you want to use configuration files from the Repository.•
Step 3
Figure 12-57 Audit Specific Customer—Schedule Tab

In this window, follow this procedure:
a.
b.
c.
d.
e.
f.
Note
Errors and warnings are highlighted in yellow.
Audit Service Requests—for Specific VPN (Customer Tab)
The Auditor verifies that a Service Request for a specific VPN in the Customer tab is correctly deployed.
Step 1
Figure 12-58 Audit Service Requests—for Specific VPN (Customer Tab)
Step 2
Figure 12-59 Audit Specific VPN (Customer Tab)—Options Tab
In this window, make the following choices:
•
–
–
–
•
Click the Yes radio button if you want to upload the configuration file from the router.
Click the No radio button if you want to use configuration files from the Repository.
•
Step 3
Figure 12-60 Audit Specific VPN (Customer Tab)—Schedule Tab

In this window, follow this procedure:
a.
b.
c.
d.
e.
f.
Note
Errors and warnings are highlighted in yellow.
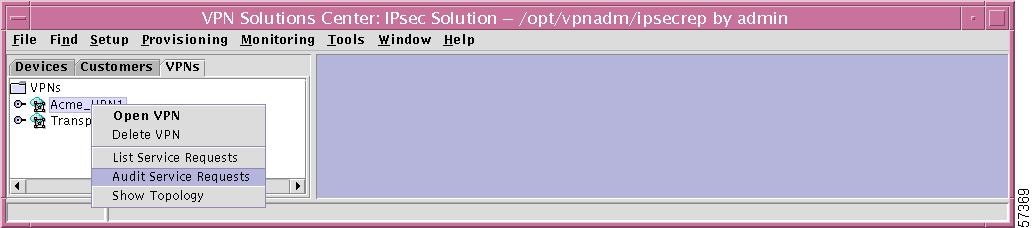
Audit Service Requests—for Specific VPN (VPN Tab)
The Auditor verifies that a Service Request for a specific VPN in the VPN tab is correctly deployed.
Step 1
Figure 12-61 Audit Service Requests—for Specific VPN (VPN Tab)
Step 2
Figure 12-62 Audit Specific VPN (VPN Tab)—Options Tab
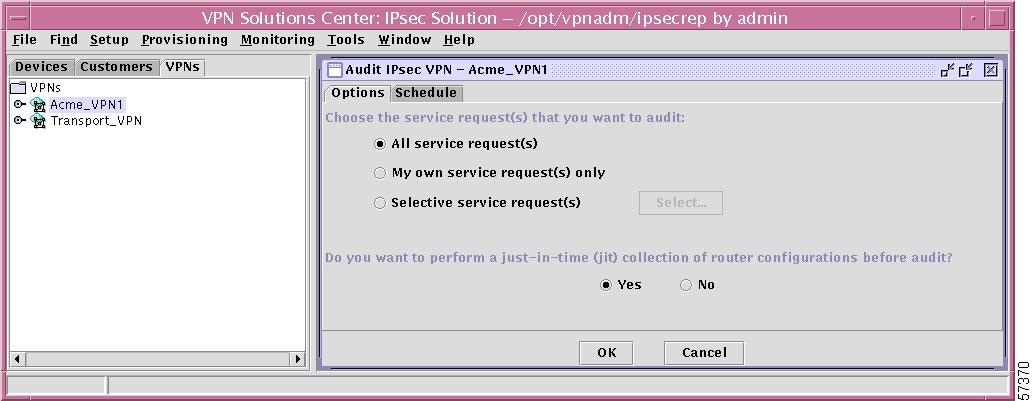
In this window, make the following choices:
•
–
–
–
•
Click the Yes radio button if you want to upload the configuration file from the router.
Click the No radio button if you want to use configuration files from the Repository.
•
Step 3
Figure 12-63 Audit Specific VPN (VPN Tab)—Schedule Tab
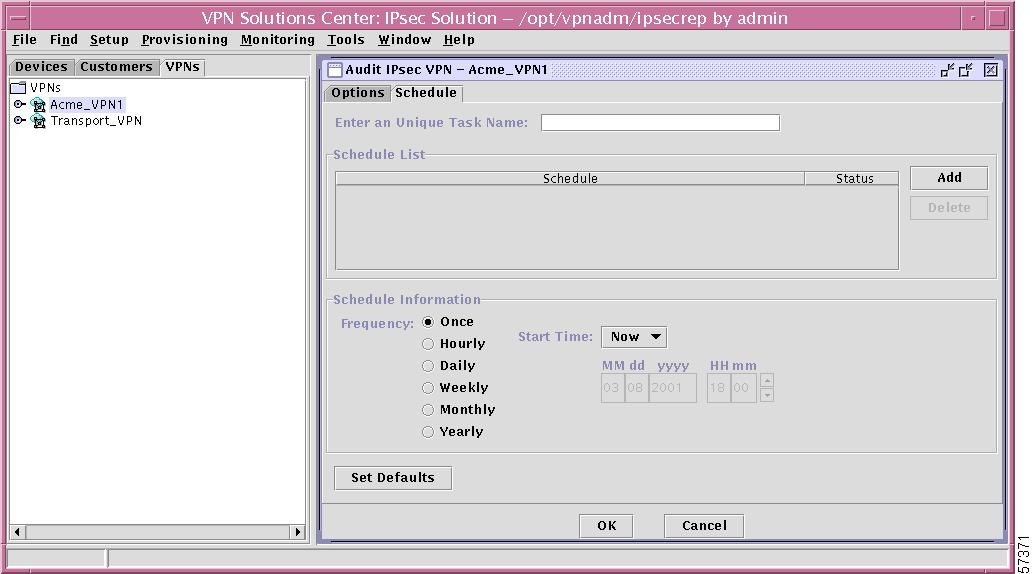
In this window, follow this procedure:
a.
b.
c.
d.
e.
f.
Note
Errors and warnings are highlighted in yellow.
 Feedback
Contact Cisco
- Open a Support Case

- (Requires a Cisco Service Contract)
This Document Applies to These Products
- Collaboration Endpoints - Retired Products
- Conferencing - Retired Products
- Contact Center - Retired Products
- Optical Networking - Retired Products
- Routers - Retired Products
- Security - Retired Products
- Servers - Unified Computing (UCS) Retired Products
- Storage Networking Retired Products
- Switches - Retired Products
- Video - Retired Products
- Wireless - Retired Products