Change Audit
Available Languages
Table Of Contents
Defining and Running an Exceptions Summary
Defining Your Exceptions Summary
Running the Exceptions Summary Report
Tracking Application-Specific Change Record Reports
Tracking Configuration Change Records
Tracking Software Management Change Records
Tracking Inventory Change Records
Generating a Report on All Change Records
Change Audit
Change Audit provides a change logging service to Essentials applications that lets you do the following:
•
Monitor your software image distribution and download history from Software Management—Software Management automatically sends change record data to the Change Audit log summary and the details tables.
•
•
•
For detailed information on Change Audit, refer to the online help.
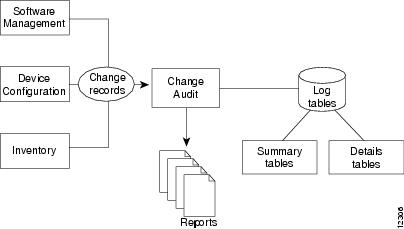
Change Audit Process
shows a typical workflow in which Essentials applications log change records to the Change Audit application. The Change Audit log tables (summary and details) store the data and display it based on reports you specify.
Figure 9-1 Change Audit Logging Workflow

Note
Defining and Running an Exceptions Summary
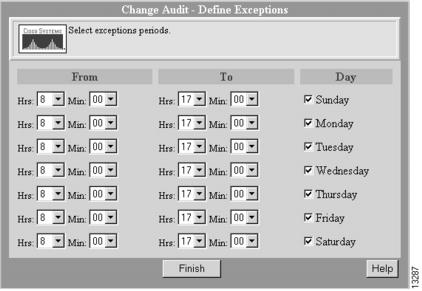
An exceptions summary contains change records that occurred during a specific time. The report is based on an exceptions profile you set up. The summary shows whether network changes were made during the time when no changes should occur, known as the "blackout period." This report simplifies tracking a network problem because it focuses on specific time periods.
Scenario: You want to set a time between 0600 and 1700 weekdays for your blackout period. To monitor this blackout, you set up an exceptions summary so that you can review exception summaries.Defining Your Exceptions Summary
Note
To define your exceptions summary, perform the following steps:
Step 1
Change Audit—Define Exceptions dialog box appears. (See .)
Figure 9-2 Change Audit — Define Exceptions Dialog Box
Step 2
A dialog box confirms that your profile has been saved.
Running the Exceptions Summary Report
To run an exceptions summary, perform the following steps:
Step 1
The Change Audit — View Exceptions dialog box appears. (See .)
Figure 9-3 Change Audit — View Exceptions Dialog Box
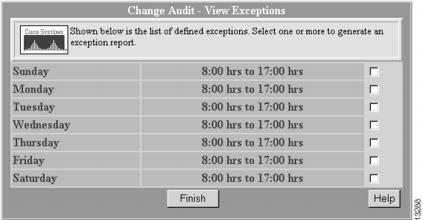
Step 2
The exceptions summary displays activity that occurred during this time. If no activity occurred, the report is blank.
Step 3
Step 4
Step 5
(a)
(b)
(c)
Step 6
Tracking Application-Specific Change Record Reports
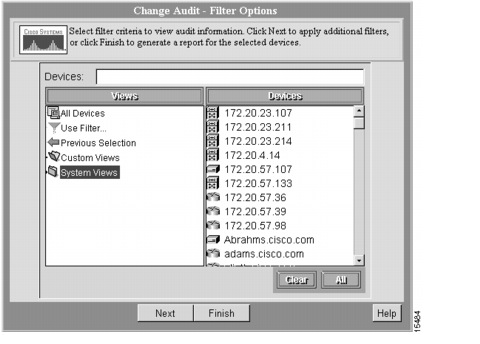
Change Audit lets you track application-specific changes in your network. By searching the Change Audit log, you can use specific filters to track inventory, software management, or configuration changes. After you set select devices or set one or more filters, you can run the report or view all changes.
If no changes were made, an empty report displays.
Tracking Configuration Change Records
Scenario: You want to identify the devices that have had configuration file changes over the last week and who made those changes.To track configuration change records, perform the following steps:
Step 1
The Change Audit — Filter Options dialog box appears. (See .)
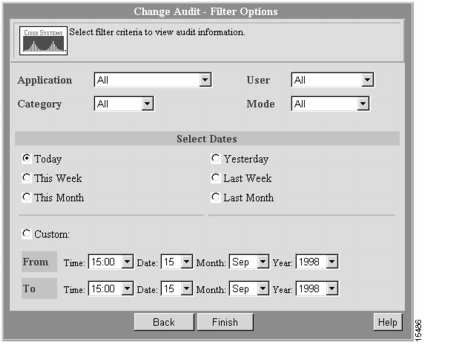
Figure 9-4 Change Audit — Filter Options Dialog Box
Step 2
Figure 9-5 Change Audit — Filter Options Dialog Box
Step 3
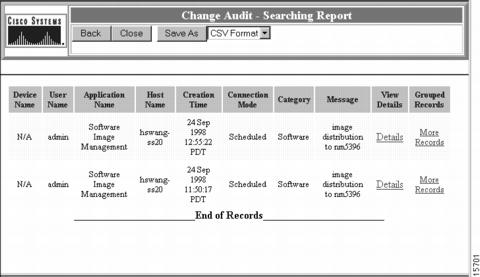
The Change Audit — Searching report displays. (See .)
Step 4
Step 5
Figure 9-6 Change Audit — Searching Report
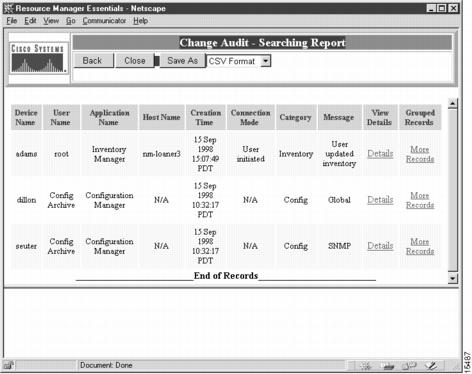
Step 6
(a)
(b)
(c)
Step 7
Tracking Software Management Change Records
Scenario: You want to see a list of the software changes from a branch office that occurred during the last month.To track software management change records, perform the following steps:
Step 1
The Change Audit — Filter Options dialog box appears. (See .)
Figure 9-7 Change Audit — Filter Options Dialog Box

Step 2
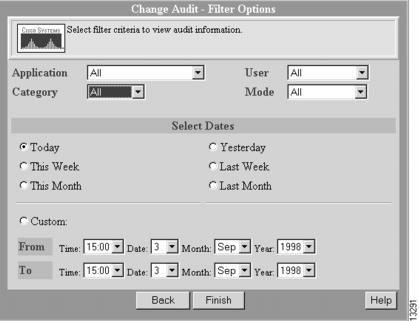
A second Change Audit — Filter Options dialog box appears. (See .)
Figure 9-8 Change Audit — Filter Options Dialog Box
Step 3
The Change Audit — Searching report displays. (See .)
Figure 9-9 Change Audit — Searching Report

Step 4
Step 5
Step 6
Tracking Inventory Change Records
Scenario: A device failed at 0500. You need to identify the changes (if any) that were made to this device after midnight.To track inventory change records, perform the following steps:
Step 1
The Change Audit — Filter Options dialog box appears. (See .)
Step 2
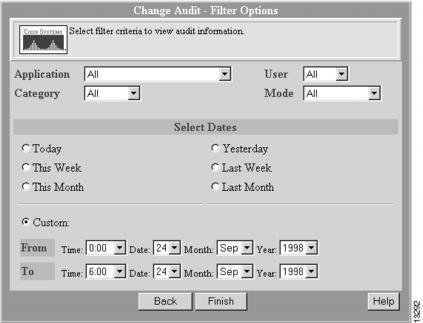
Step 3
Figure 9-10 Selecting a Custom Date Range
Step 4
The Change Audit — Searching report displays. (See .)
Figure 9-11 Change Audit — Searching Report
Step 5
Step 6
Step 7
Note
Maintaining Logs
Over time, the Change Audit log can become filled with old data. You should remove some of these records to save disk space.
You should maintain history reports for at least one year. Before deleting any change records, create a report on all Essentials changes for a given time. For details on creating a report on all change records, refer to the section "Generating a Report on All Change Records."
Backing up the database also backs up the Change Audit tables.
Generating a Report on All Change Records
Scenario: You want to create a historical look at network changes before deleting the change records.To create a report on all change records, perform the following steps:
Step 1
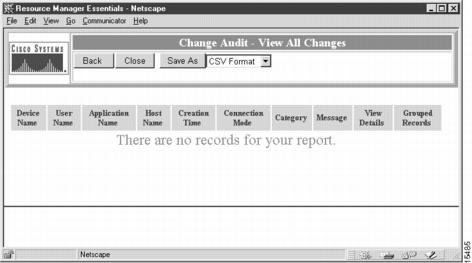
The Change Audit — View All Changes report displays. (See .)
Figure 9-12 Change Audit — View All Changes Report
Step 2
Step 3
Step 4
(a)
(b)
(c)
Step 5
Deleting Change Records
Delete Change History deletes Change Audit stored data from the Change Audit log summary tables and application-specific details tables.
Scenario: You want to delete change record data older than one month.To delete change records, perform the following steps:
Step 1
Step 2
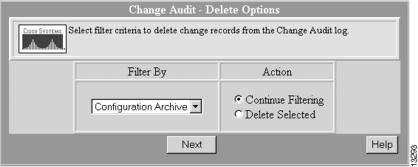
The Change Audit — Delete Options dialog box appears. (See .)
Figure 9-13 Change Audit — Delete Options Dialog Box
Step 3
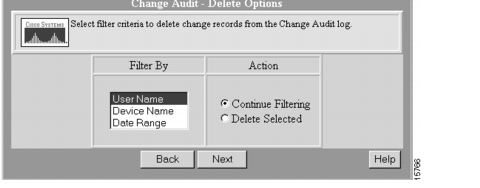
A second Change Audit — Delete Options dialog box appears. (See .)
Figure 9-14 Change Audit — Delete Options Dialog Box
Step 4
A third Change Audit — Delete Options dialog box appears. (See .)
Figure 9-15 Change Audit — Delete Options Dialog Box
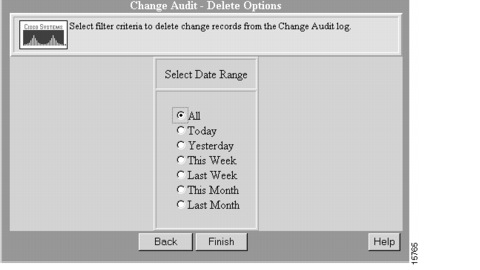
Step 5
Step 6
The selected records are deleted and a confirmation message appears.
Since you delete only one set of application records at a time, repeat Step 3 through Step 6 for each set of application records you want to delete.
This completes the chapter on Change Audit.
 Feedback
Contact Cisco
- Open a Support Case

- (Requires a Cisco Service Contract)
This Document Applies to These Products
- Collaboration Endpoints - Retired Products
- Conferencing - Retired Products
- Contact Center - Retired Products
- Optical Networking - Retired Products
- Routers - Retired Products
- Security - Retired Products
- Servers - Unified Computing (UCS) Retired Products
- Storage Networking Retired Products
- Switches - Retired Products
- Video - Retired Products
- Wireless - Retired Products