
Configuration Backup and Restore Guidelines
You can create backups of your Cisco Nexus Dashboard Orchestrator configuration that can facilitate in recovering from Orchestrator failures or cluster restarts. We recommend creating a backup of the configuration before every upgrade or downgrade of your Orchestrator and after every configuration change or deployment. The backups are always created on a remote server (not Cisco Nexus Dashboard cluster), which is defined in the Cisco Nexus Dashboard Orchestrator as described in the following sections.
When creating configuration backups, the following guidelines apply:
-
Importing and restoring backups that are created from later releases is not supported.
For example, if you downgrade your Cisco Nexus Dashboard Orchestrator to an earlier release, you cannot restore a backup of the configuration that is created on a later release.
-
Restoring configuration backups created on releases before Release 4.0(1) is supported only during the initial upgrade to this release.
If you want to upgrade from a release before release 4.0(1) to this release, see the "Upgrading NDO Service in Cisco Nexus Dashboard" chapter in the Cisco Nexus Dashboard Orchestrator Deployment Guide.
-
When saving a backup, the configuration is saved in the same state in which it was deployed. When restoring a backup, any policies that were deployed will show as
deployed, while any policies that were not deployed will remain in theundeployedstate. -
Restoring a backup action restores the database on the Cisco Nexus Dashboard Orchestrator, but it does not make any changes to the controller (such as APIC, Cloud Network Controller, or NDFC) databases on each site.
We recommend that after you restore the Orchestrator database you resolve any configuration drifts that may appear in the templates, as described in the "Configuration Drifts" section of this guide, and then redeploy the existing templates to avoid potentially mismatching policies between the Cisco Nexus Dashboard Orchestrator and each site’s controller.
-
When you create a configuration backup, the files are first created on the Orchestrator’s local drives, then uploaded to the remote location, and finally deleted from the local storage. If there is not enough local disk space, the backup fails.
-
If you have a backup scheduler that is enabled to take local backups before upgrading to Release 4.0(1) or later, it will be disabled after the upgrade.
After the upgrade, you must readd any remote locations you had set up and then re-enable backup scheduler.
-
Deleting a backup using the UI also deletes the backup files from the remote location.
When restoring configuration backups, the following guidelines apply:
-
If there have been no policy changes between when the backup was created and when it is being restored, no additional considerations are required and you can simply restore the configuration as described in Restoring Backups.
-
If any configuration changes took place between the time when the configuration backup was created and the time it is being restored, consider the following:
-
Restoring a backup will not modify any objects, policies, or configurations on the sites. Any new objects or policies that are created and deployed since the backup will remain deployed.
We recommend that after you restore the Orchestrator database you resolve any configuration drifts that may appear in the templates, as described in "Configuration Drifts" section of this guide, and then redeploy the existing templates to avoid potentially mismatching policies between the Cisco Nexus Dashboard Orchestrator and each site’s controller.
Alternatively, you can choose to undeploy all policies first, which will avoid any potential stale objects after the configuration is restored from backup. However, this would cause a disruption in traffic or services that are defined by those policies.
-
The steps required to restore a configuration backup are described in Restoring Backups.
-
After a sucessfull restore of Cisco Nexus Dashboard Orchestrator configuration wait for at least 15 minutes before trying to deploy any templates to the fabric.
-
If the configuration backup you restored was saved before it was deployed to the sites, it will be restored in the
undeployedstate and you can simply deploy it to the sites as necessary. -
If the configuration backup you restored was saved when the configuration was already deployed, it will be restored in the
deployedstate, although none of the configurations exist in the sites yet.In this case, resolve any configuration drifts that may appear in the templates, as described in the "Configuration Drifts" section of this guide and redeploy the templates to sync the Cisco Nexus Dashboard Orchestrator’s configuration with the sites.
-
If sites that were managed when the backup was created are no longer present in the Cisco Nexus Dashboard, the restore fails.
-
If sites status since the backup has changed (
managedvsunmanaged) but the sites are still present in the Cisco Nexus Dashboard, the status will be restored to what it was at the time of backup.
-
Configuring Remote Locations for Backups
This section describes how to configure a remote location in Cisco Nexus Dashboard Orchestrator to which you can then export your configuration backups.
-
Log in to your Cisco Nexus Dashboard and open the Cisco Nexus Dashboard Orchestrator service.
-
From the left navigation pane, select Admin > Backup and Restore > Remote Locations tab.
-
In the top right of the main window, click Create Remote Location.
An Create New Remote Location screen appears.
-
Provide the name for the remote location and an optional description.
Two protocols are currently supported for remote export of configuration backups:
-
SCP -
SFTP

SCPis supported for non-Windows servers only. If your remote location is a Windows server, you must use theSFTPprotocol.
-
-
Specify the host name or IP address of the remote server.
Based on your Protocol selection, the server you specify must allow
SCPorSFTPconnections. -
Provide the full path to a directory on the remote server where you save the backups.
The path must start with a slash (
/) characters and must not contain periods (.) or backslashes (\). For example,/backups/multisite.
The directory must exist on the remote server.
-
Specify the port used to connect to the remote server.
By default, port is set to
22. -
Specify the authentication type used when connecting to the remote server.
You can configure one of the following two authentication methods:
-
Password-Provide the username and password that is used to sign in to the remote server. -
SSH Private Files-provide the username and the SSH Key/Passphrase pair that is used to sign in to the remote server.
-
-
Click Save to add the remote server.
Creating Backups
You must first add the remote location as described in Configuring Remote Locations for Backups.
This section describes how to create a new backup of your Cisco Nexus Dashboard Orchestrator configuration.
-
Log in to your Cisco Nexus Dashboard Orchestrator.
-
Backup existing deployment configuration.
-
From the left navigation pane, select Admin > Backups & Restore.
-
In the main window, click Create New Backup.
A New Backup window opens.
-
Provide the backup information.
-
In the Name field, provide the name for the backup file.
The name can contain up to 10 alphanumeric characters, but no spaces or underscores (
_). -
From the Remote Location drop-down, select a remote location that you have configured for storing backups.
-
(Optional) In the Remote Path, provide the specific directory on the remote server where to save the backup.
The directory that you specify must exist.
-
-
Click Save to create the backup.
-
Restoring Backups
-
You must have configured a remote location for storing your NDO backups, as described in Configuring Remote Locations for Backups.
-
Ensure that the backup you want to restore is on the remote location server or import the backup into the remote location, as described in Importing Backups to Remote Location.
Restoring a backup action restores the database on the Cisco Nexus Dashboard Orchestrator, but it does not make any changes to the controller (such as APIC, Cloud Network Controller, or NDFC) databases on each site.
We recommend that after you restore the Orchestrator database you resolve any configuration drifts that may appear in the templates, as described in the "Configuration Drifts" section of this guide, and then redeploy the existing templates to avoid potentially mismatching policies between the Cisco Nexus Dashboard Orchestrator and each site’s controller.
For information on specific configuration mismatch scenarios and recommended restore procedures that are related to each one, see Configuration Backup and Restore Guidelines.
This section describes how to restore a Cisco Nexus Dashboard Orchestrator configuration to a previous state.
-
Log in to your Cisco Nexus Dashboard Orchestrator GUI.
-
If necessary, undeploy existing policies.
We recommend you perform this step if new objects or policies were added to the configuration between when the backup was created and current configuration. Extra context is available in Configuration Backup and Restore Guidelines.
-
From the left navigation menu, select Admin > Backups & Restore.
-
In the main window, click the actions (…) icon next to the backup you want to restore and select Rollback to this backup.
If the version of the selected backup is different from the running Cisco Nexus Dashboard Orchestrator version, the rollback could cause a removal of the features that are not present in the backup version.
-
Click Yes to confirm that you want to restore the backup you selected.
If you click Yes, the system stops the current session and the user is logged out.
Multiple services are restarted during the configuration restore process. As a result, you may notice an up to 10-minute delay before the restored configuration is properly reflected in the NDO GUI.
-
Using REST API calls, validate if NDO-managed policy IDs match across fabrics.
-
Log into your NDO through the REST API:
POST https://{{ndo-ip}}/loginRequest Body:
{"userName":"<username>","userPasswd":"<password>","domain":"<domain>"}For example:
POST https://192.168.0.1/login
Request Body:
{"userName":"admin","userPasswd":"MyNDOPassword","domain":"DefaultAuth"} -
Post a GET policy-report API with validate=true for all tenants managed by this NDO.
Request:
GET https://{{ndo-ip}}/mso/api/v1/policy-report?tenants=<comma separated list of tenants...>&validate=trueFor example:
GET https://192.168.0.1/api/v1/policy-report?tenants=T-policyreport,T-migration&validate=true
The following is an example response:
{ "sites": [ { "id": "66903a7f5c1ced5eebed97ec", "apicId": "1", "name": "fabric-1" }, { "id": "668eeb235c1ced5eebed97eb", "apicId": "2", "name": "fabric-2" }, { "id": "60309f0b11000059b8d16c9d", "apicId": "3", "name": "fabric-3" } ], "policies": { "uni/tn-T-migration/BD-BD-singlesite": [ { "apicId": "1", "vnid": "16056263", "peerContexts": [], "remoteMappings": {}, "importRemoteIds": [], "exportFlag": false } ], "uni/tn-T-migration/ctx-VRF-singlesite": [ { "apicId": "1", "vnid": "2490368", "ctxPcTag": "16386", "peerContexts": [], "remoteMappings": {}, "importRemoteIds": [], "exportFlag": false } ], "uni/tn-T-policyreport/ctx-VRF-validation": [ { "apicId": "1", "vnid": "2719745", "ctxPcTag": "16386", "peerContexts": [], "remoteMappings": { "11": "3112961, 49153" }, "importRemoteIds": [], "exportFlag": false } ], "uni/tn-tenant1/BD-BD1": [ { "apicId": "2", "vnid": "15925212", "peerContexts": [], "remoteMappings": { "1": "15728629", "3": "15761391" }, "importRemoteIds": [], "exportFlag": false }, { "apicId": "1", "vnid": "15859694", "peerContexts": [], "remoteMappings": { "2": "15925212", "3": "15761391" }, "importRemoteIds": [], "exportFlag": false }, { "apicId": "3", "vnid": "16711549", "peerContexts": [], "remoteMappings": { "1": "15728629", "2": "15925212" }, "importRemoteIds": [], "exportFlag": false } ] }, "validation": { "uni/tn-T-policyreport/ctx-VRF-validation": [ "Fabric id 1 and 2 do not have the same site list for this DN. (1: [1 11], 11: [])", "Fabric id 1 does not have the correct number of remote mappings for this DN." ], "uni/tn-tenant1/BD-BD1": [ "Site id 2 and 1 have pcTag mismatch for this DN. (2: {2 15925212 [] map[1:15728629 3:15761391 4:15794150] [] false}, 1: 15728629)", "Site id 2 and 3 have pcTag mismatch for this DN. (2: {2 15925212 [] map[1:15728629 3:15761391 4:15794150] [] false}, 3: 15761391)", "Site id 1 and 3 have pcTag mismatch for this DN. (1: {1 15859694 [] map[2:15925212 3:15761391 4:15794150] [] false}, 3: 15761391)", "Site id 3 and 1 have pcTag mismatch for this DN. (3: {3 16711549 [] map[1:15728629 2:15925212 4:15794150] [] false}, 1: 15728629)" ] } } -
Determine if any NDO-managed policy IDs have a mismatch across fabrics.
-
If you do not see validation responses similar to the ones shown under the "validation": area in the example responses above, then all NDO-managed policies exist across the fabrics as expected and their IDs match (the "validation" json holds information about policies that have mismatches).
You do not have to take any further action in this case; the recovery process is complete.
-
If you do see a validation response similar to the ones shown under the "validation": area in the example responses above, then there are NDO-managed policy IDs that have a mismatch across the fabrics.
-
-
-
If there are NDO-managed policy IDs that have a mismatch across the fabrics, check if any templates contain configuration drifts.
You repeat the following steps for every schema and template in your deployment.
You can check for configuration drifts in one of the following two ways:
-
Check the template deployment status icon for each site to which the template is assigned:
 Figure 1. Deployment status
 -
Select the template and click Deploy template to bring up the configuration comparison screen to check which objects contain configuration drifts:
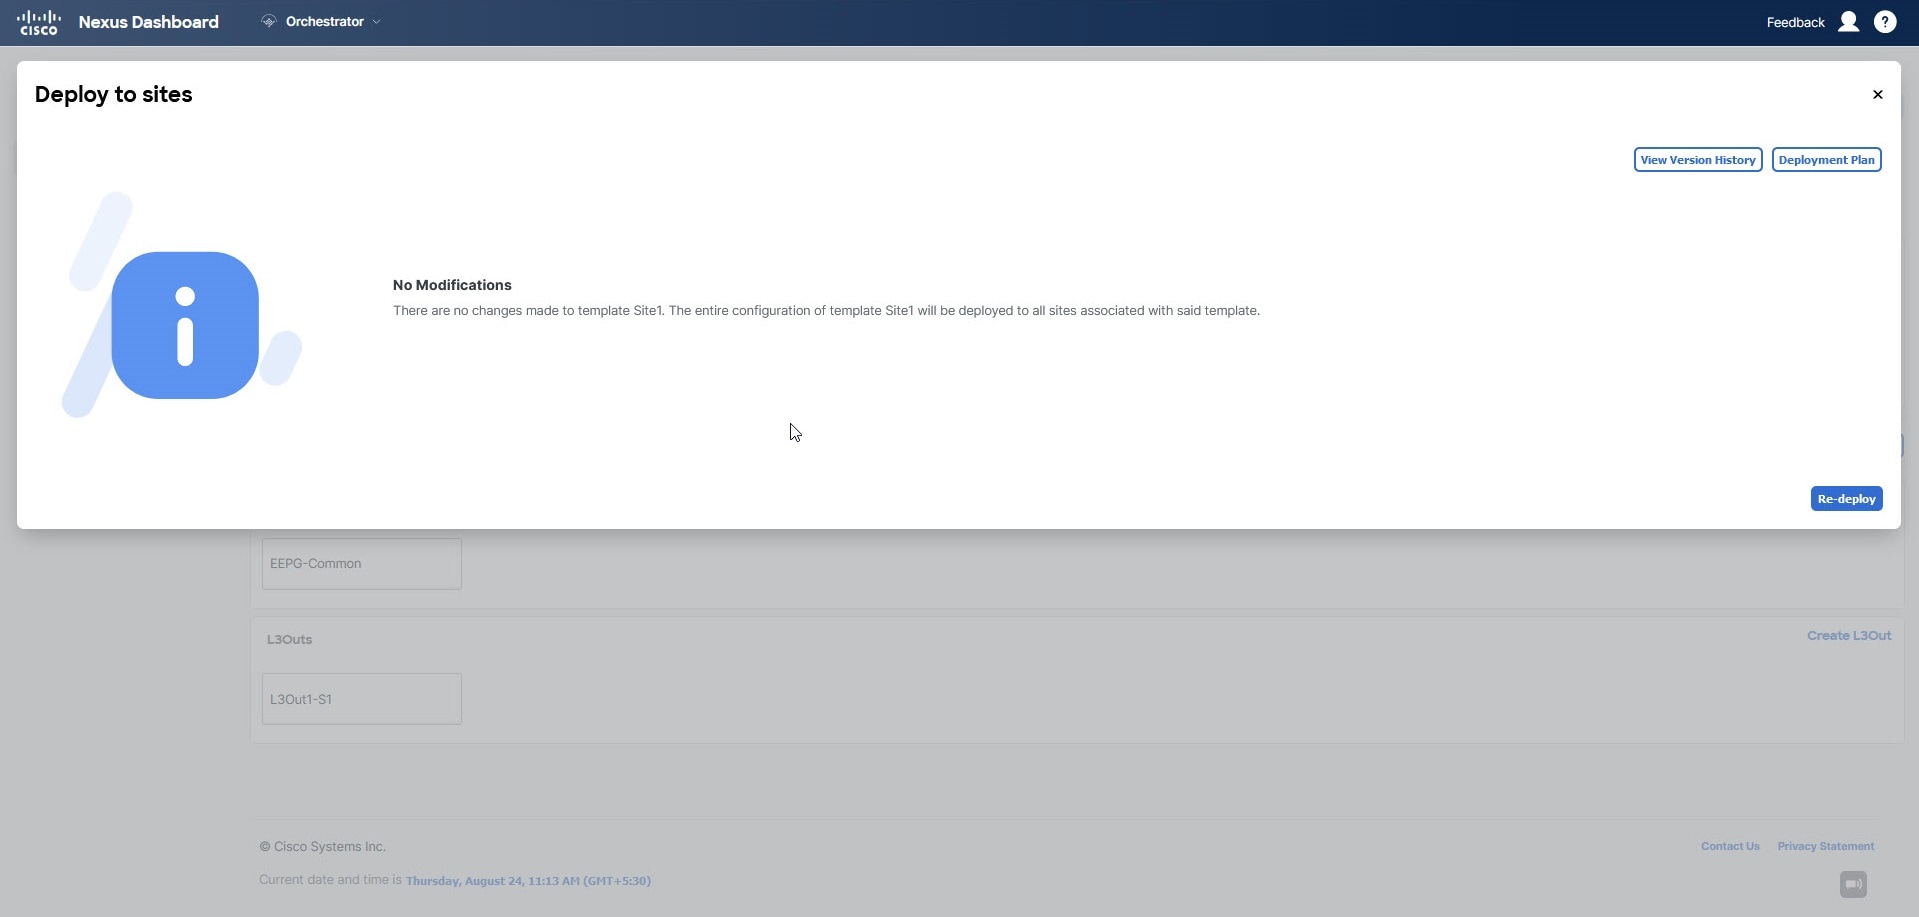 Figure 2. Deploy to sites
 -
-
Determine your next course of action based on the result of the check on the configuration drifts.
-
If any template contains a configuration drift, continue to Step 9 to resolve the conflicts.
-
If no template contains a configuration drift, skip to Step 10 to perform a full redeployment of the templates that hold the appropriate policies, where the NDO-managed policy IDs have a mismatch across the fabrics.
-
-
If any template contains a configuration drift, resolve the conflicts.
For more information about configuration drifts, check the "Configuration Drifts" chapter in the Cisco Nexus Dashboard Orchestrator Configuration Guide for ACI Fabrics.
-
Close the template deployment dialog to return to the Schema view.
Deploying any templates at this point would push the values in the Orchestrator database and overwrite any existing settings in the fabrics.
-
From the template’s Actions menu, select Reconcile Configuration Drifts.
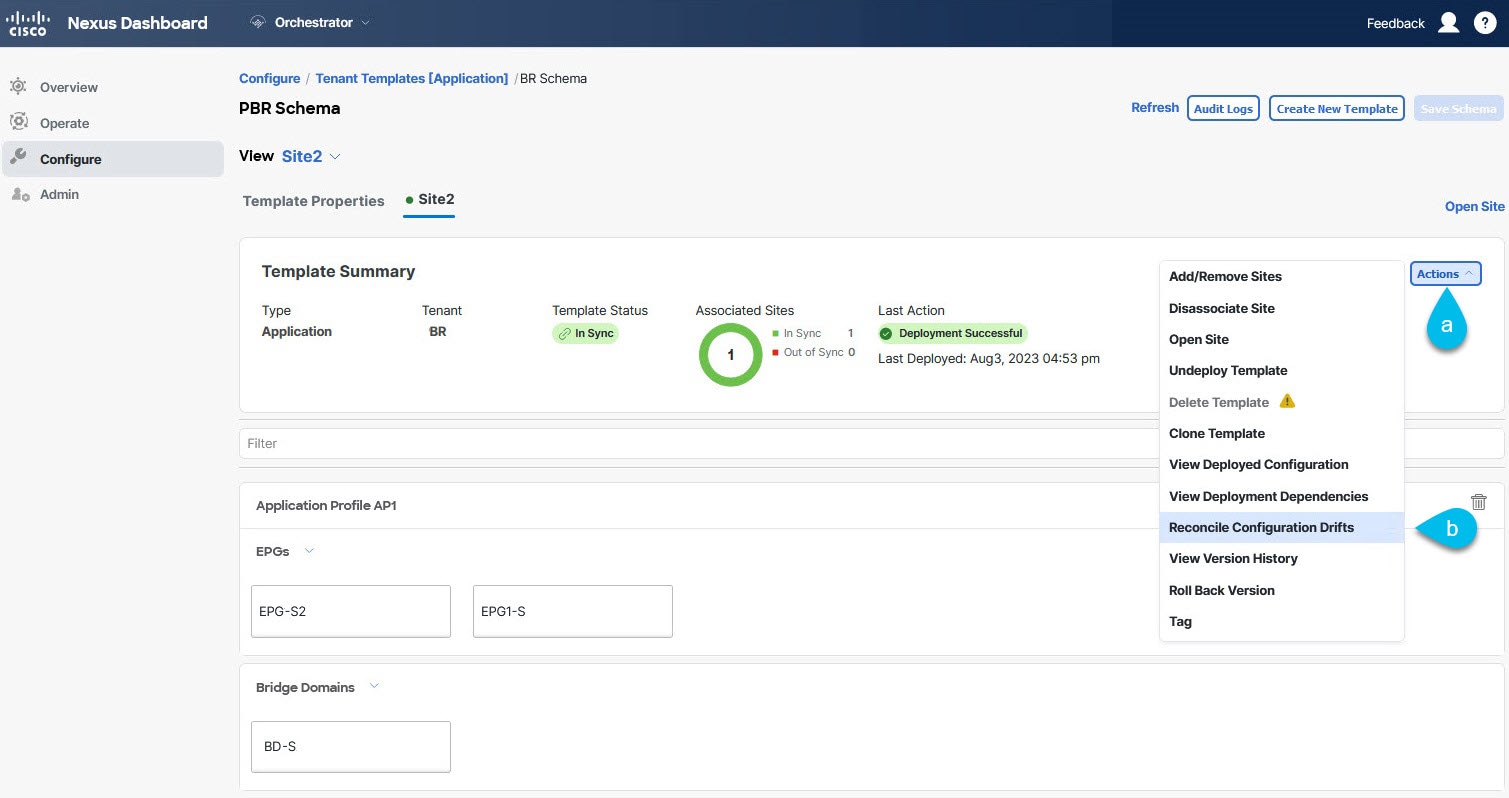 Figure 3. Reconcile Configuration Drifts
The Drift Reconciliation wizard opens.
-
In the Drift Reconciliation screen, compare the template-level configurations for each site and choose the one you want.
 Figure 4. Drift Reconciliation
Template-level properties are common across all sites that are associated to the template. You can compare the template level properties that are defined on Cisco Nexus Dashboard Orchestrator with the configuration that is rendered in each site and decide what should become the new configuration in the Cisco Nexus Dashboard Orchestrator template. Selecting the site configuration modifies those properties in the existing Cisco Nexus Dashboard Orchestrator template, whereas selecting the Cisco Nexus Dashboard Orchestrator configuration keeps the existing Cisco Nexus Dashboard Orchestrator template settings as is.
-
Click Go to Site Specific Properties to switch to site-level configuration.
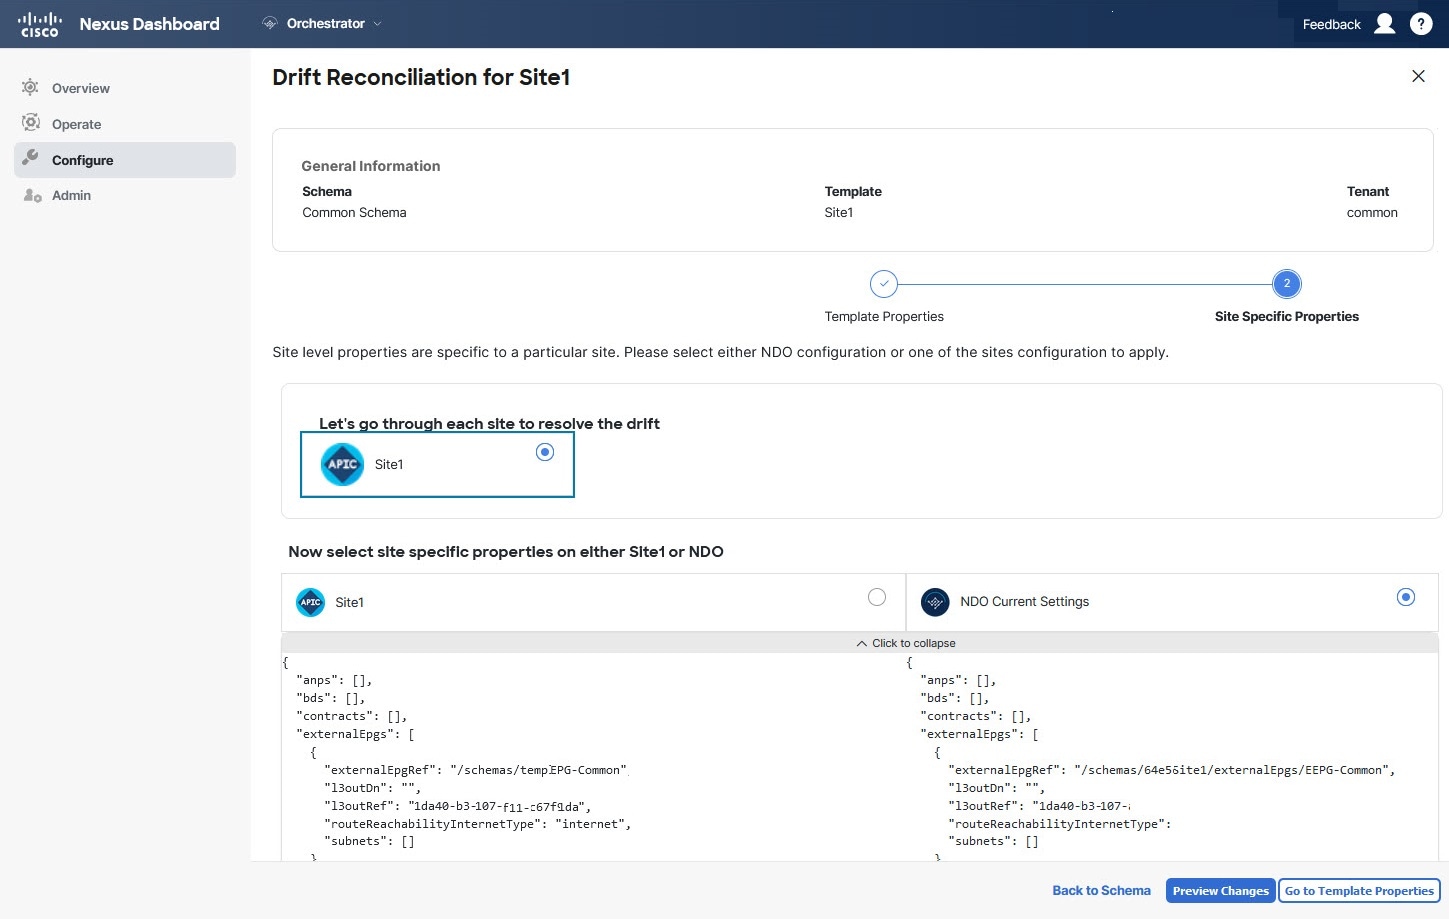 Figure 5. Go to Site Specific Properties
You can choose a site to compare that specific site’s configuration. Unlike template-level configurations, you can choose either the Cisco Nexus Dashboard Orchestrator-defined or actual existing configurations for each site individually to be retained as the template’s site-local properties for that site.
Although in most scenarios you make the same choice for both template-level and site-level configuration, the drift reconciliation wizard allows you to choose the configuration defined in the site’s controller at the "Template Properties" level and the configuration that is defined in Cisco Nexus Dashboard Orchestrator at the "Site Local Properties" level or conversely.
-
Click Preview Changes to verify your choices.
The preview displays full template configuration adjusted based on the choices that are picked in the Drift Reconciliation wizard. You can then click Deploy to sites to deploy the configuration and reconcile the drift for that template.
-
-
Perform a full redeployment of the template.
You will perform a full deployment of a template in either of these situations:
-
You found one or more templates that contain a configuration drift, and you resolved the conflicts using the instructions in Step 9. After all configuration drifts are resolved and there are no changes that are shown in the Deploy to sites dialog for the template, perform full redeployment of the template.
or
-
No template contained a configuration drift but you found NDO-managed policy IDs that have a mismatch across the fabrics in Step 6. The policy names with their tenant names are listed in the validation report in that step. In this case, you must find the templates that hold these policies and redeploy those templates. Redeploying each of those templates pushes the IDs across the fabrics again and resolves the mismatches.
Once you have redeployed all of the necessary templates and the GET policy report API does not find any mismatches, then the recovery procedure is complete.
-
We recommend that you do not redeploy templates if you are running on NDO release 4.2.3j or lower versions because of a known defect (CSCwj99109). This defect is resolved in NDO release 4.2.3k and later.
-
Due to database transformations, you must perform a full redeployment of each template.
Ensure that the Deploy to sites dialog contains no changes as shown in the following figure, then click Deploy to redeploy complete configuration:
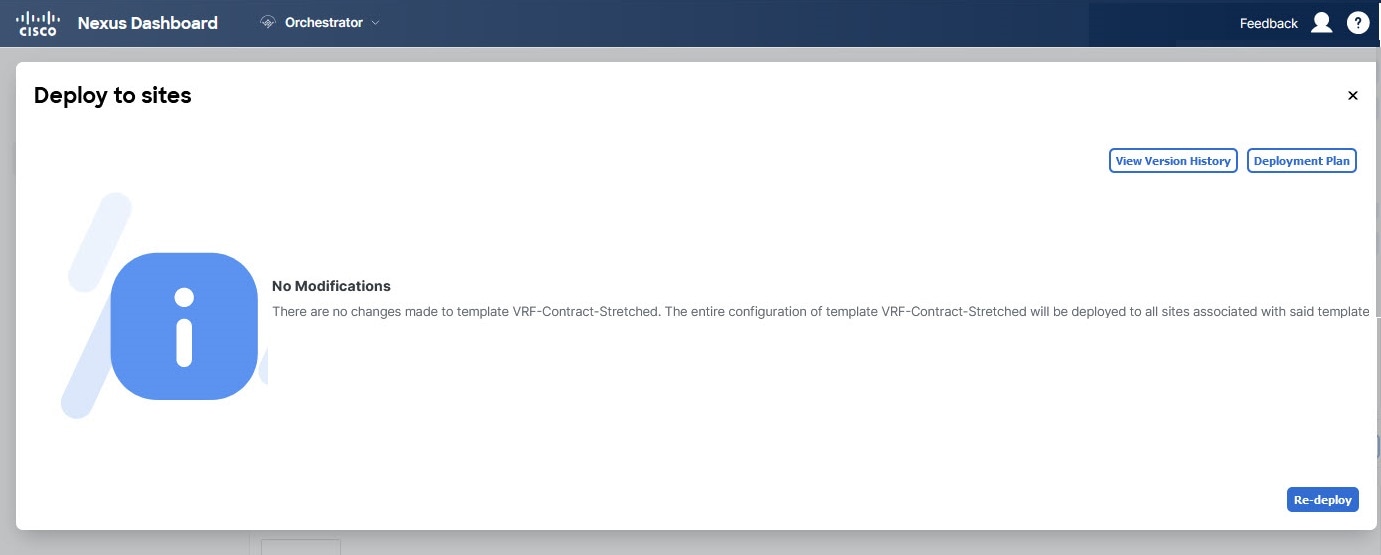 Figure 6. Deploy to sites
 -
-
-
Repeat the above steps for every schema and template in your Cisco Nexus Dashboard Orchestrator.
-
Check audit logs to verify that all templates have been redeployed.
You can view the audit signs in the Operations tab.
Audit Logs page and confirm that all templates show as
Redeployedto ensure that full redeployment successfully completed.
Exporting (Downloading) Backups
This section describes how to download the backup from the Cisco Nexus Dashboard Orchestrator.
-
Log in to your Cisco Nexus Dashboard Orchestrator GUI.
-
From the left navigation menu, select Admin > Backups & Restore.
-
In the main window, click the actions (…) icon next to the backup you want to download and select Download.
This downloads the backup file in
msc-backups-<timestamp>.tar.gzformat to your system. You can then extract the file to view its contents.
Importing Backups to Remote Location
You must have completed the following:
-
Created and downloaded a configuration backup as described in Creating Backups and Exporting (Downloading) Backups.
If your backup is already on a remote location, for example, if it was created on release 3.4(1) or later, you can download it to your local computer and upload it to a different remote location.
-
Added a remote location for backups as described in Configuring Remote Locations for Backups.
This section describes how to upload an existing configuration backup you have previously downloaded and import it into one of the remote locations that are configured in your Cisco Nexus Dashboard Orchestrator.
-
Log in to your Cisco Nexus Dashboard Orchestrator.
-
From the left navigation pane, select Admin > Backups & Restore.
-
In the main pane, click Upload.
-
In the Upload from file window that opens, click Select File and choose the backup file that you want to import.
Uploading a backup adds it to the list of the backups displayed the Backups page.
-
From the Remote Location drop-down list, select the remote location.
-
(Optional) Update the remote location path.
The target directory on the remote server, which you configured when creating the remote backup location, will be displayed in the Remote Path field.
You can choose to append extra subdirectories to the path. However, the directories must be under the default-configured path and must have been already created on the remote server.
-
Click Upload to import the file.
Importing a backup adds it to the list of the backups displayed the Backups page.
Note that although the backups are shown on the NDO UI, they are located on the remote servers only.
Backup Scheduler
You must have already added a remote location for backups as described in Configuring Remote Locations for Backups.
This section describes how to enable or disable the backup scheduler, which will perform complete configuration backup at regular intervals.
-
Log in to your Cisco Nexus Dashboard Orchestrator GUI.
-
From the left navigation menu, select Admin > Backups & Restore.
-
In the top right of the main pane, click No Schedule.
The Backup Scheduler Settings window opens.
-
Set up backup scheduler.
-
Check the Enable Scheduler check box.
-
In the Select Starting Date field, provide the day when you want the scheduler to start.
-
In the Select Time fields, provide the time of day when you want the scheduler to start.
-
From the Select Frequency drop-down, choose how often the backup should be performed.
-
From the Remote Location drop-down, select the location where the backups will be saved.
-
(Optional) In the Remote Path field, update the path on the remote location where the backups will be saved.
The target directory on the remote server, which you configured when creating the remote backup location, will be displayed in the Remote Path field.
You can choose to append extra subdirectories to the path. However, the directories must be under the default-configured path and must have been already created on the remote server.
-
Click Save to finish.
-
-
If you want to disable the backup scheduler, simply uncheck the Enable Scheduler check box in the preceding step.
First Published: 2024-03-01
Last Modified: 2024-03-01