Automation of Onboarding and Provisioning of IOS-XR Devices Using ZTP

This section explains the following topics:

Overview

Objective

Allow users to quickly, easily, and automatically onboard new devices and provision them using a Cisco-certified software image and a day-zero software configuration.

Challenge

Deploying and configuring network devices is a tedious task. It requires extensive hands-on provisioning and configuration by knowledgeable personnel, which is time-consuming, expensive, and error-prone.

Solution

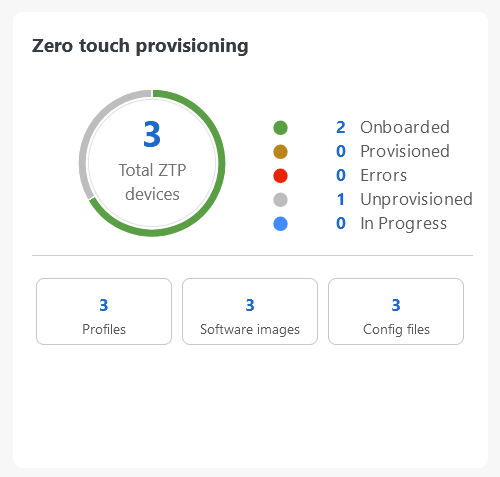
Automate onboarding of new devices using Crosswork Zero Touch Provisioning (Cisco Crosswork ZTP). Cisco Crosswork ZTP allows users to provision networking devices remotely without a trained specialist on site. After establishing an entry for the device in the DHCP server and the ZTP application, all the operators must connect the device to the network, power it on, and press reset to activate the devices. A certified image and configuration are downloaded and automatically applied to the device. After it is provisioned in this way, the new device is onboarded to the Crosswork device inventory, which can be monitored and managed like other devices.

How does it work?

  • Classic ZTP: The DHCP server verifies the device's identity based on its serial number and then offers to download the boot file and image. After the device is imaged, it downloads and executes the configuration file.

  • Secure ZTP: The device and the Cisco Crosswork ZTP bootstrap server authenticate each other using the device's Secure Unique Device Identifier (SUDI) and Crosswork server certificates over TLS/HTTPS. After a secure HTTPS channel is established, the Crosswork bootstrap server allows the device to request to download and apply a set of signed image and configuration artifacts adhering to the RFC 8572 YANG schema. After the image (if any) is downloaded and installed, and the device reloads with the new image, the device downloads configuration scripts and executes them.

  • Plug and Play (PnP) ZTP: The Cisco PnP agent on the IOS-XE device and the Cisco Crosswork PnP Server authenticate each other over HTTP using a PnP profile supplied on a TFTP server. They then establish a secure connection over HTTPS, and the PnP agent downloads and installs images (optional) and configuration artifacts.

Additional resources

Detailed information is available in the ZTP chapter in Cisco Crosswork Network Controller 7.0 Device Lifecycle Management.

Scenario: Use ZTP to onboard and provision new devices automatically

Scenario context

With the exponential growth of service provider networks and their rapid expansion into new customer sites and locations, there is a need to connect an ever-increasing number of edge devices. At the same time, functional sophistication is increasing, requiring more time to configure those devices and activate new services. Manual processes limit a service provider’s ability to rapidly scale networks and roll out new services cost-efficiently.

In this scenario, we will onboard the new IOS-XR devices required to set up a new customer site in a remote location and go live without sending skilled technicians on time-consuming and costly on-site visits to complete the provisioning.

We will leverage the configuration of devices at existing customer sites that are already set up and operating to ensure that the Day0 configuration of the new devices includes whatever is necessary to get them up and running quickly and efficiently.

Assumptions and prerequisites

  • Crosswork ZTP must be installed in your Cisco Crosswork Network Controller setup.

  • For Classic ZTP, Crosswork and the devices must be deployed in a secure network domain. Secure ZTP does not have this requirement; it is secure across public networks.

  • The Crosswork server must be reachable from the devices via an out-of-band management network or an in-band data network.

  • If you also want to onboard devices to Cisco NSO, it must be configured as a Crosswork provider. When configuring the NSO provider, ensure that the provider property key is set to forward and the property value is true.

ZTP Scenario: Workflow

Procedure

This is a high-level workflow for onboarding IOS-XR devices using Cisco Crosswork Classic or Secure ZTP.

To onboard IOS-XE devices, or for more detailed information on these options, see the Zero Touch Provisioning chapter in the Cisco Crosswork Network Controller 7.0 Device Lifecycle Management guide.


This is a high-level workflow for onboarding IOS-XR devices using Cisco Crosswork Classic or Secure ZTP. To onboard IOS-XE devices, or for more detailed information on these options, see the Zero Touch Provisioning chapter in the Cisco Crosswork Network Controller 7.0 Device Lifecycle Management guide.

Step 1

Assemble and upload ZTP assets

  1. Assemble the following assets before you begin:

    • (Optional) Software images. For Classic ZTP, you can use Cisco IOS-XR versions 6.6.3, 7.0.1, 7.0.2, 7.0.12, and 7.3.1 or later. For Secure ZTP, use Cisco IOS-XR 7.3.1 or later (except 7.3.2 and 7.4.1).

    • Configuration Files: SH, PY, or TXT files. You can specify up to three different configuration files for Secure ZTP.

    • Credentials of the devices to be onboarded

    • Serial numbers of the devices to be onboarded

    For Secure ZTP only, also assemble:

    • Owner certificates - Specifies your organization's CA-signed end-entity certificates installed on your devices, which binds a public key to your organization.

    • Pinned domain certificate - Specifies your organization's CA- or self-signed domain certificate, with its public key pinned to your organization's DNS network domain. The PDC helps your devices verify that images and configurations downloaded and applied during ZTP processing come from within your organization.

    • Ownership vouchers - Specifies nonceless audit vouchers that verify that devices being onboarded with ZTP are bootstrapping into a domain owned by your organization. Cisco supplies OVs when a request is submitted with your organization's PDC and device serial numbers.

  2. To apply software images, upload the software images. From the main menu, choose Device Management > Software Management > Images.

  3. To upload the configuration files, choose Device Management > Zero Touch Provisioning > Configuration files.

  4. To upload device serial numbers, choose Device Management > Zero Touch Provisioning > Serial Numbers & Ownership Vouchers and click Add serial number(s).

  5. For Secure ZTP, upload your pinned domain certificate and owner certificates. From the main menu, choose Administration > Certificate Management and add your certificates.

  6. For Secure ZTP, upload ownership vouchers. From the main menu, choose Device Management > Zero Touch Provisioning > Serial Numbers & Ownership Vouchers and click Add voucher(s).

Step 2

Create a ZTP profile combining an image file and configuration file

Crosswork uses ZTP profiles to automate imaging and configuration processes. While optional, creating ZTP profiles is recommended as the best way to combine a single image and configuration file based on a product or device family, such as the Cisco ASR 9000 or Cisco NCS5500. We recommend that you create only one day-zero ZTP profile for each device family, use case or role the devices serve in the network.

To create ZTP profiles, go to Device Management > Zero Touch Provisioning > ZTP profiles.

Step 3

Prepare ZTP device entries for the devices to be onboarded

Depending on how many devices you are onboarding, you can prepare and import a CSV file or create device entries individually.

  1. Go to Device Management > Zero Touch Provisioning > Devices.

  2. Click Total ZTP devices. Then:

    • To create a device entry file for many devices, click the Import icon and download the CSV template. Edit the template and add entries for each device you want to onboard. See the Zero Touch Provisioning chapter in the Cisco Crosswork Network Controller 7.0 Device Lifecycle Management guide for details on the file entries. Then click the Import icon again to import your device entry file.

    • To create device entries one at a time, click the Add devices icon.

Step 4

Set up DHCP for Crosswork ZTP

Before triggering ZTP processing, you must update your organization's DHCP server configuration file with the IDs for your ZTP device entries and the paths to the image and configuration files stored in the ZTP repository. This allows Crosswork and DHCP to identify these ZTP devices, respond correctly to each device's network connection requests, and download image and configuration files. For sample DHCP entries, see the Zero Touch Provisioning chapter in the Cisco Crosswork Network Controller 7.0 Device Lifecycle Management guide.

Step 5

Initiate ZTP processing to onboard the devices

Initiate ZTP processing by rebooting each device to be provisioned: Power-cycle it or press the chassis reset button.

Step 6

Monitor the ZTP processing status

You can monitor the progress of ZTP processing in the dashboard.

  1. Click Dashboard in the main menu and look at the Zero Touch Provisioning dashlet.

    Figure 1. Zero Touch Provisioning
    Zero Touch Provisioning
  2. Click on the Total ZTP devices number link to view the detailed status of the devices.

Step 7

Verify your onboarded devices

From the main menu, choose Device Management > Zero Touch Provisioning > Devices. Click Total ZTP devices. All of your onboard devices should be listed.

You may need to edit the information for some devices. Some of the information needed for a complete device record either is not needed to onboard the device or is not directly available through automation. For example, geographical location data is defined using a set of GPS coordinates.

ZTP devices, after being onboarded, are automatically part of the shared Crosswork device inventory. You can edit them like any other device.