Geo Redundancy Switchover

This chapter contains the following topics:

Perform Switchover

Switchover is the process of interchanging the roles of the active cluster and standby cluster in the event of a failure.

In case of a failure, the system performs many preliminary checks (heartbeat count, connectivity checks, HTTP and SSH login checks, etc.) and raises alarms if they fail. If you notice an alarm, you are expected to check both clusters to verify the authenticity of the alarms before you initiate the switchover.


Note


  • If a switchover operation is completed on a standby VM (before the sync operation), there are no rows or entries displayed on the Publish Details for tech-support jobs. This happens because the tech-support history is written to ETCD which is not synced across geo redundancy setups. This is an expected system behavior.

  • All services provisioned on AZ1 are continuously synced to AZ2 through live asynchronous replication.

  • If you use the Service Health application, you must trigger an additional periodic or on-demand sync after a switchover to reconcile the replication data in the Neo4j data stores between the clusters.

  • After a switchover, the topology is discovered more quickly on AZ2 because it is built via resync rather than from scratch.


Before you begin

Before the switchover, it is important that both clusters have the same application versions and resource footprints used.

Procedure


Step 1

Log in to the standby cluster.

Step 2

From the main menu, choose Administration > Cross Cluster. The Cross Cluster window is displayed.

Step 3

Click Actions > Switch cluster role

The Switch Cluster Role dialog box is displayed with the initial state of the clusters. For the purpose of this topic, SJC cluster (cluster-sjc) is in Active state and NYC cluster (cluster-nyc) is in Standby state.
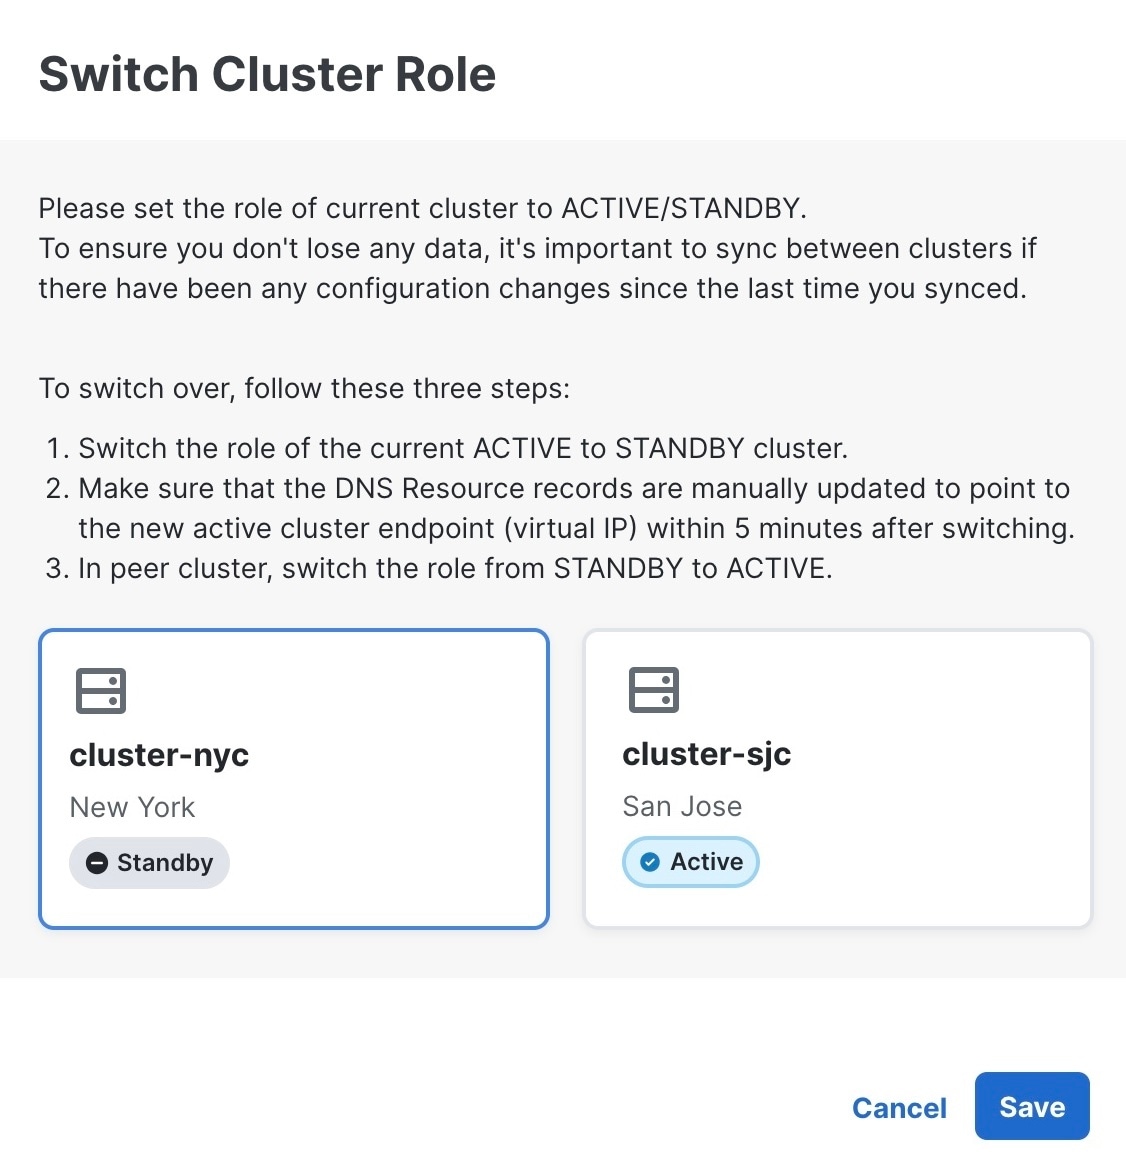
Figure 1. Switch Cluster Role

Step 4

Click on the NYC cluster to change it to Active state. Click Save to confirm change.
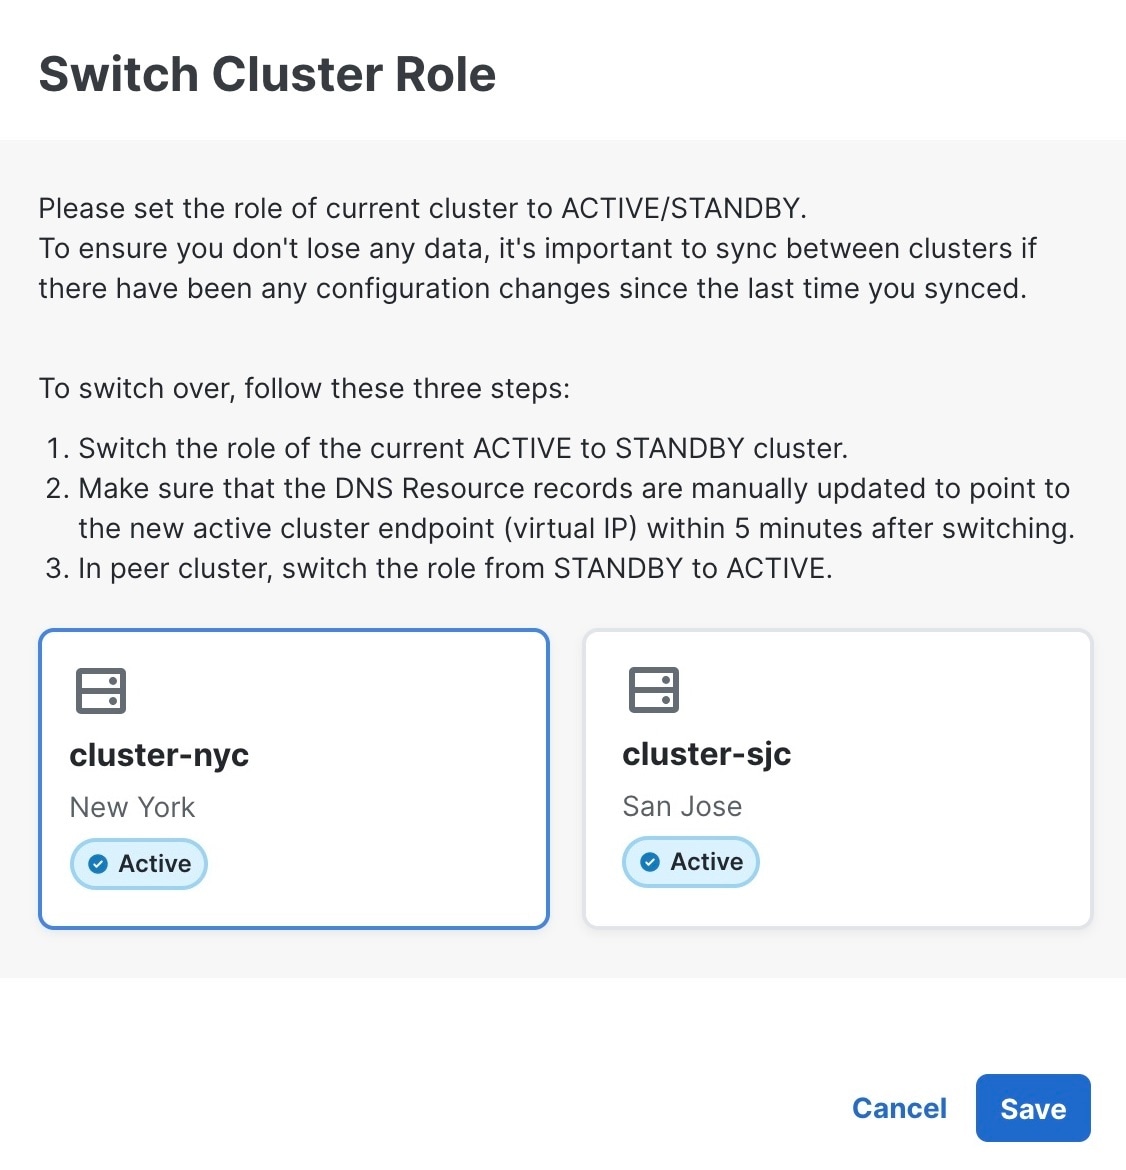
Figure 2. Switch standby cluster to active

Step 5

Update the DNS server records of Management FQDN and Data FQDN to point to the new active cluster.

Step 6

Now log in to the SJC cluster (already active). In the Cross Cluster window, click Actions > Switch cluster role.

Note


At this point, till the time you change the cluster state, both clusters will be in Active state.

Step 7

In the Switch Cluster Role dialog box, click on the cluster to change it to Standby state.

Figure 3. Switch active cluster to standby

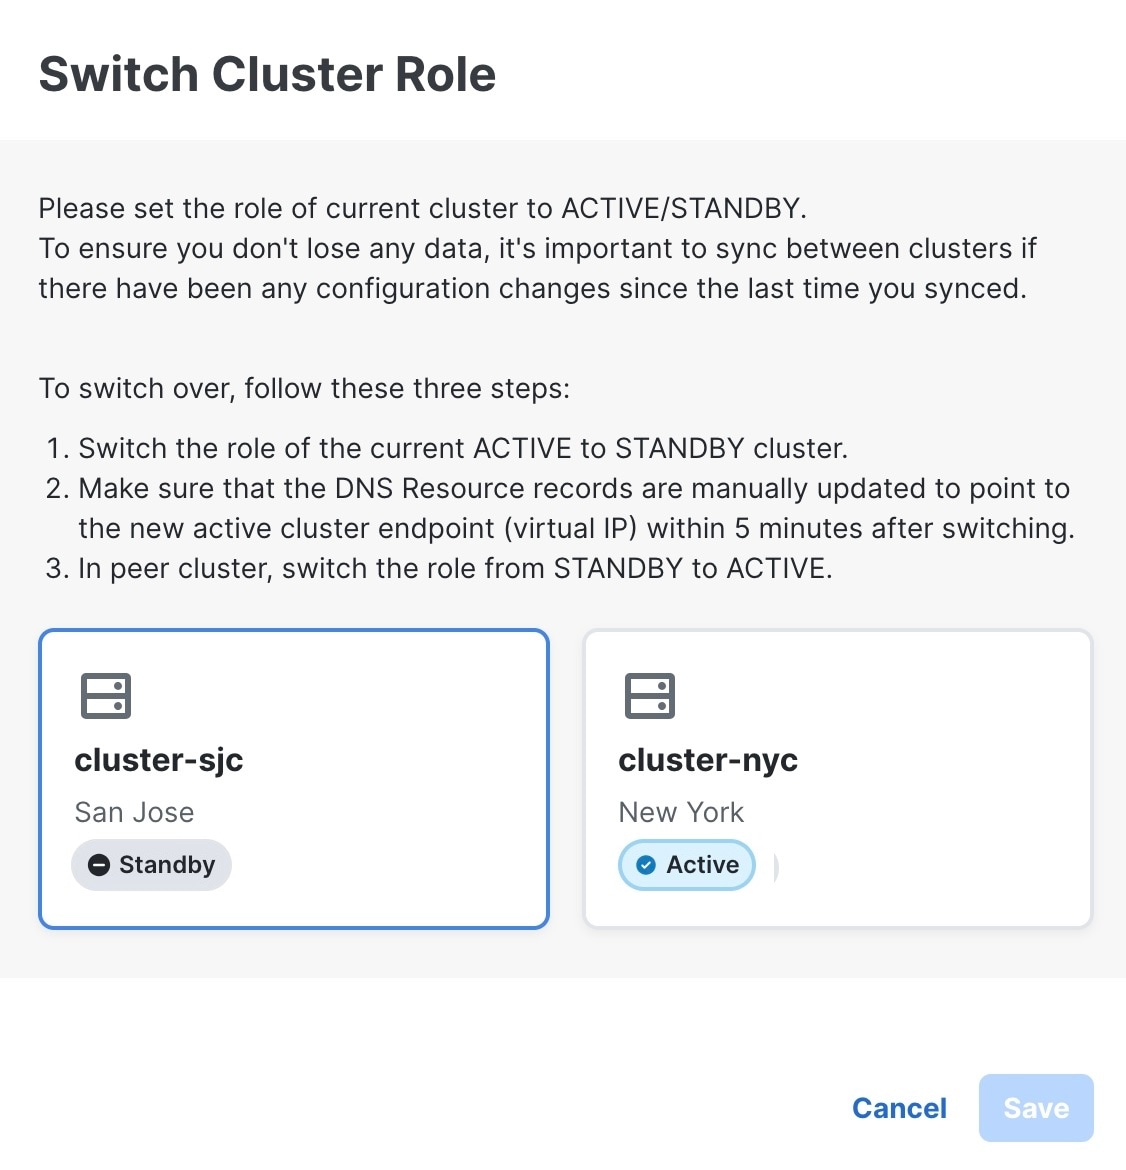
Click Save to confirm the change.

Note


Wait for the device reachability to converge before moving to resume operations on the standby cluster.

Step 8

After few minutes, log in to the first cluster. The switchover will be completed.

Step 9

Post-switchover, verify the following:

  1. Verify the cluster health and device status to ensure the system is functioning properly.

  2. Check the health status of the Crosswork Data Gateway to ensure it is functioning properly.

  3. Check the status of the HA pool.

  4. Check the Collection status and confirm that traffic is flowing smoothly to the newly active cluster.


Crosswork Optimization Engine License Count After a Switchover

For Crosswork Optimization Engine, the Smart Licenses page reflects the correct license count only after 24 hours or by 1:00 am after a switchover.

If you cannot wait 24 hours or until 1:00 am, there are two methods to force a license update:

  • You can disable or enable feature packs (Bandwidth on Demand, Circuit Style Manager, or Local Congestion Manager).

  • You can detach and add devices back again.

Geo Redundant Cluster Disaster Recovery

At some time during normal operations of your Cisco Crosswork cluster, you may find that you need to recover the entire system. This can be the result of one or more malfunctioning nodes, one or more malfunctioning services or applications, or a disaster that destroys the hosts for the entire cluster.

This section explains the steps needed to perform to recover your geo redundant clusters.

Destruction of Standby Cluster

This topic explains the recovery steps that must be executed when the standby cluster is destroyed.

Procedure


Step 1

Deploy the new standby cluster with the same IP and Virtual IP (VIP) addresses.

Step 2

Install the same version of applications as the active cluster.

Step 3

Enable pairing mode in the active cluster. For more information, see Enable Geo Redundancy

Step 4

Enable geo redundancy on the standby cluster. For more information, see Enable Geo Redundancy

Step 5

Enter the Cross Cluster settings on the new standby cluster as per the settings on the active cluster. Alternatively, you can enable the Apply the same configuration to peer cluster checkbox for the Cross Cluster settings on the active cluster, and save the settings.

Step 6

On the Cross Cluster window, use the Initiate Sync option to ensure the standby cluster pulls data from the active cluster.


Destruction of Active Cluster

This topic explains the recovery steps that must be executed when the active cluster is destroyed.

Procedure


Step 1

Switch the standby cluster to become the new active cluster. For more information, see Geo Redundancy Switchover.

Step 2

Re-deploy the destroyed cluster (currently, the standby cluster) with the same IP and Virtual IP (VIP) addresses.

Step 3

Install the same version of applications as the active cluster.

Step 4

Enable pairing mode in the active cluster. For more information, see Enable Geo Redundancy

Step 5

Edit the Cross Cluster inventory file (.yaml) to reflect the current state of the Cross Cluster after the switchover in step 1.

Step 6

On the Geo Redundancy window of the active cluster, click Browse and upload the edited inventory file (.yaml file).

Step 7

Enable geo redundancy on the standby cluster. For more information, see Enable Geo Redundancy

Step 8

Enter the Cross Cluster settings on the new standby cluster as per the settings on the active cluster. Alternatively, you can enable the Apply the same configuration to peer cluster checkbox for the Cross Cluster settings on the active cluster, and save the settings.

Step 9

On the Cross Cluster window, synchronize data to ensure the standby cluster pulls data from the active cluster.

Step 10

(Optional) Switch the standby cluster to become the new active cluster.