Configure Crosswork Data Gateway

This section contains the following topics:

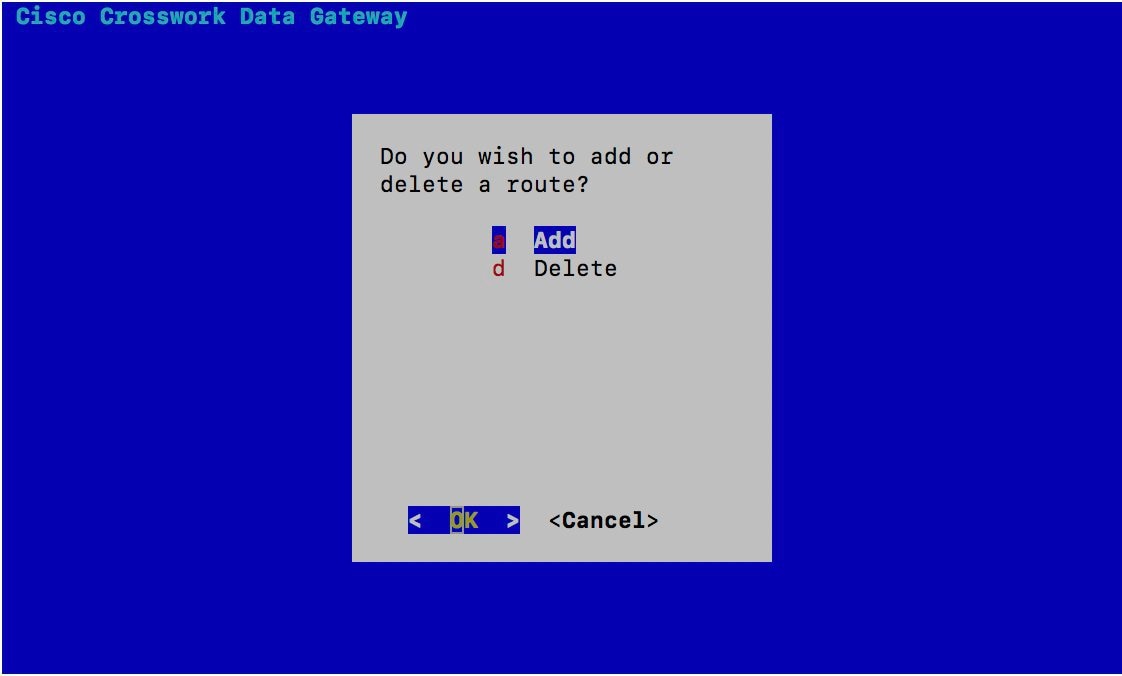
View Current System Settings

Crosswork Data Gateway allows you to view the following settings:

  • Management and South/North-bound Data Addresses

  • NTP

  • DNS

  • Proxy

  • UUID

  • Syslog

  • Certificates

Follow these steps to view the current system settings:

Procedure


Step 1

From the Main Menu, select 4 Show System Settings, as shown in the following figure:
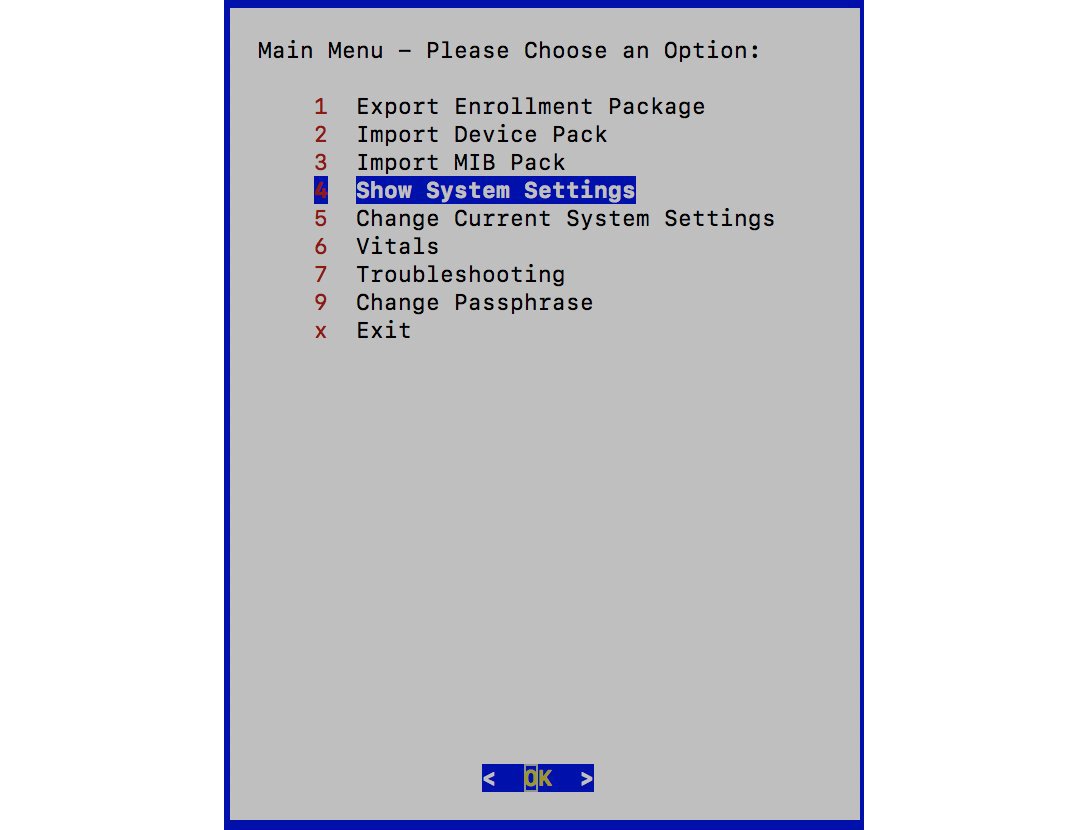


Step 2

Click OK. The Show Current System Settings menu opens.
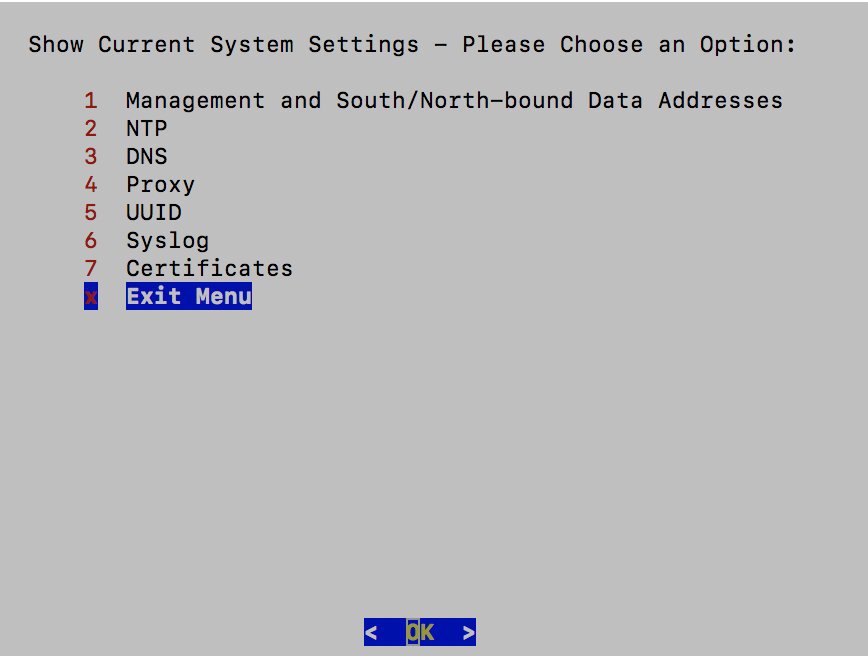


Step 3

Select the setting you want to view.

Step 4

Click OK. Crosswork Data Gateway displays the selected setting.

After you are done viewing the settings, press any key to return to the Show Current System Settings menu.

To return to the Main Menu, select x Exit Menu and click OK.


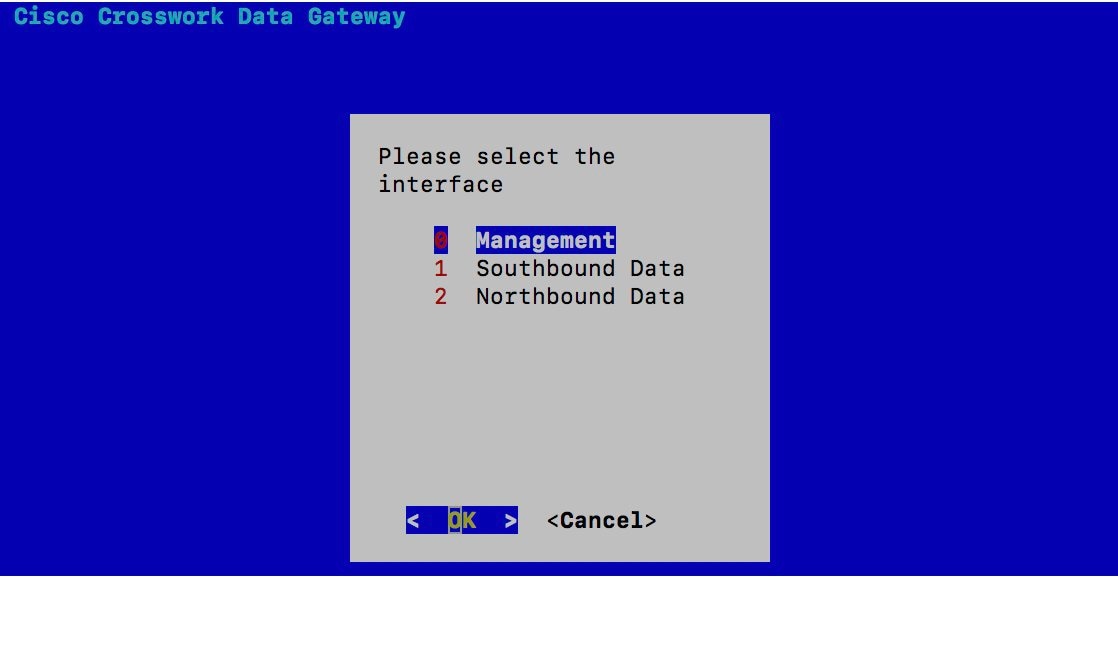
View Management and South/North-bound Addresses

Procedure


Step 1

From the Show Current System Settings Menu, select 1 Management and South/North-bound Data Addresses.

Step 2

Click OK. Crosswork Data Gateway displays the Management and South/North-bound Data Addresses settings.


View NTP Settings

Procedure


Step 1

From the Show Current System Settings Menu, select 2 NTP.

Step 2

Click OK. Crosswork Data Gateway displays the NTP settings.


View DNS Settings

Procedure


Step 1

From the Show Current System Settings Menu, select 3 DNS.

Step 2

Click OK. Crosswork Data Gateway displays the DNS settings.


View Proxy Settings

Procedure


Step 1

From the Show Current System Settings Menu, select 4 Proxy.

Step 2

Click OK. Crosswork Data Gateway displays the Proxy settings.


View VM UUID

Procedure


Step 1

From the Show Current System Settings Menu, select 5 UUID.

Step 2

Click OK. Crosswork Data Gateway displays the UUID of the VM.


View Syslogs

Procedure


Step 1

From the Show Current System Settings Menu, select 6 Syslog.

Step 2

Click OK. Crosswork Data Gateway displays the Syslog of the VM.


View Certificates

Procedure


Step 1

From the Show Current System Settings Menu, select 7 Certificates.

Step 2

Click OK. Show Certificates menu opens:
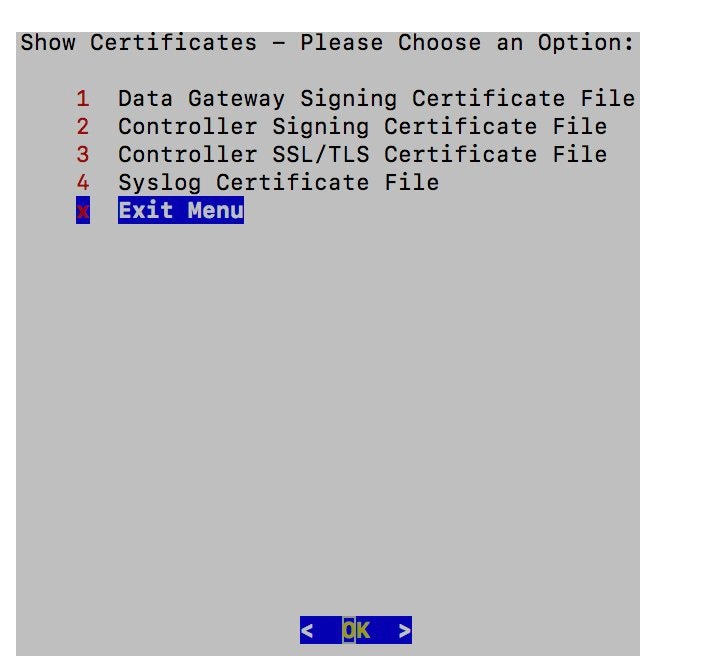


Step 3

Select the certification you want to view and click OK. Crosswork Data Gateway displays the selected certificate.


Change Current System Settings


Note

System settings can only be configured by the Administrator.


Crosswork Data Gateway allows you to change the following settings:

  • NTP

  • DNS

  • Control Proxy

  • Static routes

  • Syslog

  • SSH keys

  • Certificate

Follow these steps to change the current system settings:

Procedure


Step 1

From the Main Menu, select 5 Change Current System Settings, as shown in the following figure.


Step 2

Click OK. The Change System Settings menu opens.


Step 3

Select the setting you want to change.

Step 4

Click OK. Crosswork Data Gateway prompts you to input new value for the selected setting.

Step 5

After you have entered the new settings, click OK to save the settings and return to the Change System System Settings menu.

To return to the Main Menu, select x Exit Menu and click OK.


Configure NTP

Procedure


Step 1

From the Change Current System Settings Menu, select 1 Configure NTP.

Step 2

Click OK. Enter the new NTP server address when prompted.

Step 3

Click OK to save the settings.


Configure DNS

Procedure


Step 1

From the Change Current System Settings Menu, select 2 Configure DNS.

Step 2

Click OK. Enter the new DNS server address when prompted.

Step 3

Click OK to save the settings.


Configure Control Proxy

Procedure


Step 1

From the Change Current System Settings Menu, select 3 Configure Control Proxy.

Step 2

Click OK. Enter the new Proxy server URL when prompted.

Step 3

Click OK to save the settings.


Configure Static Routes

In Crosswork Data Gateway, the preferred approach to configure static routes is to configure them on the Controller. Crosswork Data Gateway's Route Manager periodically syncs the configured static routes from the Controller. Configuring static routes from the interactive menu is available only to fix any issues with static routes configuration synced from the Controller.


Note

If static routes are configured directly from the interactive menu without updating static routes in Controller then those static routes will be lost next time the Route Manager syncs with the Controller. On rebooting Crosswork Data Gateway, static routes will be lost temporarily till synced again from the Controller by the Route Manager.


Add Static Routes

Procedure

Step 1

From the Change Current System Settings Menu, select 4 Configure Static Routes.

Step 2

Click OK. Crosswork Data Gateway displays the following prompt:


Step 3

To add a static route, select a Add.

Step 4

Click OK. Crosswork Data Gateway prompts you to select the interface:


Step 5

Select the interface for which you want to add a static route.

Step 6

Click OK. Crosswork Data Gateway prompts you to select IP address version.


Step 7

Select the IP address version you prefer.

Step 8

Click OK. Enter IPv4/IPv6 subnet in CIDR format when prompted.

Step 9

Click OK. The static route for the entered IP address is added.


Delete Static Routes

Procedure

Step 1

From the Change Current System Settings Menu, select 4 Configure Static Routes.

Step 2

Click OK. Crosswork Data Gateway displays the following prompt:


Step 3

To delete a static route, select d Delete.

Step 4

Click OK. Crosswork Data Gateway prompts you to select the interface:


Step 5

Select the interface for which you want to delete a static route.

Step 6

Click OK. Crosswork Data Gateway prompts you to select IP address version.


Step 7

Select the IP address version you prefer.

Step 8

Click OK. Enter IPv4/IPv6 subnet in CIDR format when prompted.

Step 9

Click OK. The static route for the entered IP address is delete.


Configure Syslog


Note

For any Syslog server configuration with IPv4/IPv6 support for different linux distributions, please refer your system administrator and configuration guides.


Procedure


Step 1

From the Change Current System Settings Menu, select 5 Configure Syslog.

Step 2

Click OK. Enter the new Syslog server address or hostname when prompted.

Step 3

Click OK to save the settings.


Create New SSH Keys

Procedure


Step 1

From the Change Current System Settings Menu, select 6 Create new SSH keys.

Step 2

Click OK. Crosswork Data Gateway launches an auto-configuration process that generates new SSH keys.


Import Certificate

Procedure


Step 1

From the Change Current System Settings Menu, select 7 Import Certificate.

Step 2

Click OK. Select the certificate to be imported when prompted.


Step 3

Select the certificate you want to import.

Step 4

Click OK and enter SCP URI to the selected certificate file when prompted.

Step 5

Click OK and enter passphrase for the SCP URI.