Introduction
This document describes the procedure to upgrade Cisco IP phone firmware individually with Cisco Unified Communications Manager (CUCM) 10.x and later.
Prerequisites
Requirements
Cisco recommends that you have knowledge of these topics:
-
CUCM 10.x and later
-
Cisco Unified IP Phone
Note: Ensure that the Cisco IP phones are currently registered with CUCM.
Components Used
The information in this document is based on these software and hardware versions, but applicable to all CUCM releases and Cisco IP phone loads:
-
CUCM 11.x
-
Cisco Unified IP Phone
The information in this document was created from the devices in a specific lab environment. All of the devices used in this document started with a cleared (default) configuration. If your network is live, ensure that you understand the potential impact of any command.
Configure
Perform these steps in order to upgrade the phone load for a single IP phone and other phones to use the old phone load that exists in your network environment. This situation arises when new firmware must be checked before you deploy it to the entire IP telephony network, or any single phone that requires a feature supported by a particular firmware.
- Download the required IP phone firmware from Cisco IP Phone - Software Download (registered customers only).
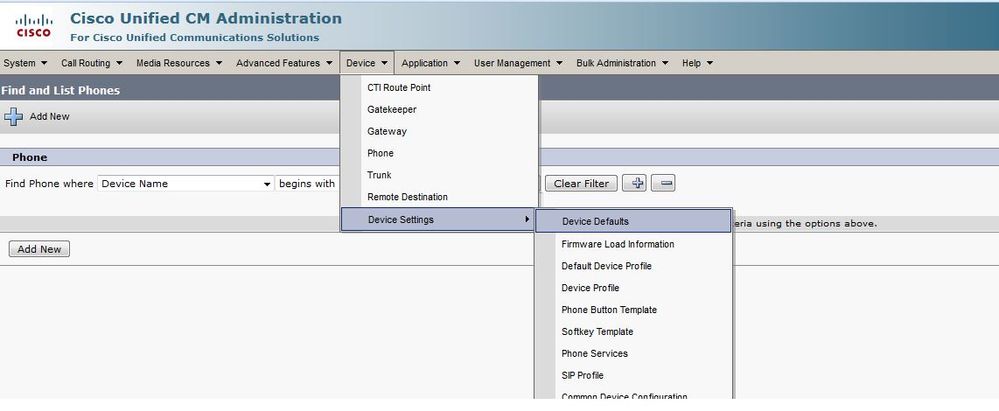
- Before you proceed to upgrade the firmware, navigate to the
Device menu, click Device Settings > Device Defaults and copy the phone load name that you currently use for the particular Cisco IP phone model which you plan to upgrade. Paste this file name in a notepad so that you can use the same file name in order to revert the default phone load name to the old firmware for all other phones.

- Run the upgrade patch file of the new IP phone load in CUCM. You can do this when you burn the patch file to a CD or DVD, or when you share it via SFTP.
- Navigate to
Cisco Unified OS Administration in the navigation menu at the top right of the web page. Log in with the platform administration credentials.
- Navigate to
Software Upgrades > Install/Upgrade.
- Choose the appropriate options for DVD/CD or network source (SFTP Server), and provide details of where it can pull the file to download.
- When the installation is complete, this automatically changes the Phone Load Namein the device defaults for the particular phone model.

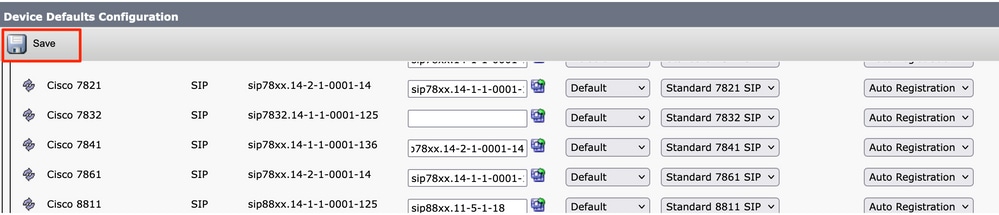
-
Copy this new load information from the Device Defaultsand paste it into the notepad file.
- In order to maintain the old load name for other phones in the network, replace the old load information from the notepad and repeat the procedure,
Device > Device Settings > Device Defaults. Then, locate the phone model for which the firmware was upgraded, click Swap Loads, and then Save. This helps all other phones to maintain the old device default load information.

- Now, restart the TFTP service on the nodes where it runs. Navigate to
Cisco Unified Serviceability, then to Tools > Control Center-Feature Services and restart the TFTP service.
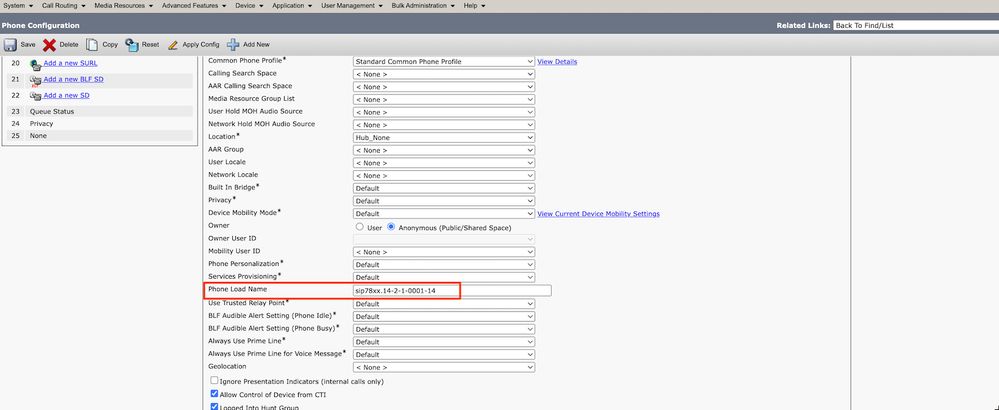
- Navigate to
Device Menu > Phone and choose the IP phone on which you want to perform the upgrade. Paste the new load information to the Phone Load Name field and click Save.
- Finally, click
Apply Configuration and then Reset the Phone.
Verify
Use this section in order to confirm that your configuration works properly.
In order to verify that the phone has copied the new firmware image, use one of these methods:
- Find the IP address of the IP phone on which the upgrade is performed. Use the IP address in the browser in order to obtain the device information of the IP phone. Check for the version to see if the firmware has changed to the new one.
- Physically, press the
Settings button on your IP phone. Scroll down to Model Information and click Select. Then, scroll down to Load File and verify that it is the same load file that is upgraded.
Troubleshoot
There is currently no specific troubleshooting information available for this configuration.
 Feedback