Configure High Availability (HA) on CUBE Routers
Available Languages
Contents
Introduction
This document describes how to configure High Availability (HA) on two Cisco Unified Border Element (CUBE) routers with all required commands.
Prerequisites
Requirements
Cisco recommends that you have knowledge of these topics:
- IP Routing
- Cisco Switch
- Cisco Unified Border Element (CUBE)
The information in this document was created from the devices in a specific lab environment. All of the devices used in this document started with a cleared (default) configuration. If your network is live, ensure that you understand the potential impact of any command.
Components Used
Cisco ASR1001-X routers running version 16.09.04.
The information in this document was created from the devices in a specific lab environment. All of the devices used in this document started with a cleared (default) configuration. If your network is live, ensure that you understand the potential impact of any command.
Configure
Network Diagram
This network connectivity diagram shows you how CUBE routers are connected to the network.
- Ingress side (Local Area Network - LAN) of both CUBEs are connected to VLAN 1900 via the interface Gi 0/0/1.
- Egress side (Wide Area Network - WAN) of both the CUBEs are connected to VLAN 1967 via the interface Gi 0/0/2.
- Keepalive interfaces of both CUBEs are connected to VLAN 17 via the interface Gi 0/0/0

Note: CUBE interfaces are connected to physical Cisco Switch and the switchports are configured to allow the respective VLANs.
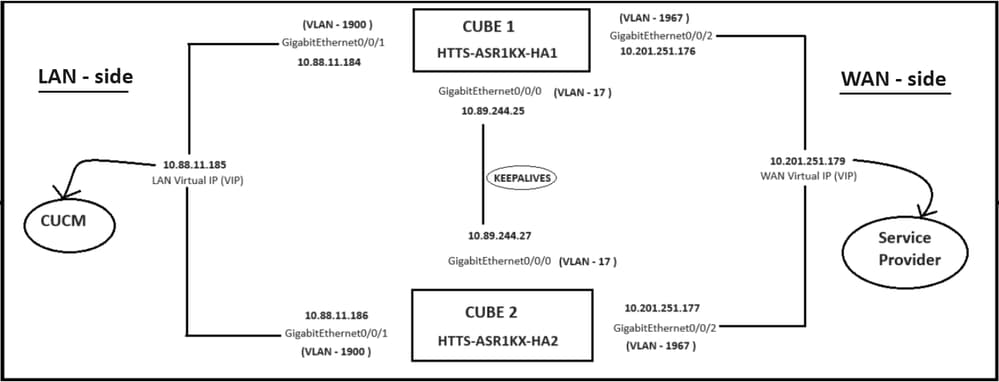 Network Diagram.
Configurations
Steps to configure the CUBE HA:
- Checkpointing configuration
- Commands to track the status of the LAN & WAN interfaces on the CUBEs
- Assign the configured tracks to the redundancy group
- Configuring virtual IP (VIP) on the LAN side
- Configuring virtual IP (VIP) on the WAN side
- Enable CUBE redundancy
- Save the configuration and reboot
Checkpointing Configuration
For checkpointing, configure these commands on both the CUBEs
Note: The interface Gi 0/0/0 on both the CUBEs are used for checkpointing.
#conf t
(config)#redundancy
(config-red)#
(config-red)#application redundancy
(config-red-app)#group 1
(config-red-app-grp)#
(config-red-app-grp)#name cube-ha
(config-red-app-grp)#data gi 0/0/0
(config-red-app-grp)#control gi 0/0/0 protocol 1
(config-red-app-grp)#
This screenshot shows the command ran on the CUBE-2 router. You must run the same set of commands on CUBE-1 router:
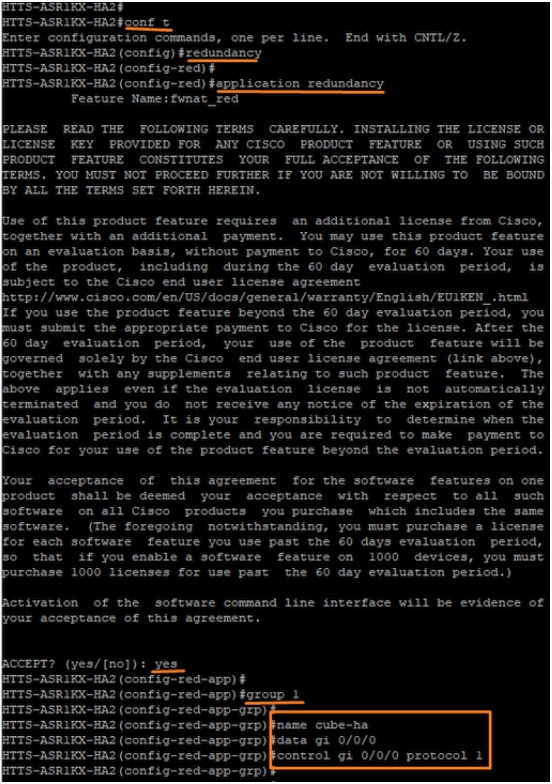 Checkpointing configuration on the CUBE-2.
Commands to Track the Status of the LAN & WAN Interfaces on the CUBEs
Configure these commands for tracking the status of the LAN & WAN interfaces. You must execute these commands on both the CUBE routers.
Note: The interface Gi 0/0/1 on both the CUBEs are connected to the LAN network and Gi 0/0/2 are connected to the WAN network.
#conf t
(config)#track 1 interface gi 0/0/1 line-protocol
(config-track)#track 2 interface gi 0/0/2 line-protocol
CUBE-1
 Interface status tracking commands on CUBE-1.
CUBE-2
 Interface status tracking commands on CUBE-2.
Assign the Configured Tracks to Redundancy Group
Assign the configured tracks to group 1 by running these commands on both the CUBE routers:
#conf t
(config)#redundancy
(config-red)#
(config-red)#application redundancy
(config-red-app)#group 1
(config-red-app-grp)#track 1 shutdown
(config-red-app-grp)#track 2 shutdown
CUBE-1
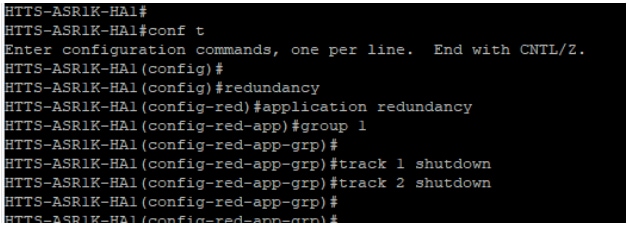 Assign the tracked interfaces to the redundancy group on CUBE-1.
CUBE-2
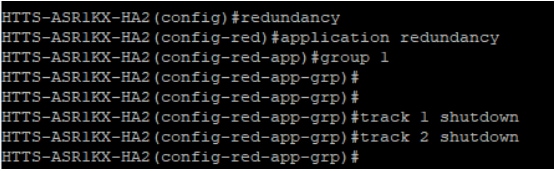 Assign the tracked interfaces to the redundancy group on CUBE-2.
Configuring the Virtual IP (VIP) on the LAN Side of Both CUBEs
These commands help configure the VIP for the LAN side of the CUBEs
(config)#interface GigabitEthernet0/0/1
(config-if)#description VLAN-1900 LAN side
(config-if)#ip address 10.88.11.184 255.255.255.0
(config-if)#redundancy rii 1
(config-if)#redundancy group 1 ip 10.88.11.185 exclusive
CUBE-1
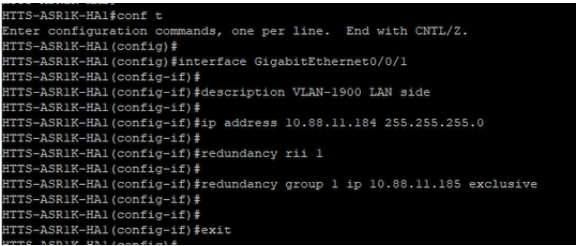 LAN side Virtual IP (VIP) configuration on CUBE-1.
CUBE-2
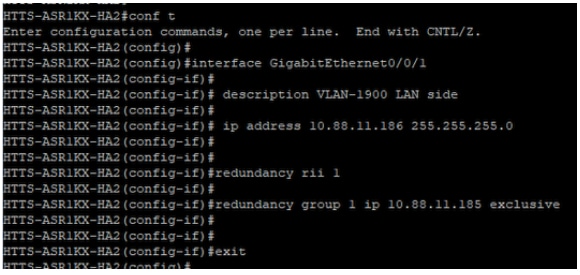 LAN side Virtual IP (VIP) configuration on CUBE-2.
Configuring the Virtual IP (VIP) on the WAN Side of both CUBEs
These commands help configure the VIP for the WAN side of the CUBEs:
(config)#interface GigabitEthernet0/0/2
(config-if)#description VLAN-1967 WAN side
(config-if)#ip address 10.201.251.176 255.255.255.224
(config-if)#redundancy rii 2
(config-if)#redundancy group 1 ip 10.201.251.179 exclusive
CUBE-1
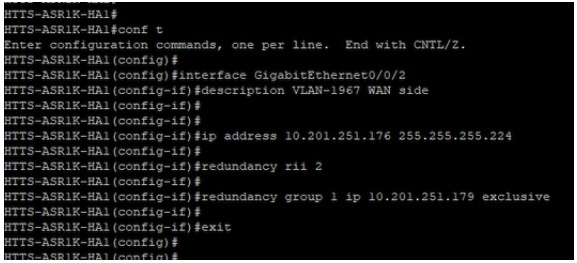 WAN side Virtual IP (VIP) configuration on CUBE-1.
CUBE-2
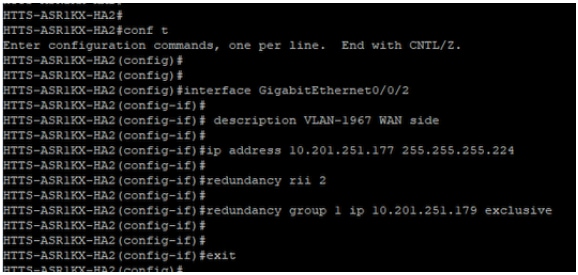 WAN side Virtual IP (VIP) configuration on CUBE-2.
Enable CUBE Redundancy
Enable CUBE Redundancy on both the routers by running these commands.
#conf t
Enter configuration commands, one per line. End with CNTL/Z.
(config)#
(config)#voice service voip
(conf-voi-serv)#redundancy-group 1
(conf-voi-serv)#
(conf-voi-serv)#exit
(config)#
(config)#ip rtcp report interval 3000
(config)#
(config)#gateway
(config-gateway)#media-inactivity-criteria all
(config-gateway)#
(config-gateway)#timer receive-rtcp 5
(config-gateway)#
(config-gateway)#timer receive-rtp 86400
(config-gateway)#
CUBE-1
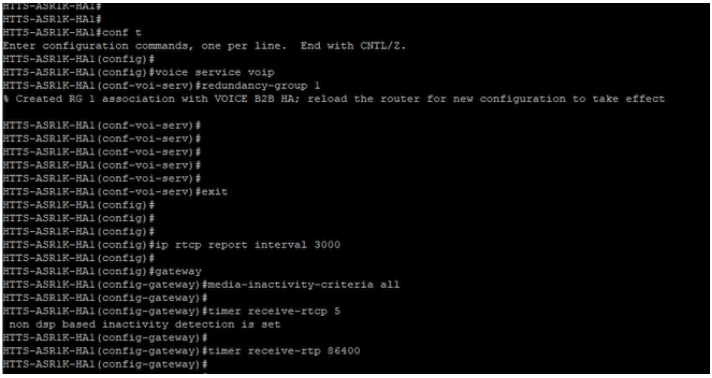 Enable CUBE Redundancy on CUBE-1.
CUBE-2
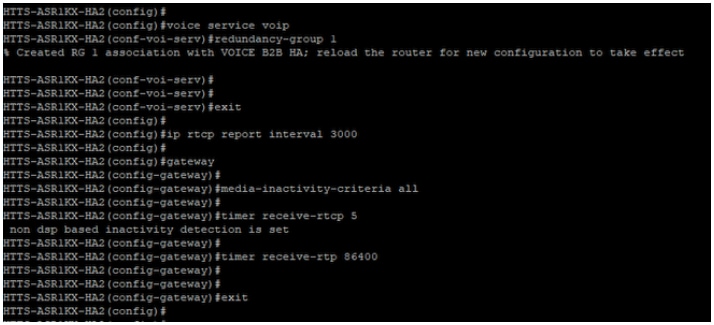 Enable CUBE Redundancy on CUBE-2.
Save the Configuration and Reboot both CUBEs
After enabling redundancy, you must reload both routers. Before the reload, save the configurations.
CUBE-1
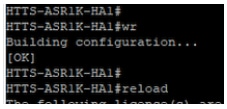 Save the configuration and reboot the CUBE-1.
CUBE-2
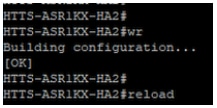 Save the configuration and reboot the CUBE-2.
Verify
You can validate the CUBE HA by running this show command:
#show redundancy application group 1
CUBE-1
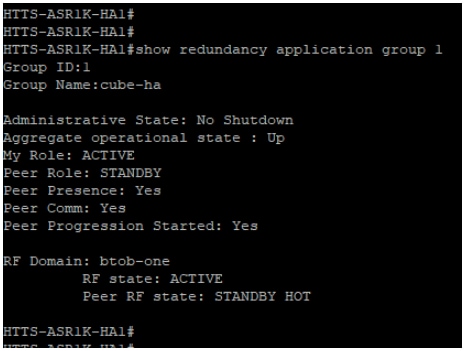 Output of the command 'show redundancy application group 1' from CUBE-1.
CUBE-2
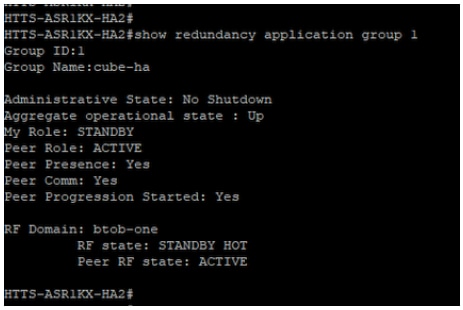 Output of the command 'show redundancy application group 1' from CUBE-2.
You can check the Virtual IP (VIP)'s status by running this show command:
#show redundancy application if-mgr group 1
For the active CUBE, the VIP status is shown as 'no shut' and the standby CUBE VIP status is shown as 'shut'.
CUBE-1
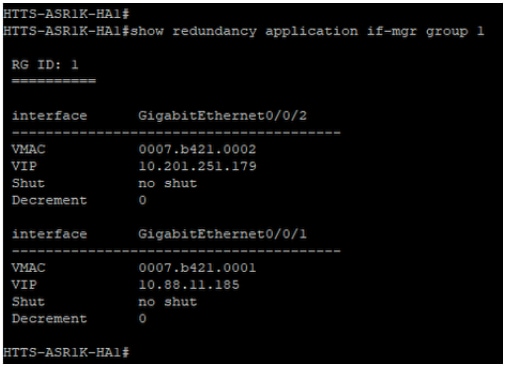 Output of the command 'show redundancy application if-mgr group 1' from CUBE-1.
CUBE-2
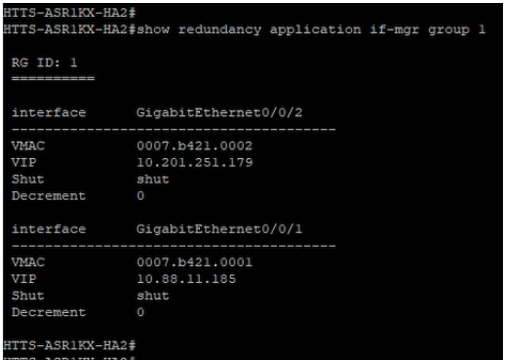 Output of the command 'show redundancy application if-mgr group 1' from CUBE-2.
Troubleshoot
There are currently no specific troubleshooting information available for this configuration.
Related Information
For more information about the CUBE HA, refer to these links:
- Cisco Unified Border Element Configuration Guide Through Cisco IOS® XE 17.5
- Cisco Unified Border Element Configuration Guide - Cisco IOS XE 17.6 Onwards
- Configure High Availability for CUBE
Revision History
| Revision | Publish Date | Comments |
|---|---|---|
2.0 |
07-Aug-2026
|
Updated Introduction, spelling, grammar, inserted horizontal lines to separate sections for readability, updated alt text, fixed CCW errors. |
1.0 |
07-Feb-2024
|
Initial Release |

 Feedback
Contact Cisco
- Open a Support Case

- (Requires a Cisco Service Contract)