Configure Proxy WebRTC With CMS over Expressway with Dual Domain
Available Languages
Download Options
Bias-Free Language
The documentation set for this product strives to use bias-free language. For the purposes of this documentation set, bias-free is defined as language that does not imply discrimination based on age, disability, gender, racial identity, ethnic identity, sexual orientation, socioeconomic status, and intersectionality. Exceptions may be present in the documentation due to language that is hardcoded in the user interfaces of the product software, language used based on RFP documentation, or language that is used by a referenced third-party product. Learn more about how Cisco is using Inclusive Language.
Contents
Introduction
This document describes an example configuration of the proxy Web Real-Time Communication (webRTC) for Cisco Meeting Server (CMS) through Expressway with different internal and external domain.
Prerequisites
Requirements
Cisco recommends you have knowledge of these topics:
- CMS single combined deployment version 2.1.4 and above
- Expressway C and Expressway E version X8.9.2 and above
- Callbridge and webbridge configured on CMS
- Mobile and Remote Access (MRA) enabled on the Expressway pair
- Traversal Using Relay NAT (TURN) option key added to the Expressway-E
- External resolvable Domain Name Server (DNS) record for webbridge URL, for external domain
- Internal resolvable DNS record for CMS IP address from external to internal domain
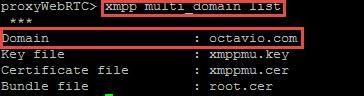
- Extensible Messaging and Presence Protocol (XMPP) multi domain configured on CMS, for internal and external domain
- TCP Port 443 opened on Firewall from the Public internet to the Expressway-E's Public IP address
- TCP and UDP Port 3478 opened on Firewall from Public internet to the Expressway-E's Public IP address
- UDP port range 24000-29999 opened on Firewall to and from the Expressway-E's Public IP address
Components Used
The information in this document is based on these software and hardware versions:
- CMS single combined deployment version 2.2.1
- Expressway-C and Expressway-E with dual Network Interface Card (NIC) and static Network Address Translation (NAT) Software version X8.9.2
- Postman
The information in this document was created from the devices in a specific lab environment. All of the devices used in this document started with a cleared (default) configuration. If your network is live, make sure that you understand the potential impact of any command.
Configure
Network Diagram
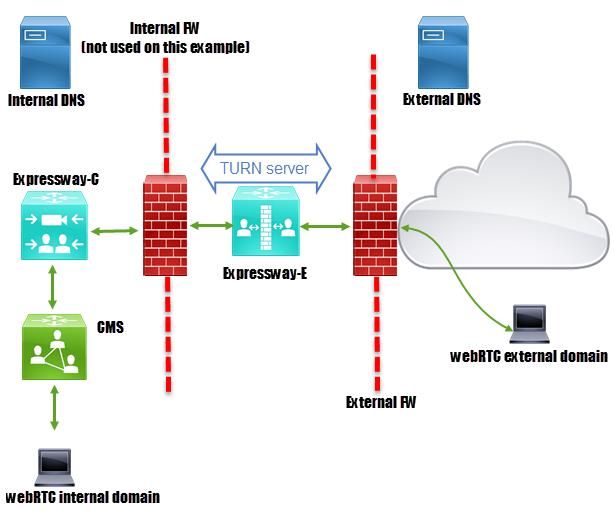
Technical Information
|
Internal domain |
cms.octavio.local |
|
External domain |
octavio.com |
|
CMS IP address |
172.16.85.180 |
|
Expressway-C IP address |
172.16.85.167 |
|
Expressway-E LAN1 IP address (internal) |
172.16.85.168 |
|
Expressway-E LAN2 IP address (external) |
192.168.245.61 |
|
Static NAT IP address |
10.88.246.156 |
DNS Configuration
Internal DNS Configuration


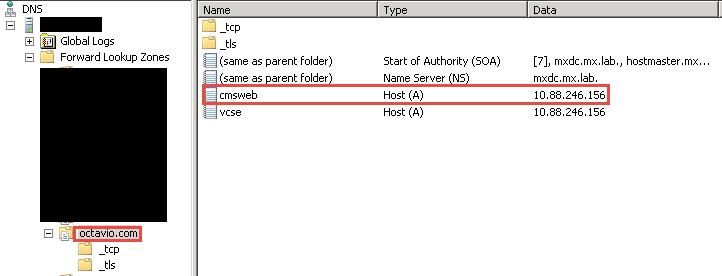
External DNS Configuration
The external DNS must have the webbridge URL which resolves to the Static NAT IP address of the Expressway-E as shown in the image.
CMS, Callbridge, Webbridge and XMPP Configuration
Step 1. You must have the callbridge license activated. The image shows a callbridge license that is active.

For more licensing information:
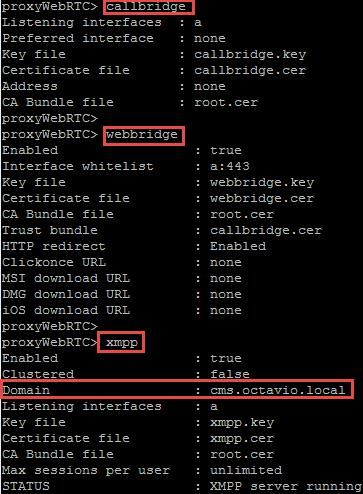
Step 2. Enable callbridge, webbridge and XMPP through MMP as shown in the image.
Follow this link for a detail process on how to enable them:
Follow this link for a detail process on how to create a certificate:
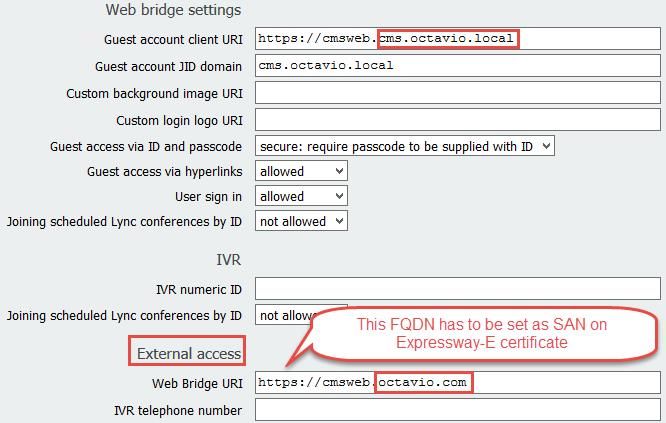
Step 3. Navigate to the CMS web page on Configuration > General and configure the internal and external URL for the webbridge as shown in the image.
Note: The CMS must be configured with at least one Space.
An example of a configured Space on CMS as shown in the image.

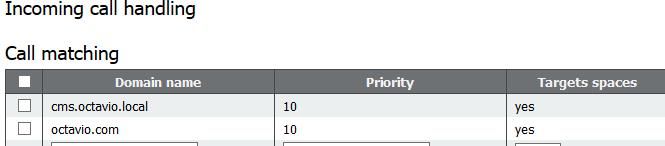
Note: The incoming calls must be configured for the internal and external domains
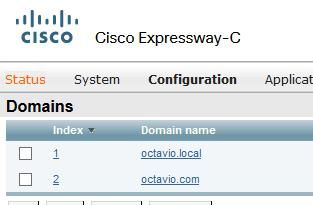
An example of configured domains for incoming call handling is as shown in the image.
TURN Configuration
Step 1. TURN must be configured by API through Postman. This command is used through all the configuration.
https://<cms_web_admin_address>:<web_admin_port>/api/v1/turnServers
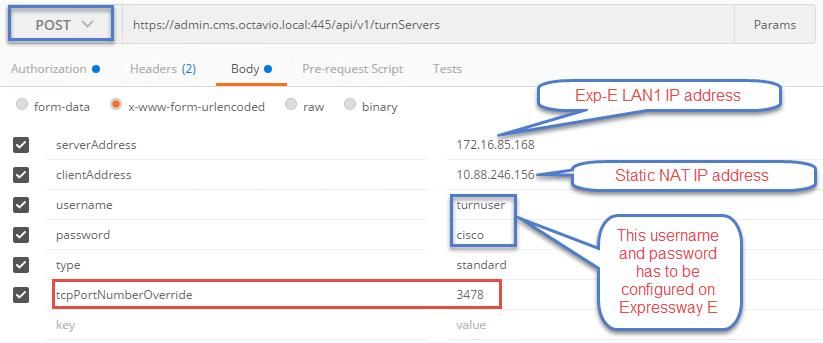
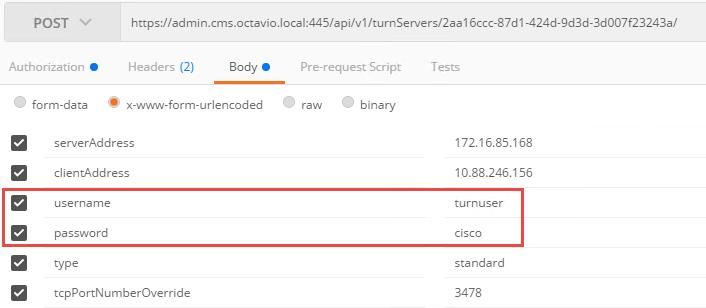
Step 2. Use the POST method and navigate to Body either to view the TURN server parameters or edit them. The parameters configured to the TURN server are as shown in the image.
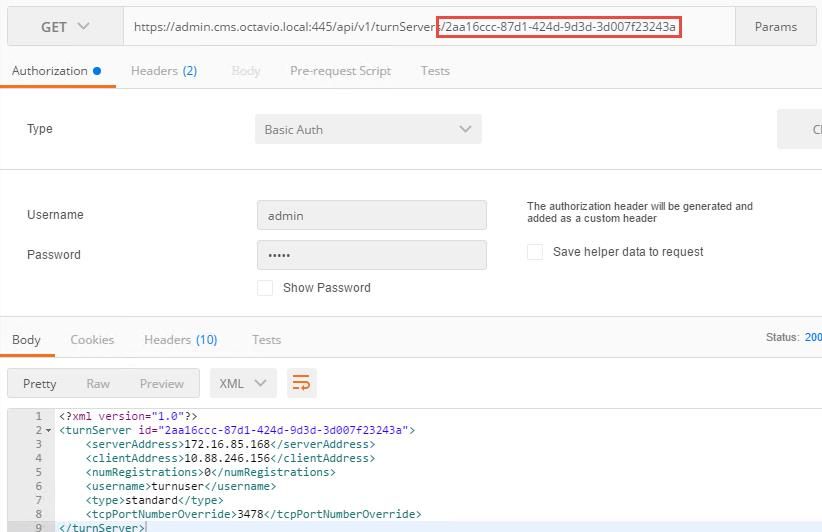
Step 3. Check the status of the TURN server configuration by running the method GET and copy the server ID. The ID that must be copied is as shown in the image.
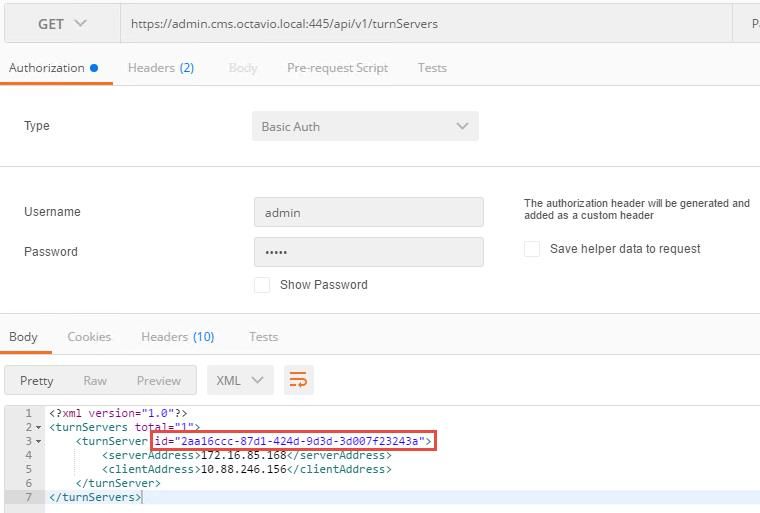
Step 4. Copy the ID at the end of the API command and use the GET method in order to see the TURN server information as shown in the image.
Note: The information won't show the server's password.
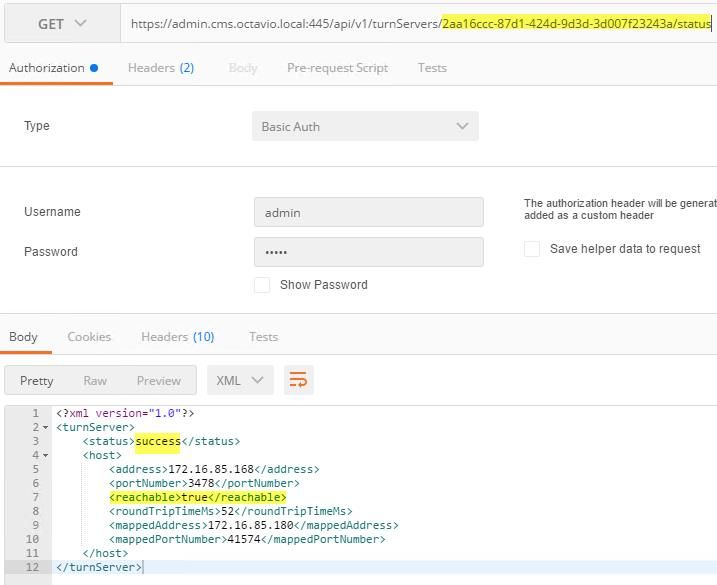
Step 5. Click send to get the server status. An example of a successful configuration as shown in the image.
Expressway-C and E Configuration
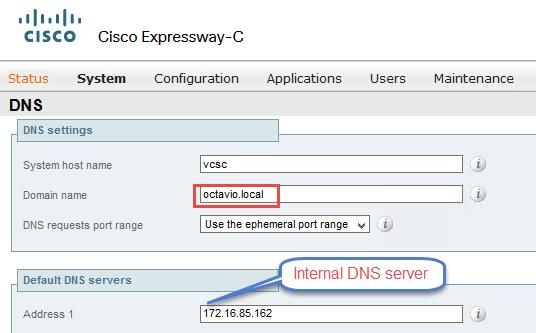
Step 1. The expressway-C must have the internal domain (octavio.local) and the Expressway-E must have the external domain (octavio.com) configured as shown in the image.
Step 2. MRA must be enabled on both Expressway C and E as shown in the image.

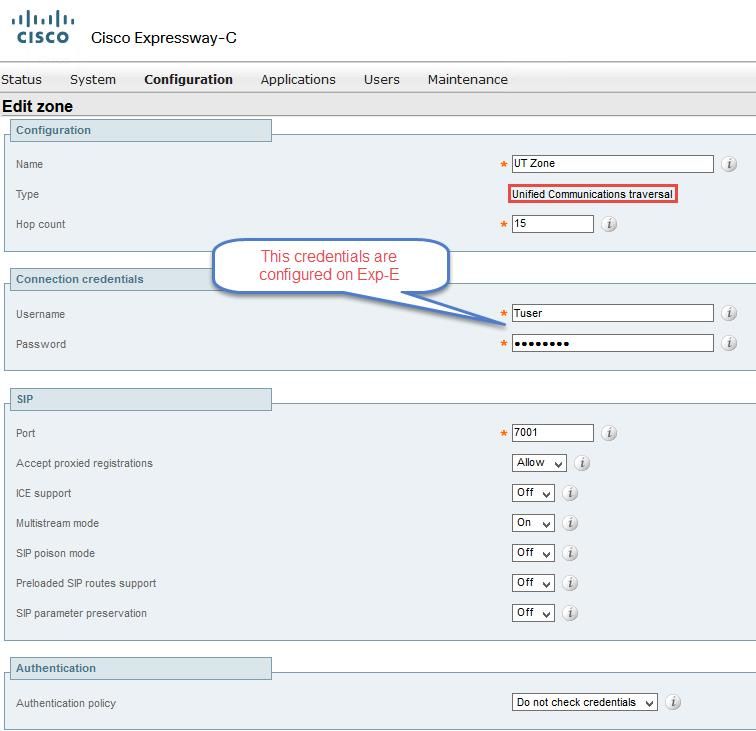
Step 3. Create a Unified Communication traversal zone between the Expressway-C and E as shown in the image.
Configuration on Expressway-C
Step 1. Configure the internal and external domain on the Expressway-C as shown in the image.
Step 2. Enable the Cisco Meeting configuration. Navigate to Configuration > Unified Communications > Cisco Meeting Server. Configure the external webbridge URL on the Guest account client URI field as shown in the image.
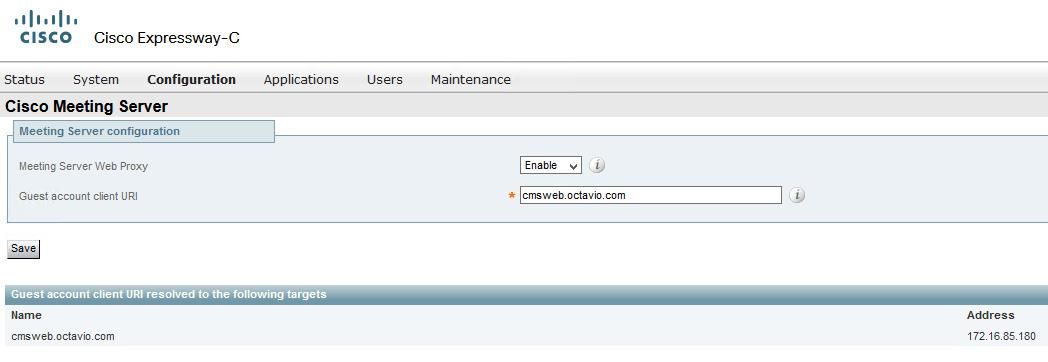
Note: The internal DNS should resolve the external webbridge URL (cmsweb.octavio.com) to the internal CMS webbridge IP address. In this example case the IP is 172.16.85.180.
The Secure Shell (SSH) tunnels on the Expressway-C must become active after some seconds as shown in the image.

Note:The server must have a server certificate and a CA certificate.
Configuration on Expressway-E
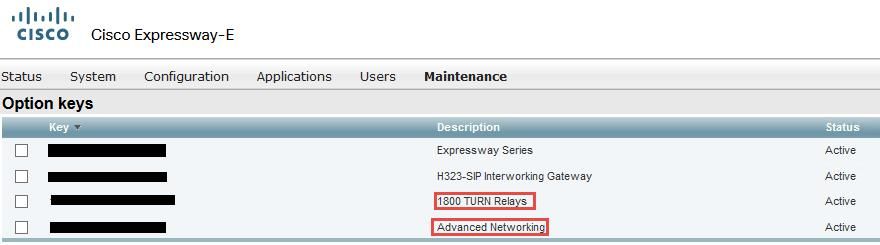
Step 1. The expressway-E must have a TURN license as shown in the image.
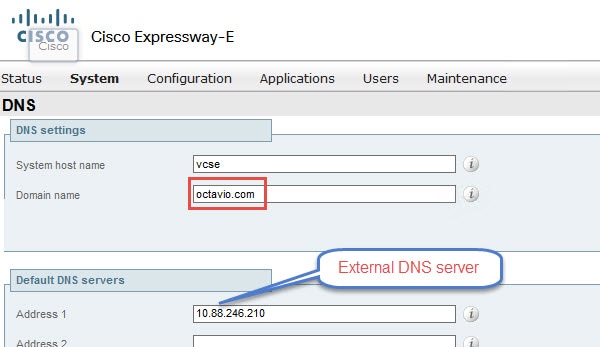
Step 2. The Expressway-E must be configured with the external domain as shown in the image.
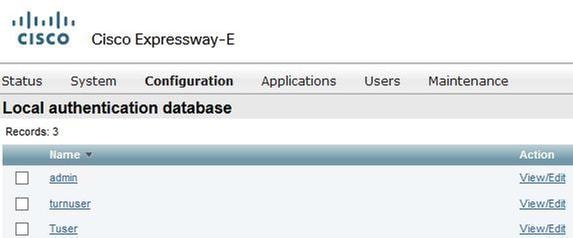
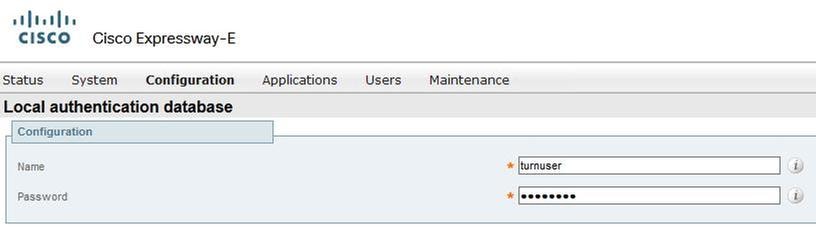
Step 3. Create users for the TURN server and for the Unified Communication traversal zone as shown in the image.
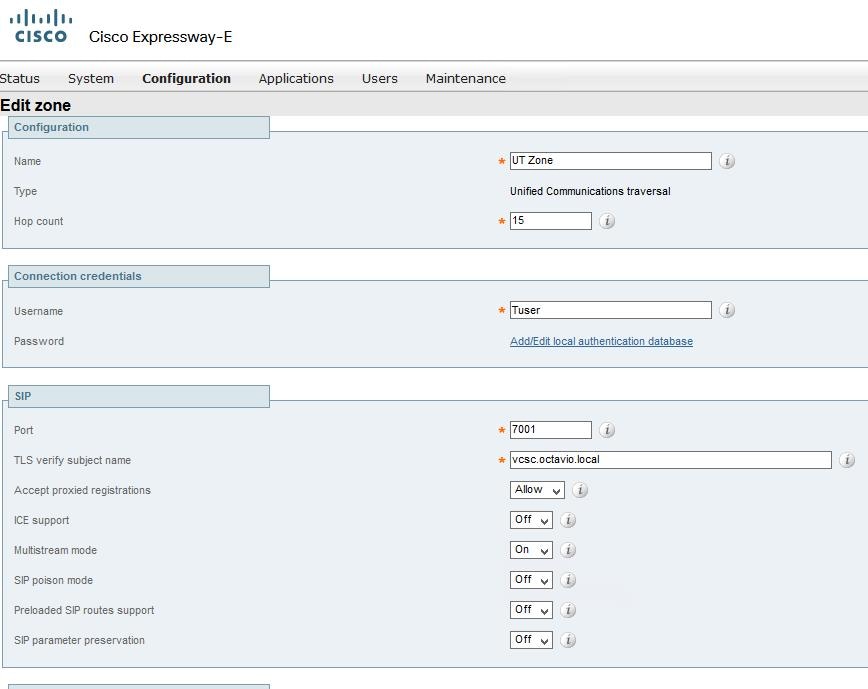
Step 4. Create a Unified Communication traversal zone as shown in the image.
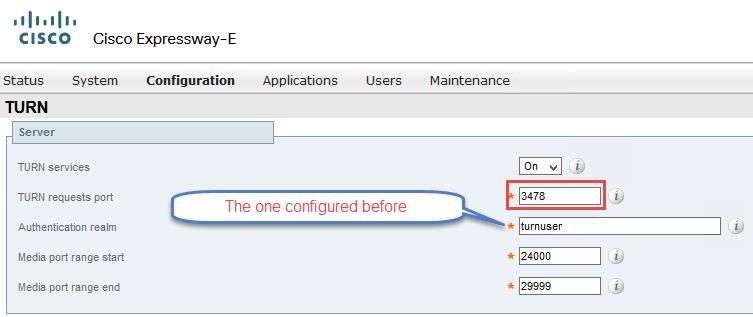
Step 5. Configure the TURN server. Navigate to Configuration > Traversal > TURN as shown in the image.
Note: The TURN request must be to the port 3478 as it is the port where the web client requests the TURN connection.
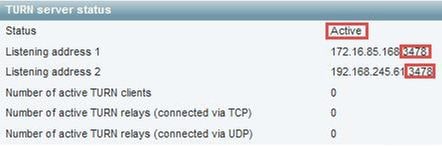
Once the Turn come up, the status shows Active as shown in the image.
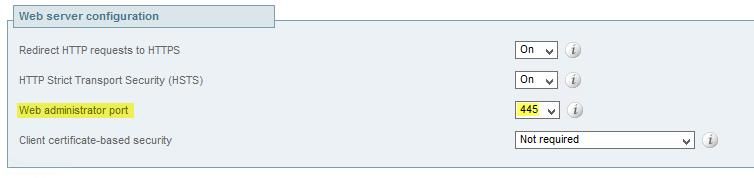
Step 6. Navigate to System > Administration. The webRTC client request access on port 443, for this reason the administration port of the Expressway-E must be changed to a different one, in this example case it is changed to 445 as shown in the image.
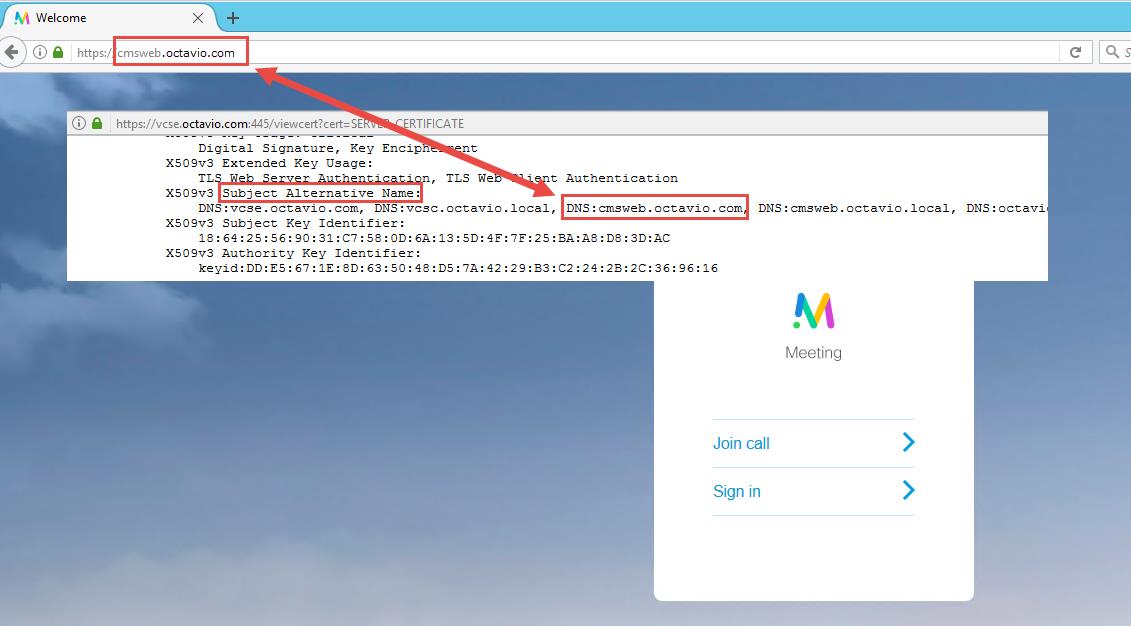
Step 7. Certificate creation for the Expressway-E: the webbridge URL must be added as a SAN on the server certificate as shown in the image.

Verify
Use this section to confirm that your configuration works properly.
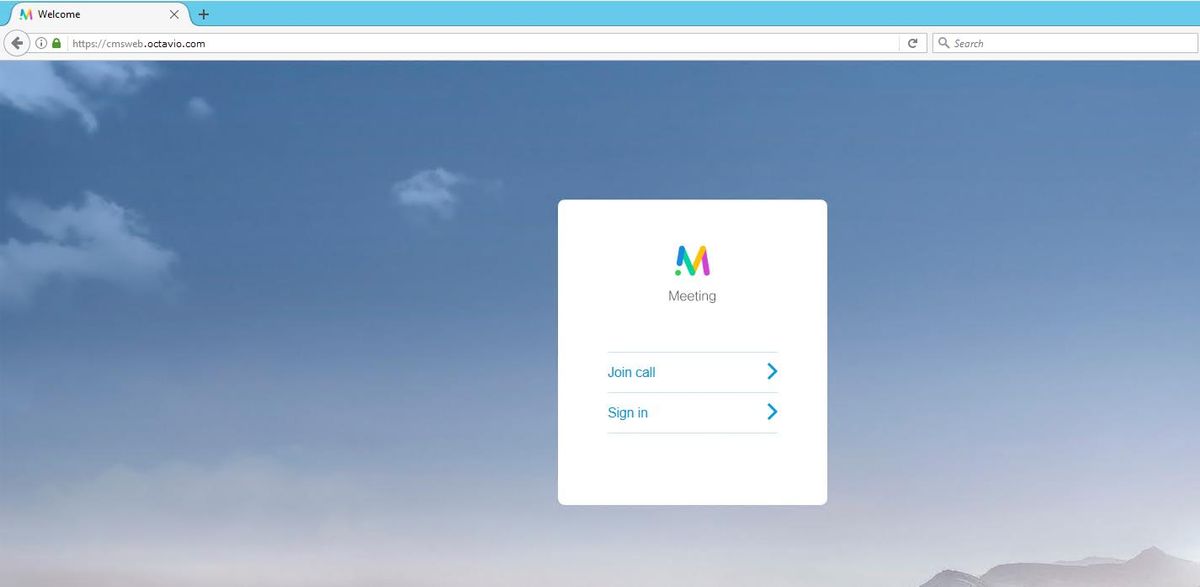
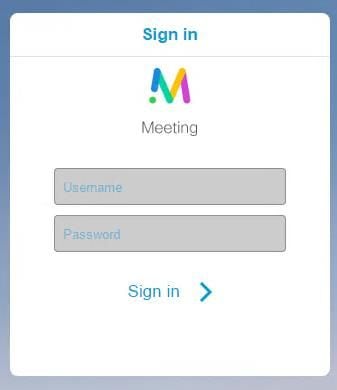
Step 1. Select a supported web browser and enter the external webbridge URL, you must see the next screen as shown in the image.
Note: You can find a list of supported browsers and versions on the link: https://kb.acano.com/content/2/4/en/what-versions-of-browsers-do-we-support-for-webrtc.html?highlight=html%5C-5%20compliant%20browsers#content
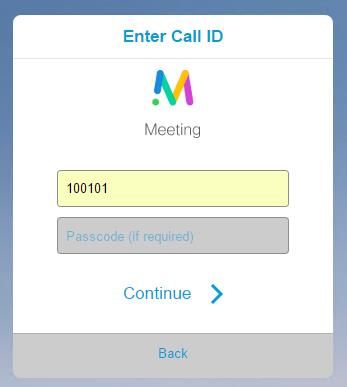
Step 2. Select Join call and enter the Space ID previously configured as shown in the image.
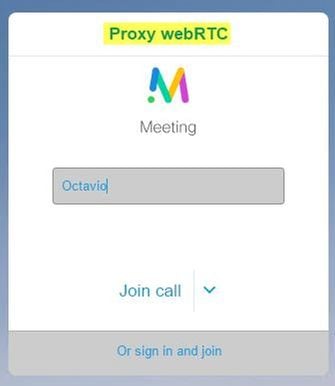
Step 3. Click continue and enter your name, at this point you must see the name of the space you’re going to join, in this case the space name is Proxy webRTC. Click Join call as shown in the image.
Step 4. Join with another device and you must see both devices connected in the conference as shown in the image.

Troubleshoot
This section provides information you can use to troubleshoot your configuration.
Join Call Button is Not Shown
The Join call button is not shown when you open the webbridge page and you see the error shown in the second image when you enter to the CMS web page as shown in the image.

The problem happens when the webbridge does not communicate correctly with the call bridge.
Solution
- Check the webbridge URL is correctly configured on the CMS admin webpage. Navigate to Configuration > General for this purpose.
- The webbridge and callbridge must trust each other, check the trust bundle is added to the webbridge configuration as shown in the images:
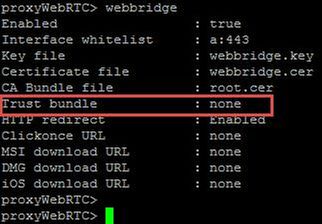
Note: The trust bundle is the call bridge certificate.
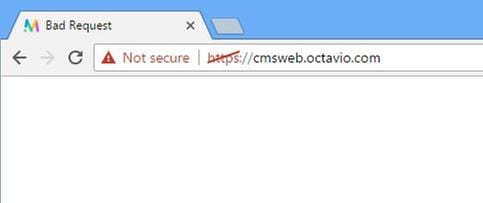
WebRTC Page Shows 'Bad Request'
Solution
- Check the correct Guest account client URI is configured on Expressway-C. Navigate to Configuration > Unified Communication > Cisco Meeting Server for this purpose.
If the internal URL is configured in the Guest account client URL, the Expressway-C will resolve it since there is a record created on the DNS server, but this can cause the "bad request" error message in the web browser. In this example case, the internal URL is configured in order to show the error as shown in the image.

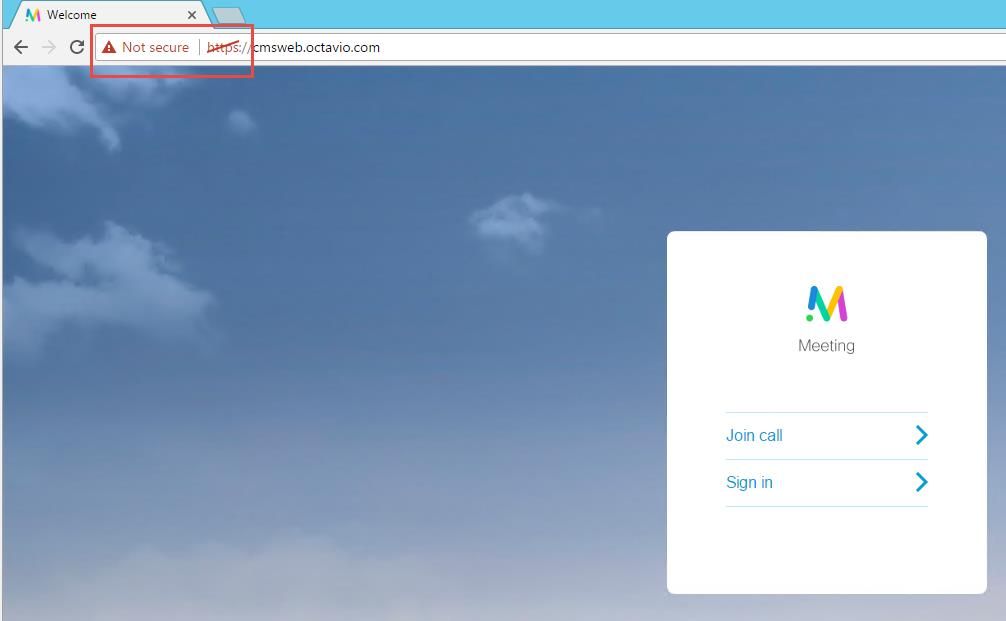
WebRTC Client Shows Unsecure Connection
Solution
- The certificate is self-signed which causes the server to not trust the source. Change the certificate on the Expressway-E to a supported third party certificate authority.
- Check the external webbridge URL is added as a SAN on the Expressway-E server certificate as shown in the image.
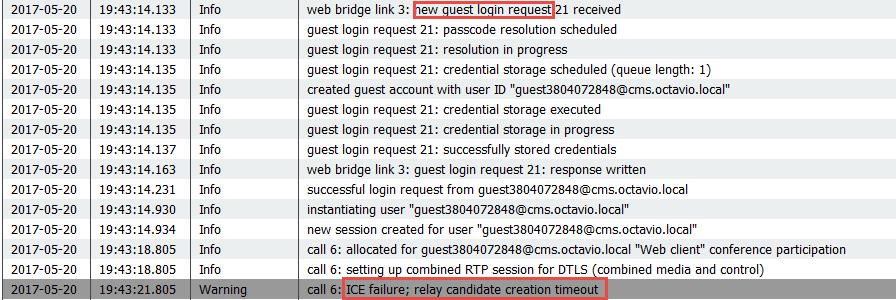
WebRTC Client Connects but Never Gets Connected and Then it Timed Out And Disconnects
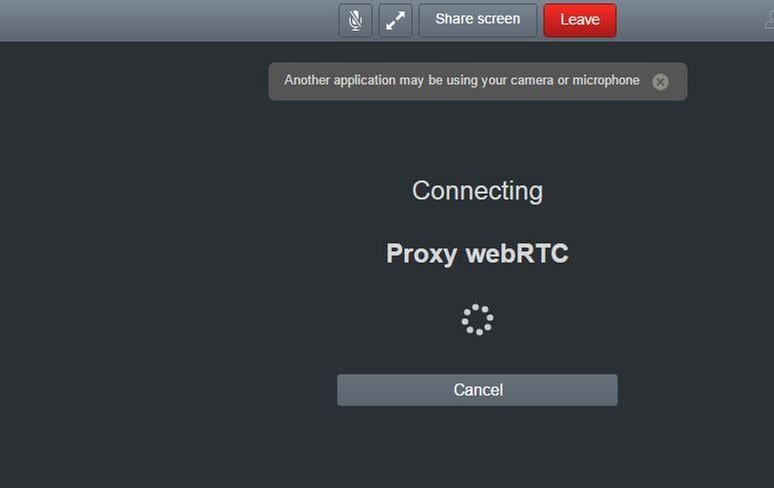
The TURN server username or password are incorrectly configured either on the expressway-E or in the CMS via API. The logs contains the errors shown in the image.
The error can be confirmed with a packet capture too. Run Wireshark on the PC where the webRTC client runs. Once you have the packet capture, filter the packets by STUN. You must see the errors shown in the image.

The PC sends an Allocate Request and the Expresssway NAT address answers with 'Integrity check failure' message.
Solution
In order to fix the error, review the username and password. They must be correctly configured on the TURN server parameters as shown in the images.
Contributed by Cisco Engineers
- Octavio MiralrioCisco TAC Engineer
 Feedback
Contact Cisco
- Open a Support Case

- (Requires a Cisco Service Contract)