Install or Upgrade to ESXi 8.X on UCS C240 M6SX

Available Languages
Introduction
This document describes the installation or upgrade to ESXi 8.x on UCS 240 M6 Servers.
Prerequisites
- ESXi - Operating System for VMWare
- UCS - Unified Computing System
- CIMC - Cisco Integrated Management Controller
- vKVM - Virtual Keyboard Video Mouse
- vDVD - Virtual DVD
- ISO - ISO Image
- UEFI - Unified Extensible Firmware Interface
- EULA - End User License Agreement
- VLAN - Virtual Local Area Network
- IPV4 - Internet Protocol version 4
Requirements
There are no specific requirements for this document.
Components Used
The information in this document is based on UCS C240 M6SX server. Cisco Custom image filename = VMware-ESXi-8.0.U2-22380479-Custom-Cisco-4.3.2-c.iso.
The information in this document was created from the devices in a specific lab environment. All of the devices used in this document started with a cleared (default) configuration. If your network is live, ensure that you understand the potential impact of any command.
Configure
1. Download the Cisco Custom Image for ESXi 8.x from Broadcom.
Example of the Download Page:

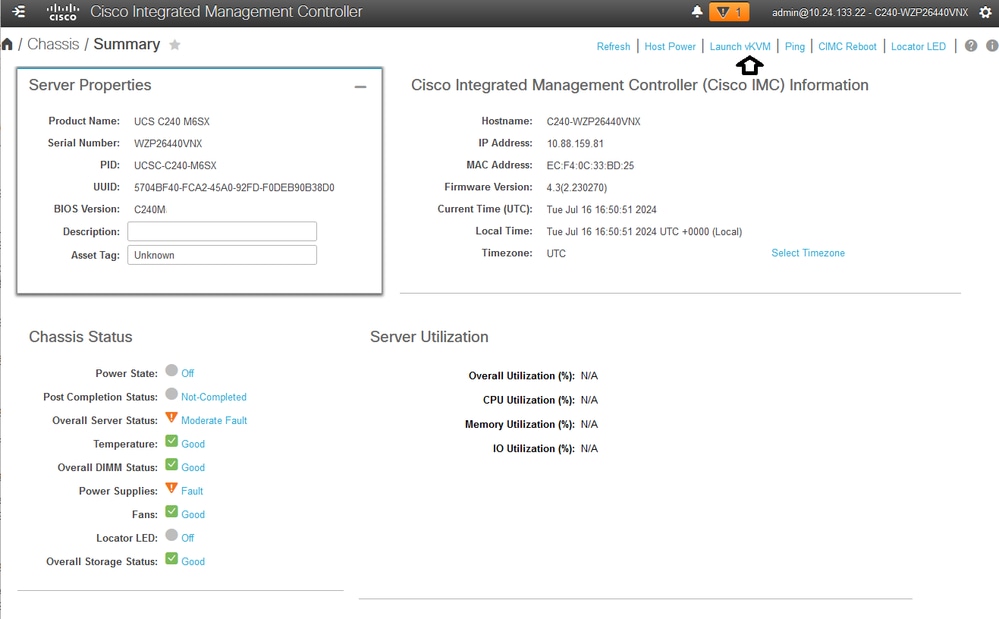
2. From the CIMC page, click Launch vKVM.
3. On the KVM page, click Virtual Media > vKVM-Mapped vDVD.
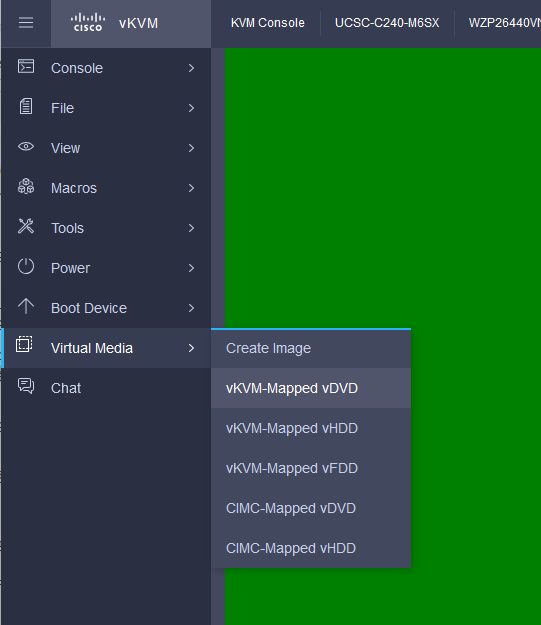 vKVM Mapped vDVD
4. Browse and select the ISO Image Previously Downloaded.
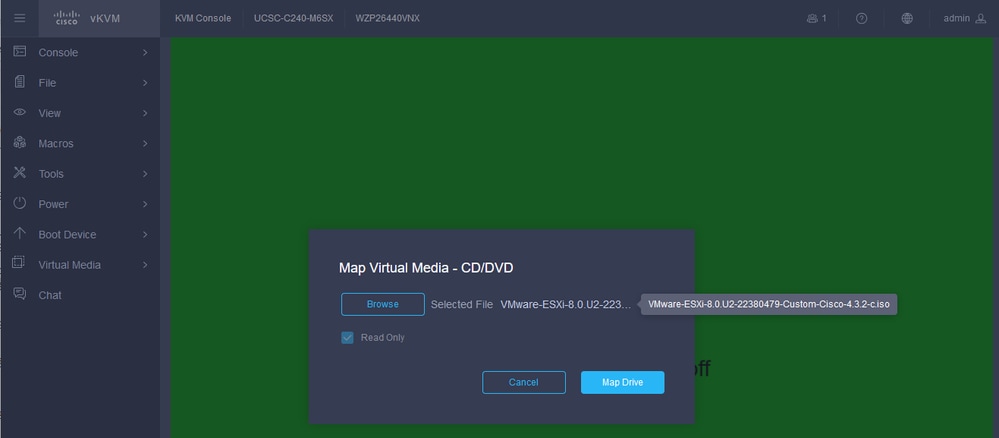 Map Virtual Media
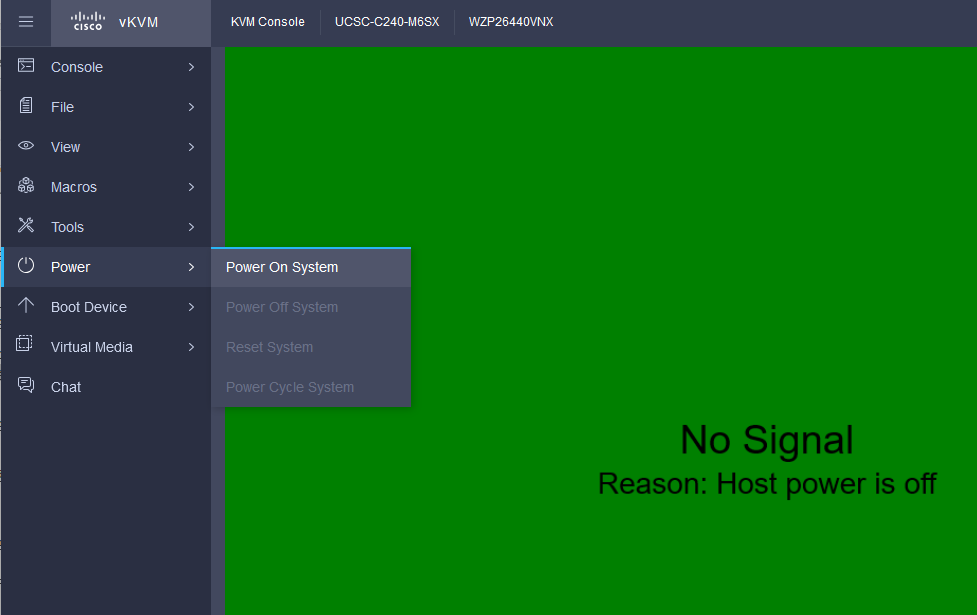
5. Click Power > Power On System.
6. When the server is booting, press F6 to get the Boot Menu.
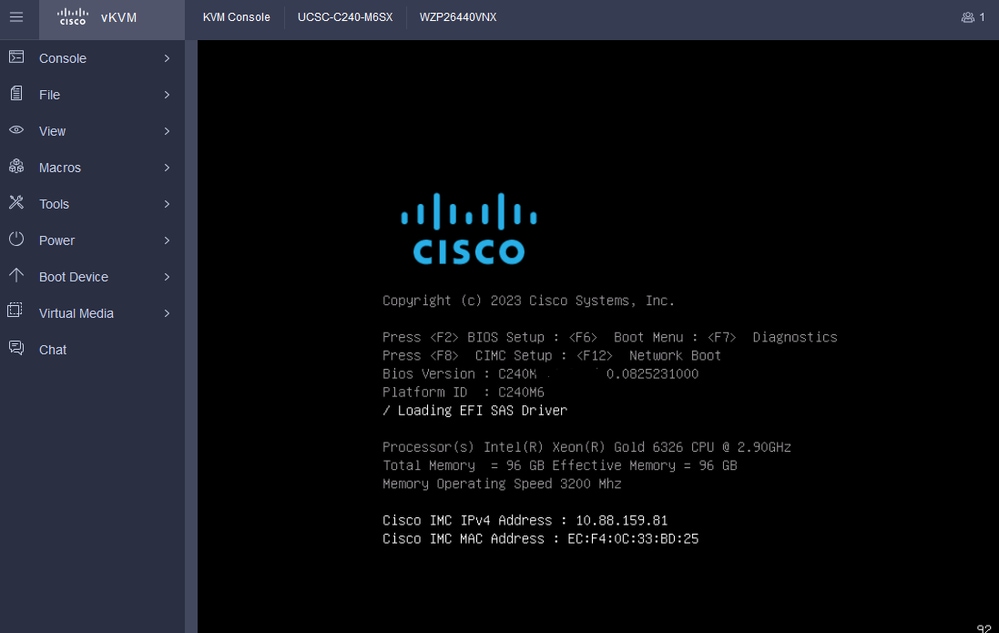
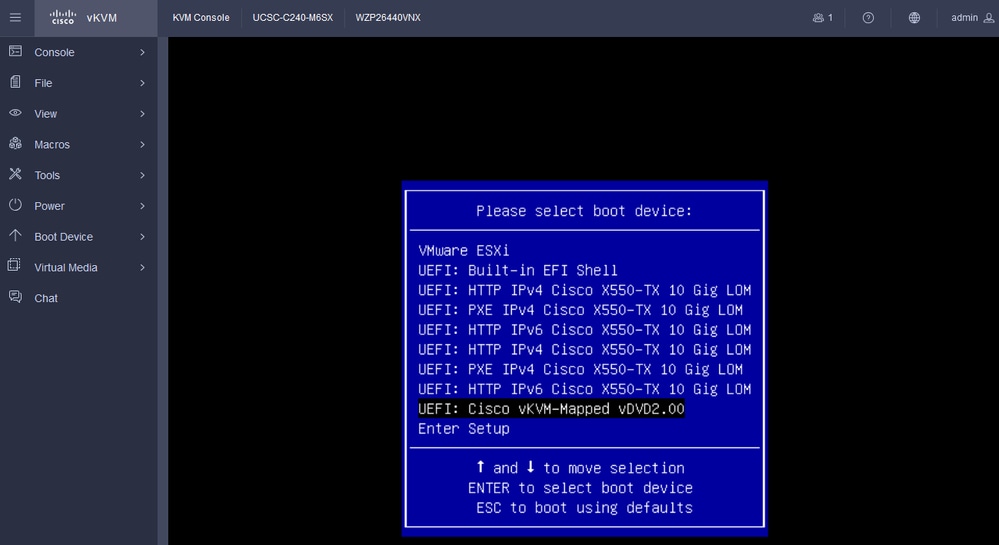
7. At the Boot Menu, select the UEFI: Cisco vKVM-Mapped vDVD2.00.
8. After the selection, ESXi starts loading the Installer.
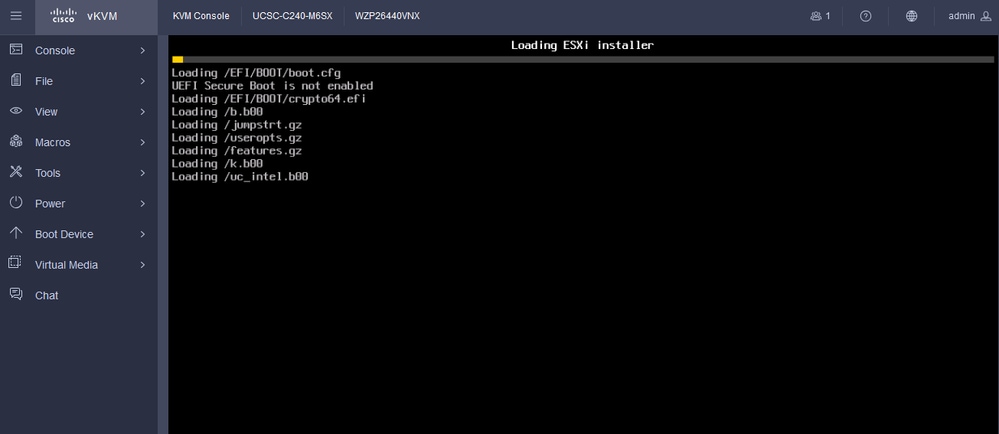 ESXi Installer
9. You are presented with the ESXi Install Welcome Screen to Continue or Cancel. Press Enter to Continue.
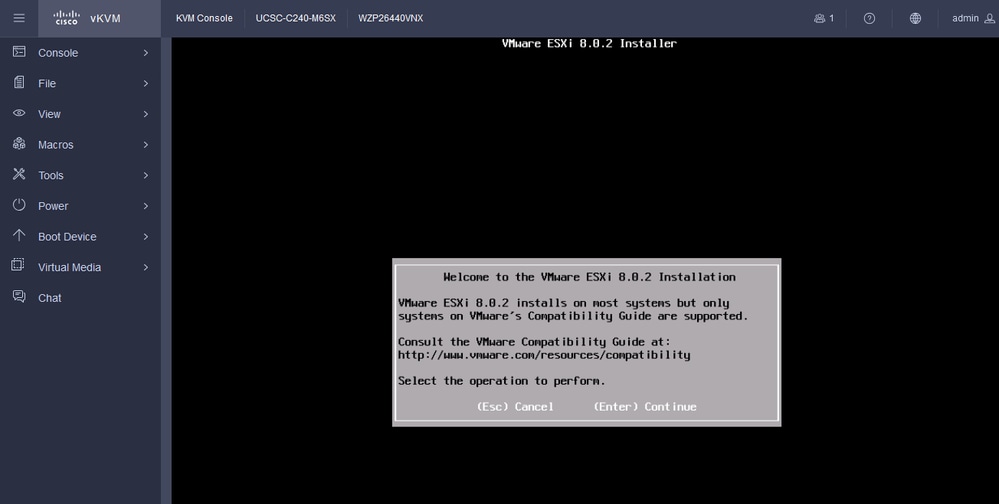 ESXi Welcome Screen
10. After you continue, the EULA Screen is presented. Press F11 to Accept.
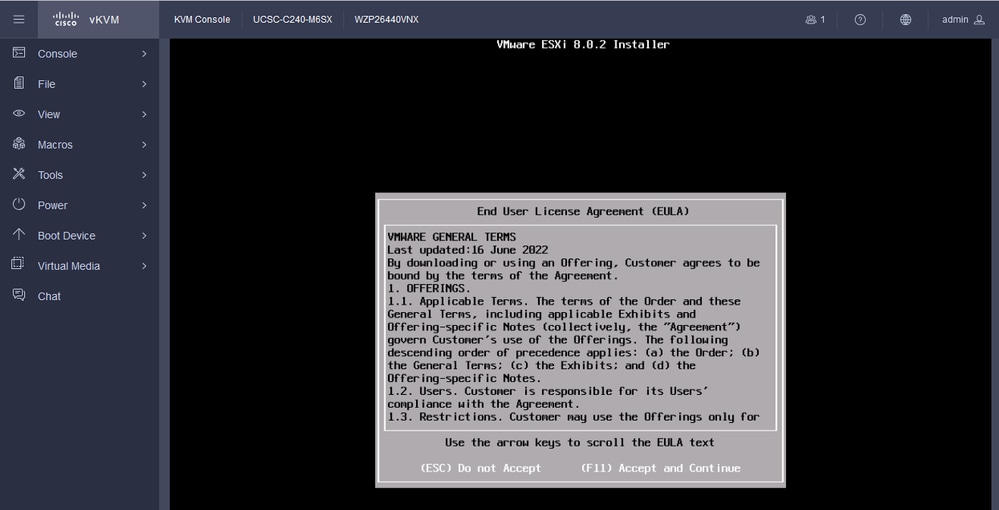 ESXi EULA Screen
11. You are presented with the option to Select the Device to install the ESXi. Select the device and press Enter.
 ESXi RAID Select
12. Once the Device is selected, you are presented with the option to Install or Upgrade ESXi. Choose Install and press Enter.
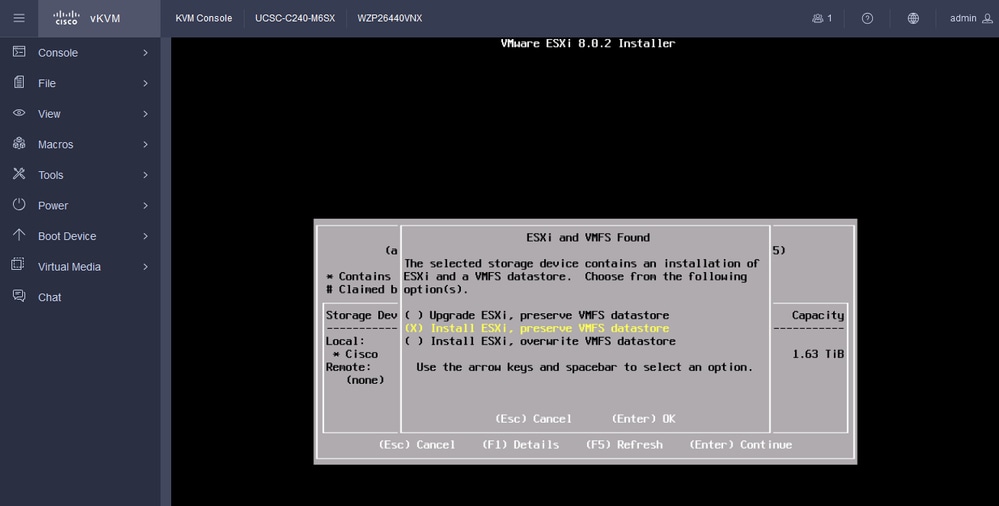 ESXI Install or Upgrade
13. The ESXi Install Keyboard Selection appears. Select your Keyboard Option and press Enter.
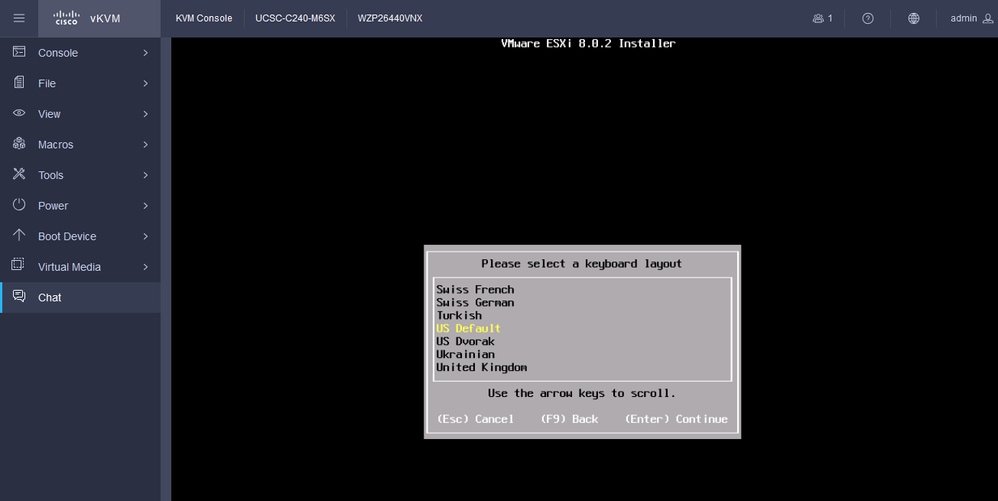 ESXi Keyboard Select
14. You are prompted to Configure the ESXi Root Password. Enter the Password Values, Confirm, and press Enter.
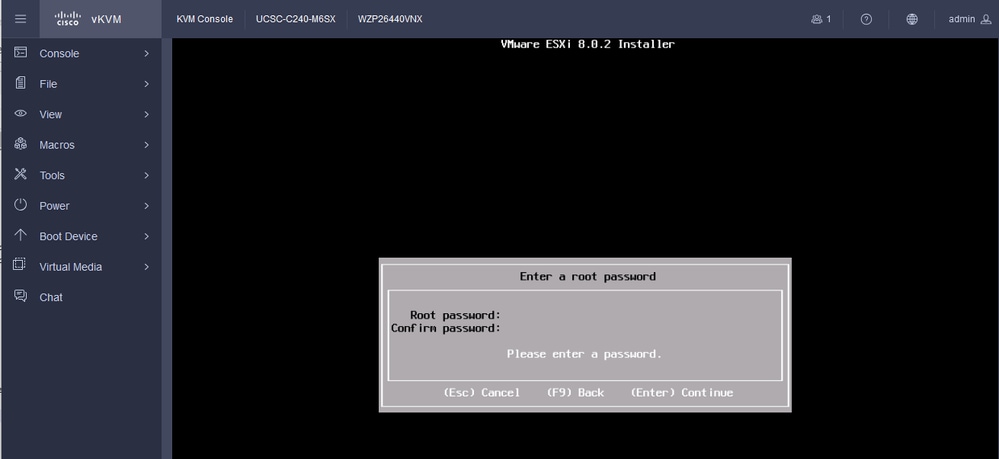 ESXi Password Config
15. Confirm the Install when you press F11.
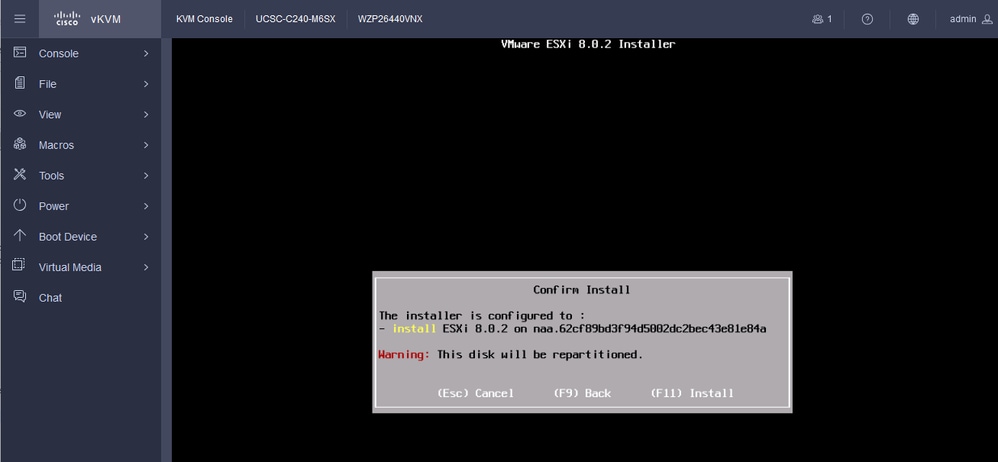 ESXi Confirm Install
16. The install begins and shows In Progress.
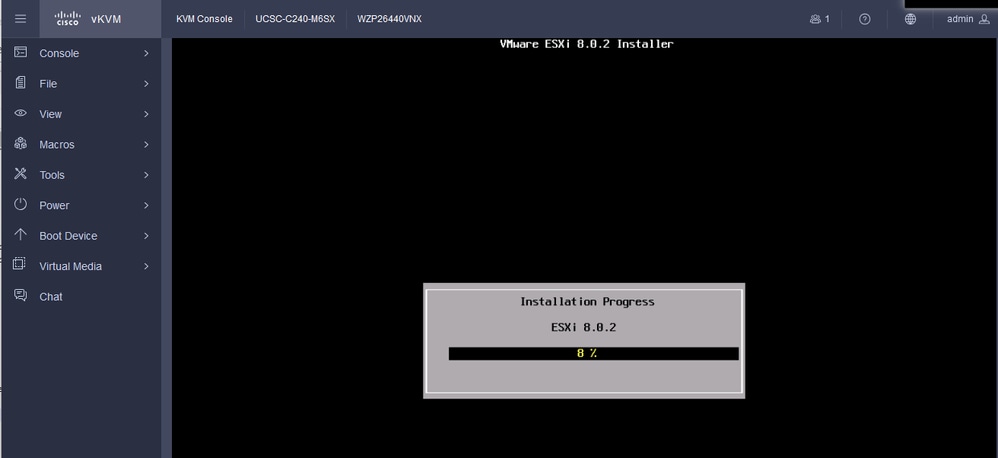 ESXI Install Progress
17. The ESXi Install completes. Press Enter to reboot the Server.
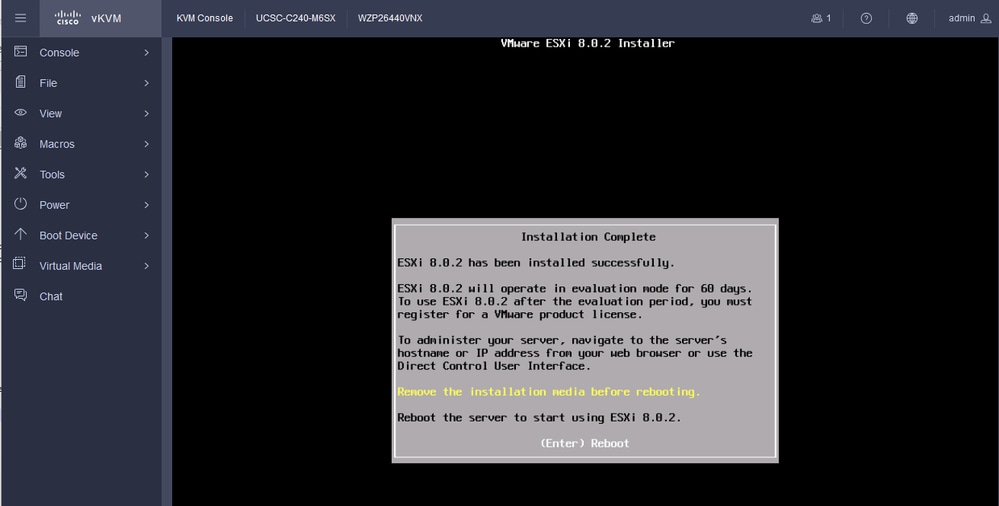 ESXi Install Complete
18. ESXi Ejects the Virtual DVD and Reboots the Server to start for the first time.
 ESXi Server Reboot
19. This is the ESXi Initial Screen after Reboot. Press F2 to Customize System.
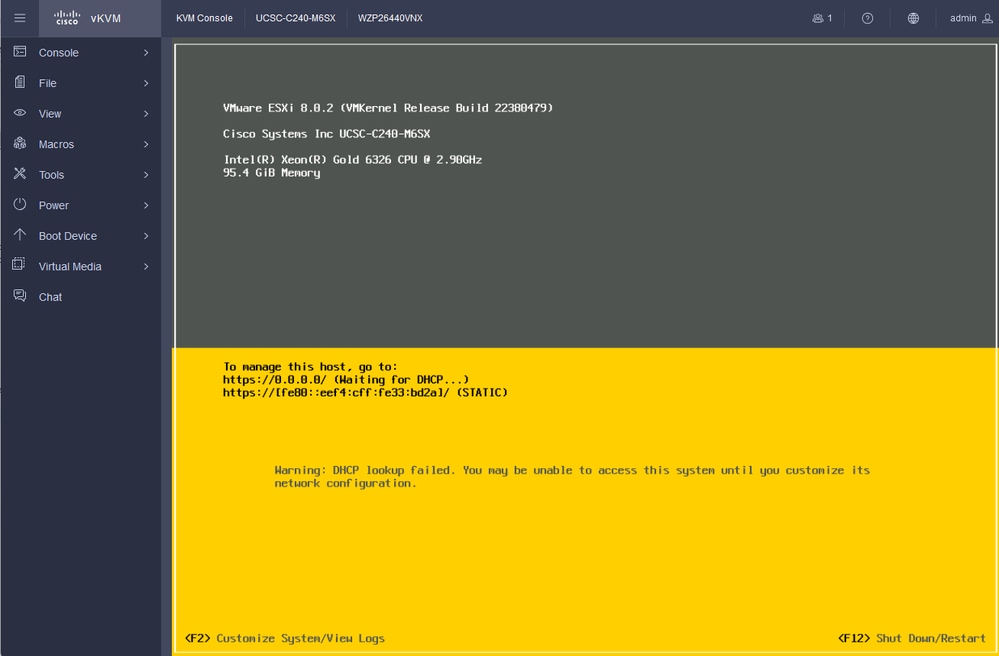 ESXi Initial Screen
20. Enter the values to log in. The password was created at install.
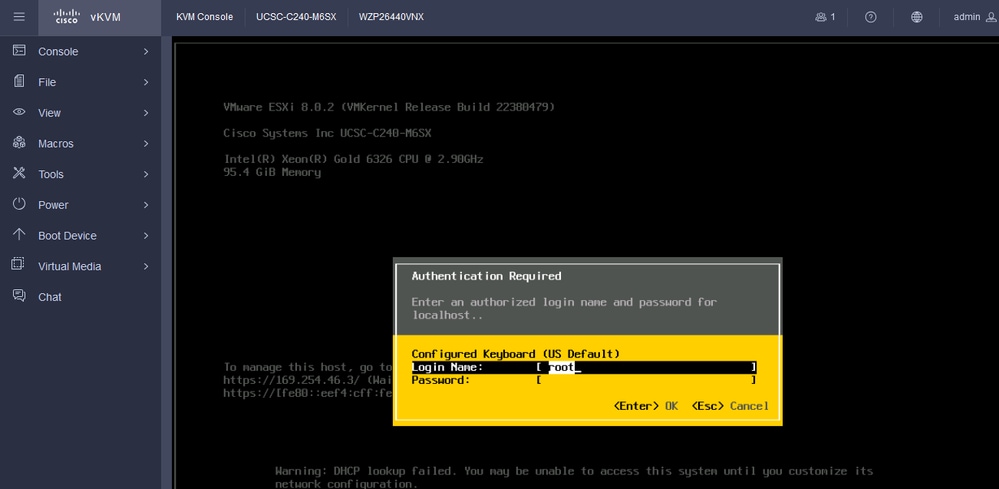 ESXi Log in Screen
21. You are presented with the System Customization. Choose Configure Management Network and press Enter.
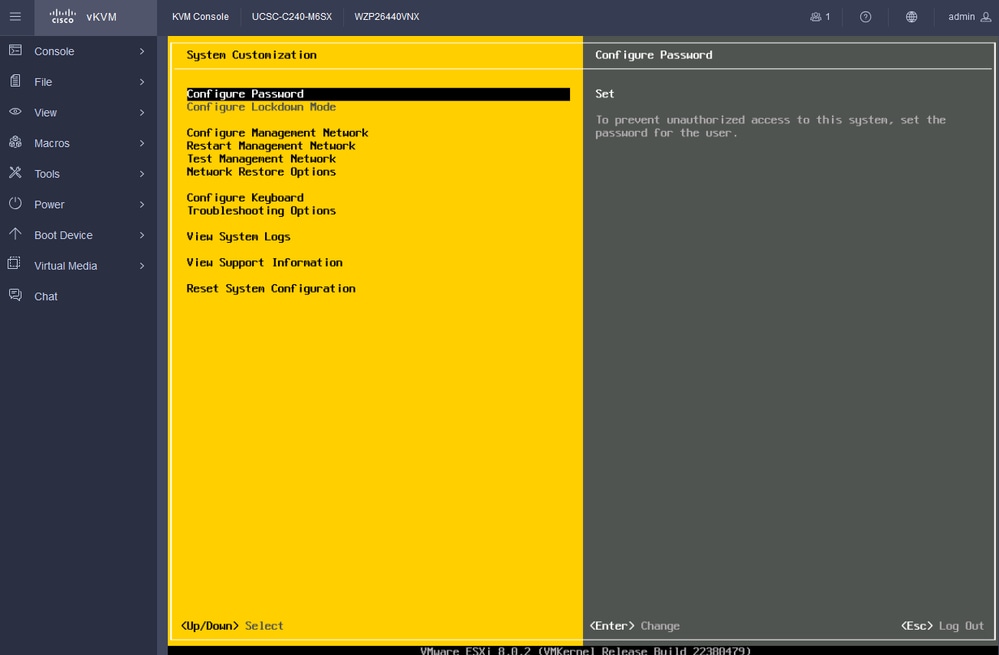 ESXi Configure Management
22. Choose Network Adapters and press Enter.
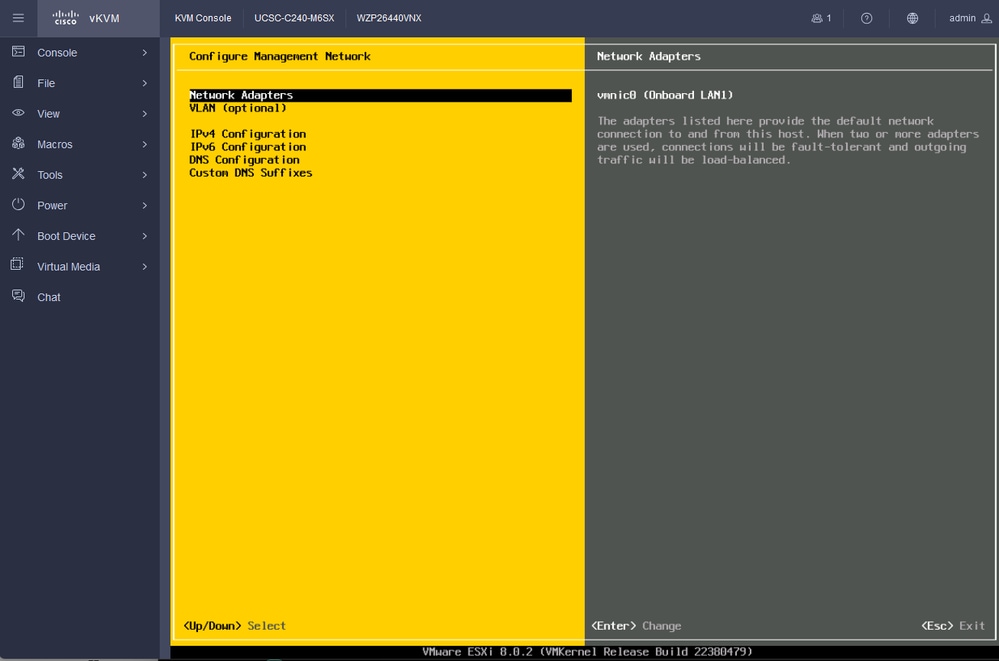 ESXi Management Configuration
23. Select the Network Adapter for Management with the Space Bar and press Enter.
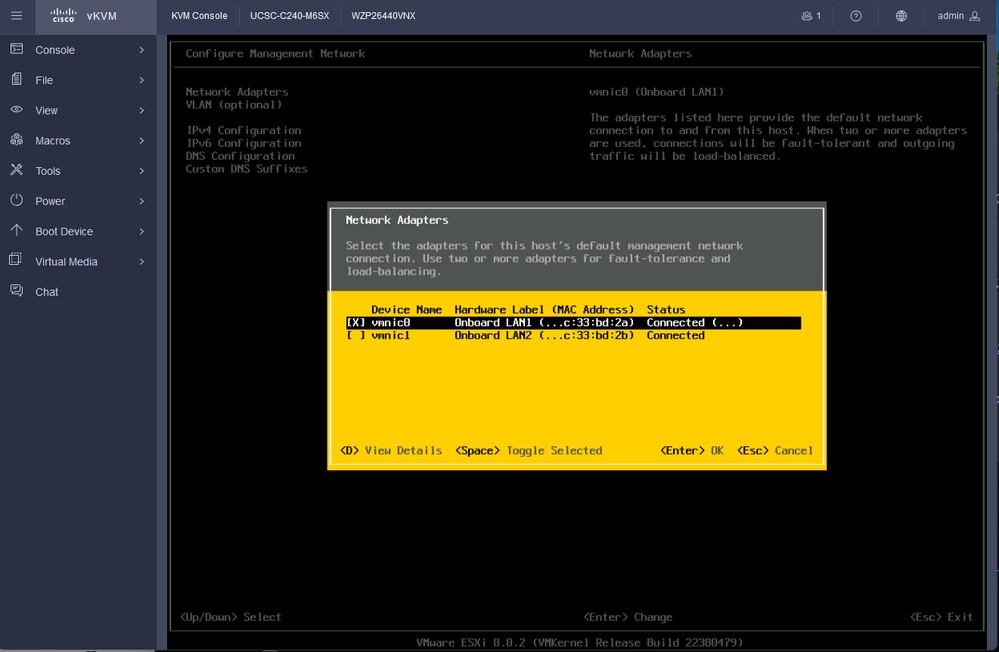 Network Adapter Selection
24. Choose VLAN (optional) and Enter the Values if required, and press Enter.
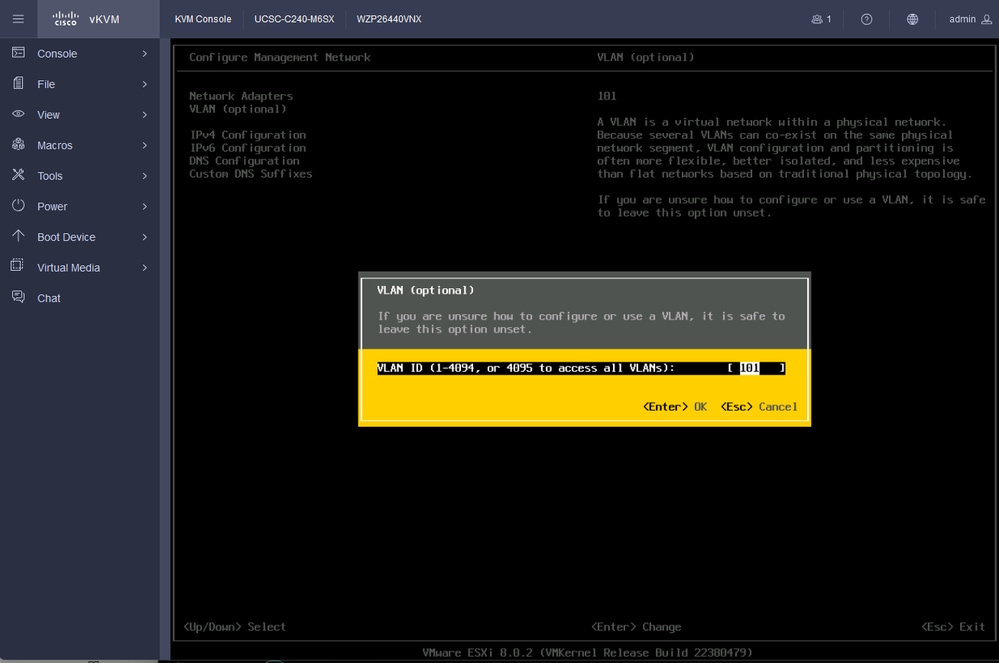 Vlan Config
25. Choose IPV4 Configuration, Enter the Values, and press Enter.
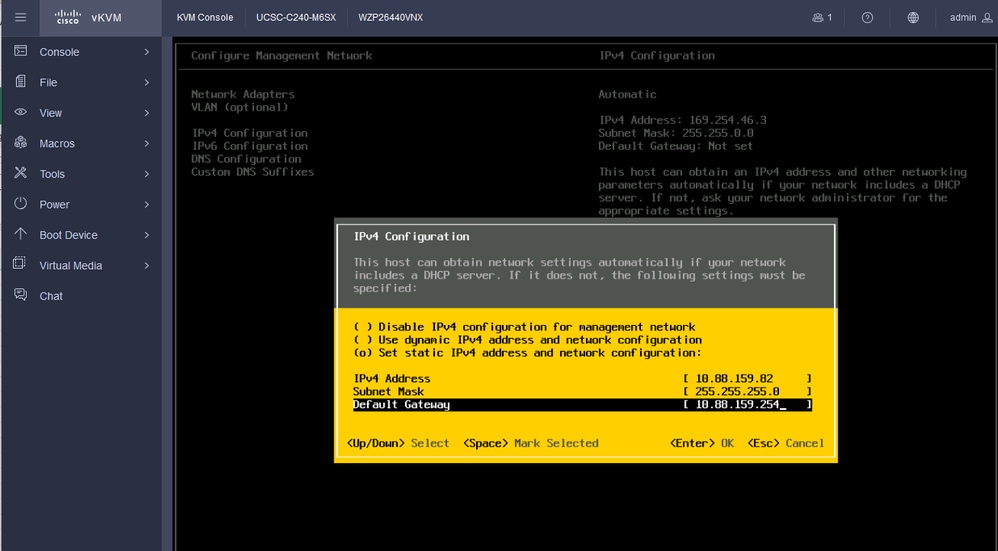 IPV4 Config
26. Use the Y Key to Accept and restart the Management Network.
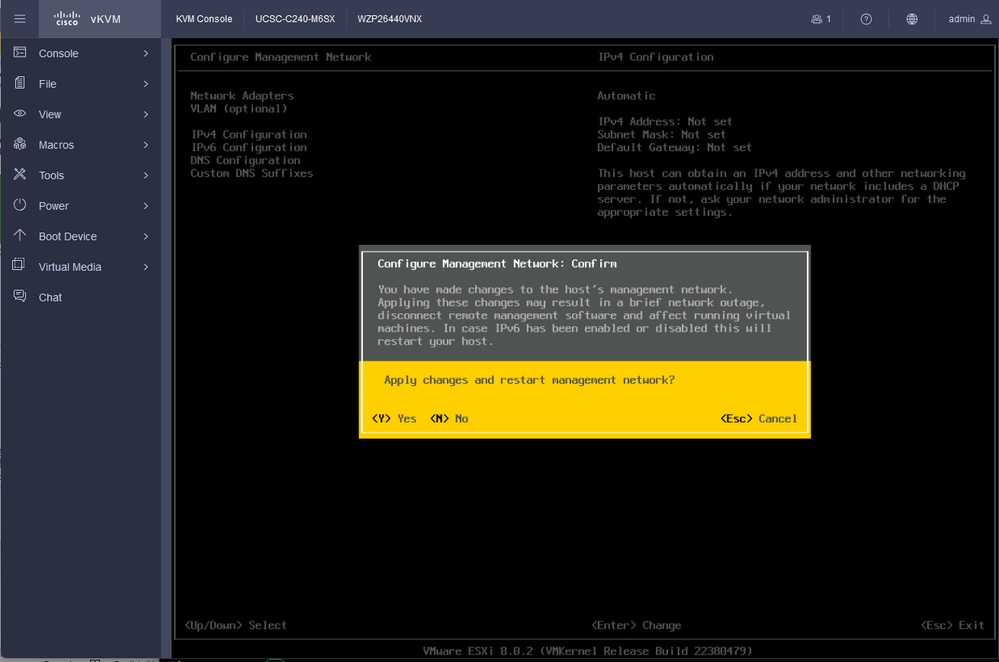 IPV4 Config Save
27. Choose Test Management Network to test the Communication, and press Enter to Exit.
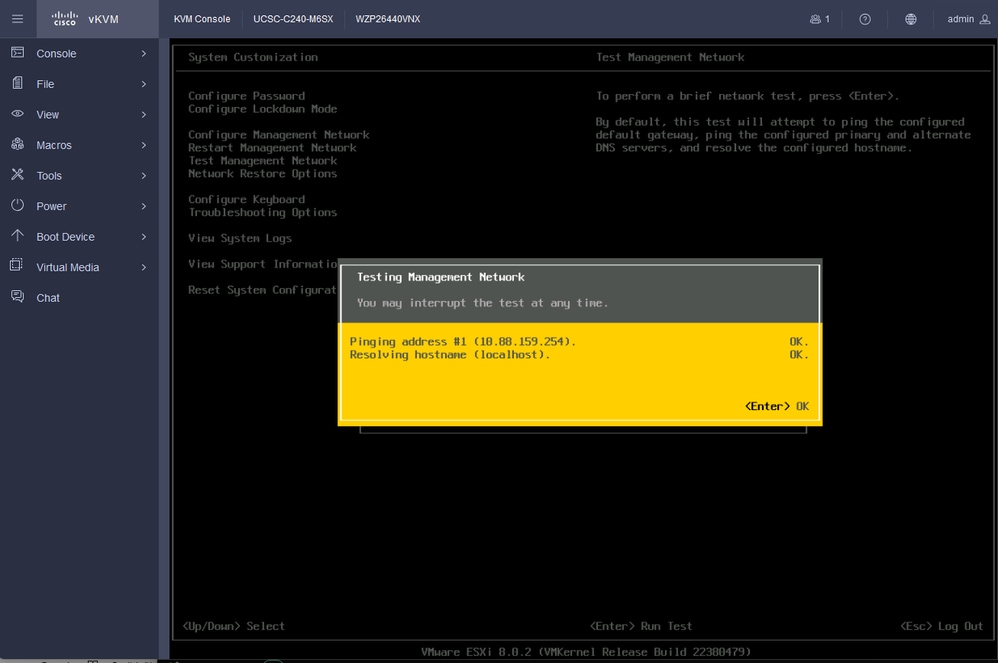 Test Mangement Network
Verify
There is currently no verification procedure available for this configuration.
Troubleshoot
There is currently no specific troubleshooting information available for this configuration.
Revision History
| Revision | Publish Date | Comments |
|---|---|---|
2.0 |
31-Jul-2026
|
Updated spelling, inserted horizontal lines to separate sections/readability. |
1.0 |
26-Jul-2024
|
Initial Release |
 Feedback