Introduction
This document describes how to deploy a step by step Resource Connector in Azure.
Prerequisites
Gather required information and understand the
- Obtain the connector image.
- You can download the image once and use it for any number of connectors in any connector group.
- If you use a previously downloaded image, ensure that the image is the latest version.
- For details, see Obtain the Connector Image.
- Copy the provisioning key for the specific connector group for which you deploy connectors.
See Provisioning Keys for Resource Connectors.
Requirements
Cisco recommends that you have knowledge of these topics:
- Cisco Secure Access dashboard administrator access
- Azure portal access
- Cisco Secure Client
- Windows machine with ZTA enrolled
Components Used
The information in this document is based on the test performed in a lab environment using the next components:
- ZTNA Client
- Secure Access
- Azure
- Private Resource
The information in this document was created from the devices in a specific lab environment. All of the devices used in this document started with a cleared (default) configuration. If your network is live, ensure that you understand the potential impact of any command.
Configure
Configurations in Secure Access
Login to Secure Access Dashboard and navigate to Connect > Network Connections > Connector Groups
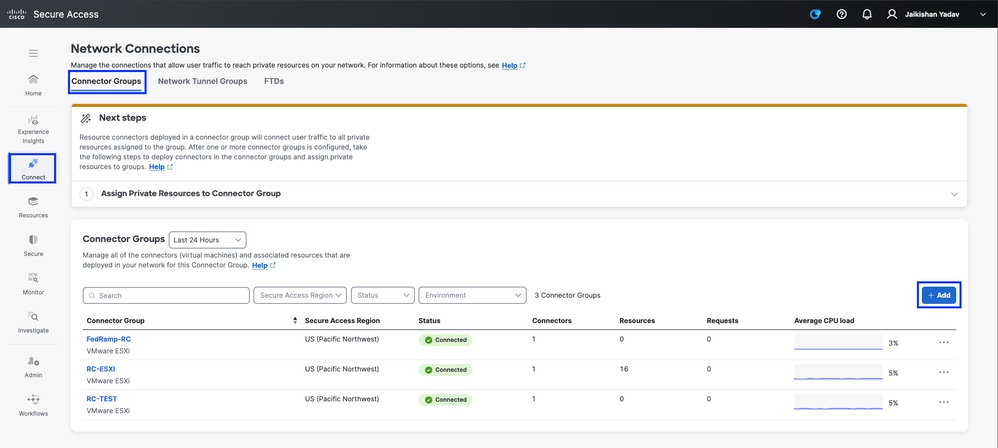
Secure Access - Connector Groups
- Specify the
Connector Group Name and the Region
- Click
Next
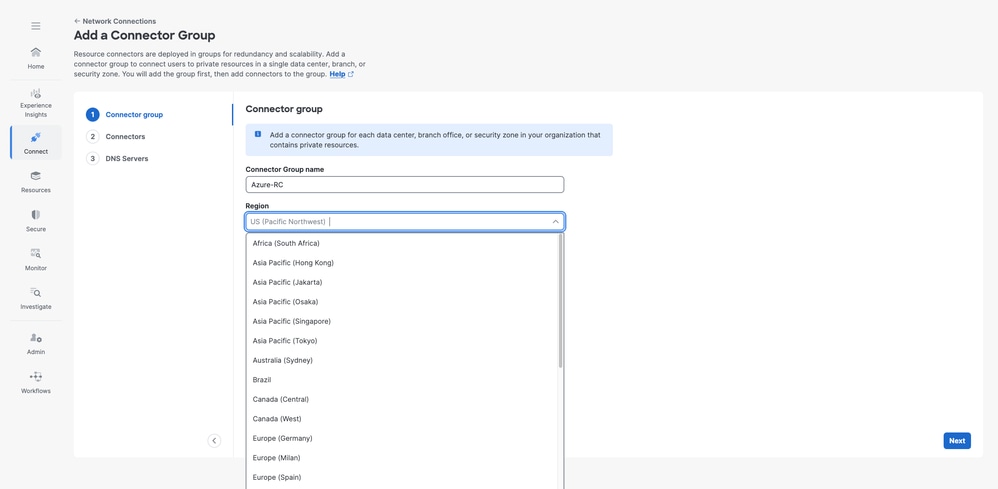
Secure Access - Connector Groups configuration
- Choose
Microsoft Azure and use the Scaling Calculator to determinate the resources needed
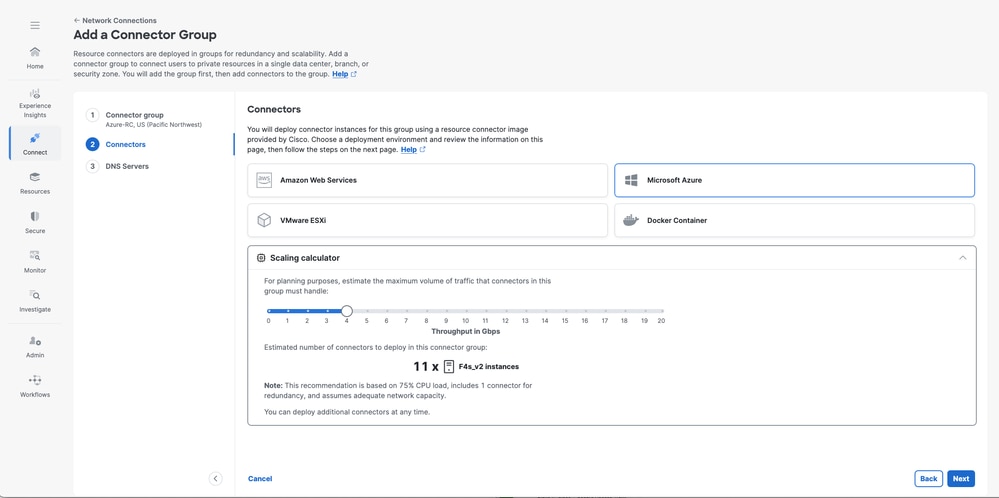
Secure Access - Resource Connector Configuration review
- Leverage the
DNS Servers option to resolve specific domains through dedicated DNS servers. This is considered a best practice for organizations with multiple internal domains.
- Click
Save
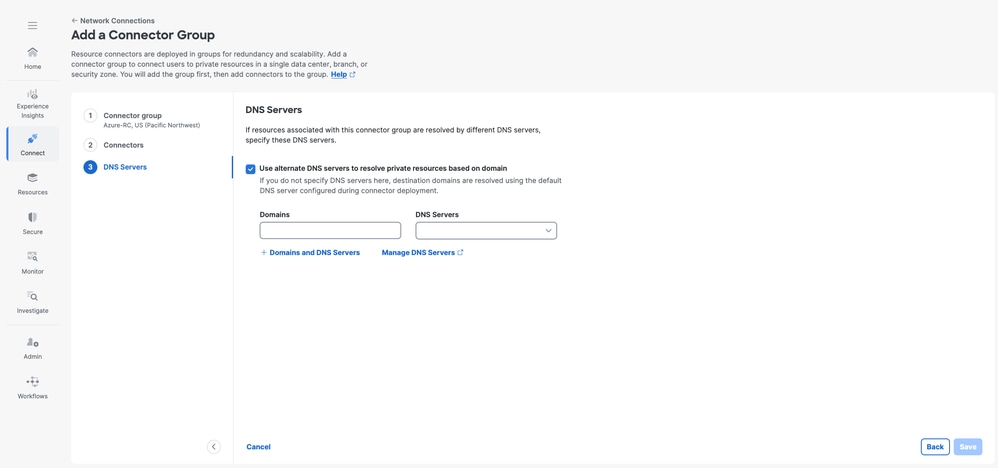
Secure Access - Resource Connector Configuration
- At this stage, ensure that you copy the
Provisioning Key. You need it later in Azure during the Resource Connector deployment to enable registration with your Secure Access Tenant.
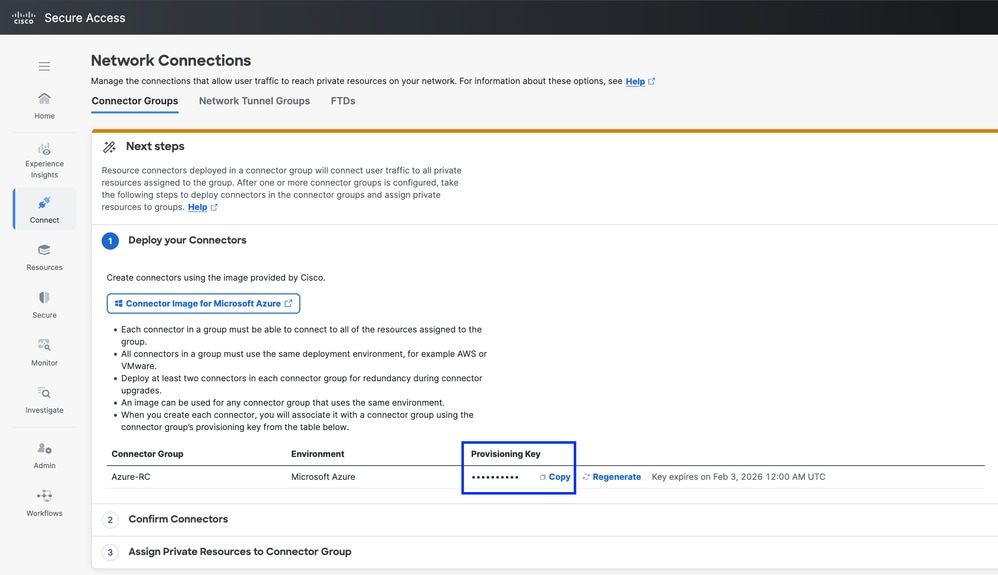
Secure Access - Resource Connector Configuration
Configurations in Azure
Navigate to Azure portal and then navigate to the Microsoft Azure Marketplace and search for Cisco Secure Access Resource Connector image:
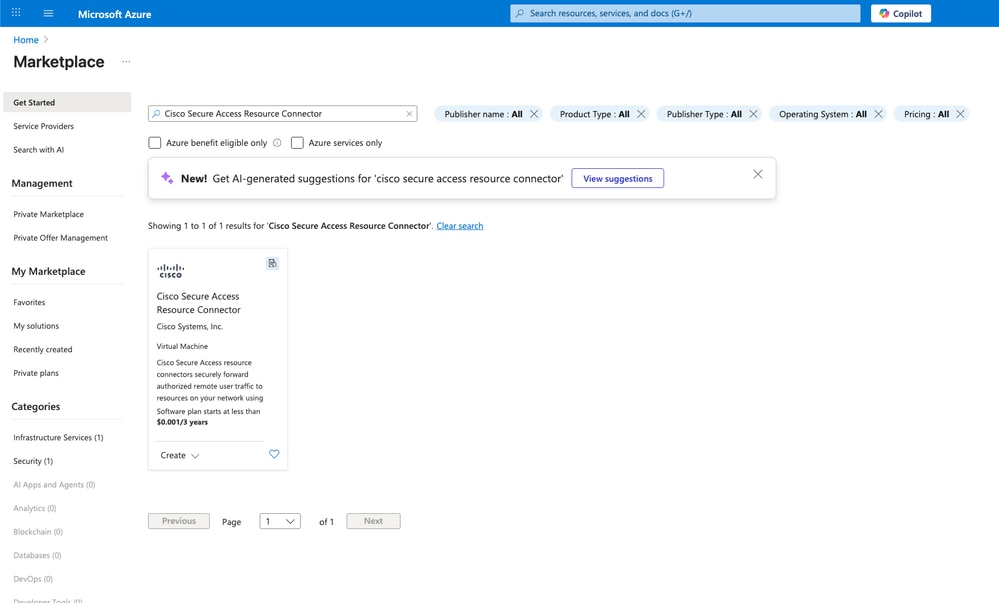
Secure Access - Resource Connector Creation on Azure
- Choose the appropriate
Subscription and and Plan then click on Create
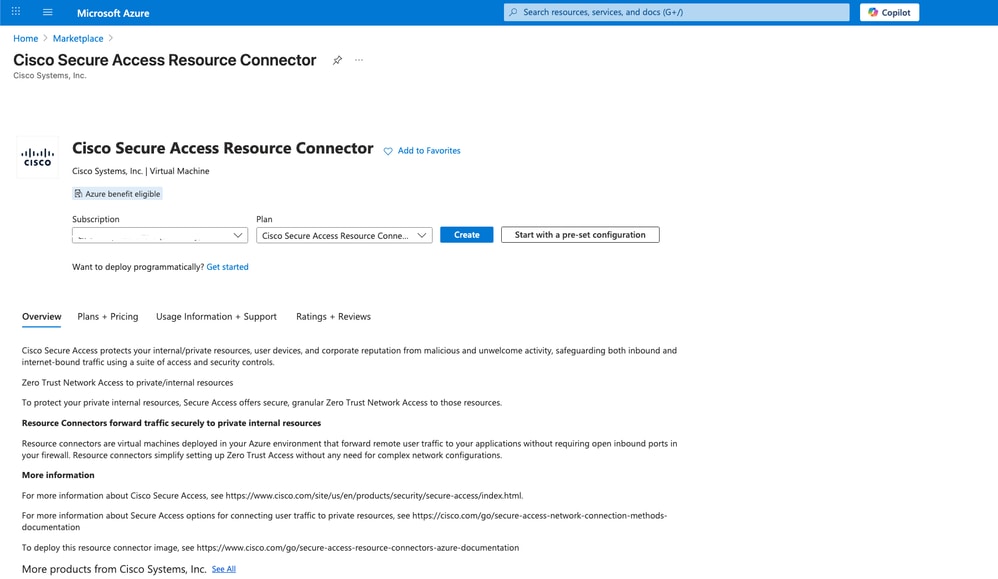
Secure Access - Resource Connector Creation on Azure
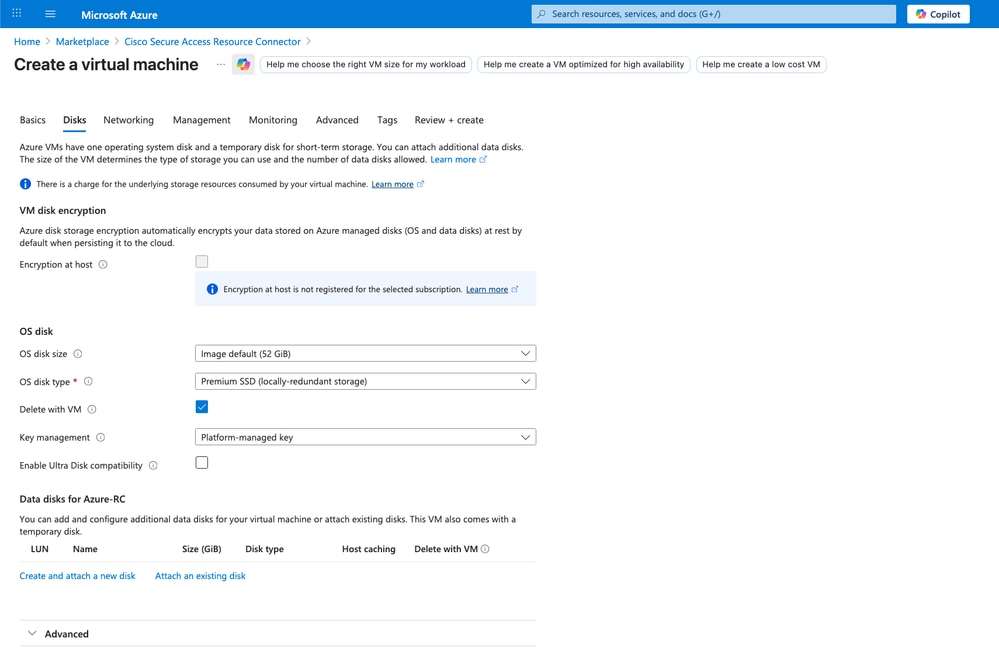
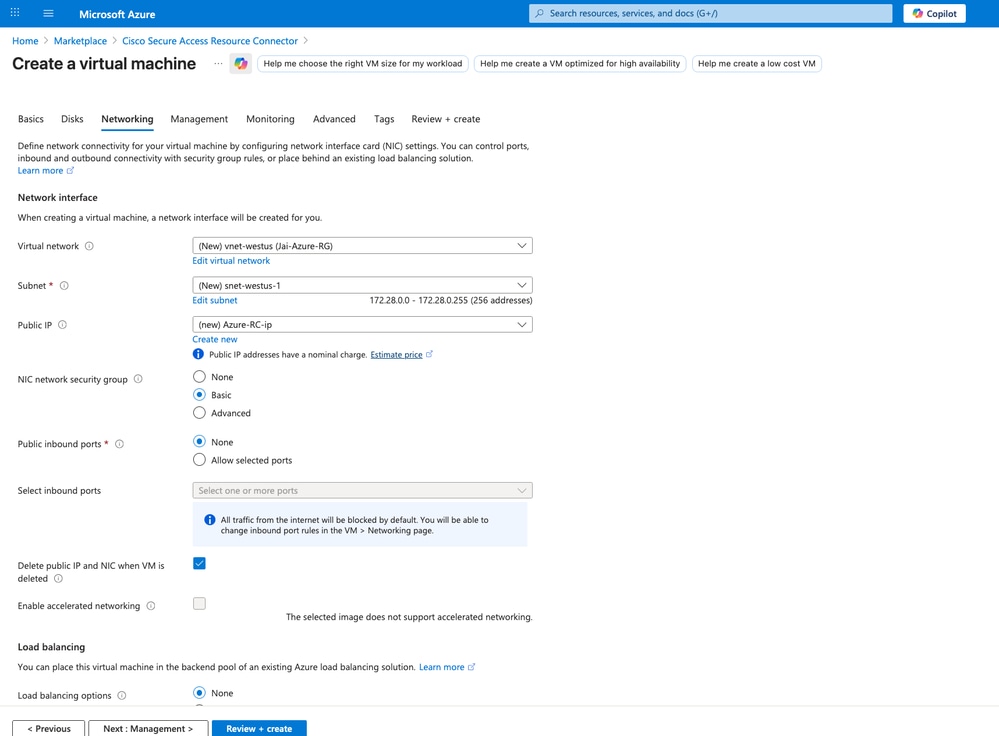
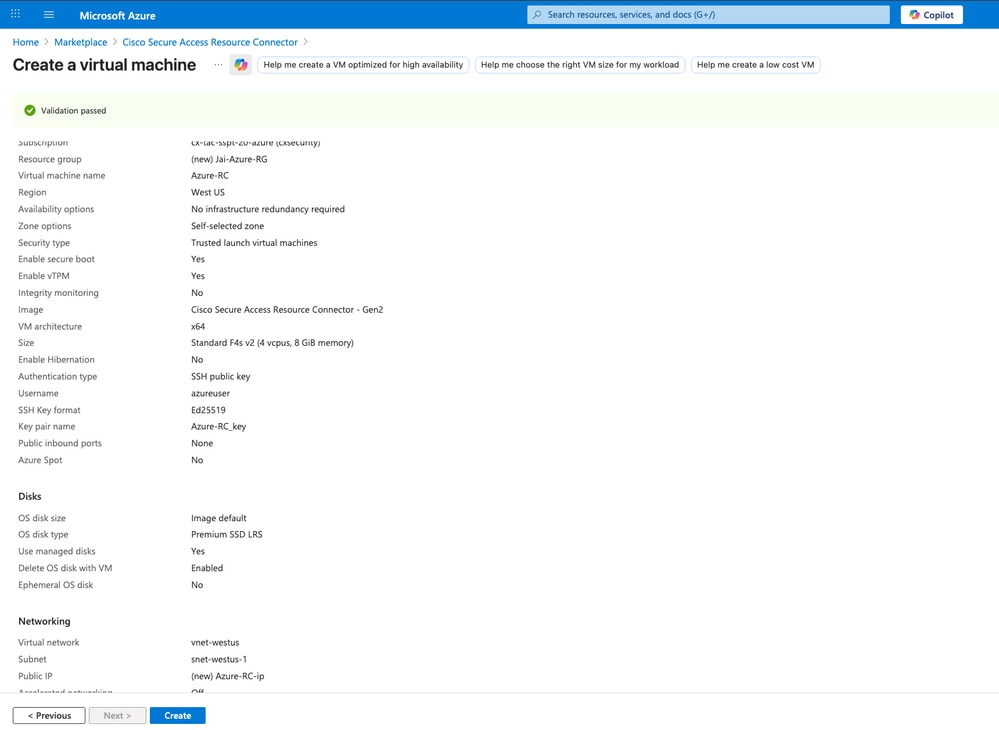
- Review the configuration for
Disks, Networking and SSH public key
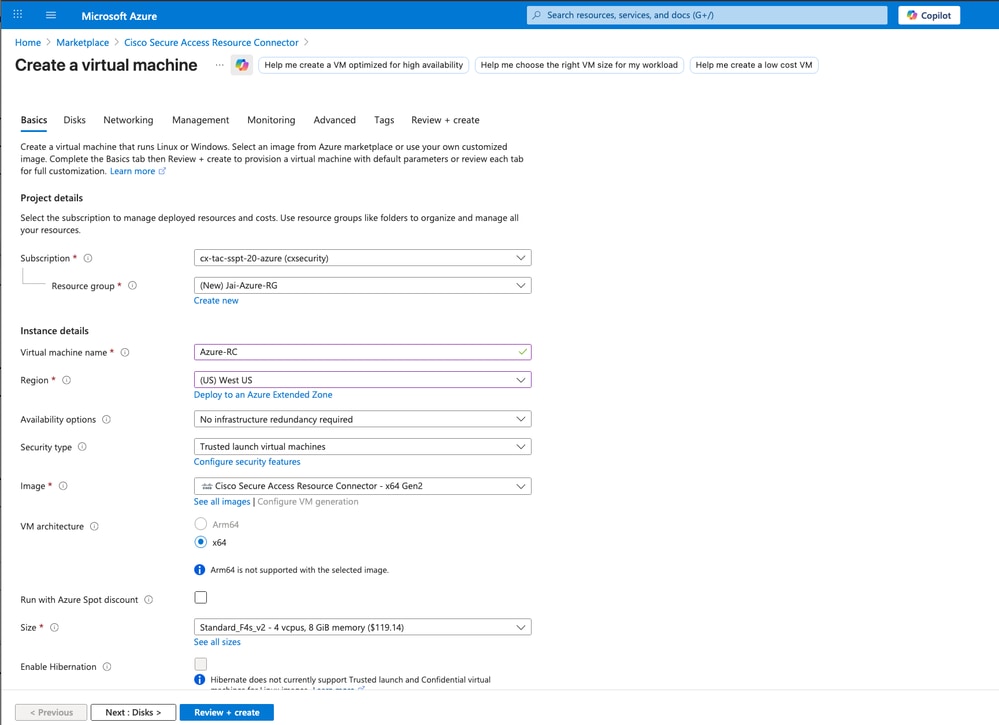
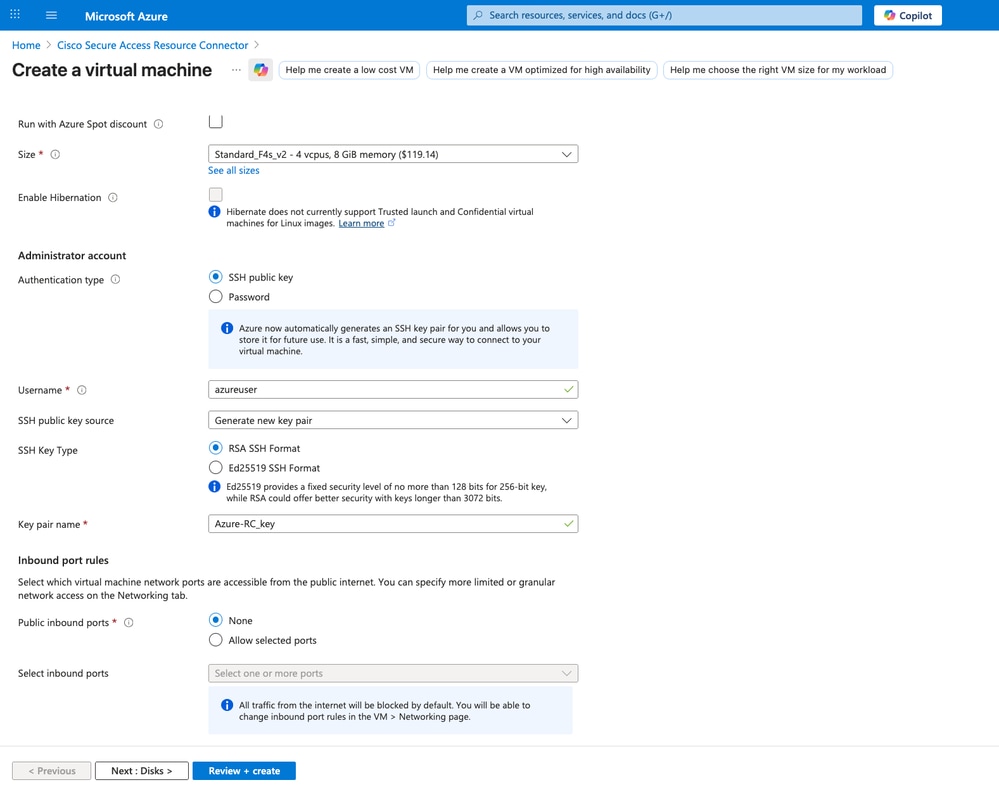

Caution: Do not lose the private SSH key; otherwise, you cannot access the RC CLI and must re-deploy it for troubleshooting.
Secure Access - Resource Connector Creation on Azure
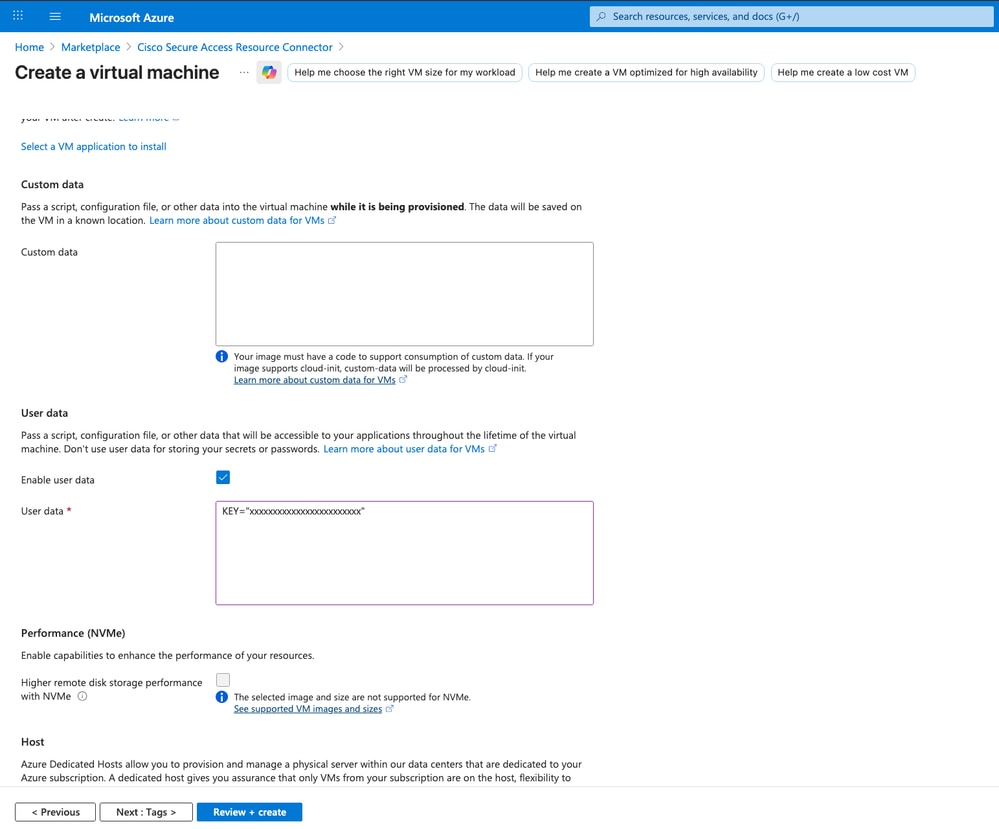
- Paste the
Provisioning Key copied from Cisco Secure Access into the User data field
KEY=XXXXXXXXXXXXXXXXXXXXX
Secure Access - Resource Connector Creation on Azure
- Review and click on
Create in order to proceed with the creation of your Resource Connector
Secure Access - Resource Connector Creation on Azure
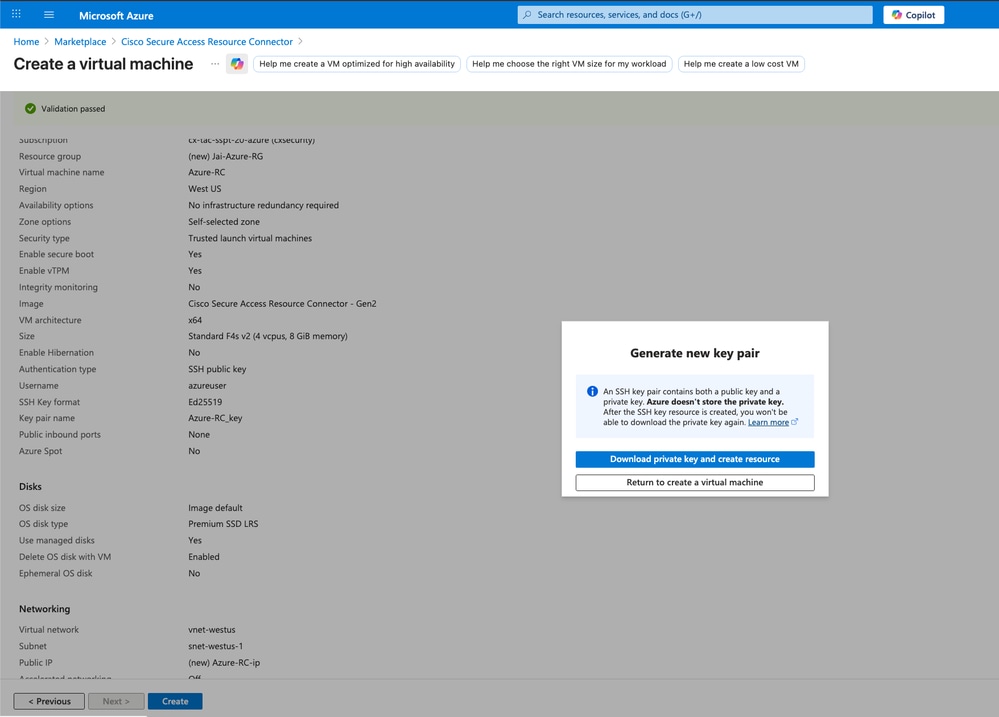
- After you click
Create, an option to download the private key appears. Click on Download private key and create resource
Secure Access - Resource Connector Creation on Azure
Caution: Do not lose the private SSH key; otherwise, you cannot access the RC CLI and must re-deploy it for troubleshooting.
- After that you can see the progress of your
Resource Connector
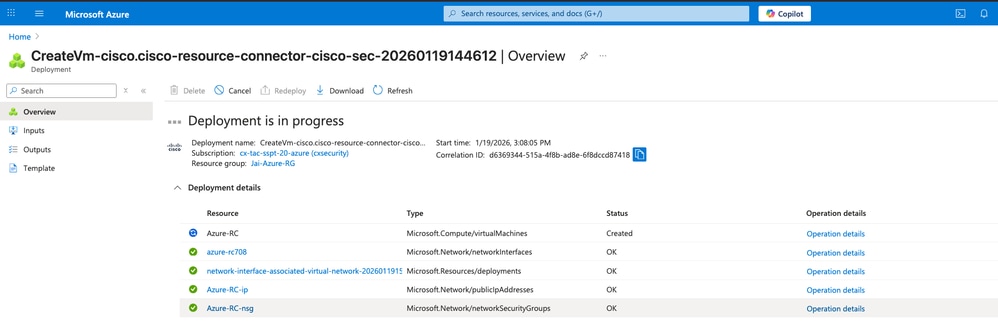
Secure Access - Resource Connector Deployment on Azure
- Then Navigate to Secure Access Dashboard in order to confirm the
Resource Connector connection and sucesfull deployment in your Secure Access Tenant
- Click on
Connect > Network Connections > Connector Groups
- Under the option 2 Confirm Connectors click on
Confirm Connectors to end the deployment

Secure Access - Resource Connector Confirmation
Now you are able to see your new Resource Connector deployed and connected in your Secure Access tenant:

Secure Access - Resource Connector
Verify
Accessing from the inbuild Bastion CLI
In Azure, access to your resource connector and click on Bastion:
Authentication Type: Choose SSH Private key from Local FileUsername: You must use acadminLocal File: Choose the private key previusly downloaded
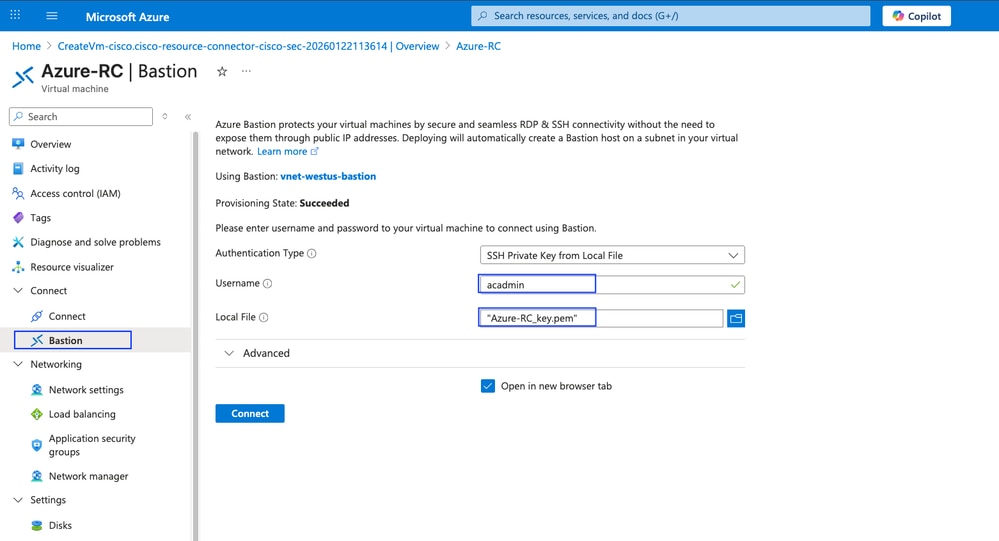
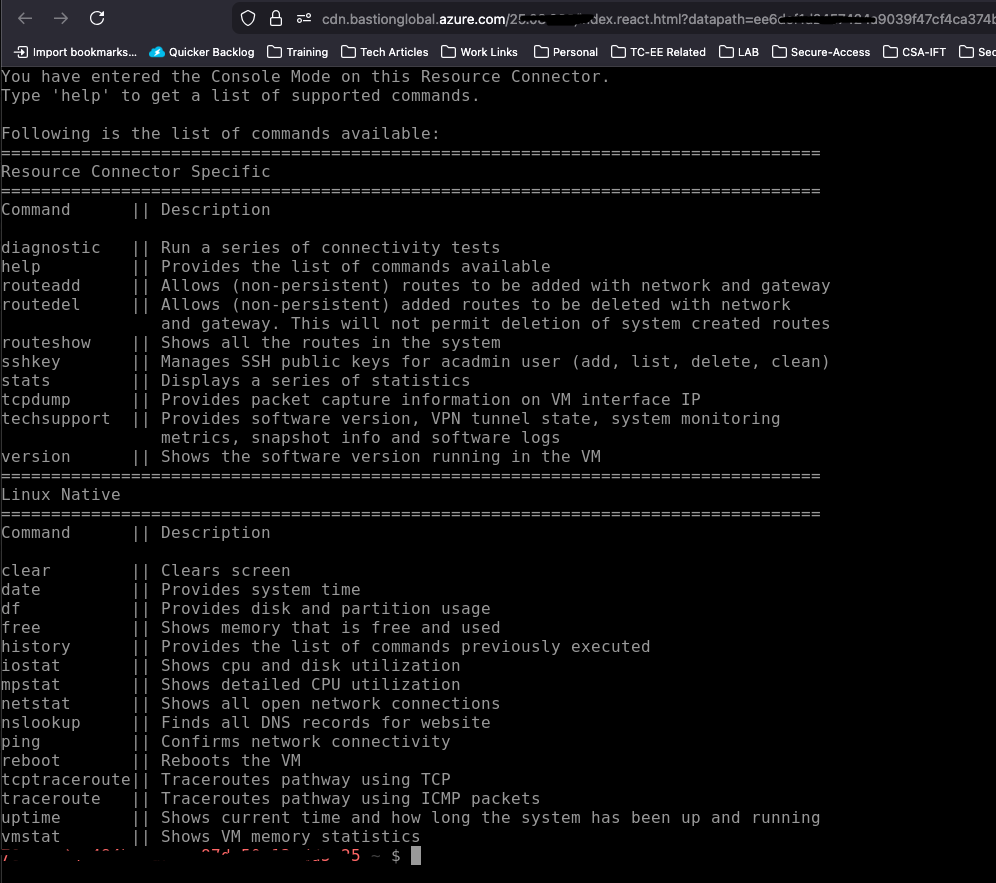
Secure Access - Accessing Resource Connector command line
Accessing RC from MAC-OS terminal
Open the terminal and use ssh -i <private-key-file-path> acadmin@x.x.x.x.x in order to connector to your resource connector.
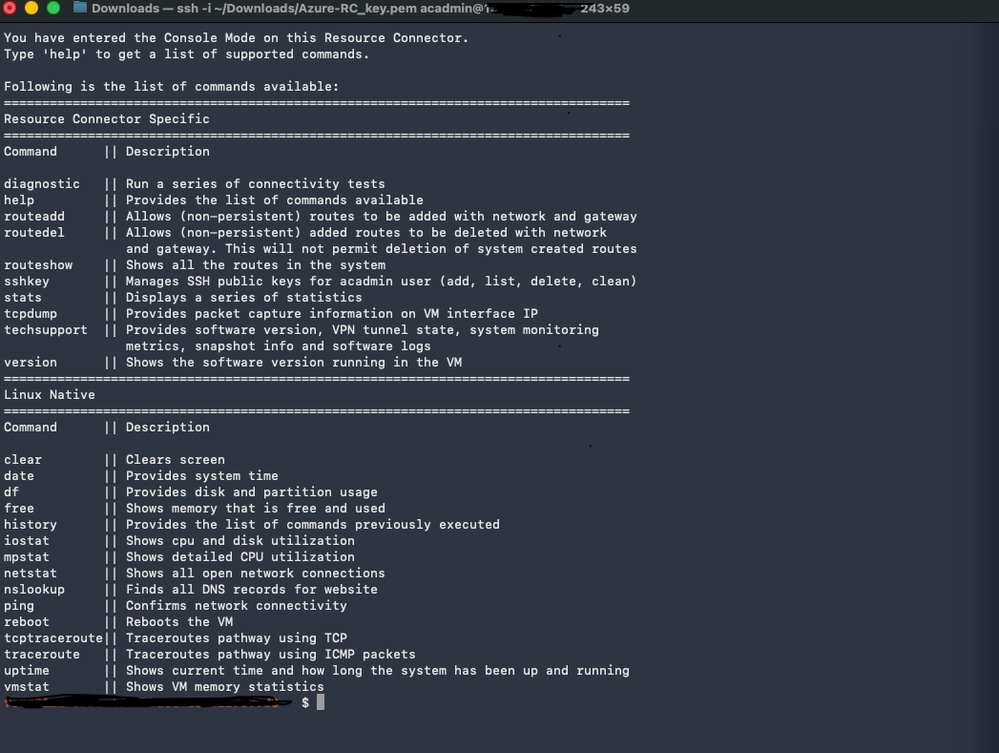
Secure Access - Accessing Resource Connector command line
Accessing from Windows - Putty
In order to use the private key, you must convert the SSH private key from .pem to .ppk formart using Puttygen:
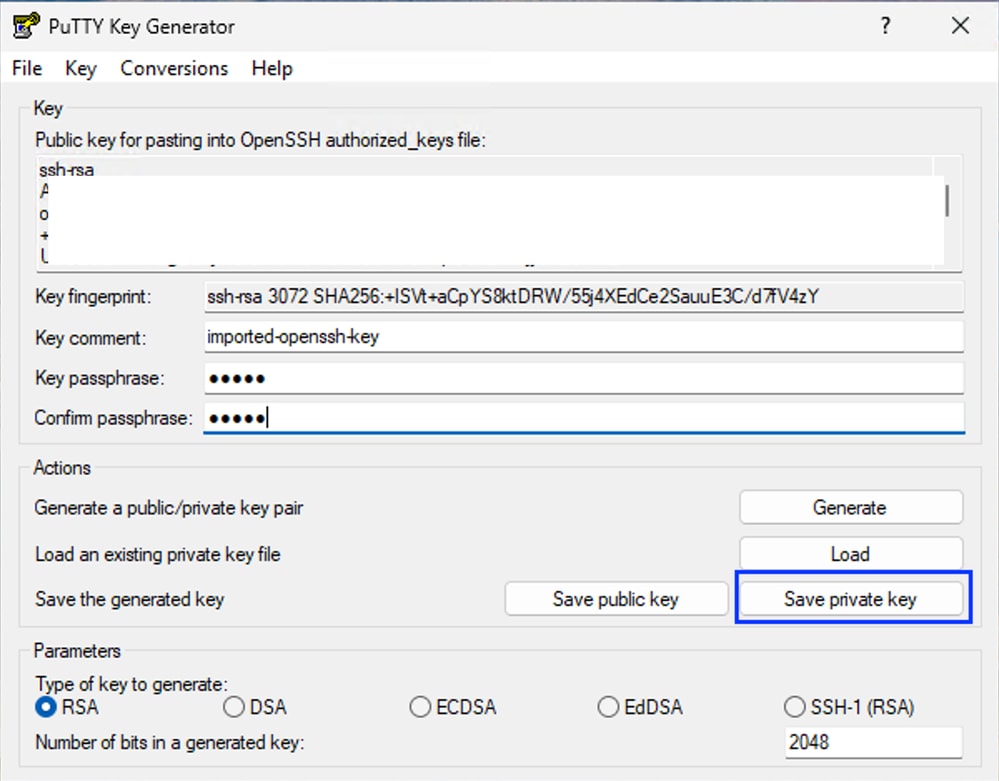
- Save the private key in .ppk format
- Launch putty application and navigate to
SSH > Auth > Credentials and browse your SSH private key in .ppk format
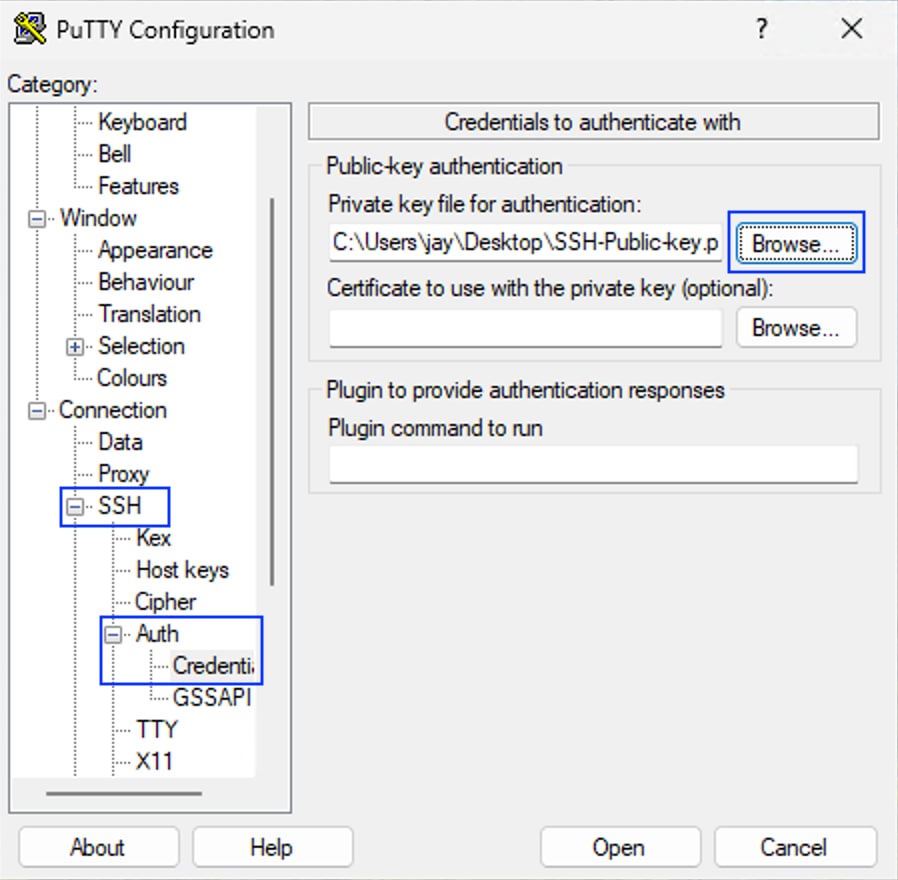
- Navigate to
Sessionand put the IP address of the Resource Connector and click Open

Tip: username : acadmin passphrase : the passphrase configured while converting private key from .pem to .ppk format
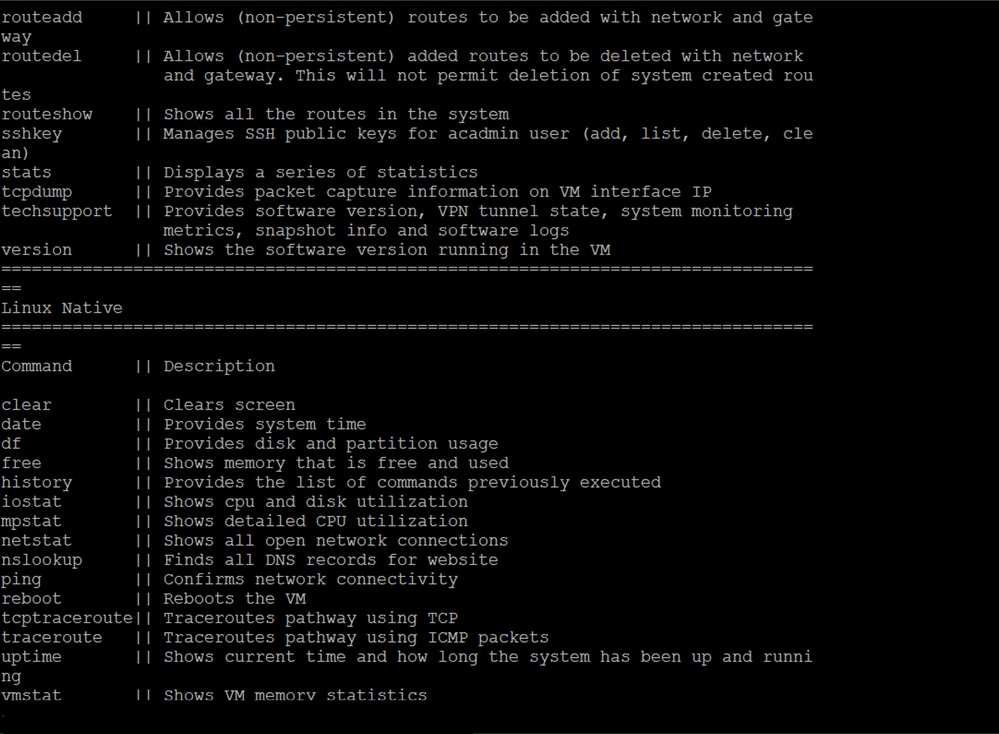
Troubleshooting
In order to access to the troubleshooting command acces to .
Caution: Do not lose the private SSH key; otherwise, you cannot access the RC CLI and must re-deploy it for troubleshooting.
Related Information
 Feedback