Configure Umbrella for Migration to Secure Access and Security Cloud Control
Available Languages
Contents
Introduction
This document describes how to migrate from Umbrella to Secure Access using Security Cloud Control (SCC).
Background Information
You are encouraged to migrate from Umbrella to Secure Access and required to use Security Cloud Control to manage all their cloud security products as part of these changes. This allows you to have a single pane of glass to manage their cloud security products which includes Cisco Secure Access.
Mutli-org and MSSP migration is out of scope of this article. For multi-org and MSSP migration, please refer to Umbrella Multi-org Console Upgrade to Secure Access Manager Organization.
Prerequisites
- Current DNS or SIG Subscription
- Full Admin Access to Umbrella
- Access to Security Cloud Control
Preparation Stages
1. Prepare for Migration
Ensure you have a DNS or SIG subscription on Umbrella:
- Navigate to Admin > Licensing to verify. Upgrade to Secure Access must appear at the top of the page:
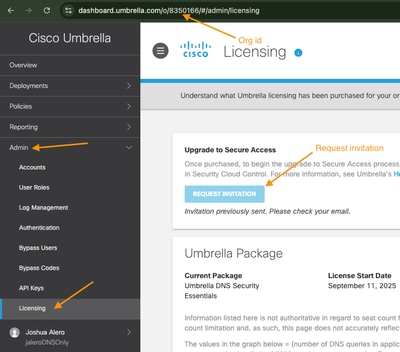
- Make note of the org ID, in this example 8350166.
- Select the Request Invitation option on the licensing page.
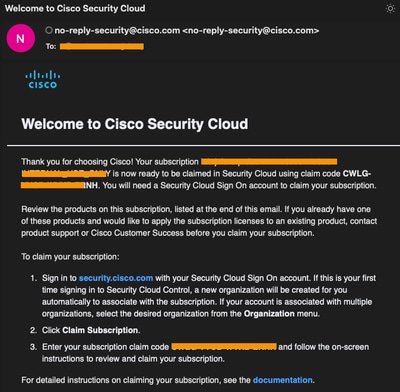
- Assuming you place your order for Secure Access, wait 3–4 business days for an email with your subscription claim code (after initiating the request invitation from your Umbrella Tenant). Example email:
2. Log in to SCC using your Existing Cisco Login Credentials
- Navigate to Security Cloud Control portal and log in with your Cisco login credentials.
- Select Create new organization (if you do not have an existing one).
- Enter the new organization name in the New Organization name field.
- Select the appropriate region from the Region deployment drop-down menu.
Example:
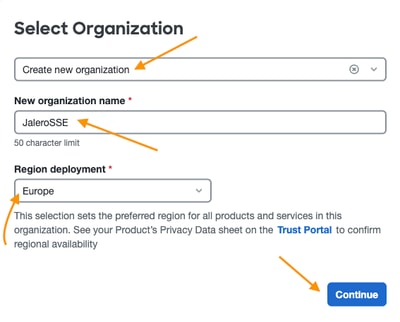
- Select Continue to complete the org creation.
3. Link Umbrella Org to SCC and Claim Subscription
- Select Claim subscription button to claim it with the codes provided from step 1 above.
- Your Umbrella org ID must be seen in the Subscriptions page as well with the invitation to attach it to SCC.
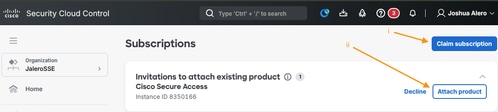
Select Attach product to attach your Umbrella org to SCC.
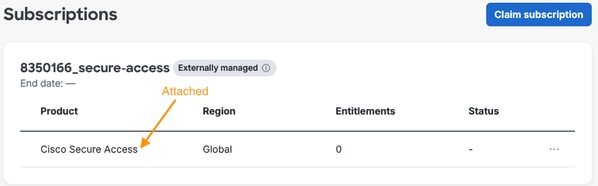
When attached, you must see the Cisco Secure Access as a product in the same page as shown on the example here:
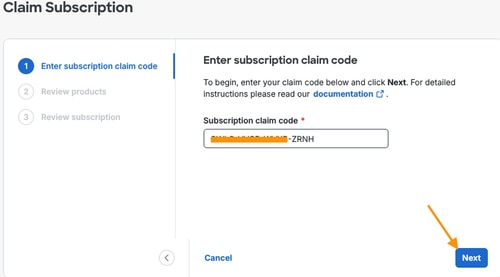
- Enter the claim code and select Next:
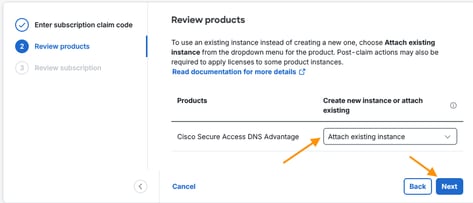
- Select Attach existing instance from the Create new instance or attach existing drop-down menu:
- Review the settings:
- Ensure the (Existing instance) is part of the product name.
- Set the region to the existing region of the attached Secure Access instance.
- Select Claim move to move to the next page.
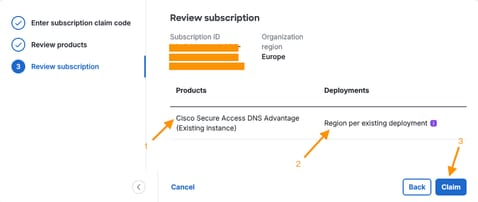
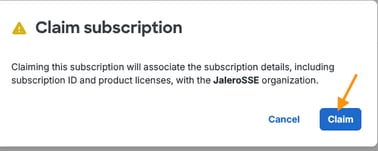
- Confirm the subscription claim.
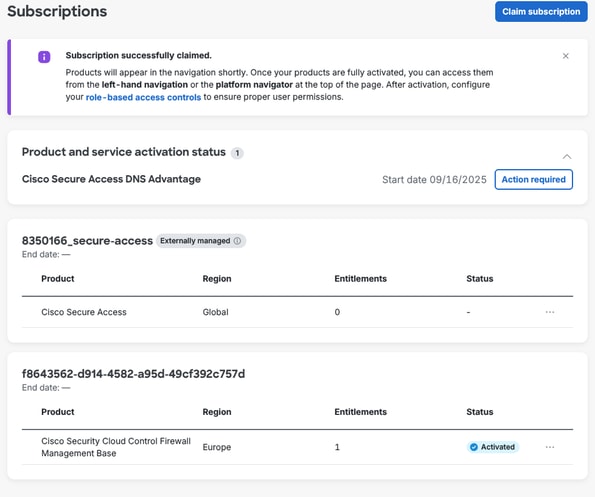
- After successful claim and provisioning, watch for a Subscriptions page showing all your activated products:
4. Apply the License to Secure Access Instance
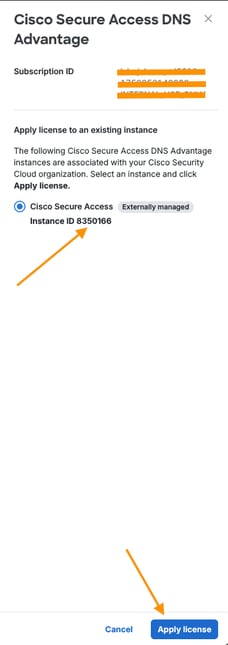
- Select Action required option.

- Select Appy license.
Verify Secure Access Link to SCC
Use this section to verify that your Secure Access tenant has been linked to SCC.
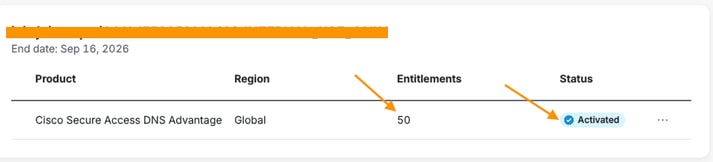
1. Product Activation Status in Subscriptions
Verify that the Cisco Secure Access <License Type> product Instance has been activated:
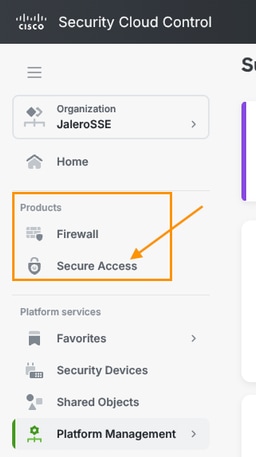
2. Secure Access in Product list
Secure Access must now be listed under Products as well:
Migrate from Umbrella to Secure Access
- Log back into Umbrella with the same account as above.
- Navigate to the new menu item Upgrade Manager.
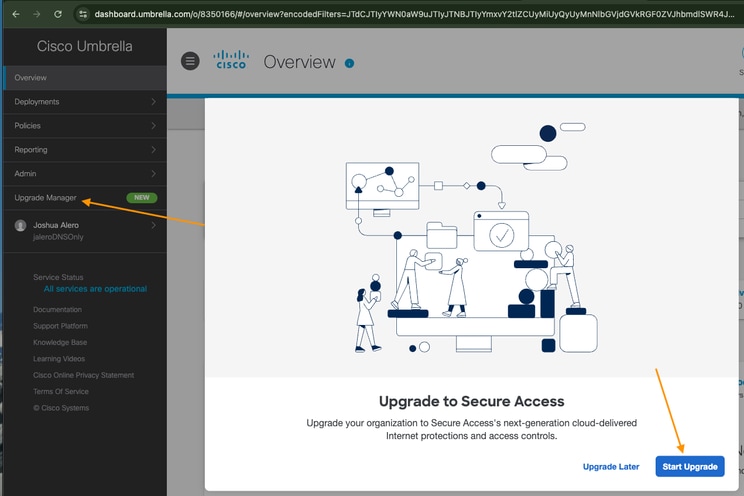
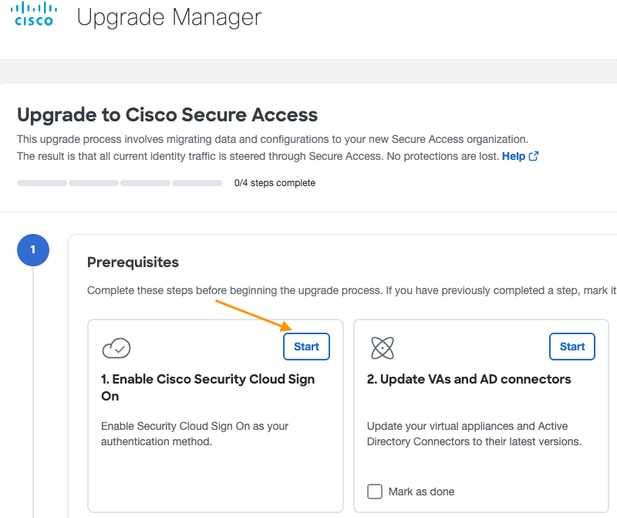
- In the Upgrade Manager page, select Start under Enable Cisco Security Cloud Sign on.
- Select ENABLE SAML under SAML Dashboard User Configuration to link your SCC as SAML provider for dashboard login.
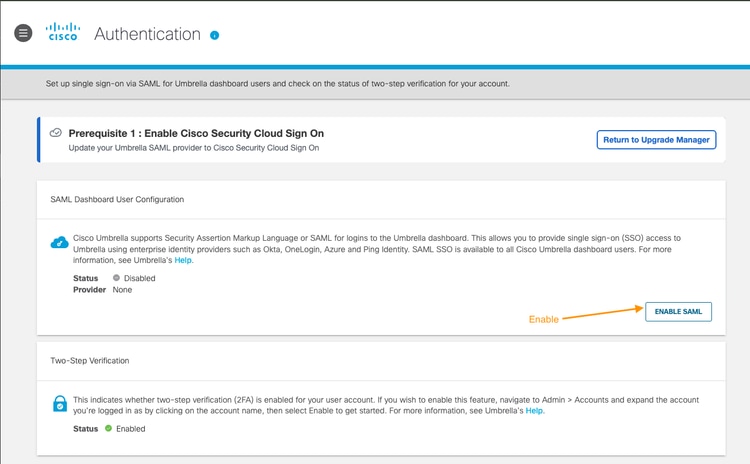
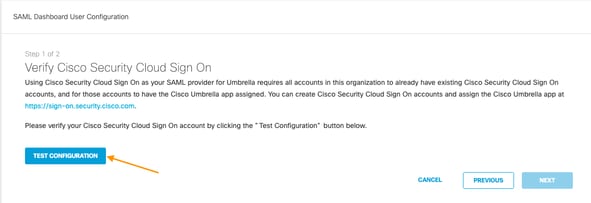
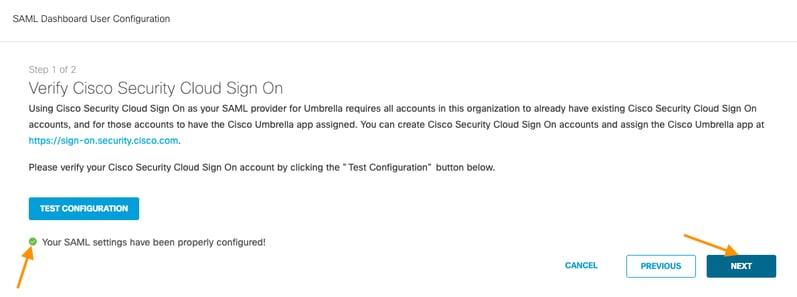
- Test SAML configuration with the TEST CONFIGURATION option.
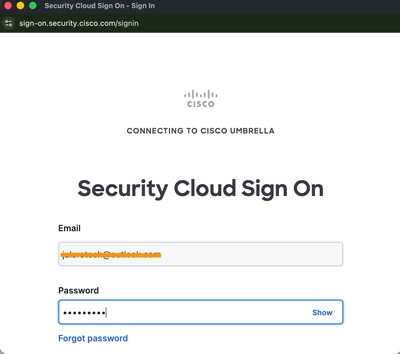
- The login page of SCC must appear in a different pop-up window (ensure that pop-up blocker is disabled). When prompted, log in with your SCC credentials.
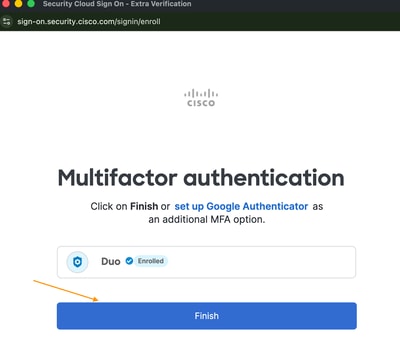
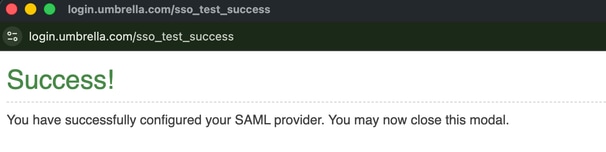
- When the login has been verified, look for this confirmation message, at which point the SAML portion is almost complete:
- Return to the SAML Dashboard User Configuration portion. Green bullet shows that the SAML settings have been correctly configured. Select NEXT.
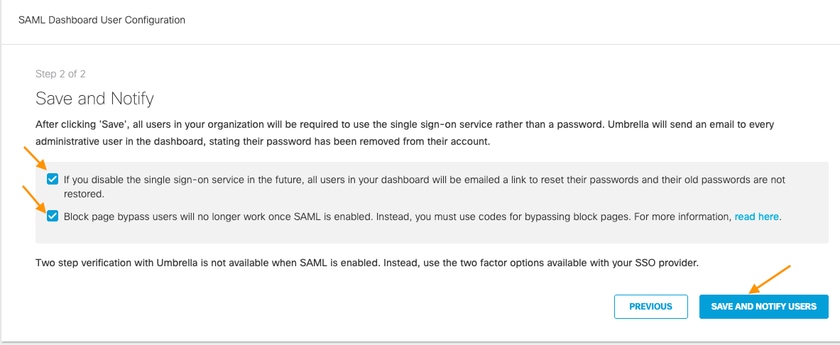
- Save and notify users of the changes.
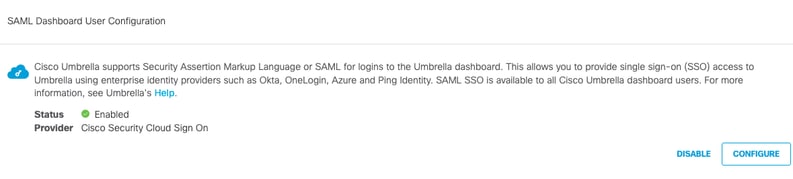
- SAML configuration completed:
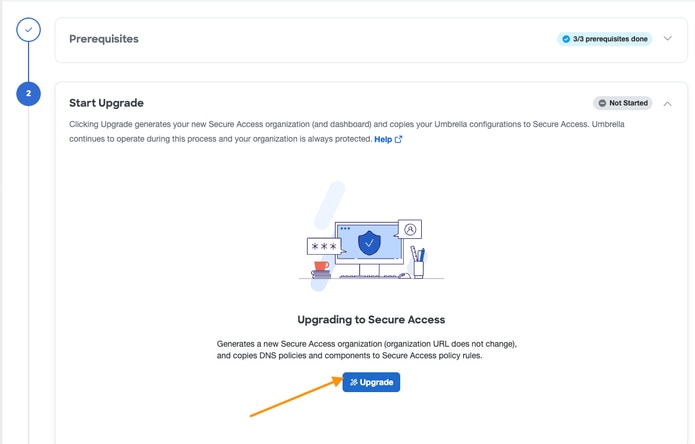
- Upgrade to Secure Access by selecting Upgrade in the Start Upgrade section:
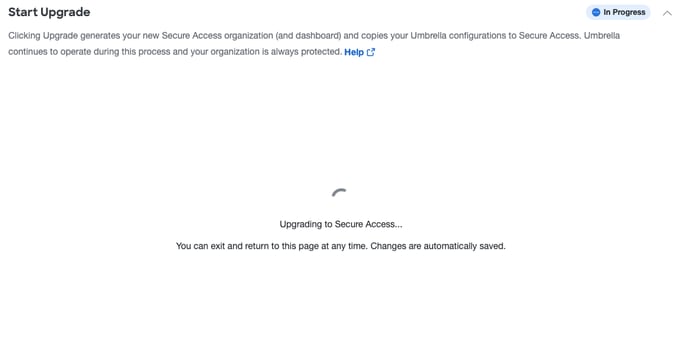
- Allow the upgrade to continue:
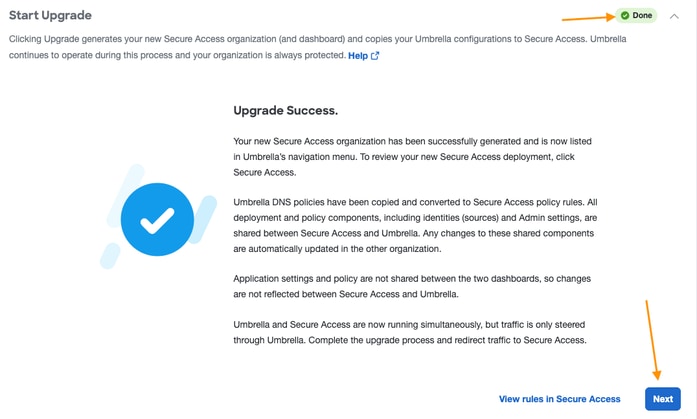
- When completed look for this page:
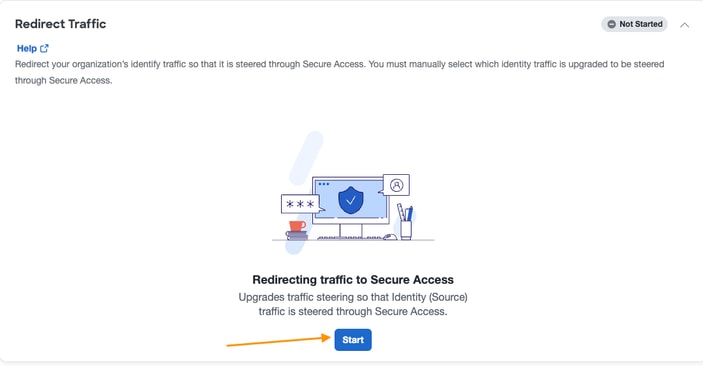
- Redirect traffic to Secure Access:
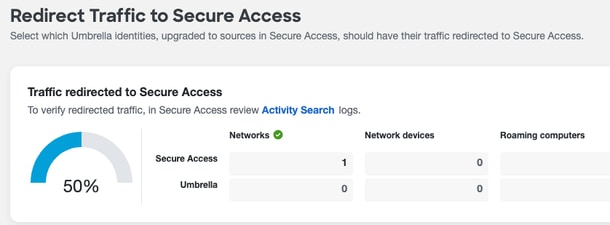
- Confirmation of the redirection being completed. In the example only the network identity was migrated from Umbrella to Secure Access:
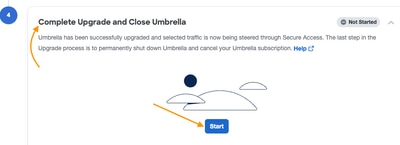
- Complete the upgrade and migration to Secure Access.
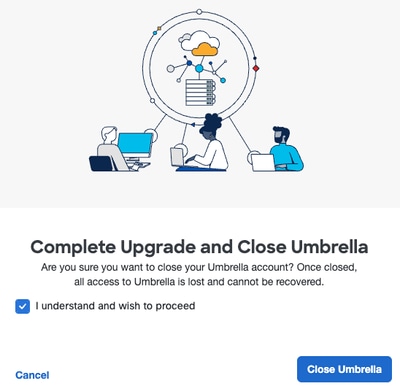
- When you select Close Umbrella on this image, you lose access to your umbrella org as it gets deleted.
Verify Migration
- Sign into Secure Access with your login credentials.
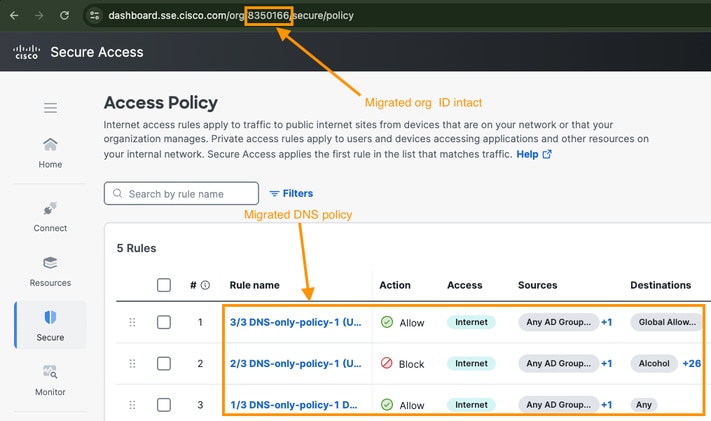
- Navigate to Secure > Access Policy to display the migrated rules, as on the example here. The org ID must be the same as in section Prepare for Migration above.
Related Information
- Umbrella Documentation
- Secure Access Documentation
- DNS Defense Upgrade Guide
- Technical Support & Documentation - Cisco Systems
Revision History
| Revision | Publish Date | Comments |
|---|---|---|
4.0 |
21-Sep-2026
|
Changed note. |
3.0 |
21-Sep-2026
|
Alt Text, grammar, punctuation, links, spelling. |
2.0 |
10-Mar-2026
|
Updated requirement for CSA subscription tobe able to migrate. |
1.0 |
25-Nov-2025
|
Initial Release |

 Feedback
Contact Cisco
- Open a Support Case

- (Requires a Cisco Service Contract)