Splunk On-Call - Splunk Enterprise Integration
Available Languages
Applicability
Splunk On-Call (SAAS so works on "All" versions) Splunk Enterprise (on-prem): 8.2, 8.1, 8.0, 7.3, 7.2, 7.1, 7.0 7.0Description
General Requirement:
- You will need an active VictorOps instance before you begin
- Required Roles/Capabilities:
-
For v.1.0.23 or newer
-
Setup and Configuration you will need to be an:
-
admin OR
-
victorops_admin AND admin_all_objects
-
list_storage_passwords AND admin_all_objects
-
-
Usage and Testing (configuring and testing alerts):
-
admin
-
victorops_admin
-
victorops_user
-
-
-
For v.1.0.18 or below to setup and configure you will need to grant the user:
-
list_storage_passwords AND admin_all_objects
-
-
- On-Prem
- users will need to open port 443 for outgoing https communication with VictorOps. The full url used will be
https://alert.victorops.com/integrations/generic/20131114/alert/$your_api_key/$your_routing_keyConfiguring Splunk Enterprise
Important Notes:
- When updating to a newer version of the app, run the bump command to clear client and server assets that have been cached. https://docs.splunk.com/Documentation/Splunk/8.0.3/AdvancedDev/CustomizationOptions
http://<host:mport>/<locale_string>/_bumpIn VictorOps
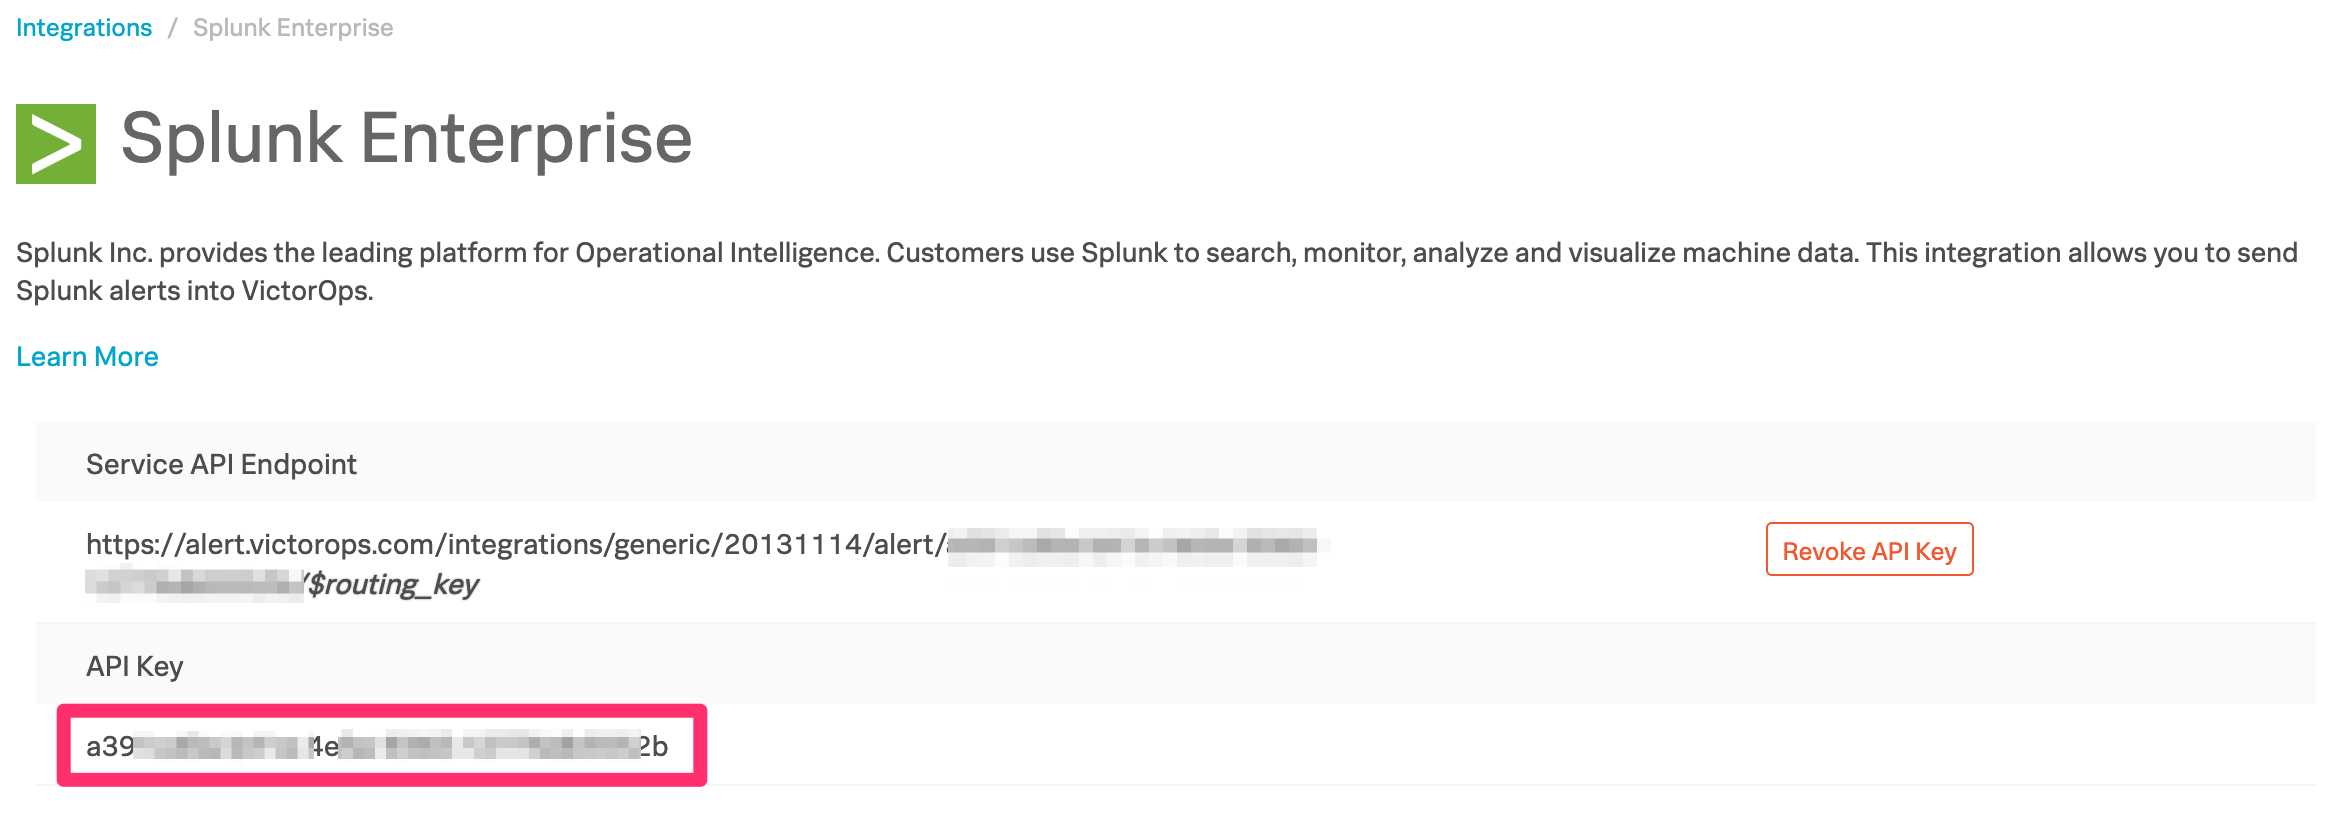
From the VictorOps web portal, navigate to Integrations >> 3rd Party Integrations >> Splunk Enterprise then click Enable Integration. Copy the API key to the clipboard to use in later steps.
In Splunk
From the Splunk Base, search for VictorOps, or follow this link. Click the Download button and accept the license agreements by checking the boxes and clicking Agree to Download.
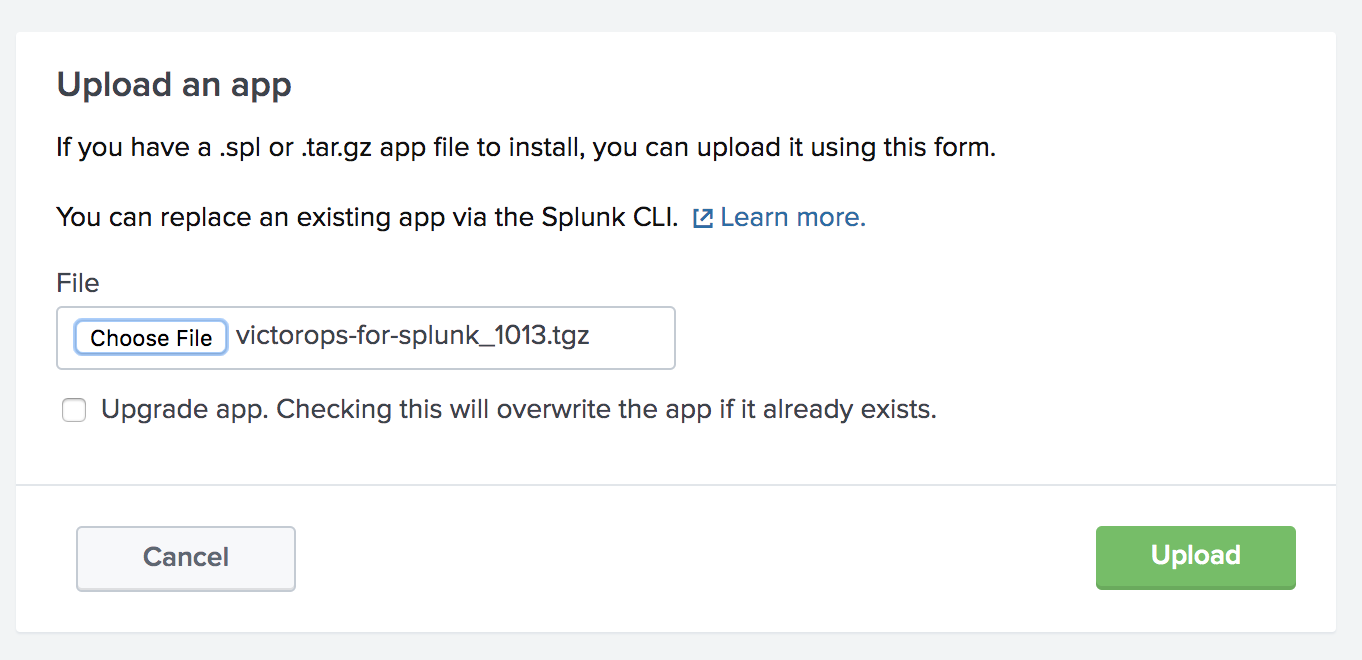
Start Splunk and open the web UI in a browser. From the top navigation bar, expand the drop-down menu and select Manage Apps. Next, click the button Install app from file.

Choose the VictorOps for Splunk app .tgz file downloaded earlier, check Upgrade app box to ensure your application is updated to the latest version. Click Upload then finish the process by restarting Splunk.
Once Splunk has restarted, return to the Manage Apps page and click Launch App next to the VictorOps Incident Management app.
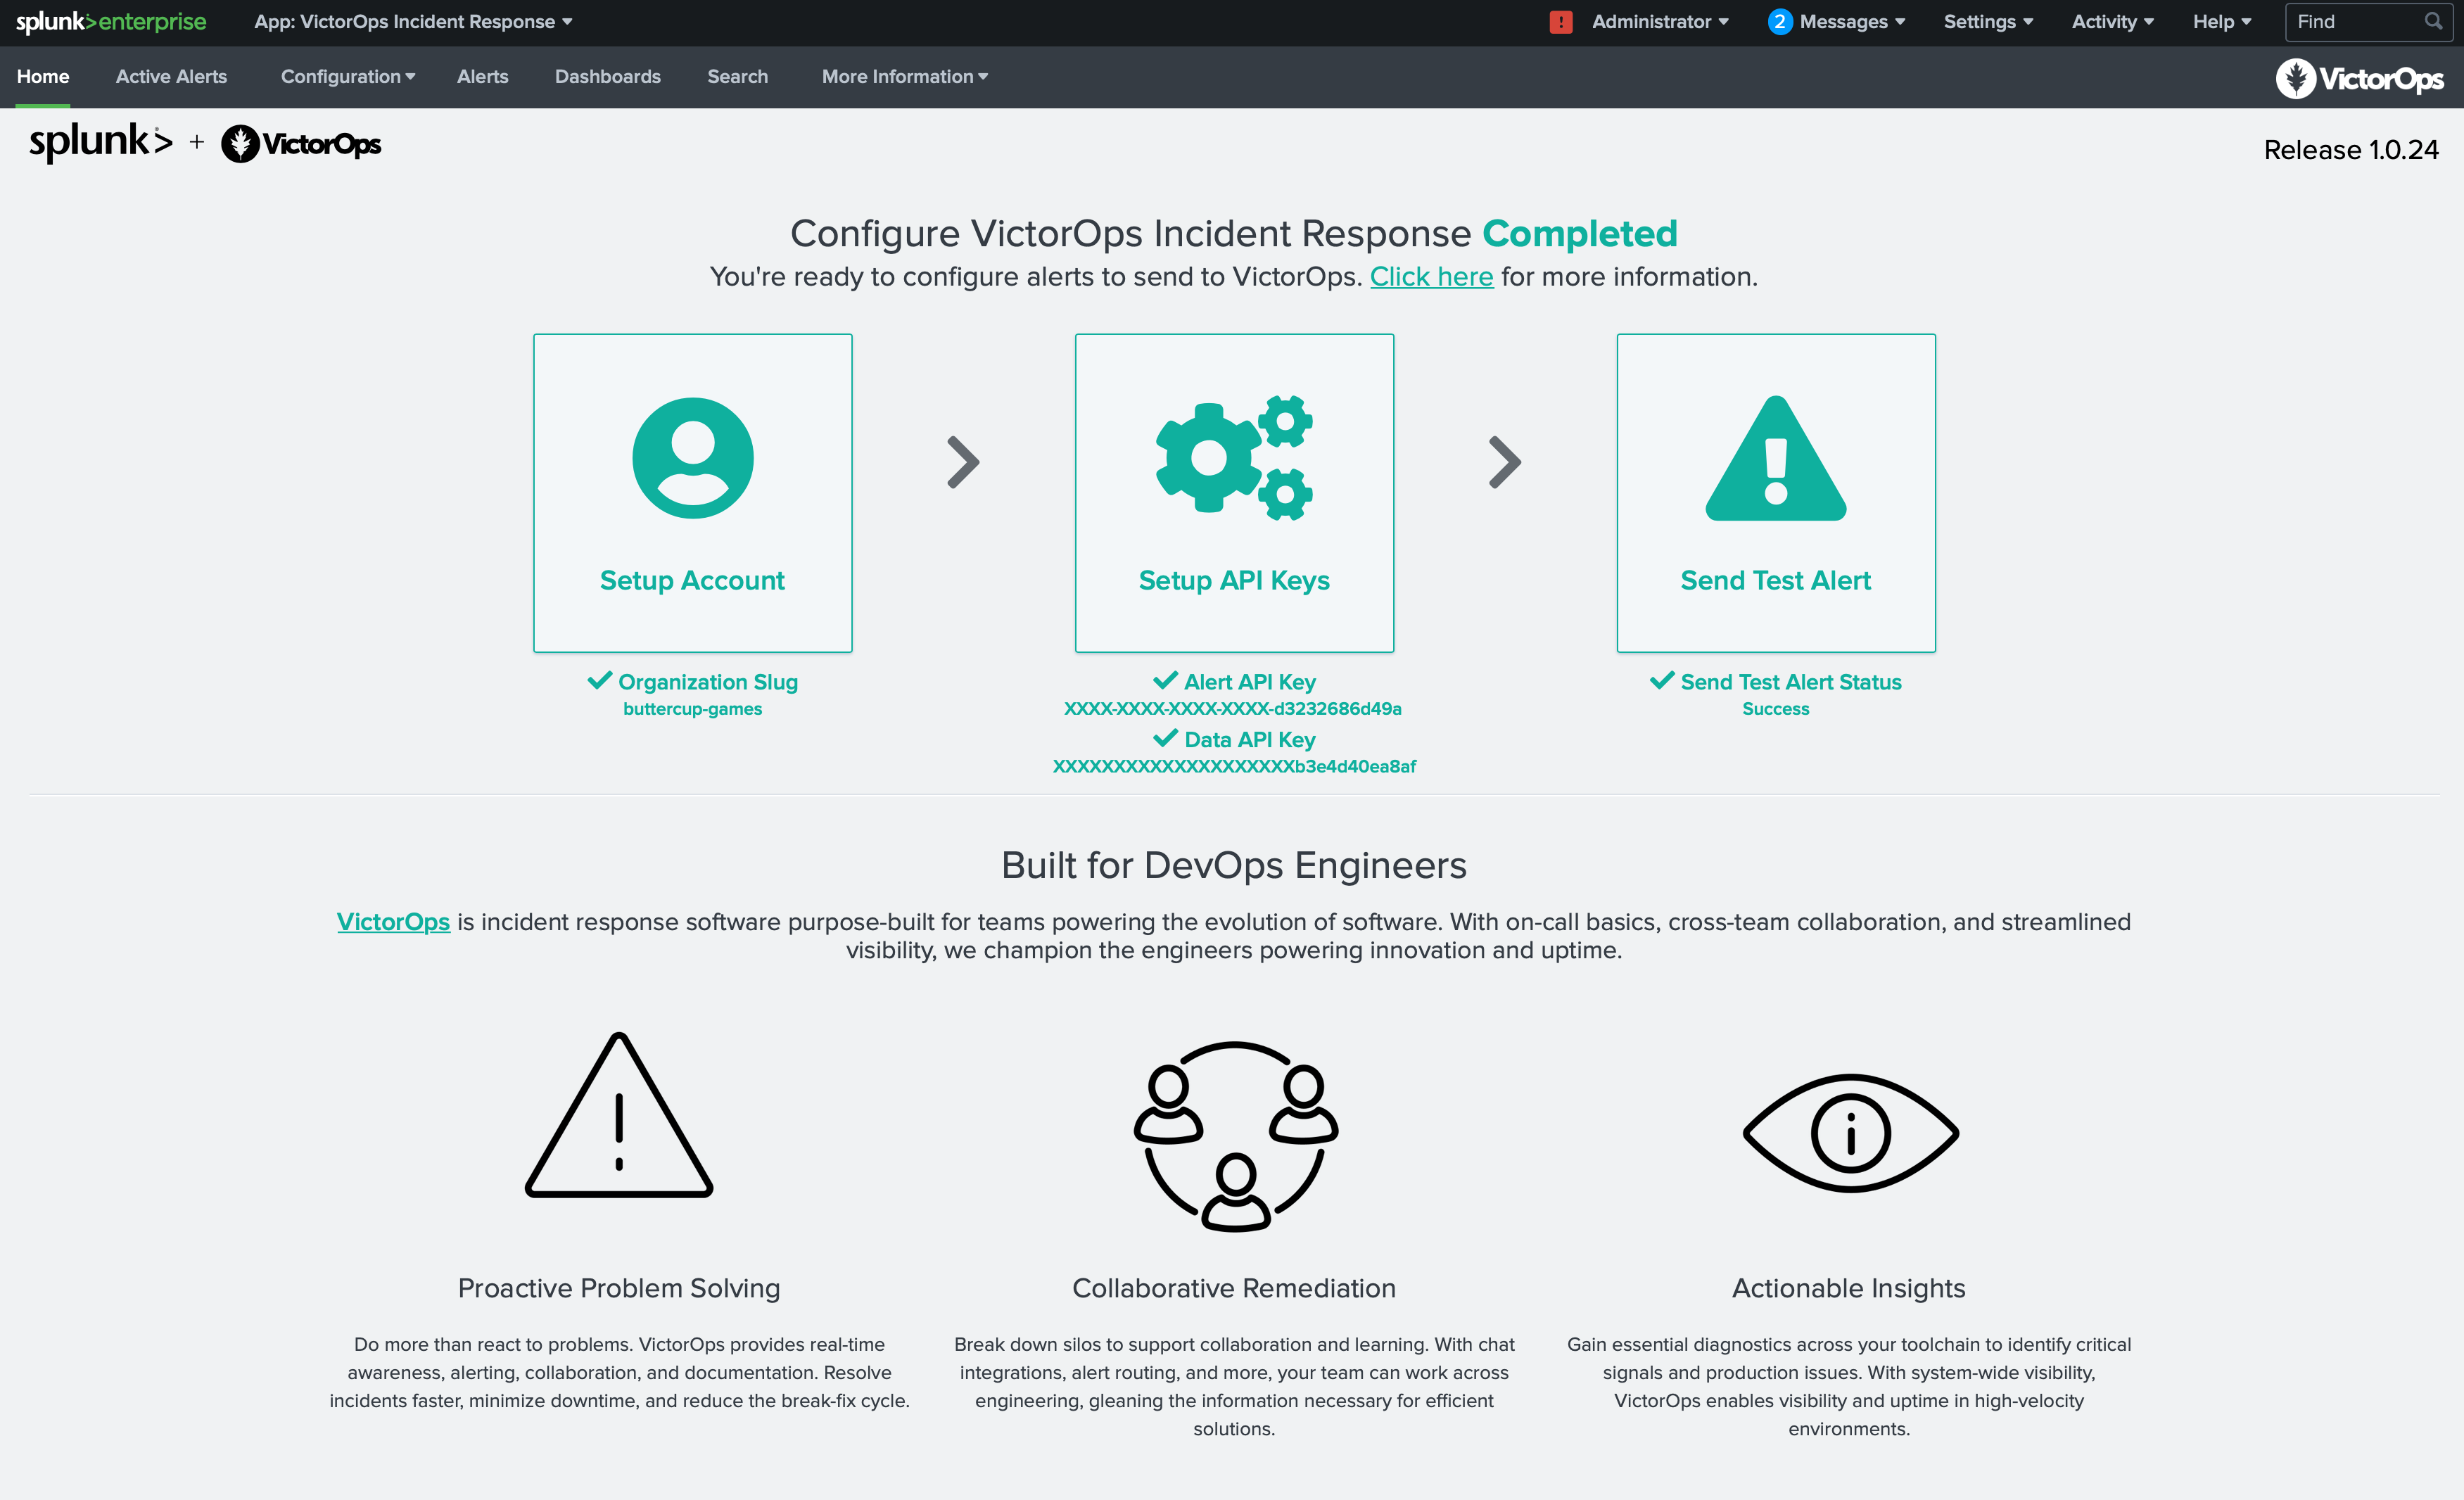
You will be taken to the VictorOps Incident Response Home page which will guide you through setting up the account, configuring API keys, and testing alerts. Once your configuration is complete you will see a check next to each configuration step.
Alert API Key Configuration
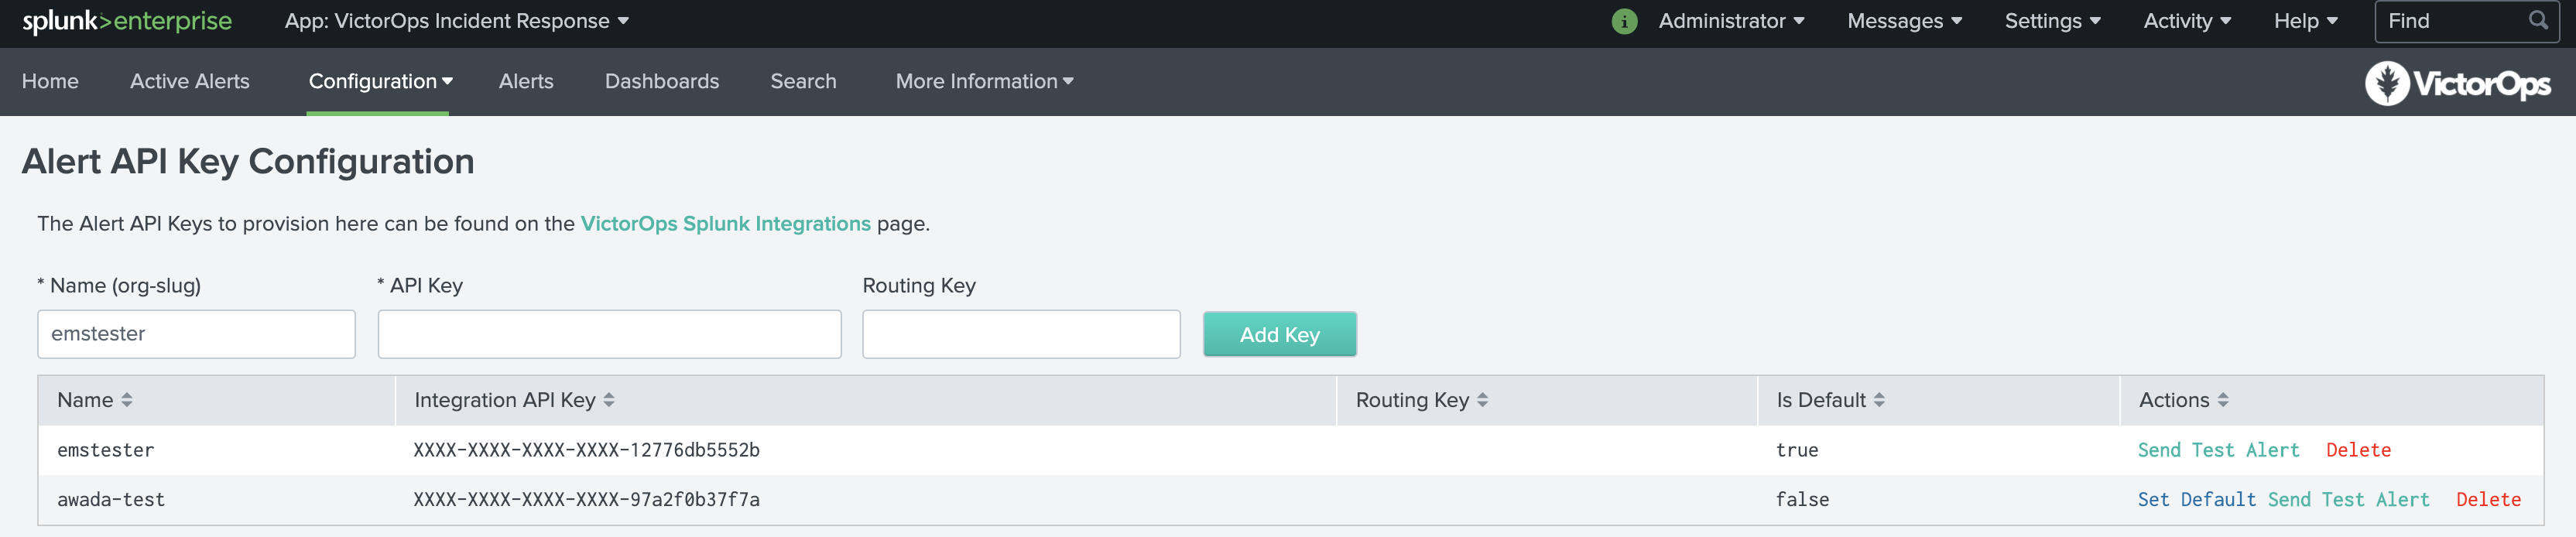
On the Alert API Key Configuration page, paste the API key copied earlier, along with any desired routing key from your VictorOps organization. If the routing key is left blank, alerts will be routed to your default routing key. You will also be able to access your API key by clicking the VictorOps Splunk Integration link.
Testing Configuration
Once API is saved you will be able to verify the integration by selecting Test under actions. You will see success as well as an alert in your VictorOps timeline.
NOTE: This test alert will not be an Incident in your org as it is an INFO alert. To find this test alert, you’ll want to look in your Timeline instead of the Incidents tab.
Also, from the Search app in Splunk, you can directly type
| sendalert victorops param.message_type="INFO"
to send a test alert directly to your VictorOps timeline. To create an incident, simply change INFO to CRITICAL.
VictorOps can now be used as an Alert Action.
Data API Configuration & Routing Keys
For versions 1.0.21 and above you will now be able to add your VictorOps API ID and API Key, found in VictorOps under Integrations >>> API, to retrieve routing keys within VictorOps. If you have yet to generate your API key and ID, please enable and generate your orgs key and ID.
Once the API Key and API ID have been saved, click Retrieve Routing Keys to retrieve the most up to date list of your organizations routing keys.
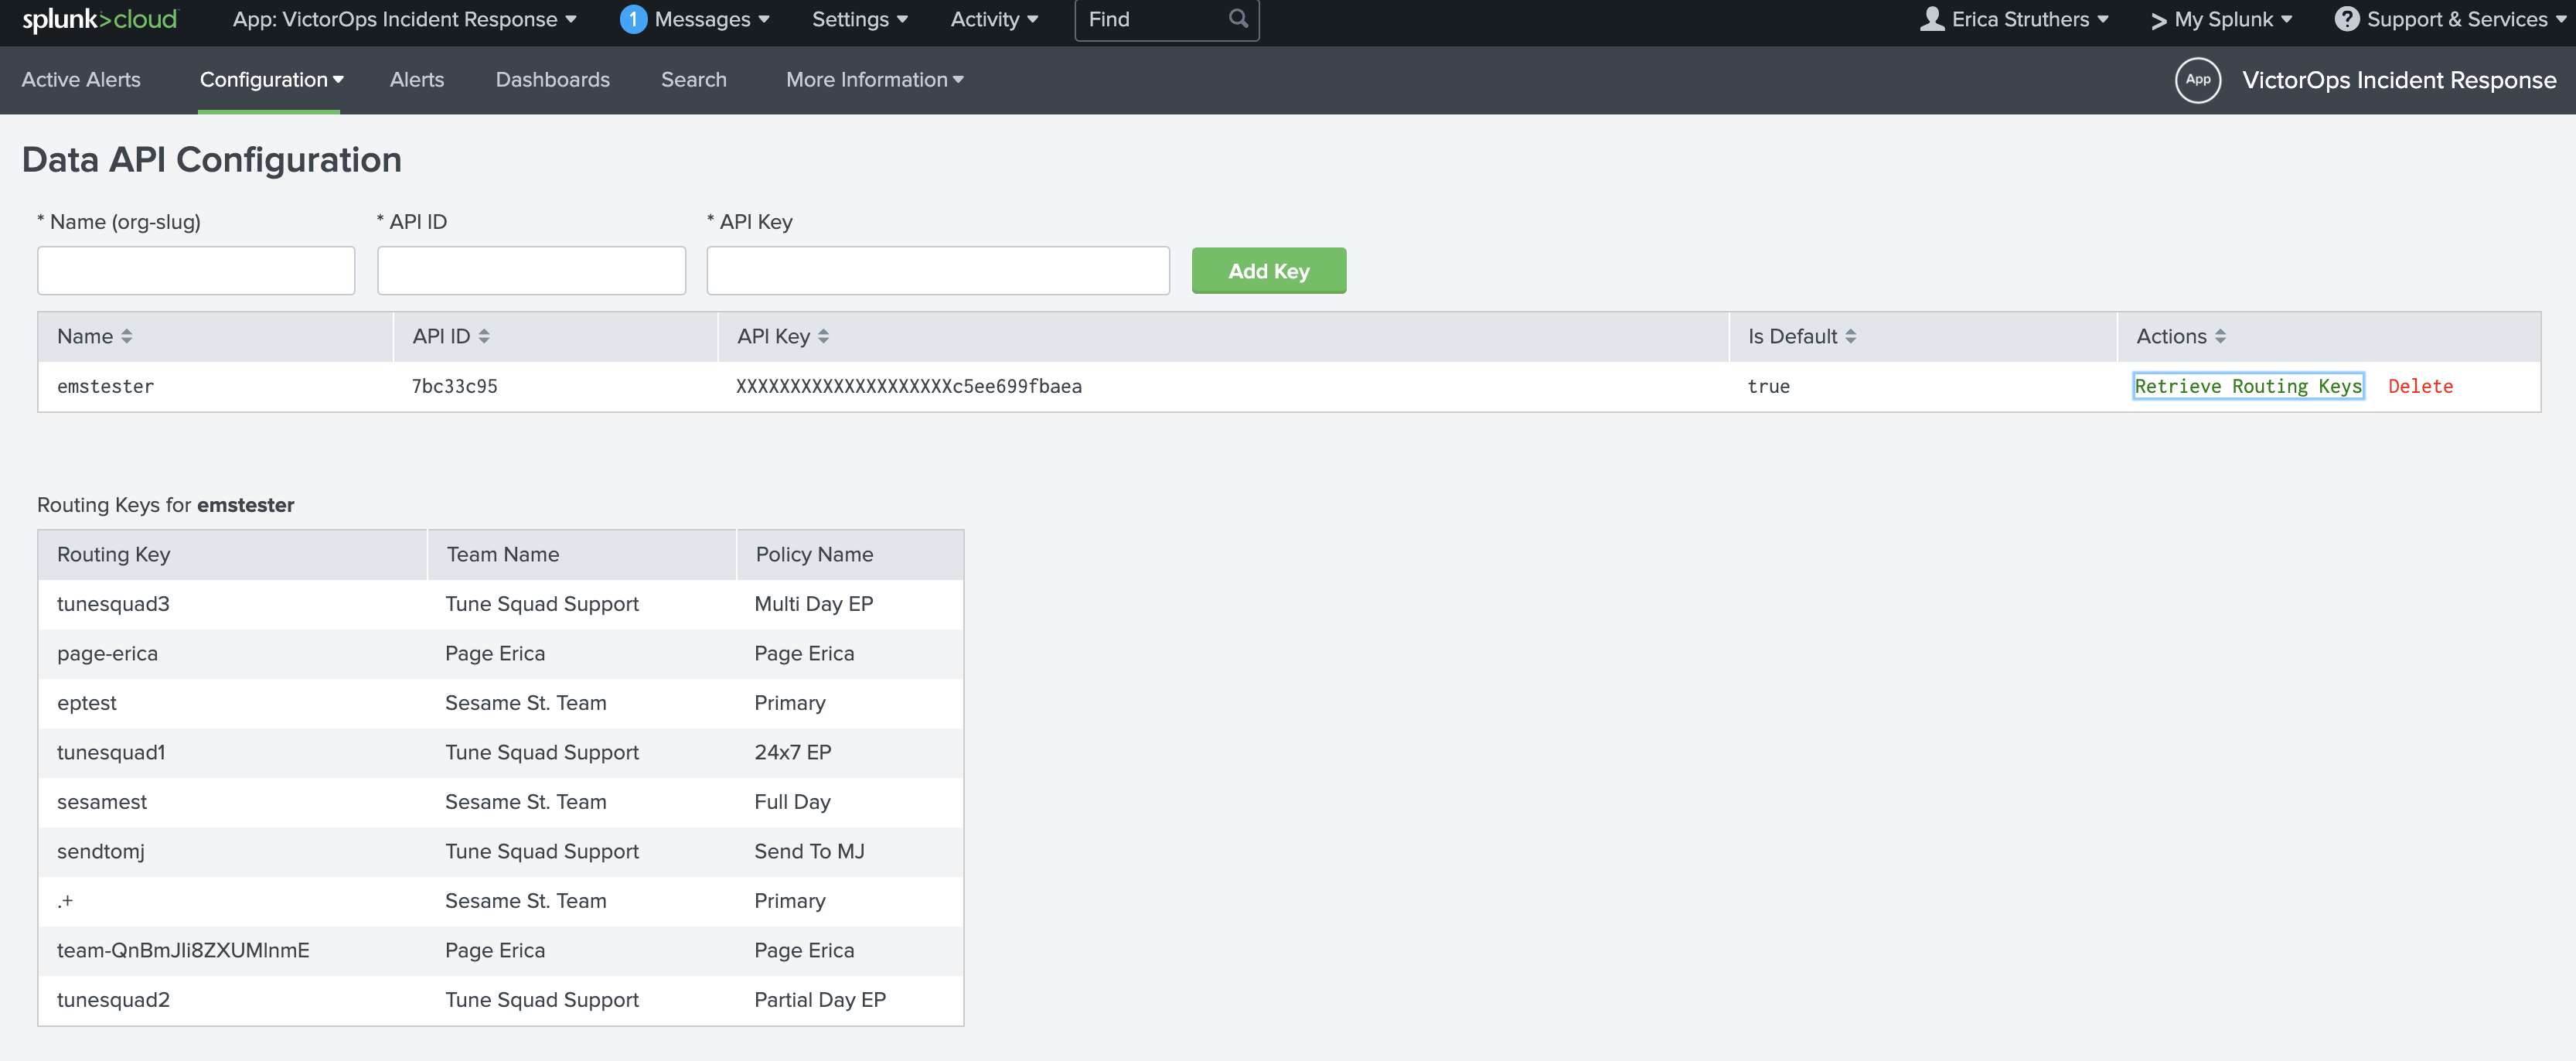
Now, when creating a VictorOps alert action you will see a dropdown of all routing keys within your VictorOps organization.
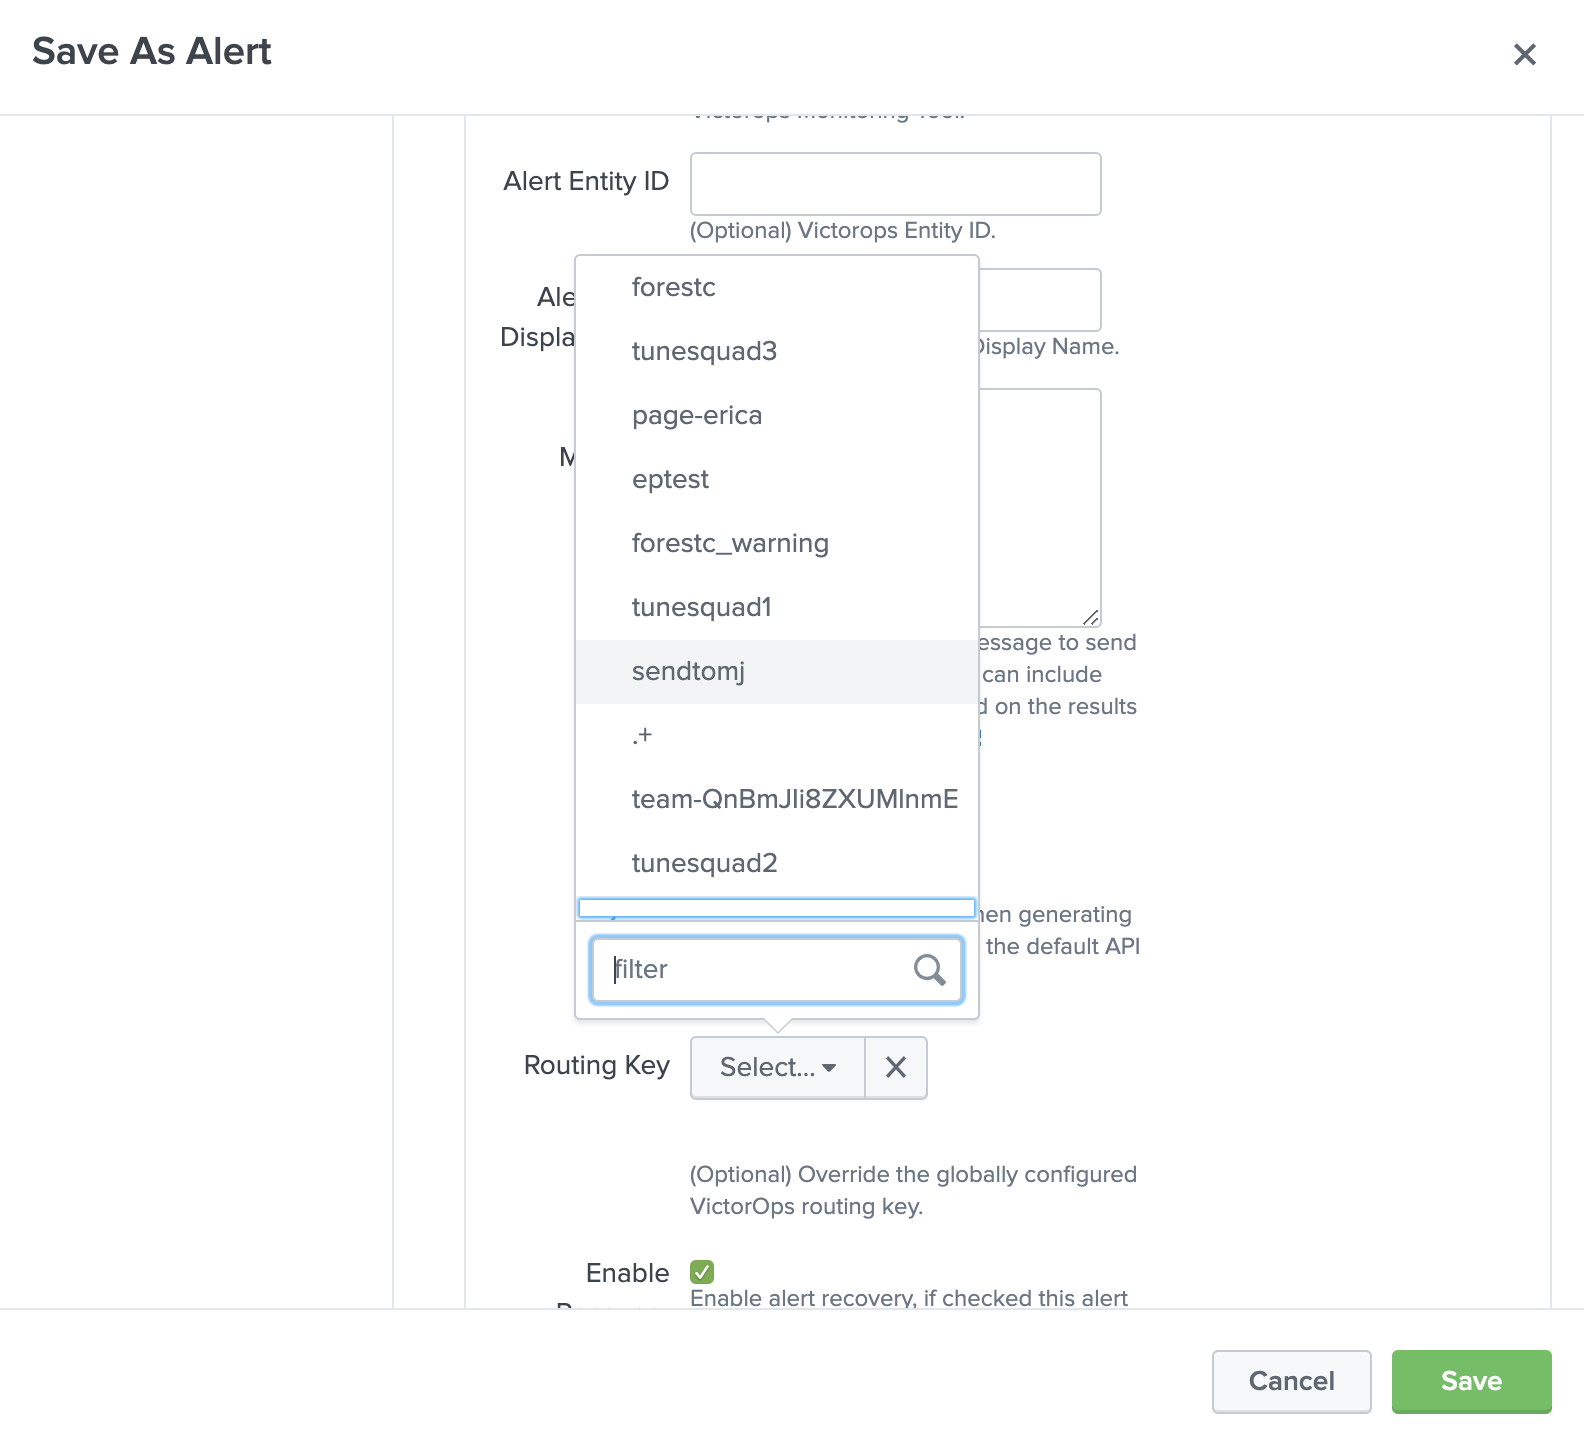
Configuring VictorOps Alert Actions
Here is an example of setting up a new alert based on a search. From a new search select Save As, then select Alert.

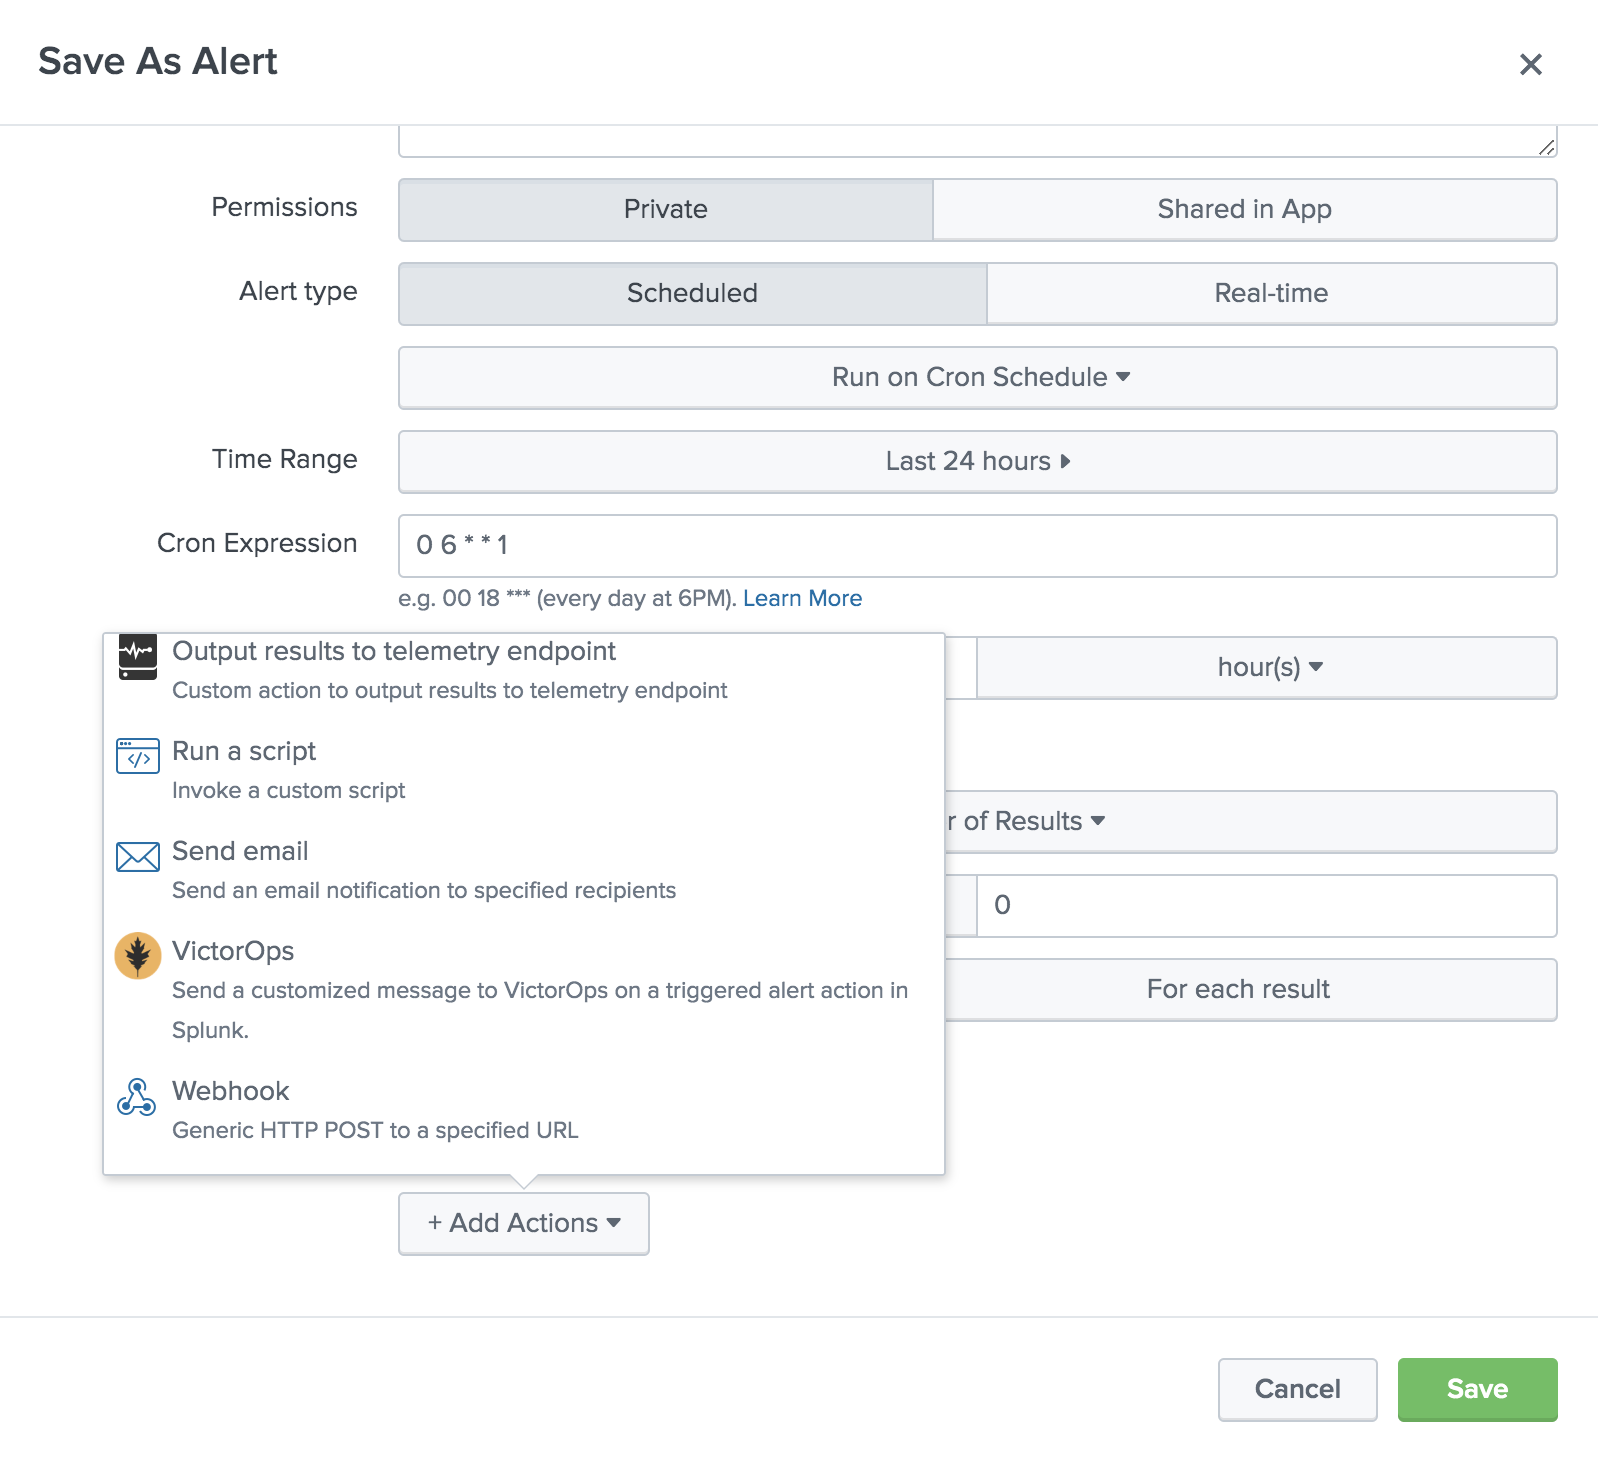
Give the alert a title, description, and permissions as well as configure the check schedule. Under + Add Actions, select VictorOps.
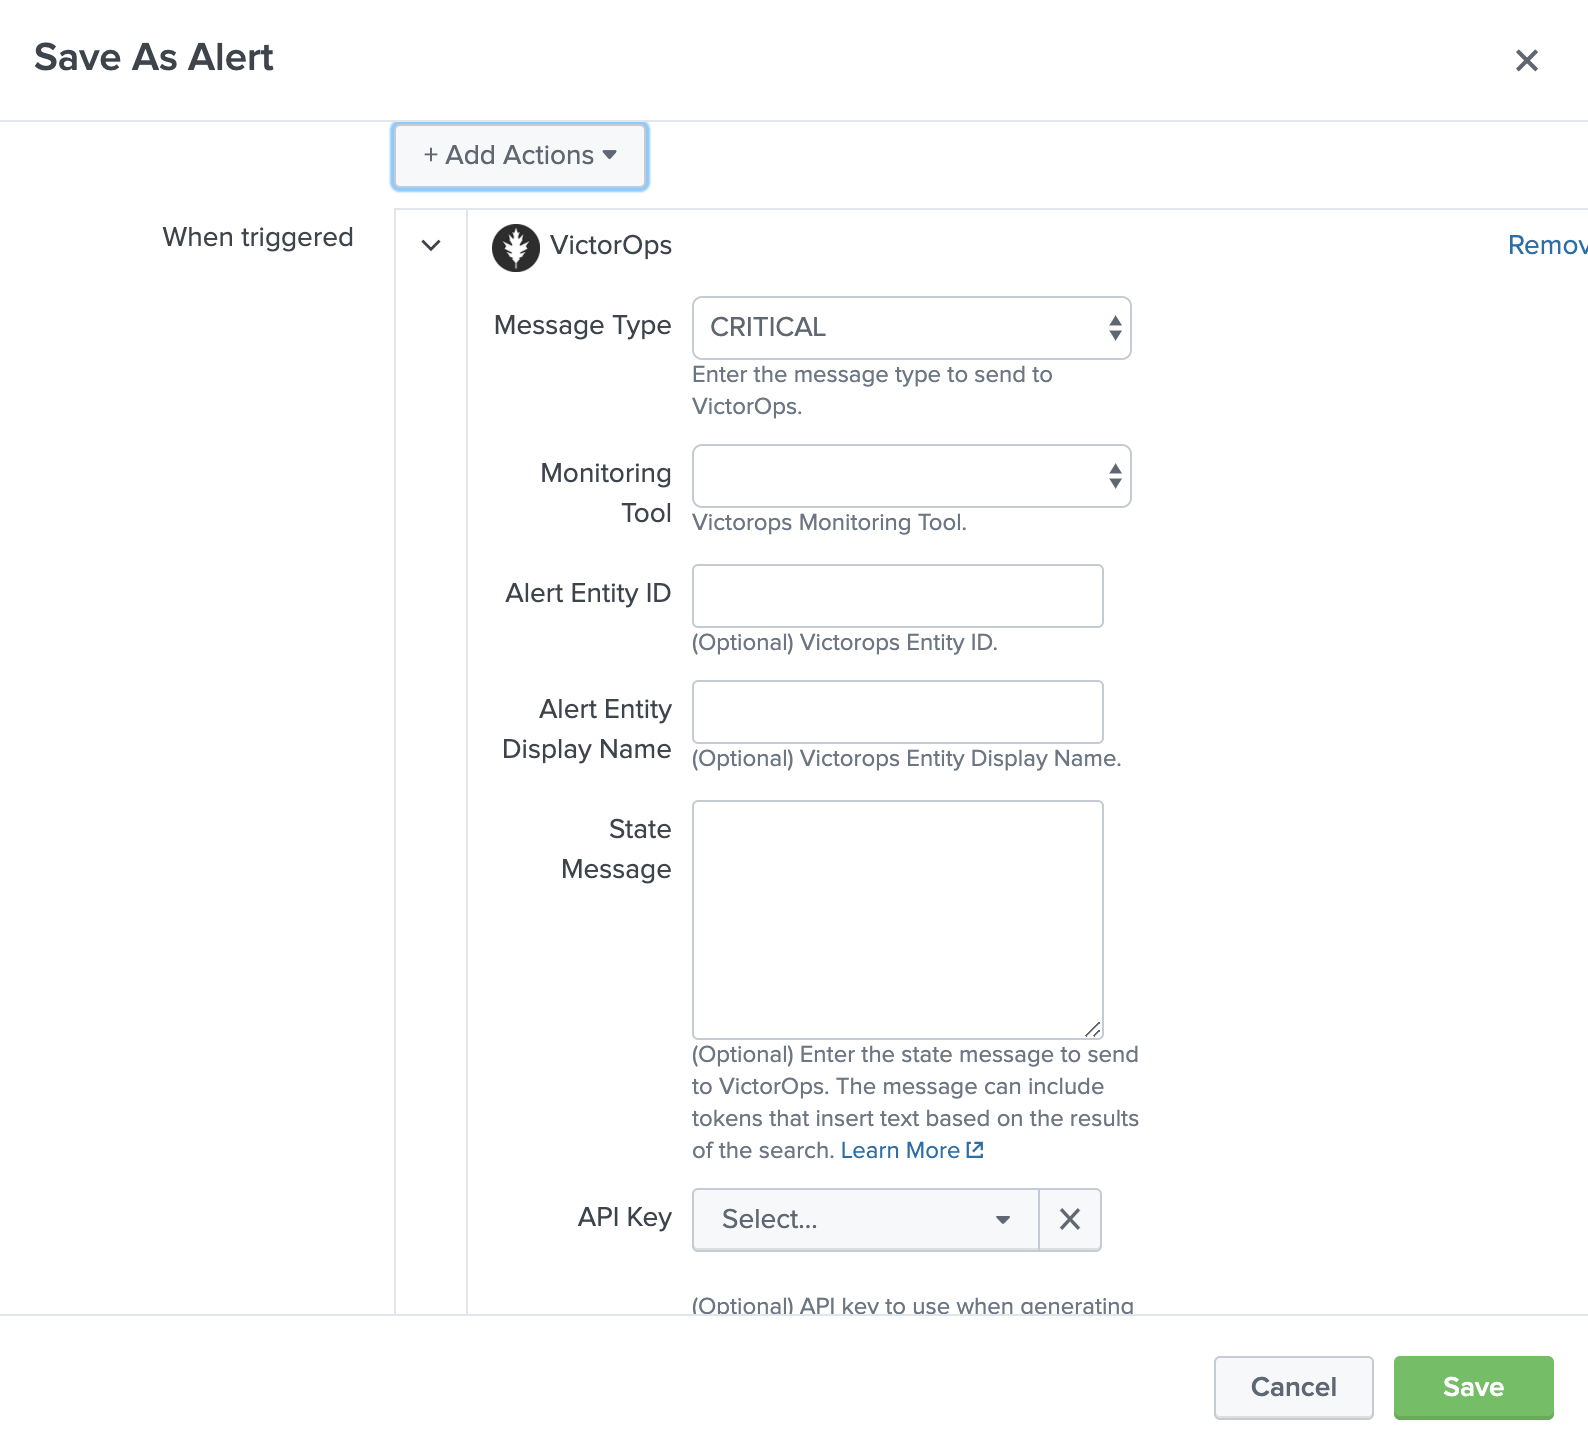
Select the desired message type, and use the state message field to add a brief description of what this particular alert indicates. You may overwrite the default values for entity_id if desired, however, you should understand how best to use this field. If no API key or routing key is selected, alerts will be sent to the default values for these fields. Additionally, you can dynamically reference Splunk fields within these assignments using tokens.
Once the specified conditions are met, you should see an alert appear in your VictorOps timeline.
Alert Annotations
In VictorOps, under the Annotations tab in the incident, all Splunk alerts include an alert link that will direct you back to the Splunk alert.
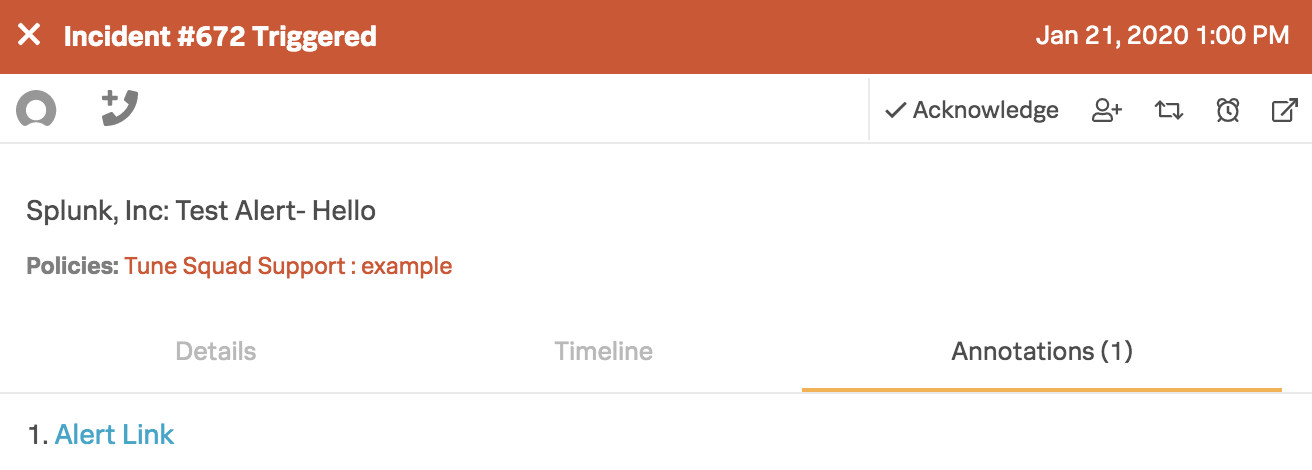
To add other incident annotations please see our Annotations knowledge base.
Investigation
If you are having any troubles with the VictorOps Incident Management App in Splunk please read through the following troubleshooting steps for help. If your problem still persists, please send a detailed summary of your issue, when it first occurred, what version Splunk instance and VictorOps app you are currently running, and support will be able to help!
Issue: The VictorOps app was installed but I am not able to configure the app.
Splunk’s permissions are highly customizable. Please make sure you have the necessary permissions to configure and set up alerts for VictorOps. You can find the necessary permissions under “General Requirements” at the top of this knowledge base.
Issue: The VictorOps Alert Action is visible but there is no option to customize the Alert Actions.
This is oftentimes because the VictorOps App Alert Action permissions are not set to global. Go to Settings >>> Alert Actions and make sure VictorOps App is set to Global sharing.
Issue: The VictorOps App has been successfully configured and test alerts are making it to VictorOps but the VictorOps Alert Action is not visible.
Sometimes a simple “reset” of the Alert Action permission will do the trick. Go to Settings >>> Alert Action >>> VictorOps (Permissions). Next to “Display For” check “app”, save, then reopen permission and select “All apps”. Now, check your alert trigger action on an alert to see if the VictorOps Alert Action is now visible.
Issue: Integration is set up correctly, with all the correct permissions but the test alert and routing key retrieval is failing. This can sometimes be caused by a firewall or multiple firewalls. To check to see if it is an internal network issue you can run the cURL command below:
curl -X POST "https://alert.victorops.com/integrations/generic/20131114/alert/SPLUNK_API_KEY --insecure -H "accept: application/json" -H "Content-Type: application/json" -d '{"message_type": "INFO", "monitoring_tool": "splunk", "state_message": "Test Alert", "entity_display_name": "Test Alert"}'`
If the post does not make it to VictorOps please grep for sendalert in the $SPLUNK_HOME/var/log/splunk/victorops_modalert.log and send the output to victorops-support@splunk.com and a detailed summary of the issue you are facing.
Issue: The VictorOps App is installed, the Alert Action is visible in Alert Actions Settings, but the VictorOps app is not visible as an alert action for an alert.
Please run ./splunk btool check –debug and send victorops-support@splunk.com the log and a detailed summary of the issue you are facing.
Issue: Splunk (enterprise) alerts stopped alerting in VictorOps.
Please try to post the below cURL to check for any internal network issues. If the post makes it to VictorOps please check your firewalls.
curl -X POST "https://alert.victorops.com/integrations/generic/20131114/alert/SPLUNK_API_KEY --insecure -H "accept: application/json" -H "Content-Type: application/json" -d '{"message_type": "INFO", "monitoring_tool": "splunk", "state_message": "Test Alert from localhost", "entity_display_name": "Test Alert"}'`
If the post does not make it to VictorOps please grep for sendalert in the $SPLUNK_HOME/var/log/splunk/victorops_modalert.log and send the output to support and include a detailed summary of the issue you are facing.
Resolution
After following these steps you should now be integrated with Splunk Enterprise and Splunk OnCall! If you have any issues, please refer to the "Investigation" portion of this article or reach out to support.
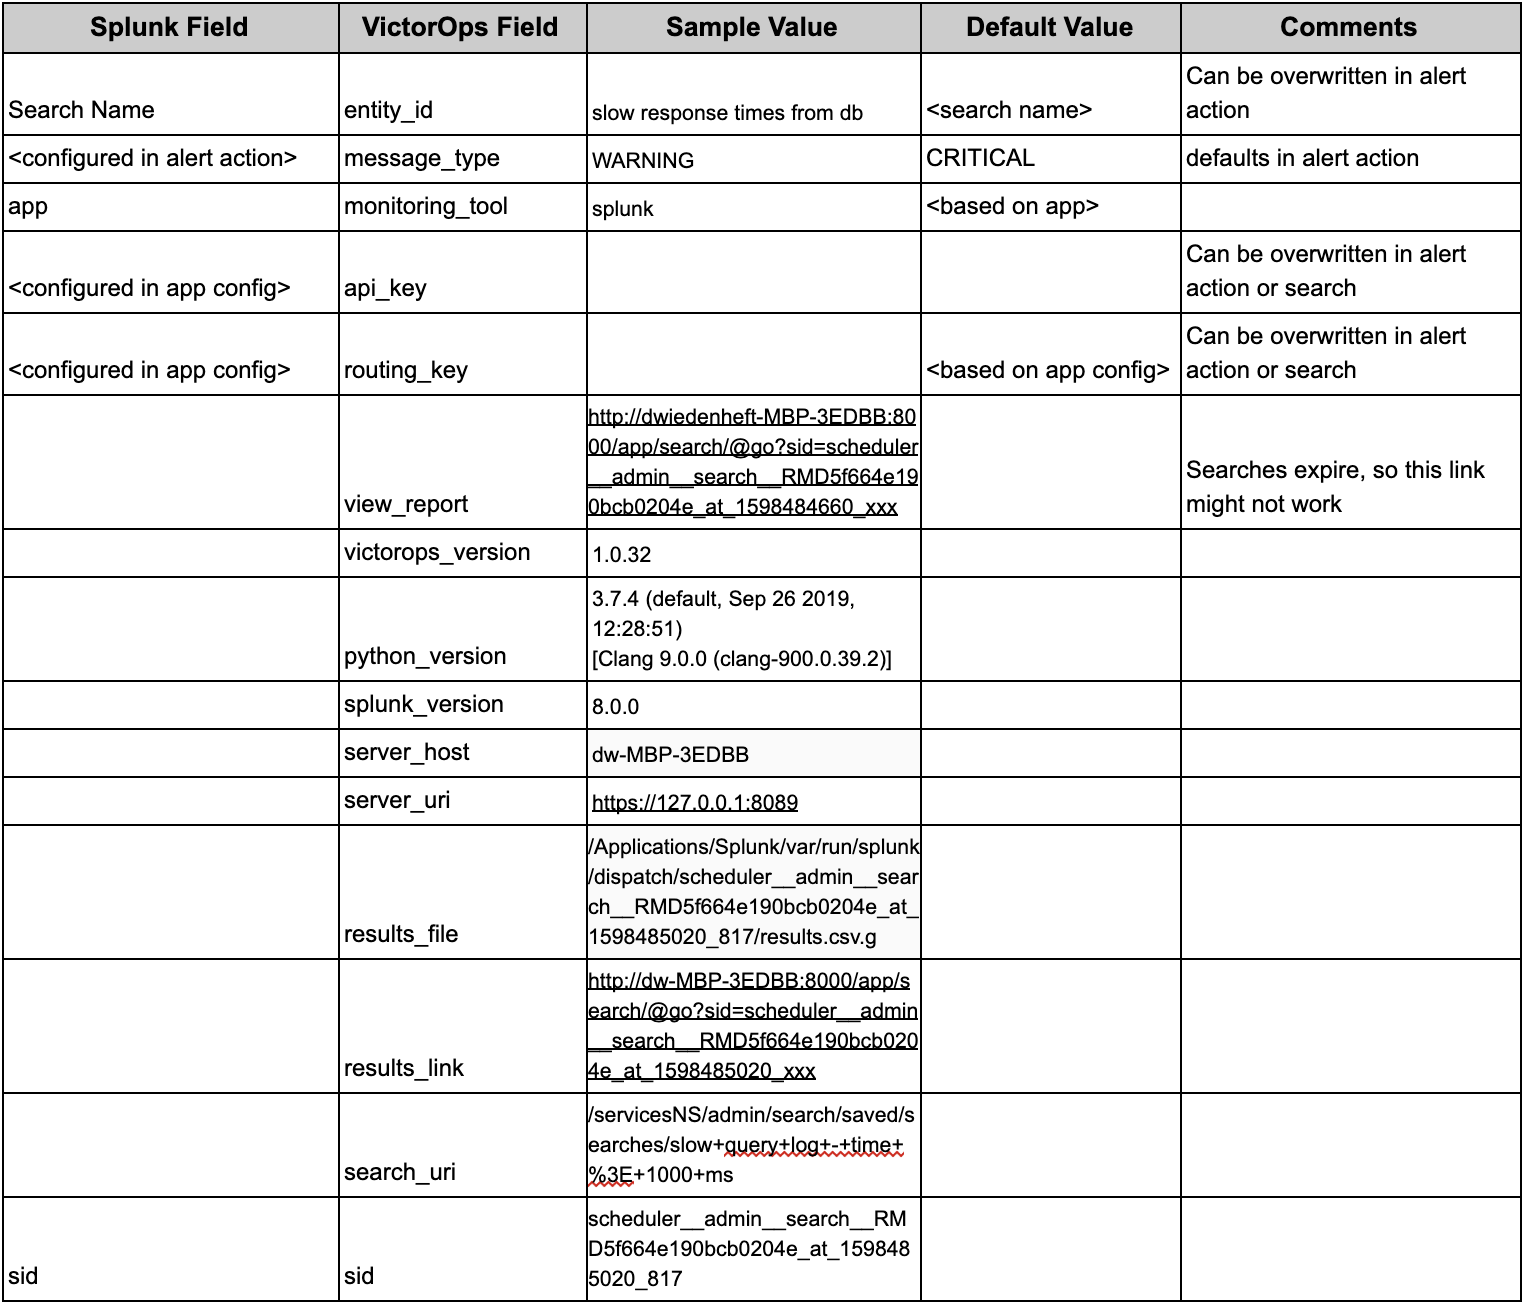
Splunk and VictorOps Mapped Fields
Related Links
For more information: https://docs.splunk.com/observability/en/sp-oncall/spoc-integrations/splunk-integration-guide.html
Revision History
| Revision | Publish Date | Comments |
|---|---|---|
1.0 |
30-Sep-2026
|
Initial Release |
 Feedback
