Configure Catalyst Center Remote Support Authorization Feature
Available Languages
Introduction
This document describes how to setup the Remote Support Authorization feature in Catalyst Center (formerly Cisco DNA Center).
Prerequisites
To fully utilize the Remote Support Authorization feature in Catalyst Center, certain criteria must be met:
- Catalyst Center must be version 2.3.7.6 or higher.
- The Support Services package must to be installed in Catalyst Center.
- Allow Remote Authorization Support through the firewall or proxy.

Note: Remote Support Authorization was introduced in Catalyst Center version 2.3.3.x, however, it has limited functionality. Only network device access is permitted and Catalyst Center CLI access is not present in the earlier version. Catalyst Center versions 2.3.7.6 and later offer web UI proxy access, role-based access control (RBAC) profiling, and passwordless command access.
Description
RADKit provides secure interactive connectivity to remote terminals and Web UIs. The RADKit features are integrated into Catalyst Center and are referenced as Remote Support Authorization. When users utilize the Remote Support Authorization feature, users can have the TAC access their Catalyst Center environments remotely to help gather information or troubleshoot issues. This reduces the amount of time users must sit on video calls as the TAC investigates issues that have occurred.
Limitations
The current version of Remote Support Authorization has these limitations compared to the RADKit standalone version:
- When the support engineer executes the "maglev", "sudo" or "rca" commands on your Catalyst Center, those commands prompt for credentials. Remote Support Authorization does not automate the handling of these credentials, so, you must share these credentials with the support engineer (That feature was added in Catalyst Center 2.3.7.6 and later).
- Through the Remote Support Authorization service, it is not possible to connect to the Graphical User Interface (GUI) of network devices.
- It is not possible to provide remote access to devices that are not in the Catalyst Center inventory but that must be necessary for troubleshooting (for example ISE).
- It is not possible to provide remote access to wireless access points, even when they are in the Catalyst Center inventory.
- Remote access is limited to 24 hours at a time until version 2.3.7.9. In 2.3.7.10 the limit was increased to 4 days.
- By creating an authorization, you allow access to all devices in the Catalyst Center inventory. It is not possible to restrict access to certain network devices.
To overcome these limitations, you can consider installing the standalone RADKit service instead. Installation is available for Windows, Mac, and Linux. For more information, refer to: RADKit
-
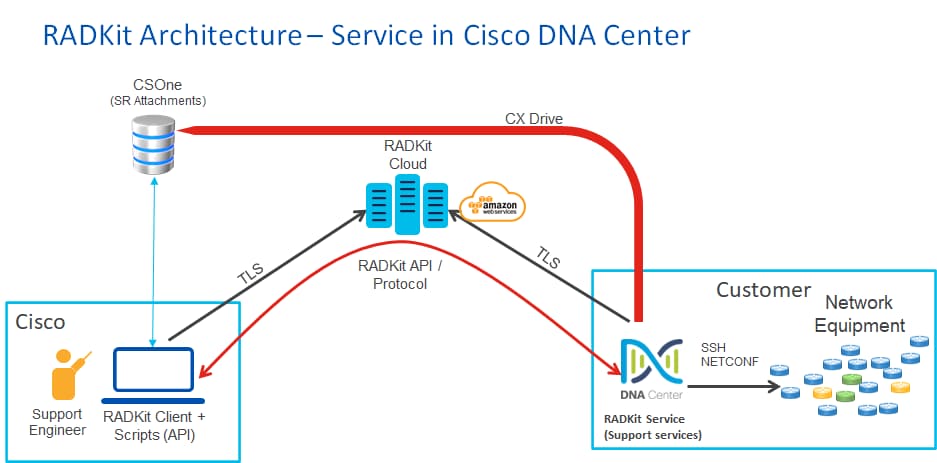
Network Connectivity
Catalyst Center connects to the RADKit connector over AWS. The RADKit connector is built into the Remote Support Authorization feature. The TAC connects to the RADKit connector over AWS and uses a RADKit client. Once a Support ID is generated by the Catalyst Center environment, the RADKit client uses the Support ID to connect to the Catalyst Center.
Set Up Remote Support Authorization
For Remote Support Authorization to be enabled to allow a TAC engineer to engage remotely, these steps must be completed:
1. Ensure the firewall allows the required URL.
2. Install the Support Services package.
3. Configure the SSH credentials for the Remote Support Authorization workflow (No longer required in Catalyst Center versions 2.3.7.6 and later).
4. Create a new authorization.
Step 1
1. For Remote Support Authorization to work, the Catalyst Center connector must communicate with the AWS connector. To ensure this communication, this URL must be allowed through the firewall if one is configured: Prod RADKit

Tip: For more information on specific ports and URLs that are required to be allowed/open for Catalyst Center features to work, review the Plan the Deployment section of the Installation Guide.
Step 2
1. After a fresh install or upgrade of Catalyst Center 2.3.5.x or later is completed, the Support Services package must be manually installed. This is an optional package and is not installed by default.
2. Navigate to the Catalyst Center UI.
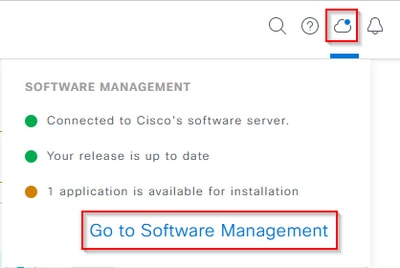
3. From the Home screen of the Catalyst Center UI, select the Cloud Icon at the top-right of the screen and choose Go to Software Management.
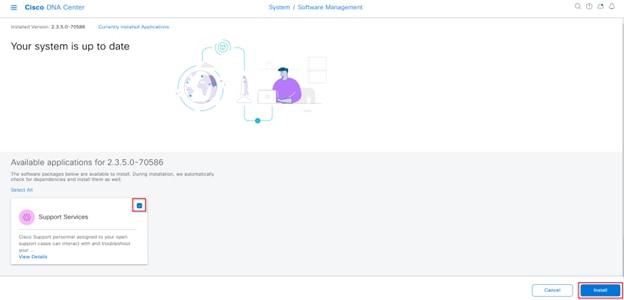
4. Once on the Software Management page, you can see the current installed release and any available release(s) to upgrade to (and any available optional packages).
5. The Support Services package is an optional package and is not installed automatically after a completed fresh install or an upgrade where the package was not previously deployed.
6. Click the box for the Support Services Package under the available packages list, then click the Install button on the bottom-right of the screen.
7. A pop-up window appears for a dependency check for the selected package(s).
8. When the check is finished, choose Continue.
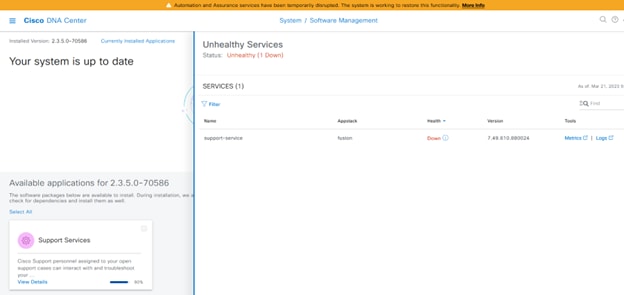
9. The selected package(s) then begins to install. The length of this process depends on the number of packages currently in the deployment process. As the package is in the deployment process, an orange banner appears at the top of the screen that states Automation and Assurance services have been temporarily disrupted. This occurs due to the new support-service pod this is created and is in the process of booting up.
10. After roughly 10 to 20 minutes, the new pod will be in a fully up state and the Support Services package installation completes. Once the package has been installed, refresh the browser, and proceed to Step 3.
Step 3
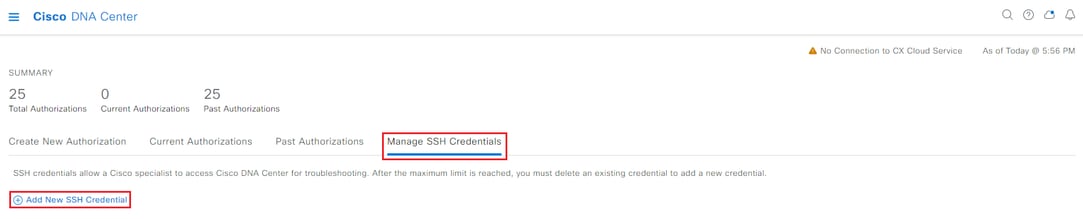
- Full access to the Remote Support Authorization feature requires that the SSH credentials be configured in the Remote Support Authorization settings. Without these credentials defined, the TAC is unable to utilize RADKit to troubleshoot remotely.
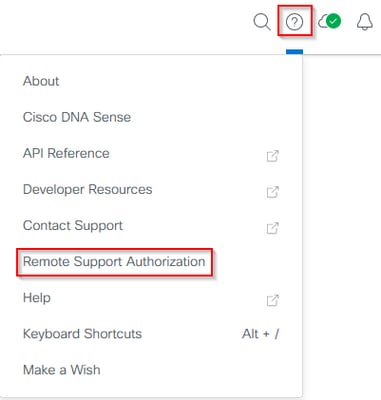
- To configure the SSH credentials, navigate to the Question Mark icon on the top-right of the Catalyst Center UI.
- From the list, choose Remote Support Authorization.
Note: The Remote Support Authorization only shows after the Support Services package is installed and the browser has been refreshed. Refer to Step 2 on how to complete this.
Note: SSH credentials no longer need to be configured in the Remote Support Authorization page starting in version 2.3.7.6 and later. This is part of the new passwordless feature. Catalyst Center pulls the credentials stored internally and no credentials need to be configured or shared with TAC engineers.
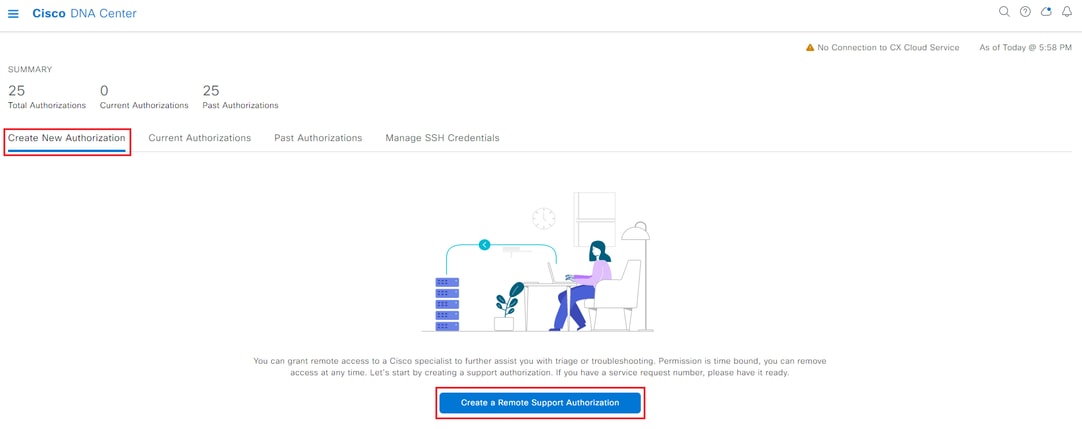
4. Next, you are redirected to the Remote Support Authorization page. If this is the first time accessing this page after installating the Support Services package, you only see the Create New Authorization screen.
Step 4
1. Choose Create a Remote Support Authorization.
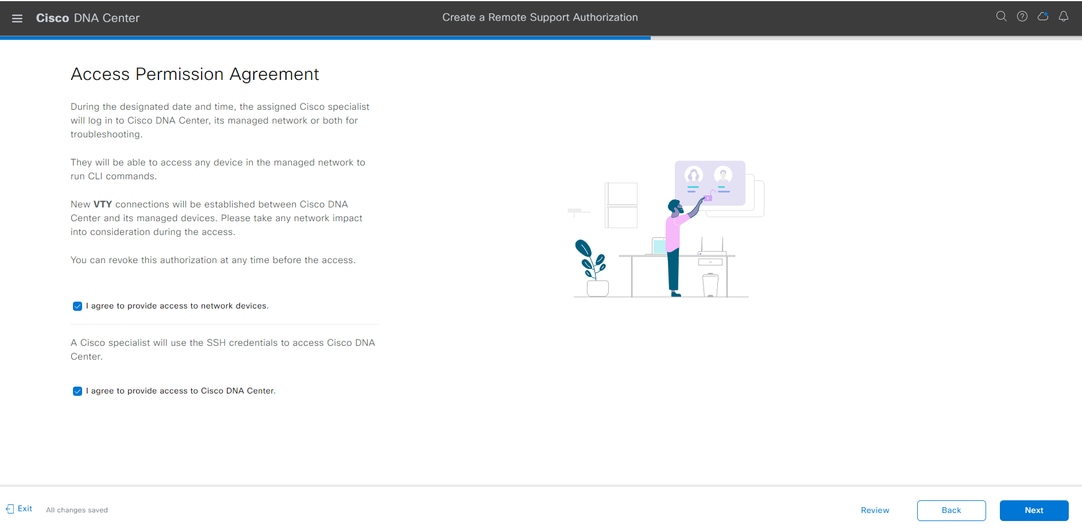
2. You are redirected to the Access Permission Agreement page. This page has two options:
- New VTY connections between Catalyst Center and the devices managed in Inventory.
- Access to the CLI of the Catalyst Center appliance(s)
3. To establish an SSH connection with the network devices managed by Catalyst Center, the first option must be selected. If this option is not selected, TAC engineers cannot SSH into the devices with RADKit.
4. To establish an SSH connection to the Catalyst Center appliance(s), the second option must be selected. If this option is not selected, TAC engineers cannot access the Catalyst Center with RADKit. For the best use of the Remote Support Authorization feature, it is recommended to select both options.
5. After the desired options are selected, click Next.
6. Next, you are redirected to a workflow page to start the setup of the authorization. You must enter the TAC engineer's email address and their access role. For example: “ciscotac@cisco.com” and "OBSERVER-ROLE". These two fields are optional:
- Existing SR Number(s)
- Access Justification
7. If you have an open TAC Service Request, enter that Service Request number in the Existing SR Number(s) field. If you have additional documentation for the Remote Support Authorization, add that in the Access Justification field such as, “Required by the TAC to help troubleshoot an issue seen”.
8. Click Next.
Note: The ability to use the GUI to generate the RCA or mini-RCA, run validation tool checks, or run any reports is disabled for the OBSERVER-ROLE access as this is a read-only role.

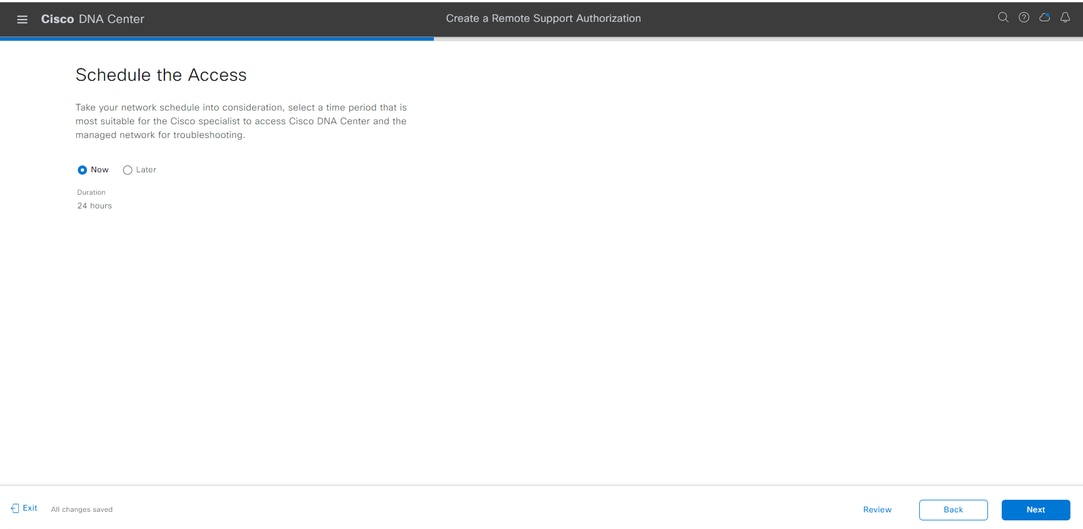
9. Now, you are redirected to the Schedule the Access step. You must either choose Now or Later. You can start the authorization immediately or schedule the authorization in advance.
Note: The authorization can only be scheduled in advanced for up to 30 days from the current date the authorization request was created.
Note: Authorization requests are set for 24 hours. Although authorizations can be cancelled early, the duration cannot be changed from 24 hours until 2.3.6.7.10 or later.
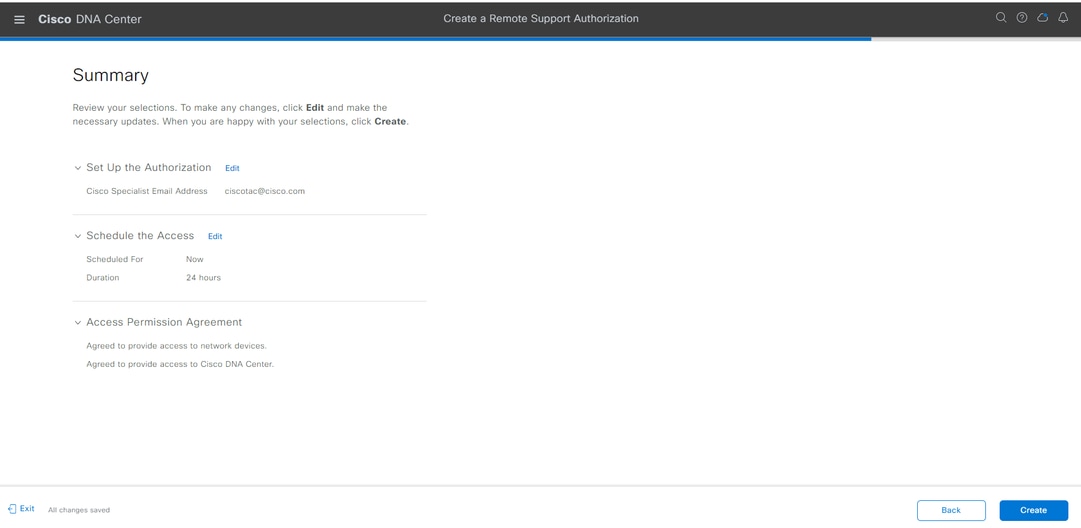
10. You are redirected to the Summary page, which lists the configuration changes planned from the responses to the Create a Remote Support Authorization workflow. Review and confirm the settings are correct. If the settings are correct, click Create.
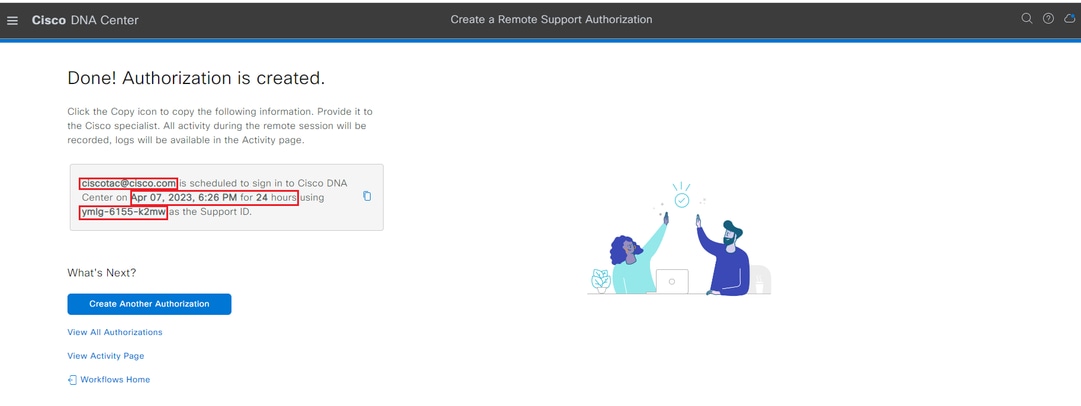
11. Click Create to proceed to the final step. You are redirected to a page that states the authorization has been created. Key items on this page include:
- TAC engineer email address
- Scheduled start time and duration of the authorization
- Support ID
Note: The TAC engineer requires the Support ID to connect with the RADKit client to attach the authorization request. Copy the information provided and send it to the TAC engineer.
12. From this page you have the option to choose Create Another Authorization, View All Authorizations, View Activity Page, or View Workflows.
13. If another authorization does not need to be created, you can choose View All Authorizations to see all current and past authorizations.
- View Activity Page redirects you to the Audit Logs page.
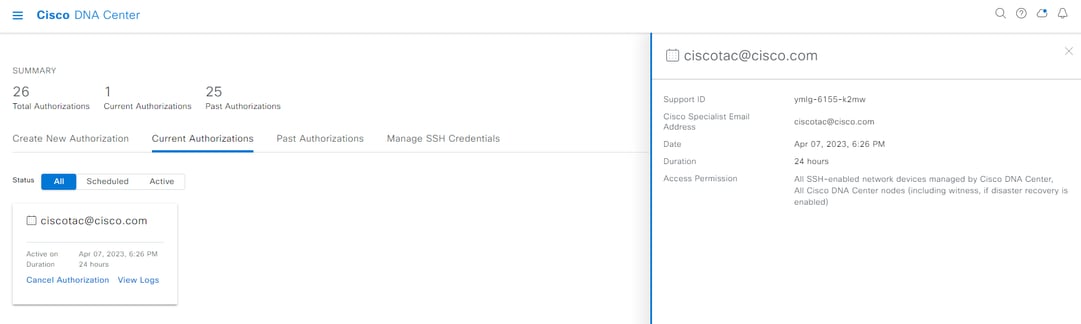
- View All Authorizations redirects you to the Current Authorizations page on the Remote Support Authorization section.
- You can view All, Scheduled, or Active authorizations.
- Click on an authorization to open a side window that displays the settings configured with the Create a Remote Support Authorization workflow.
14. You can cancel an authorization or view audit logs of what the TAC engineer has done with your deployment. You can choose to switch to the Past Authorizations tab to view historical information on previous authorizations.
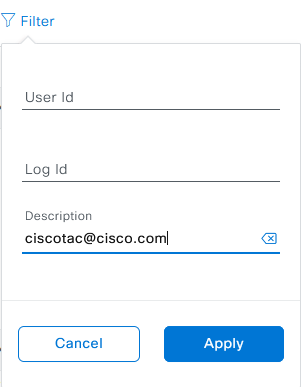
15. Choose View Logs to be redirected to the Audit Logs page. From the Audit Logs page, you can choose Filter, then filter by Description with the email address of the TAC engineer.
16. Choose Apply. This adds a filter based on the TAC engineer's email address and it shows the description of the audit logs when RADKit is used to remotely access the deployment.
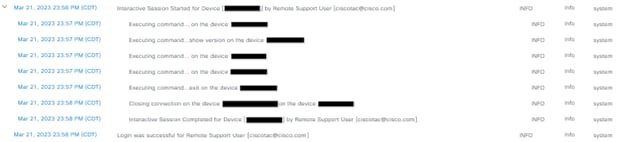
17. From the audit logs you can see what the TAC engineer did and when they signed on.

Warning: Remote Support Authorization feature of Catalyst Center version 2.3.7.6 is tested with RADKit client 1.6.11.
Step-by-Step Video Guide
Refer to this link to view a video created as a step-by-step guide:
Revision History
| Revision | Publish Date | Comments |
|---|---|---|
6.0 |
15-Jun-2026
|
Updated spelling, grammar, sentence structure, spacing, numbering, alt text on pictures, and updated notes and tips for alignment purposes. |
4.0 |
13-Aug-2024
|
Update Cisco DNA Center to Cisco Catalyst Center. Updated the title. Updated the doc to display the new workflow for enabling on 2.3.7.6+ |
3.0 |
01-Mar-2024
|
Added "limitations" section |
2.0 |
07-Apr-2023
|
Initial Release |
1.0 |
29-Mar-2023
|
Initial Release |
 Feedback
Contact Cisco
- Open a Support Case

- (Requires a Cisco Service Contract)