CSPC Collection Platform Software Installation and Configuration Guide
Available Languages
Introduction
Introduction to CSPC Collection Platform Software
Installation and Configuration
OVA Installation
ESXi Patch Installation
CSR1000V NAT OVA Installation
CSR1000v Upgrade
CIMC Patch Installation
NOS Configurer
Introduction
This guide explains how to use install and configure CSPC Server. Refer to CSPC User Guide to use the application.
For program updates and important notes, refer to CSPC Release Notes and README documentation.
Introduction to CSPC Collection Platform Software
The Cisco Common Service Platform Collector (CSPC) is an SNMP-based tool that discovers and collects information from the Cisco devices installed on your network. The CSPC software provides an extensive collection mechanism to gather various aspects of customer device data. Information gathered by the collector is used by several Cisco Service offers, such as Smart Net Total Care, Partner Support Service, and Business Critical Services. The data is used to provide inventory reports, product alerts, configuration best practices, technical service coverage, lifecycle information, and many other detailed reports and analytics for both the hardware and operating system (OS) software.
Who Should Use This Guide
This guide is written for Network and Security Administrators and Cisco Network Engineers and also for new users.
The user should have Administrative privileges on the machine to install CSPC.
Installation and Configuration
CSPC Server image comes with a preloaded application that consists of server software, database, and all the necessary tools.
OVA Installation
This section describes detailed installation procedures for different installation stages
Pre-requisites
For an uninterrupted deployment, installation, and configuration of CSPC software, have these ready:
- xxx.ova file from the download center
- CSPC static IP address, default gateway IP address and subnet mask use. This is recommended only if DHCP is not enabled.
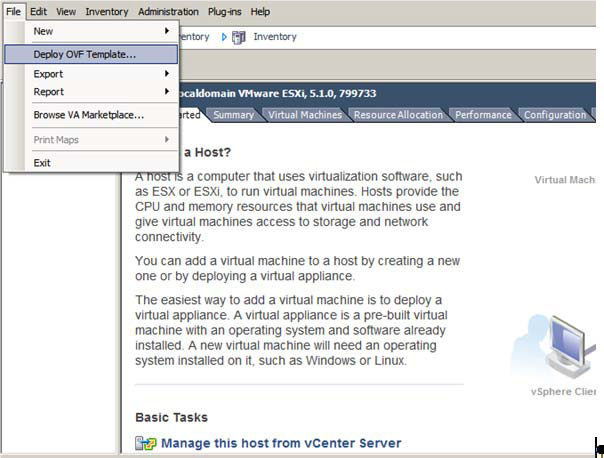
Deploy CSPC OVA
This section describes steps to deploy CSPC OVA using VMWare vSphere Client:
- Get the xxx.ova file either to a web server or local file system where vSphere client is available
- Launch vSphere client and login using credentials with the privilege to deploy an OVA file
- Use vSphere client and select the ESXi host or IP address that manages CSPC virtual machine
- Use vSphere client and select the File menu and then select the Deploy OVF Template… menu item shown in the file menu.
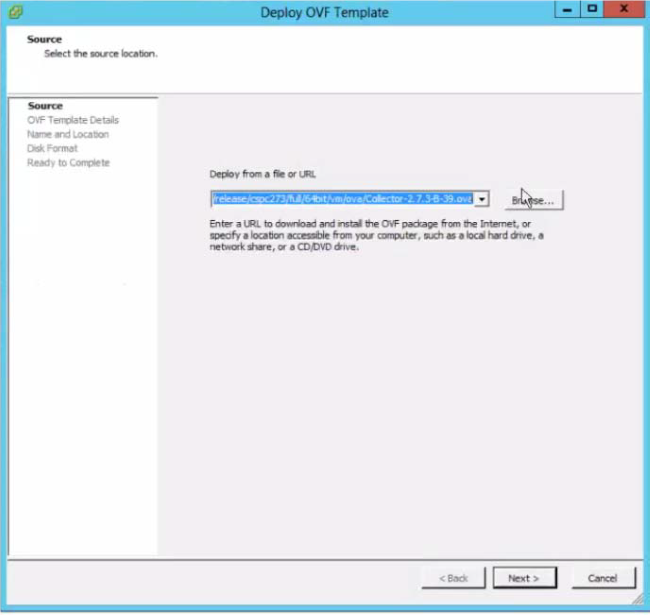
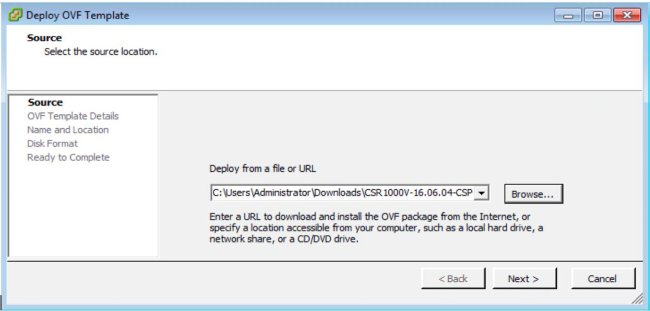
- There are two ways to select the OVF file to deploy:
- Select the OVF file residing on local or a remote web server using web browser. If this option is used, type the URL for the file xxx.ova, then click Next.
- Select the OVF file residing locally using the file explorer. If this option is used, click Browse… and navigate the file explorer to locate the file xxx.ova, then click Next.

- Browse to select the URL and click Next to proceed.
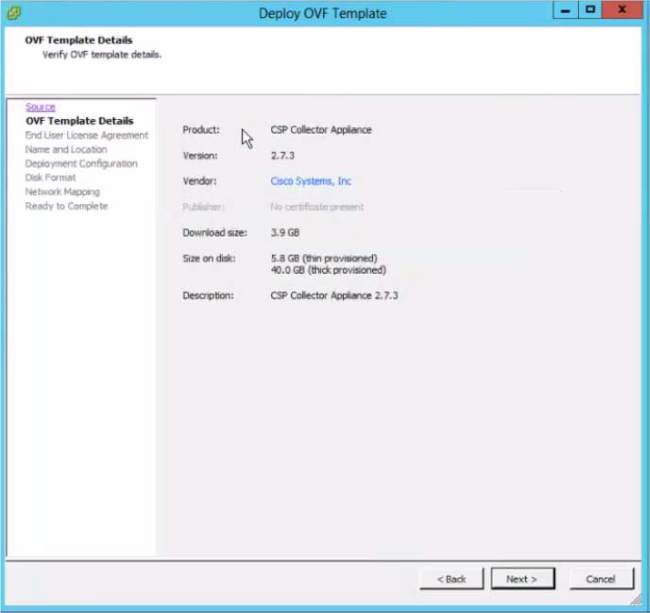
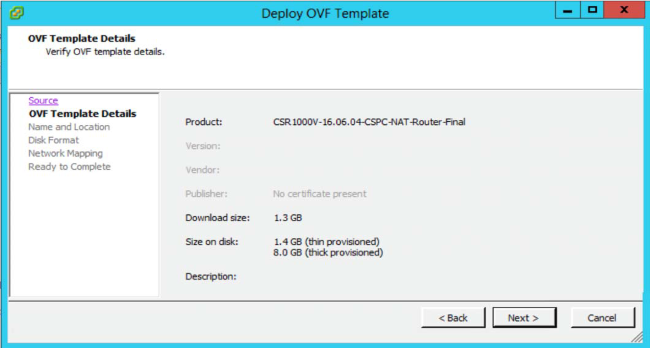
- Click Next to proceed.
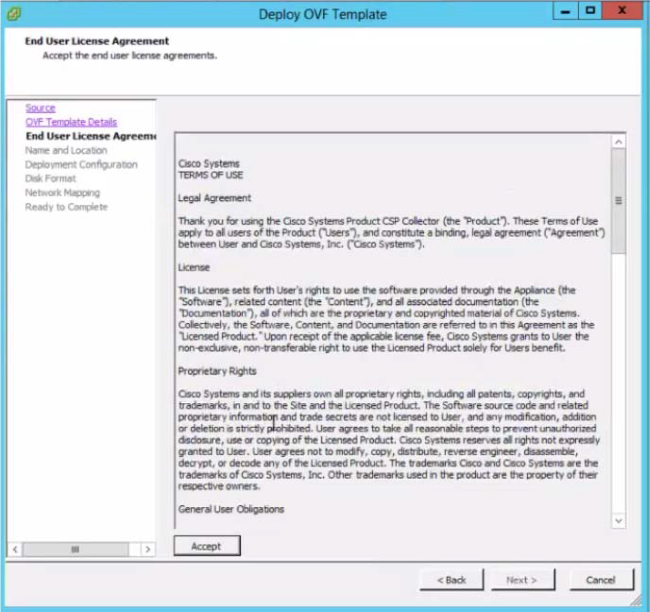
- Click Accept to acknowledge the end user agreement.
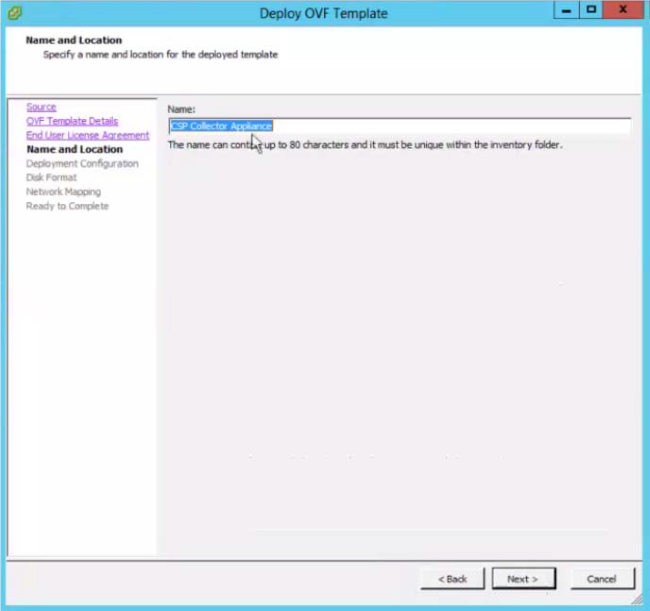
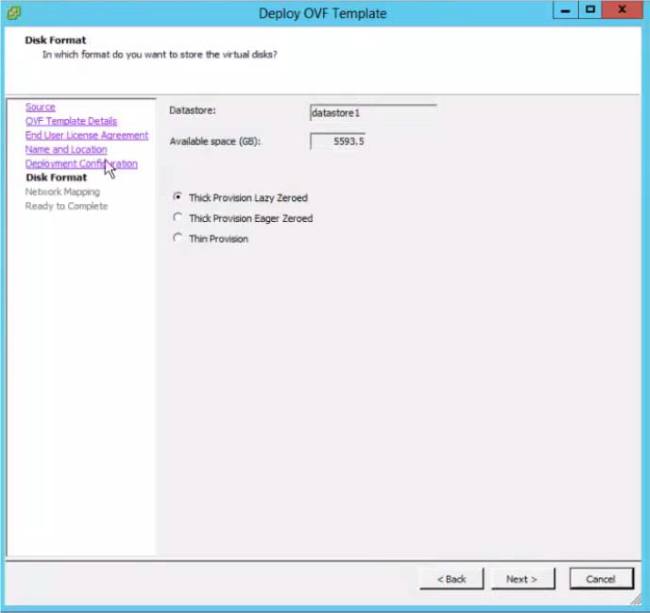
- Select the appropriate storage to store the virtual machine then click Next to proceed.
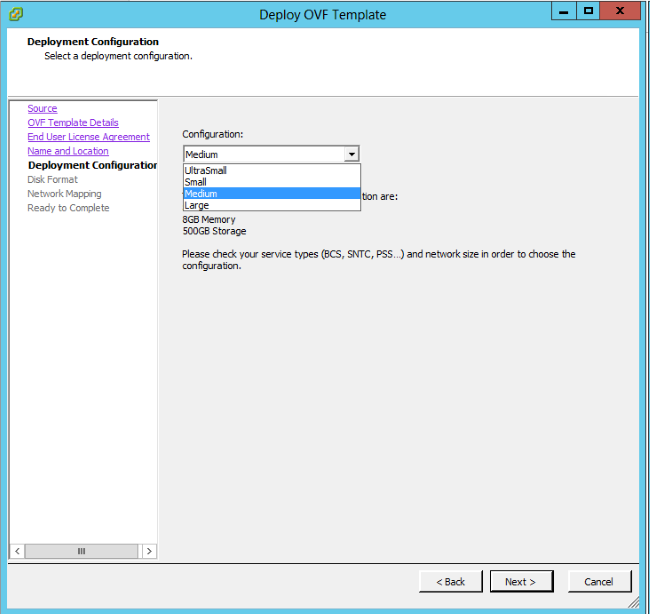
- Select the required configuration and click Next.
- Click Next to proceed.
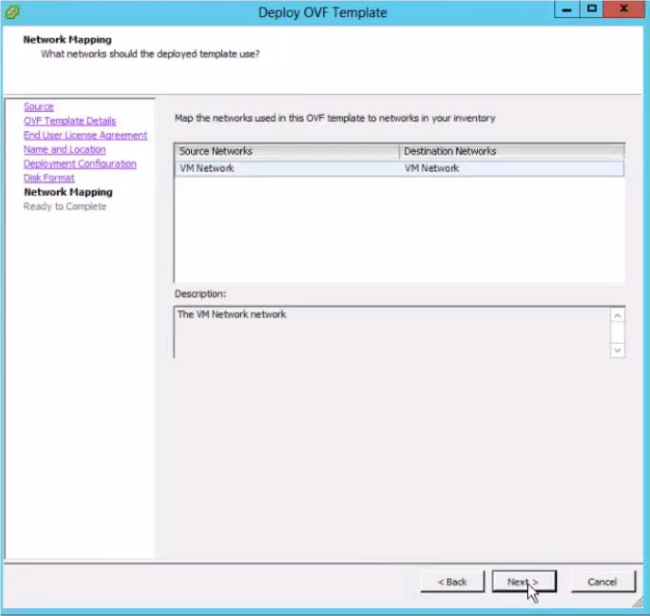
- Map the network use and click Next.
- Choose the Poweron after deployment, then click Finish.
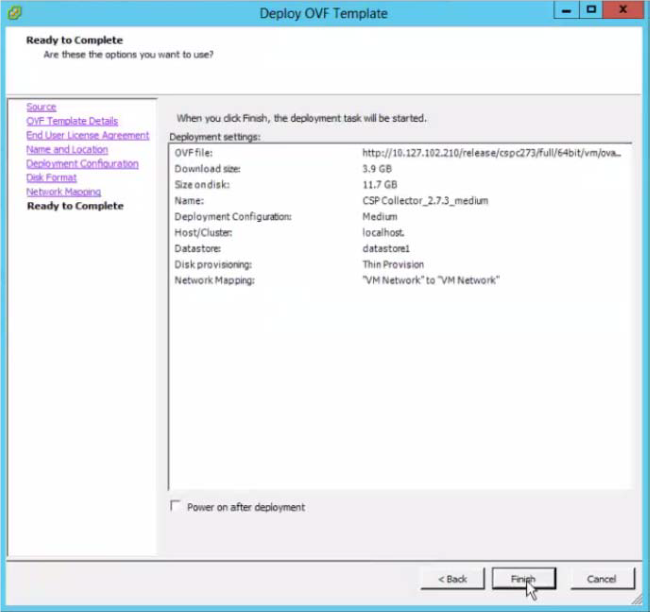
Deployment progress screen appears. Wait for the deployment to complete.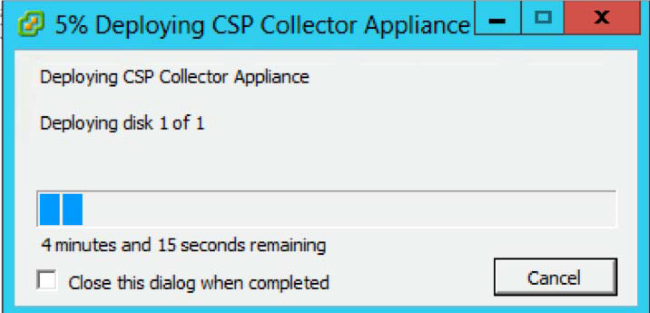
After Successful installation of CSPC OVA, you have to configure IP address.
- Click on the new installed CSPC OVA.
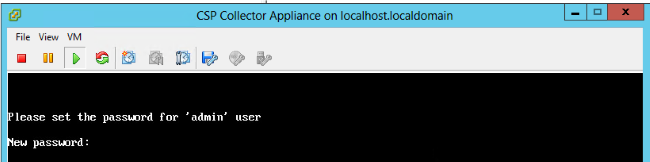
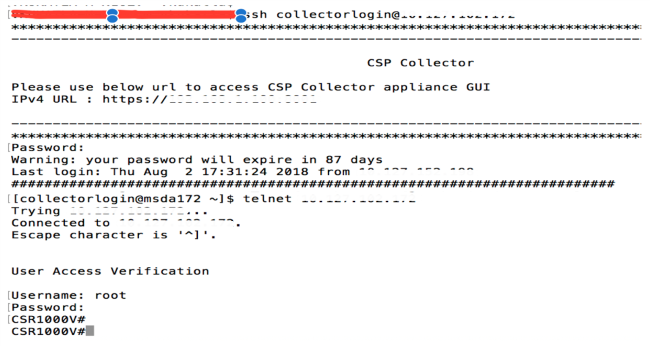
You will be prompted to enter your password. First enter the password and confirm the password.Once you enter your password, you will be able to configure the IP from the menu or in the command shell prompt.
No matter which method you use to configure the IP address, be sure to connect to the admin shell to initialize the collectorlogin and root users. - Select any one of the options.
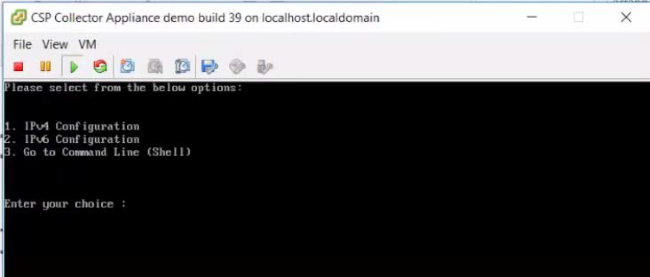
Configure IPv4 Address
- Select 1 to configure IPv4 address.
- Select one of the options displayed:
- Select 1 to fetch IP address automatically.
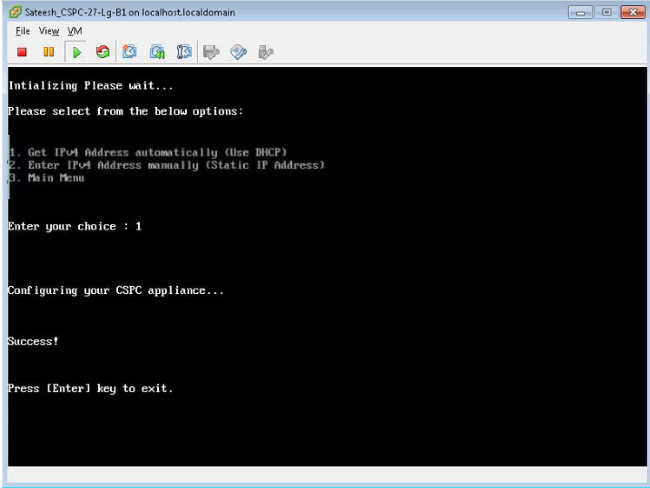
- Select 2 to enter the IP Address manually.
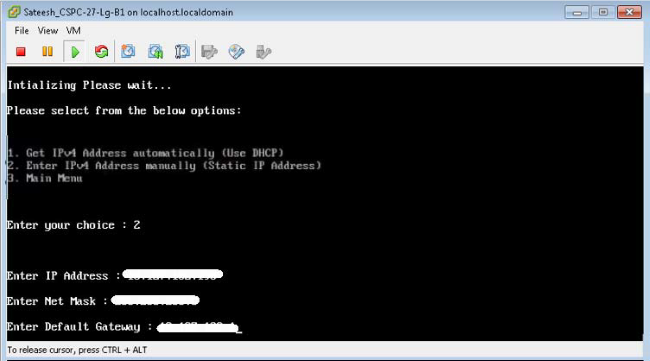
- Select 3 to go back to main menu.
- Select 1 to fetch IP address automatically.
Configure IPv6 Address
- Select 2 to configure IPv6 address.
- Select one of the options displayed:
- Select 1 to fetch IP address automatically.
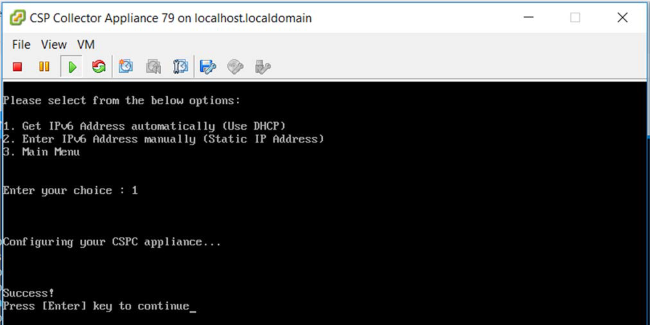
- Select 2 to enter the IP Address manually.
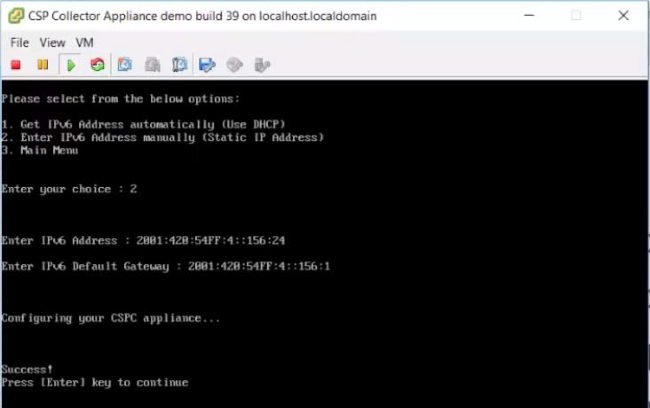
- Select 3 to go back to main menu.
- Select 1 to fetch IP address automatically.
Configure the IP Address Directly on Shell
- Select 3 to view Command line (Shell).
- Enter the command
Conf ip -v4 eth0orConf ip -v6 eth0and enter IP Address, Subnet mask, and gateway as show in the figure.
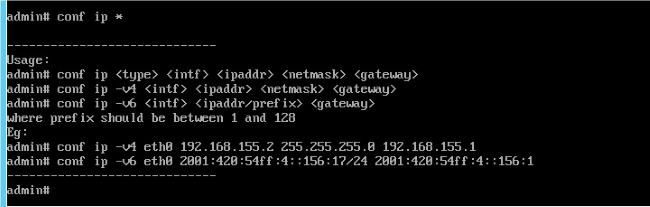
- Confirm your IP address settings:
# show ip
Enable Default Account
To initially set or reset the password use the below command:
- Enable the Linux user login "collectorlogin:"
# pwdreset collectorlogin 90
This generates a password for the username "collectorlogin." - Enable the Linux root login:
# pwdreset root 90
This generates a password for the username " root". - To connect to root first connect to the collectorlogin prompt and then use the command
su root:$ su root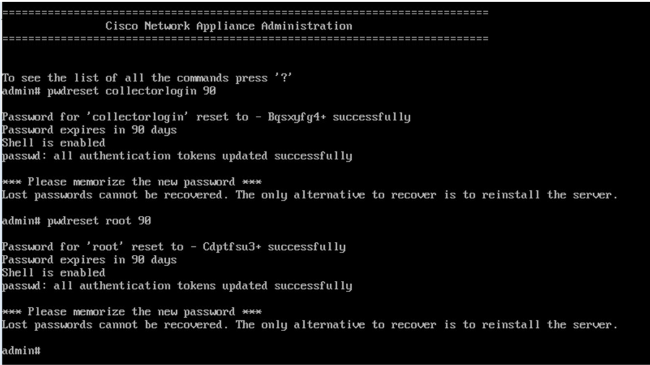
ESXi Patch Installation
Prerequisites
- Make sure all the virtual machines are powered off before proceeding for Upgrade.
- After upgrade from ESXi 5.x to ESXi 6.x, old 5.x license key will be deleted and you are required to add 6.x license key for VMs in ESXi to work.
Upgrade ESXi 6.0
- Login to collector appliance as admin.
- To check updates for ESXI execute below command:
#check update esxi - To download the ESXI patch execute below command:
#download jeos-100.0.6-0-lnx64 - To check download status execute below command:
#show download - Once the patch is downloaded to
/opt/LCM/tmp, unzip the patch and follow the instructions from Read_me_ESXI_6.0U3_and_6.0_patch_build_9313334.docx
CSR1000V NAT OVA Installation
Prerequisites
You require all these noted below before you start deploying CSRV:
- ESXI Login IP and credentials.
- Existing NAT router / Pfsense VM login IP and credentials.
- Copy of NAT rules and other customized configuration on old NAT router VM that required to be replaced.
- VSphere client to connect to ESXI.
- CSR1000V CSPC NAT OVA available locally or on network to deploy. Default credentials of the OVA.
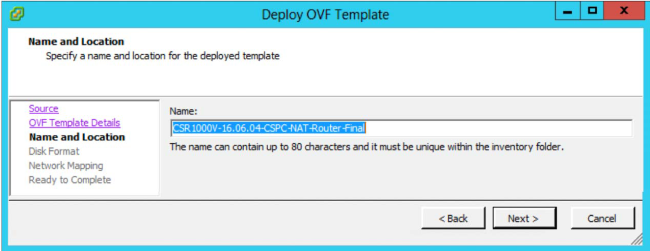
This section describes steps to deploy CSR1000V CSPC NAT OVA using VMWare vSphere Client:
- Get the xxx.ova file either to a web server or local file system where vSphere client is available
- Launch vSphere client and login using credentials with the privilege to deploy an OVA file
- Use vSphere client and select the ESXi host or IP address that manages NAT virtual machine
- Use vSphere client and select the File menu and then select the Deploy OVF Template… menu item shown in the file menu.
- Select the OVA file residing locally using the file explorer. If this option is used, click Browse… and navigate the file explorer to locate the file xxx.ova, then click Next.
- Browse to select the URL and click Next to proceed
- Click Next to proceed
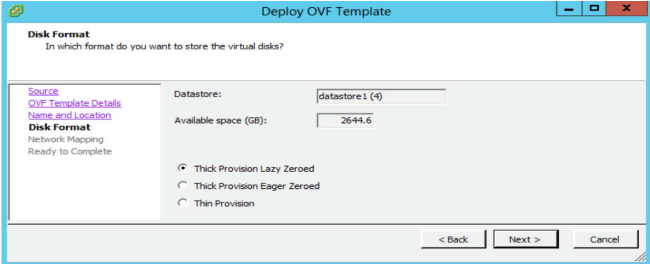
- Select the appropriate storage to store the virtual machine then click Next to proceed
- Click Next to proceed
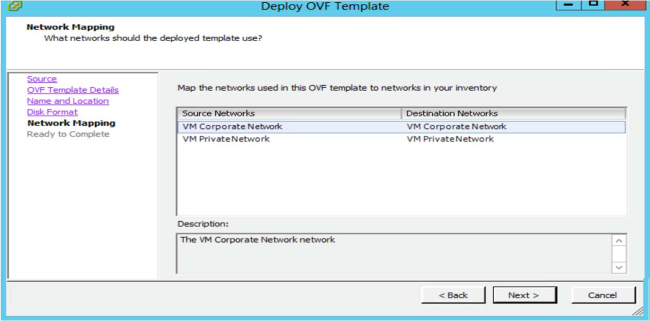
- Map the network use and click Next.
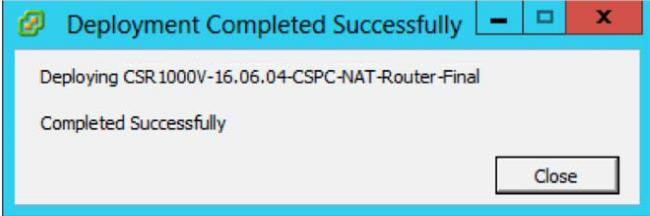
- Choose the Poweron after deployment, then click Finish
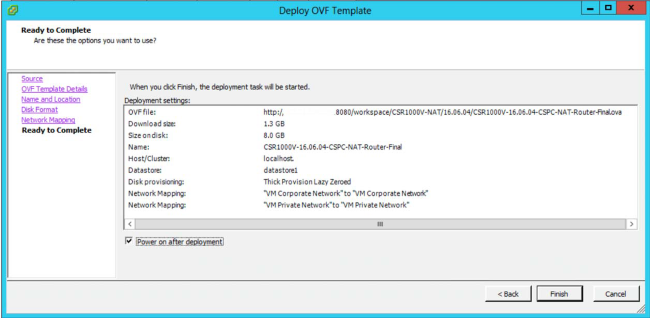
- Deployment is completed. Click Close.
After Successful installation of OVA, you have to configure CSR1000V CSPC NAT OVA.
To configure CSR1000V CSPC NAT OVA, perform the following:
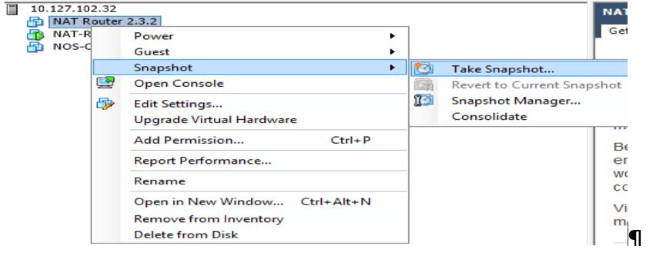
- Take Snapshot of old Pfsense and Power OFF old Pfsense VM.
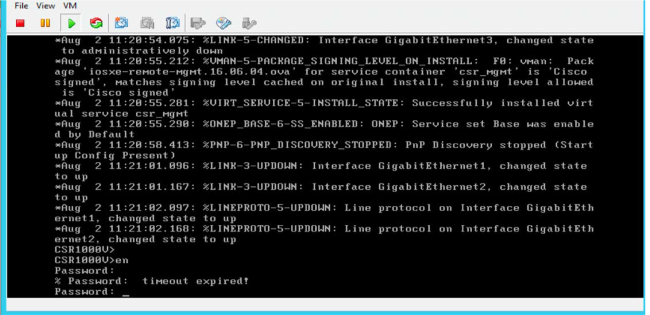
- Right click on new CSR1000V VM, and select Open Console. Once Router is up and running, press Enter key. It navigates to console mode of router.
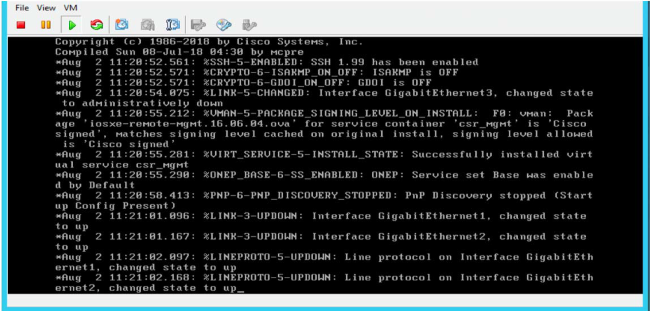
- In router console mode, enter en and press Enter key and provide default password XXxxXX (contact CSPC support for default password).
- Enter
conf t, it navigates to router’s configure terminal mode. - Enter
int gi1, it navigates to wan interface configuration mode. (provide IPaddress and Netmask)
   ip address <ipaddress> <netmask>

       no shutdown

exit - Provide default gateway and default routing in configuration mode and exit and save the configuration.
   ip default-gateway <gateway IP>
   ip route 0.0.0.0 0.0.0.0 <gateway IP>
   exit
   wr mem
- To verify the Configuration use the command
sh run - CSR1000V router is configured with IP and accessible from WEB UI. Login to WEB UI by URL http://<IP Address> and username root and password XXxxXX (contact CSPC support for password, CLI and UI will have same password).

Once configuration is completed on CSRV1000V router you will be able to access CSPC and other VMs from CLI and UI.
CSR1000v Upgrade
To upgrade CSR1000V, perform the following:
- Get new CSR1000v System Image (xxx.bin) to CSR1000V VM under
bootflash:directory. - Run
dir bootflash:command to view list of all files and directories in bootflash.
Example:Router# dir bootflash: - Run
configure terminalcommand to enter global configuration mode.
Example:Router# configure terminal
Router(config)# - Run
no boot systemcommand to delete all entries in the boot-able image list. That specifies the order in which the router attempts to load the system images at the next system reload or power cycle.
Example:Router(config)# no boot system - Run
boot system bootflash:<system-image-filename>.bincommand to load the new system image after the next system reload or power cycle. For example:
Example:Router(config)# boot system
bootflash:<system-image-filename>.bin - Run
exitcommand to exit global configuration mode
Example:Router(config)# exit
Router# - Run
writeorwrite memorycommand to update the GRUB menu list of images available on the bootflash disk.
Example:Router# write memory - Run
show versioncommand to display the configuration register setting.
Example:Router# show version
Cisco IOS XE Software, Version 16.06.04
…
Cisco Internetwork Operating System Software…
…
…
Configuration register is 0x2102
Router# - If the last digit in the above output in Step 8, in configuration register is 0 or 1, proceed to next Step 10. Or if the last digit in the configuration register is between 2 and F, proceed to the Step 13.
- Run
configure terminalcommand to enter global configuration mode.
Example:Router# configure terminal
Router(config)# - Run
config-register 0x2102command to set the configuration register so that, after the next system reload or power cycle, the router loads system image from the boot system commands in the startup configuration file.
Example:Router(config)# config-register 0x2102 - Run
exitcommand to exit global configuration mode
Example:Router(config)# exit
Router# - Run
copy running-config startup-configcommand to copy the running configuration to the startup configuration.
Example:Router# copy running-config startup-config - Run
writememory command to update the GRUB menu list of images available on the bootflash disk.
Example:Router# write memory - Run
reloadcommand to reload the operating system.
Example:Router# reload - When prompted to save the system configuration, enter
no
Example:System configuration has been modified. Save? [yes/no]: no - When prompted to confirm the reload, enter
y
Example:Proceed with reload? [confirm] y - Run
show versioncommand to verify that the router loaded the proper system image:
Example:Router# show version
Cisco IOS XE Software, Version 16.09.02
Cisco IOS Software [Fuji],......
…
System returned to ROM by reload
System image file is "bootflash:csr1000v-xxx"
Last reload reason: Reload Command…
CIMC Patch Installation
- Login to collector appliance as admin
- To check updates for CIMC execute below command:
#check update cimc - To download the CIMC patch execute below command (M3 server):
#download jeos-101.0.3-0-lnx64 - To download the CIMC patch execute below command (M4 server):
#download jeos-101.0.4-0-lnx64 - To check download status execute below command:
#show download - Once the patch is downloaded to
/opt/LCM/tmp, unzip the patch and follow the instructions from Read_me_CIMC_3.0(4i).docx
NOS Configurer
Installation Sequence For nos_configurer
This section shows the instructions on how to install nos_configurer_2.8 on CSPC 2.8, and to configure CSPC for NOS specific functionalities.
It performs the following tasks:
- Schedule jobs to carry out NOS functionalities
Following jobs are scheduled:- Weekly Inventory Job
- Daily Upload Job
- Daily DAV Job
- Daily Health Upload Job
- Adds dependency rules to maintain data consistency
Follow the steps given below to install nos_configure_2.8 on CSPC 2.8:
- Terminal login to CSPC appliance
- Navigate to path
$CSPCHOME/installs/manual - Unzip the file
nos_configurer_2.8.zip - On unzipping, a folder named nos_configurer_2.8 is created
- Enter the command:
cd nos_configurer_2.8sh nos_cspc_2.8_patch.sh <username> <pwd> <fullInventoryDay>
<hourOfFullInventory> <hourOfUpload>
Example:sh nos_cspc_2.8_patch.sh <username> <pwd> 1 22 23
1..7 = Sunday to Saturday
1…23 = hours in a day. - On triggering the above command, it will prompt for user confirmations. Provide them accordingly.
- Do you want to cancel installation and rerun with additional arguments? Enter Y or N: (y/n)? N
- Do you want to cancel installation and rerun with different scheduling day and hours ? Enter Y or N: (y/n)? N
- Do you want to schedule health job immediately Enter Y or N: (y/n)? Y
- Do you want to schedule inventory/DAV/Upload job immediately Enter Y or N: (y/n)? Y
- Restarting the server to make sure inventory is not running. Do you want to continue? Enter Y or N: (y/n)? N
Revision History
| Revision | Publish Date | Comments |
|---|---|---|
1.0 |
12-Mar-2019
|
Initial Release |
 Feedback
Contact Cisco
- Open a Support Case

- (Requires a Cisco Service Contract)