Understand Catalyst Center 3.x Maglev(SSH) Password Reset Procedure
Available Languages
Contents
Introduction
This document describes how to unlock and/or reset the password for the Maglev user for Catalyst Center 3.x physical and ESXi virtual appliance nodes.
Background Information
In the case where the Maglev account is locked out, you cannot log in to unlock it. To unlock and/or reset the password for the Maglev user, you must mount an image to the Cisco IMC vKVM for physical appliances or mount a CD ISO to the VM for ESXi virtual appliances. This allows you to access the shell and reset the user and/or password.
Prerequisites
Requirements for On-prem (Physical appliance)
-
You need to download an ISO image for Ubuntu 22.04 or newer from https://ubuntu.com/download/desktop. This is due to how the filesystem changes in Ubuntu 22.04 with xfs.
- After the ISO has been downloaded to the local system you then need to mount the ISO to the Cisco Integrated Management Controller (CIMC) KVM.
- Once the ISO is mounted to the KVM you then need to boot from the ISO.
- Once you can access Ubuntu, mount the root and var directories to the system.
- After you have mounted the root and var directories, you can unlock and change the Maglev user account.
- Finally, you reboot the appliance, confirm you can login in with Maglev, and reset the password with the configuration wizard.
Requirements for Virtual Appliance (ESXi)
- Download ISO
- Upload ISO to the Datastore ISO File location or the Content Library in vSphere/vCenter
- Add a CD/DVD rom to the VM (virtual machine)
- Change the boot delay to a larger value
Components Used
This operation was run on Ubuntu 25.10 image; a different image produces different times and results.
It has been seen in some environments to take up to 2 hours to reach the Ubuntu desktop but for most customers the process completes within 30 minutes.
This operation is not restricted strictly to the Ubuntu desktop version. All that is required is access to the shell. Any Ubuntu image at version 22.04 or newer that provides shell access works for this operation. Other images can also work such as Gentoo and Linux SystemRescue, however Cisco recommends using Ubuntu 25.10. Any other attempt is at the risk of the user themselves.
The information in this document was created from the devices in a specific lab environment. All of the devices used in this document started with a cleared (default) configuration. If your network is live, ensure that you understand the potential impact of any command.

Note: You can use the same procedure in a DR environment. However, note these points:
*** Ensure that disaster recovery is in a PAUSED state before attempting any password recovery/reset methods ***
In a 1+1+1 DR deployment, the corresponding site is down while this process is completed.
In a 3+3+3, If your passwords are to be updated on all three nodes, do it one node at a time to ensure that the two other nodes are available to avoid an unnecessary DR failover.
lesta
Step 1a: Boot from Live CD (On-prem)
Log in to the Cisco IMC GUI, choose Launch KVM and then choose Virtual Media > Activate Devices.

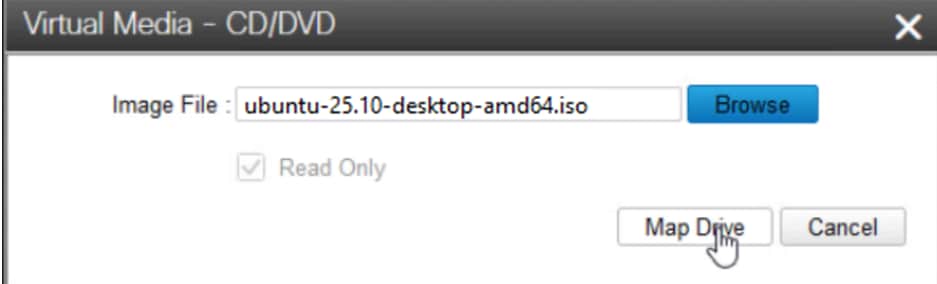
Next, navigate back to Virtual Media and choose Map CD/DVD.
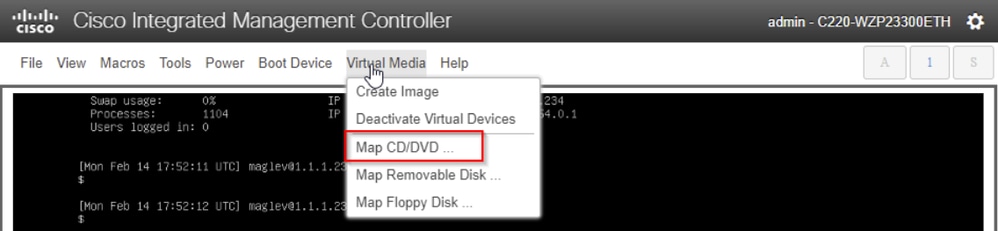
After that choose Browse and then select the Ubuntu ISO image you downloaded to your local system. After you have selected the Ubuntu image, choose the Map Drive button.
You can confirm that the image is activated and mapped by navigating back to Virtual Media and seeing the ISO mapped as an option.
Next power cycle the appliance with Power > Reset System (warm boot).
After the system has rebooted, press F6 when the Cisco logo appears.
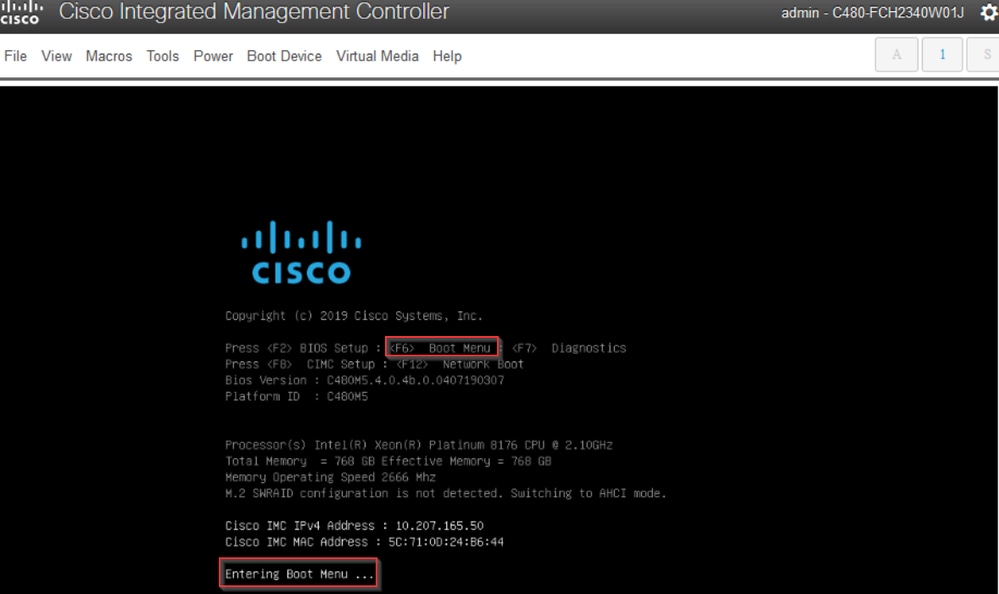
We knows if it works because you see "Entering Boot Menu ..." at the bottom of the screen.
But a second screen appears and we can see that it is entering the boot menu. If we forgot to press F6 on the first Cisco screen, we can press it here.
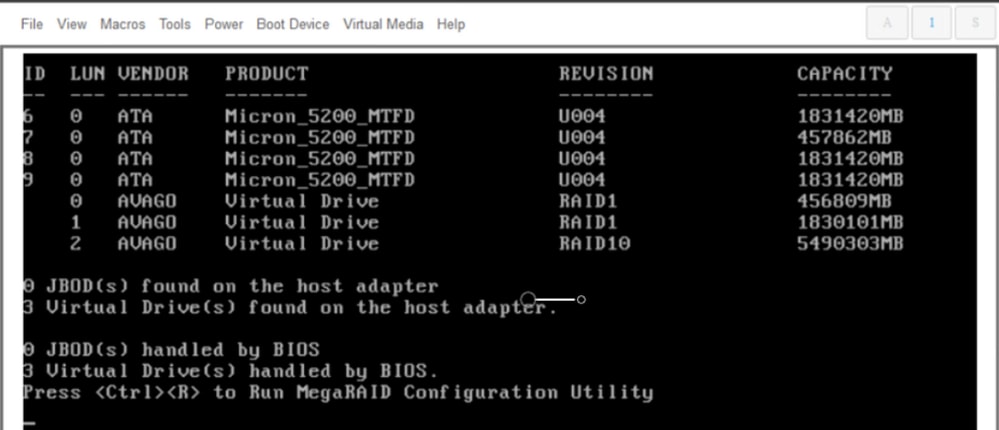
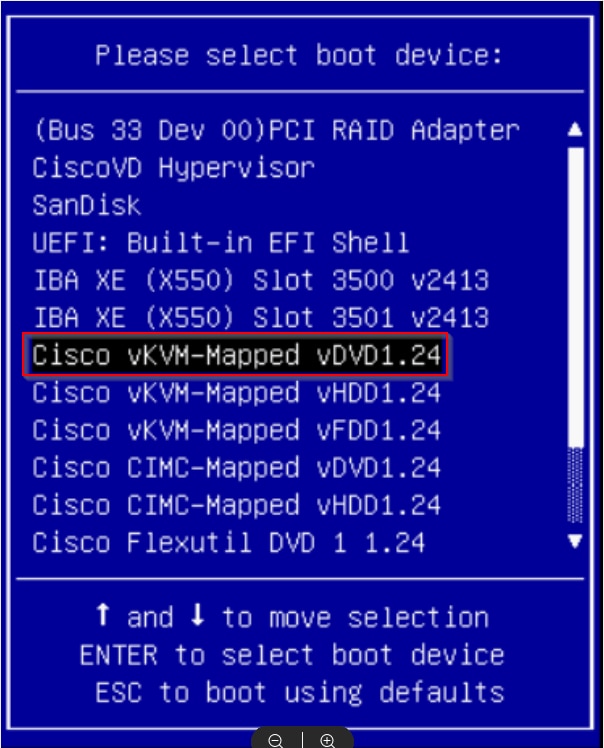
When the boot menu pops up, choose the option that says Cisco vKVM-Mapped vDVD1.24. This causes the appliance to boot from the mapped Ubuntu image selected earlier.
Step 1b: Boot from an Live CD (VA - ESXi)
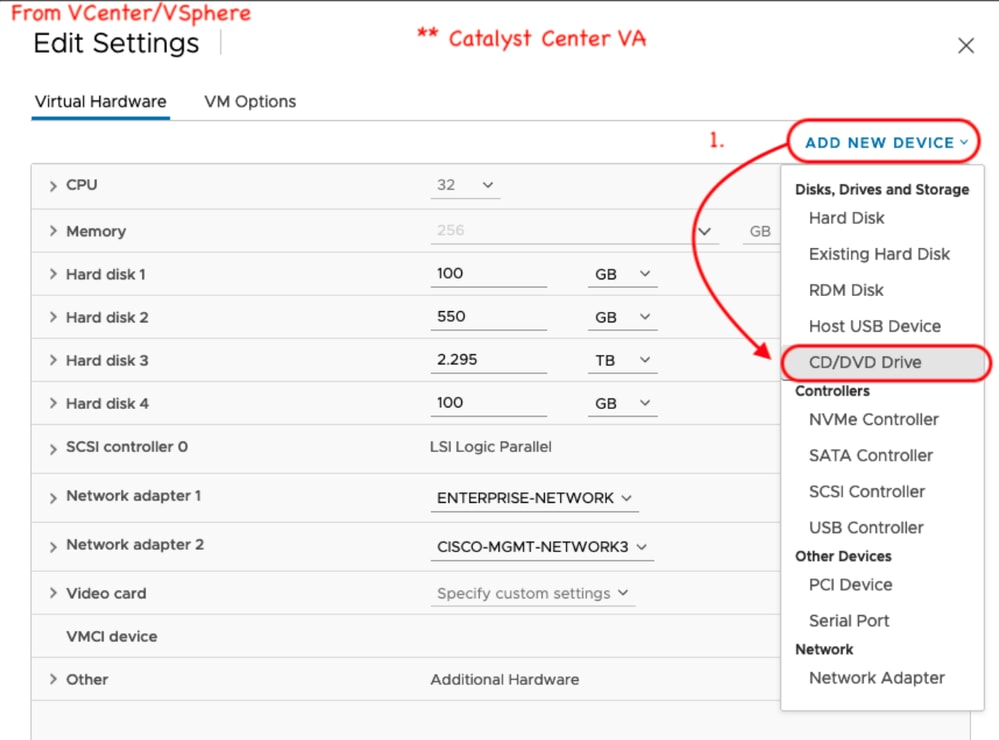
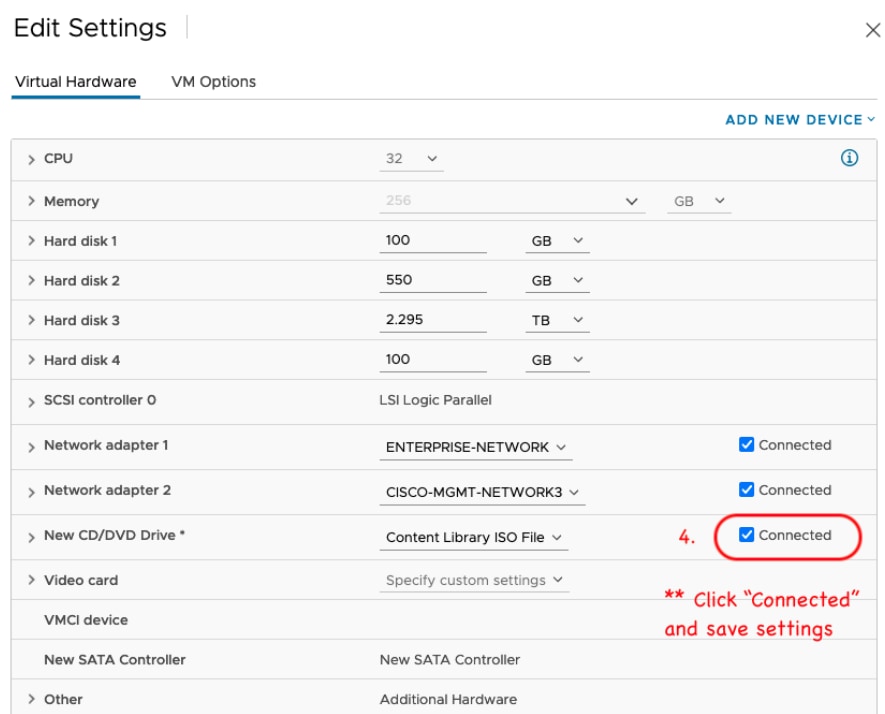
In vCenter/vSphere navigate to where the VM is located, right-click on the VM and click Edit Settings. From there, click ADD NEW DEVICE, then choose CD/DVD Drive.
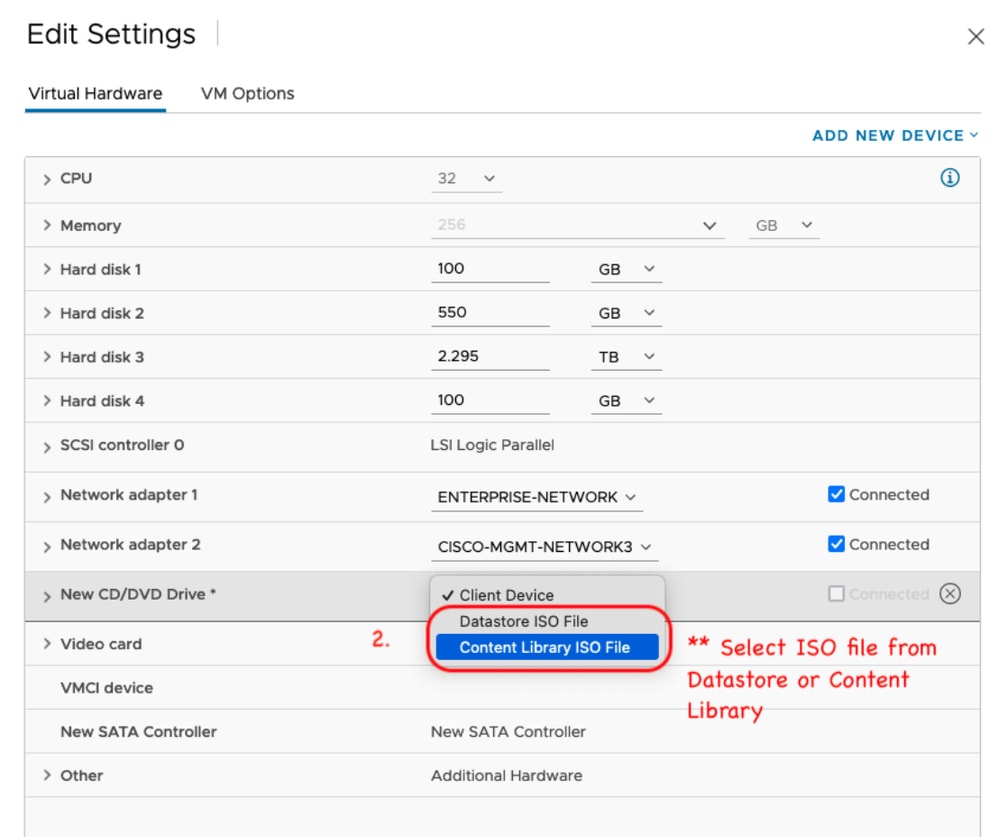
The CD/DVD drive now shows in the settings page as New CD/DVD Drive. If you have uploaded the ISO to the Datastore ISO File then choose that option for the CD/DVD. Otherwise, choose Content Library ISO File.
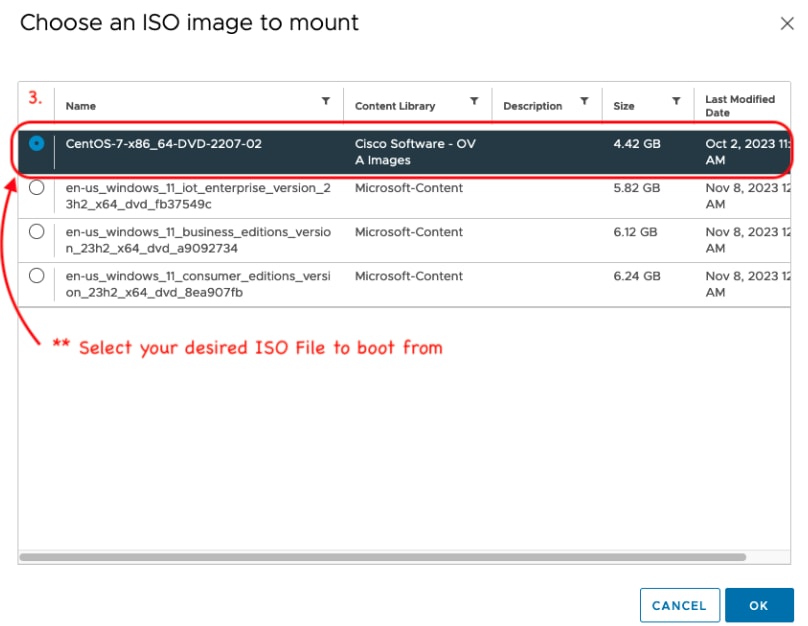
Select the ISO file to boot from. For this procedure, use the Ubuntu 25.10 ISO.
Next, make sure to enable the box for Connected to the right of the New CD/DVD Drive.
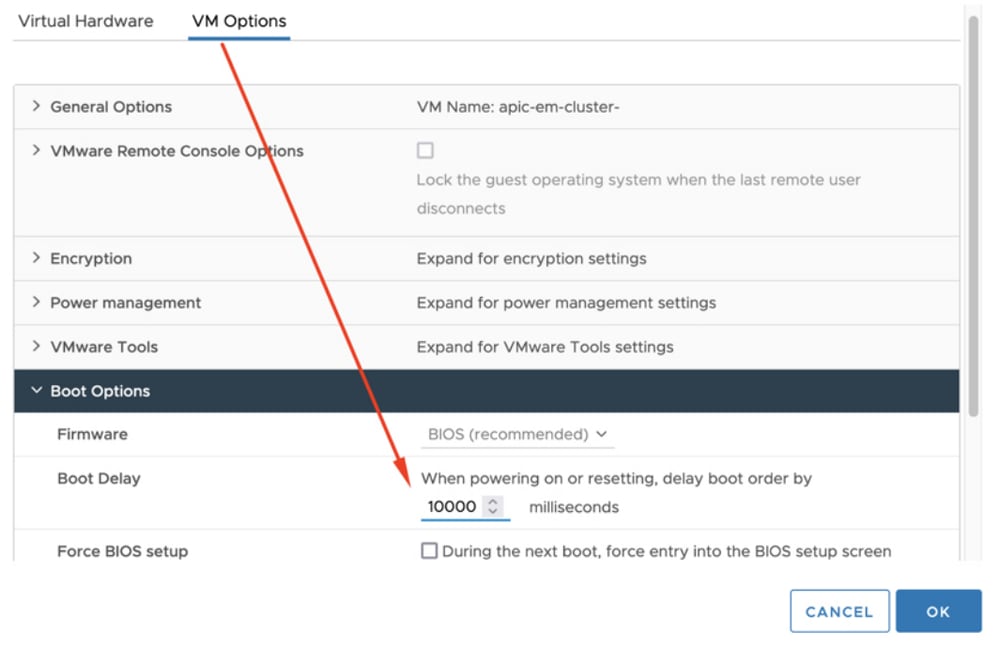
Click VM Options at the top of the settings screen. Then click the down arrow for Boot Options and change the value for Boot Delay to a larger value, such as 10000. This gives you time to see the option to enter the boot menu after restarting the VM.
Next, restart the VM so you can access the boot menu to boot from the ISO.

Step 2a: Loading into the Ubuntu ISO
Note: *** The screen shots illustrate how long it takes to reach the Ubuntu desktop in the lab. They differs per environment and image used for recovery ***
This is the first screen we are presented with. It looks like nothing is happening but just wait. In the lab we are on this screen for 40 seconds

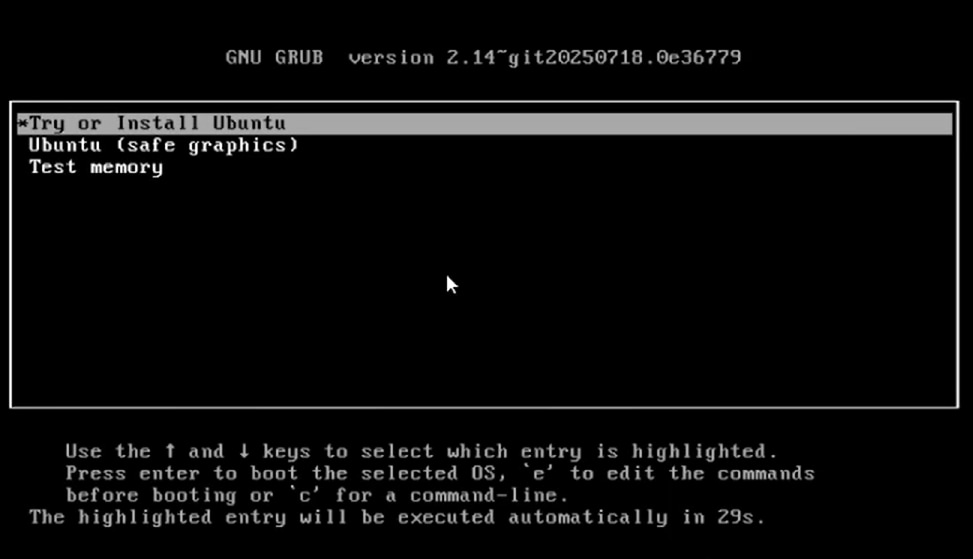
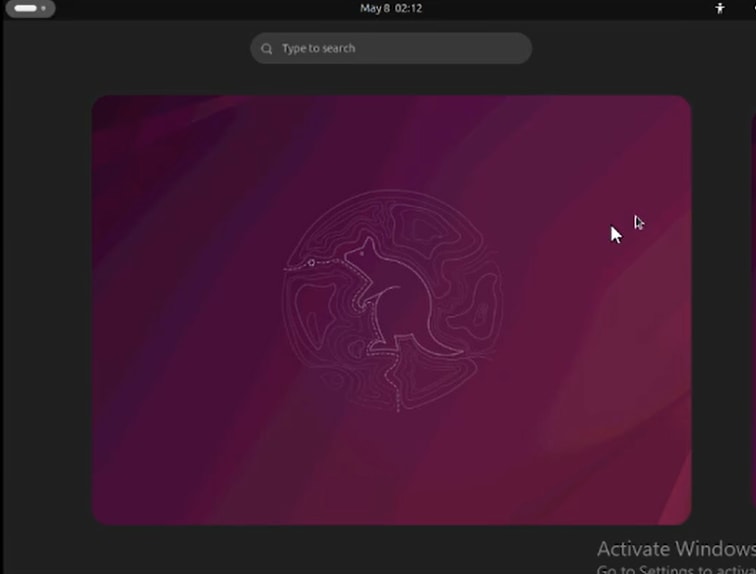
After that, we were presented with these options. Choose Try or Install Ubuntu to proceed.
Next, the process took approximately 3 mintues to reach this screen.
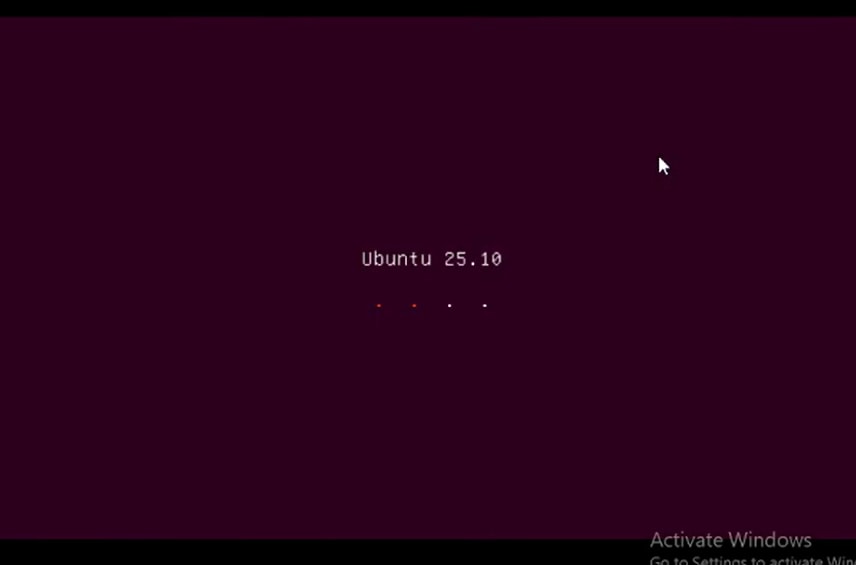
After an additional 11 minutes, the screen was still showing the Ubuntu 25.10.
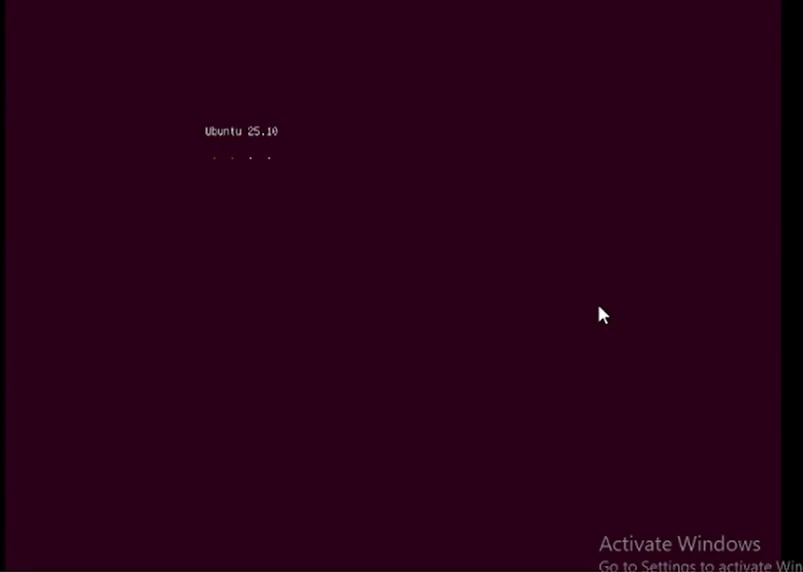
Next the screen transitioned back to a black screen for about 30 seconds before showing Ubuntu 25.10 on it.

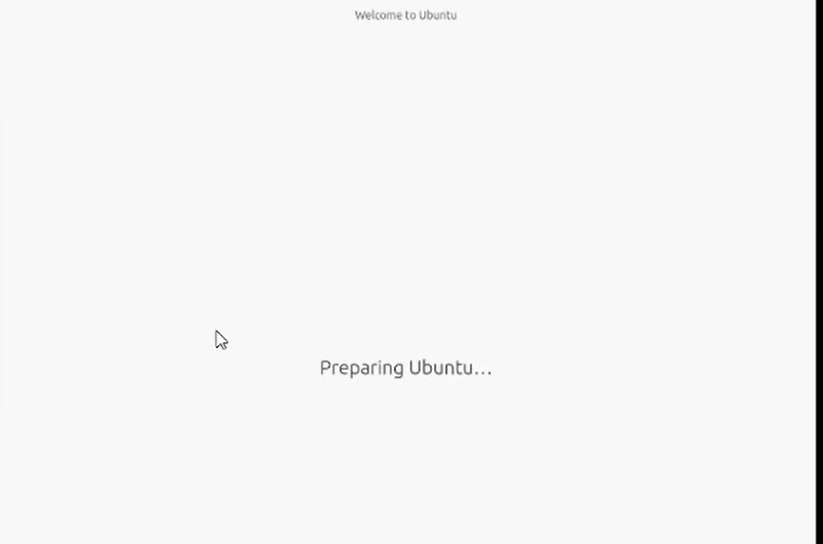
After 10 additional minutes, the screen transitioned to the Ubuntu loading screen.
The Ubuntu desktop takes roughly 5 minutes to load from here. The installer is automatically loaded and can be exited safely by clicking the X at the top-right of the installer window.
After the iinstaller is closed, open a terminal window and proceed with step 2b.
*** REMINDER: It has been seen in some environments to take up to 2 hours to get to this point. In this demonstration, it took roughly 35 minutes to reach. ***
Step 2b: Mount Required Partitions
Once you have access to the Ubuntu desktop GUI environment you need to open the terminal application and perform these steps
- Create a temporary mount point.
- Mount the root and var partitions to the system.
- Mount the pseudo filesystems to the temporary mount point.
First create the temporary mount point with the command:
sudo mkdir /altsys
Next, we need to find the root and var partitions to mount. We can use the lsblk -fm | egrep "var|install1" command to find the partition to mount for "install1" (root) and "var". Make note of the partition we have identified for the mount commands in the next step
For var, we found a match with the 120G partition. We can see in this case it is sdb2
For the install1 (root), we found a match with the 335.6G partition. In this example, it is sda5

Once you have identified the var and root partitions mount them:
sudo mount /dev/sda5  /altsys
sudo mount /dev/sdb2 /altsys/var
Once root and var have been mounted, mount the psuedo filesystems:
sudo mount --bind /proc /altsys/proc
sudo mount --bind /dev  /altsys/dev
sudo mount --bind /sys  /altsys/sys
The last step before you change the password or unlock the Maglev account is to change to the temporary mount environment:
sudo chroot /altsys
Use Case 1: Unlock Maglev Account
Step 1: Verify that maglev user is unlocked
grep maglev /etc/shadow
maglev:!$6$6jvRGoDihpcsr8Xl$RUFs.Lb.2AbbgvODfJsw4b2EnpSwiNUlwJ6NQIjEnvOtT5Svz4ePHZa4f0eUvLHl7VAFca46f2nHxqMWORYLm.:18176:0:99999:7:::
Check if there is an exclamation mark in front of the password hash or not. If there is, that indicates the account is locked. Type in the command to unlock the user:
Unlock the maglev user with the command:
usermod -U maglev
Step 2: Reset failed count
If the user does not have an escalation mark in front of the hash in the/etc/shadowfile, then the login failure limit has been exceeded. Please use these steps to reset failed login attempts.
Find the failed login attempts for the maglev user:
faillock --user maglev
maglev:
When                Type  Source                            Valid
2026-06-23 16:58:38 RHOST x.x.x.x                               V
2026-06-23 16:58:42 RHOST x.x.x.x                               V
2026-06-23 16:58:52 RHOST x.x.x.x                               V
2026-06-23 16:58:56 RHOST x.x.x.x                               V
2026-06-23 16:59:10 RHOST x.x.x.x                               V
2026-06-23 16:59:15 RHOST x.x.x.x                               V
As shown here, the login attempts are larger than the default 6 attempts. This denies that user the ability to log in until the failure count drops to less than six (6). You can reset the login failure count with the command:
faillock --user maglev --resetYou can confirm that the counter has been reset:
faillock --user maglev
If nothing is returned then the entries have been reset/cleared.
Use Case 3: Reset Maglev User Password
Step 1: Reset the Maglev user password
# passwd maglev

Enter new UNIX password:   #Enter in the desired password

Retype new UNIX password: #Re-enter the same password previously applied

Password has been already used.

passwd: password updated successfully  #Indicates that the password was successfully changed
Step 2: Reboot normally to Cisco Catalyst Center environment
Click on Power in the KVM window and then Reset System (warm boot). This causes the system to reboot and boot with the RAID controller so that the Cisco Catalyst Center software boots up.

You probably see this image stuck loading for approximately 5 to 10 minutes. This is normal. The screen eventually transition to the login screen.
Step 3: Update Maglev User Password from Cisco Catalyst Center CLI
Once the Cisco Catalyst Center software boots and you have access to the CLI, you need to change the Maglev password with the command sudo maglev-config update. This step is required to ensure that the change takes affect across the whole system.
Once the config wizard has been launched, you need to navigate completely through the wizard to screen that allows us to set the Maglev password in step 6.
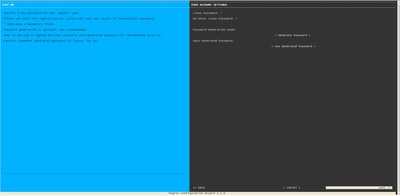
Once the password has been set for both fields Linux Password and Re-enter Linux Password, choose next and complete the wizard. When the wizard finishes the configuration push, the password is successfully changed. You can create a new SSH session or enter in the command sudo -i in the CLI to test that the password has been changed.
Step-by-Step Video Guide
Please use the link to access the step-by-step video created for this workflow.
Images provided by Tomas De Leon and Faisal Mehmood
Revision History
| Revision | Publish Date | Comments |
|---|---|---|
2.0 |
23-Jun-2026
|
Ubuntu 22+ comands changed, remoed pam_tally and add failock |
1.0 |
12-May-2026
|
Initial Release |
 Feedback
Contact Cisco
- Open a Support Case

- (Requires a Cisco Service Contract)