Troubleshoot Catalyst Center Licensing Use Cases and Workflows
Available Languages
Contents
Introduction
This document describes different Cisco DNA licensing scenarios that are frequently encountered.
Prerequisites
Requirements
There are no specific requirements for this document.
Components Used
This document is not restricted to specific software and hardware versions.
The information in this document was created from the devices in a specific lab environment. All of the devices used in this document started with a cleared (default) configuration. If your network is live, ensure that you understand the potential impact of any command.
Background Information
This document provides the step-by-step details of how to use the License Manager workflow of Cisco DNA for device license registration, license migration between Virtual Accounts via CSSM, and so on.
Scenarios
Scenario 1: Device License Registration via Cisco DNA License Manager: Legacy Method
Step 1. Log into Cisco DNA via admin credentials or via a custom role with super-admin privileges.
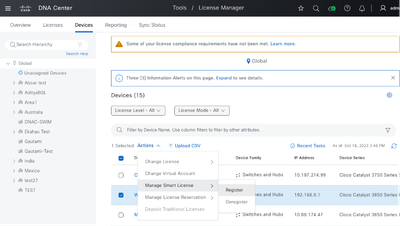
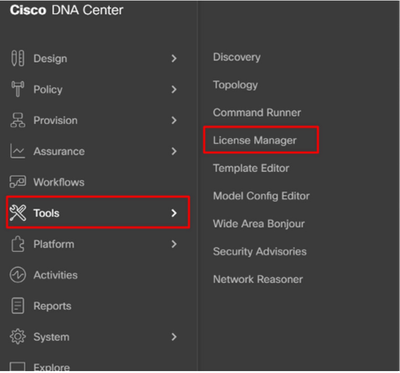
Step 2. Navigate to Hamburger and select Tools > License Manager.

Step 3. Select Devices tab and use the Filter option or scroll through the table to find the devices whose licenses you want to register.

Step 4. Select the check box next to each device whose license you want to register, then choose Actions > Manage Smart License > Register.
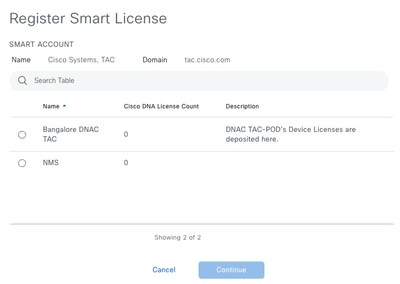
Step 5. Choose the Virtual Account where the respective license is deposited and click Continue.
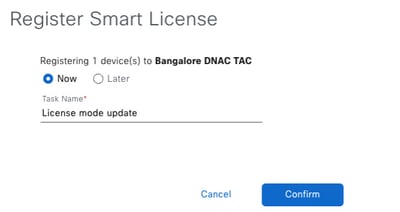
Step 6. Cisco DNA prompts whether the change is to be applied immediately or later. Choose the desired option and click Confirm.
Scenario 2: Device License Registration via Cisco DNA License Manager: CSLU Reporting Workflow
Starting from Cisco DNA release 2.2.1.x and Devices running 17.3.2 or higher, devices are no longer required to get registered with CSSM. Instead, a new workflow shall be used called Smart License Compliance Reporting. Please refer to the snippet listed for more details.

Prerequisites
Cisco DNA
- Cisco DNA must be running on release 2.2.1.0 and later.
- Catalyst Center Appliance must be registered with Cisco Smart Software Manager (CSSM) via Settings > Smart Licensing.(Recommended)
- Catalyst Center Appliance must be integrated with Cisco Smart Software Manager (CSSM) via Settings > Smart Account.
- Cisco DNA must be able to communicate with CSSM portal and be able to reach tools.cisco.com.
- Devices must be Reachable and Managed on Cisco DNA Inventory dashboard.
- Appropriate SSM Connection mode must be chosen on Catalyst Center. CSLU workflow is not applicable for On-Prem CSSM (Satellite Server) as of Catalyst Center release 2.3.7.x
- CSLU workflow is not applicable for AireOS Wireless Controllers (Models: 3504, 5520, 8540).
Network Device
- Device must be running on Cisco IOS® XE 17.3.2 or later and must have enough space in flash for the RUM report.
- For the release 2.3.7.x and later: NetConf configuration (netconf-yang) is no longer mandatory.
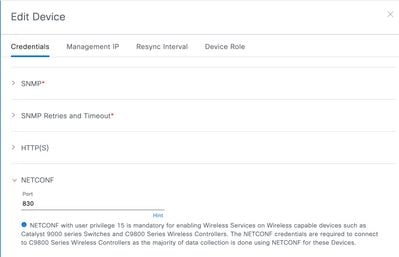
- For the release 2.3.5.x and before: Device must have netconf-yang model configured and Cisco DNA must be able to communicate with the device over Netconf port 830.
- To validate the NetConf configuration on device:
show run | sec netconf-yang
i. During Device discovery on Cisco DNA , the Netconf parameter under credentials section must be enabled.
ii. If the Netconf parameter was not enabled at the time of Device Discovery, use the Edit Device option on the Cisco DNA Inventory to enable it.
- Device must have the sdn-network-infra-iwan trustpoint installed; this is done by the Cisco DNA .
To validate:
show crypto pki trustpoint sdn-network-infra-iwan (To check the trustpoint)
show crypto pki certificates verbose sdn-network-infra-iwan (To check the trustpoint in detail)
- If the sdn-network-infra-iwan trustpoint is not installed, do these steps:
Step 1. Log into Cisco DNA via admin credentials or via a custom role with super-admin privileges.
Step 2. Navigate to Hamburger and select Provision > Inventory.
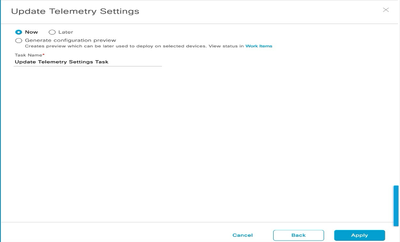
Step 3. Select the device you want to install the trustpoint on, click Actions > Telemetry > Update Telemetry Settings.

Step 4. Select Force Configuration Push and click Next

Step 5. Select Now and click Apply. This has no effect on production.
If all prerequisites are met, then refer to next steps mentioned to execute the Reporting Workflow:
Step 1. Log into Cisco DNA via admin credentials or via a custom role with super-admin privileges.

Step 2. Navigate to Hamburger and select Tools > License Manager.
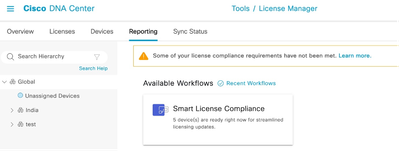
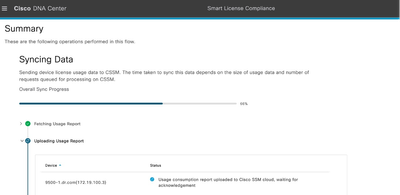
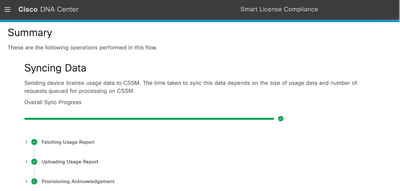
Step 3. Select the Reporting tab and locate the Smart License Compliance dashlet; click the dashlet to launch the workflow.
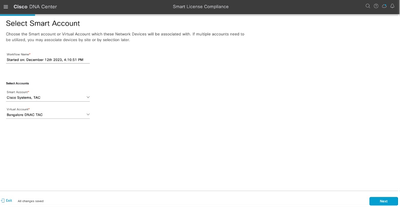
Step 4. Select the Smart Account and Virtual Account where the device licenses are stored and click Next.
Step 5. Choose the device whose license utilization you want to report.
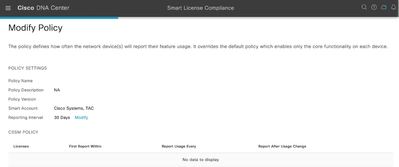
Step 6. Modify the Reporting interval, if required.
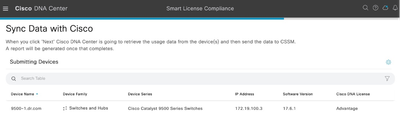
Step 7. Review the summary of devices and click Next to trigger Reporting.
- If a device has not been onboarded on Catalyst Center but has already been registered with a Virtual Account, then Catalyst Center would run the SLUP reporting for that device automatically once it is onboarded on Catalyst Center without the need to explicitly execute the Smart License Compliance workflow.
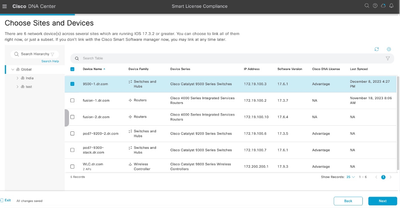
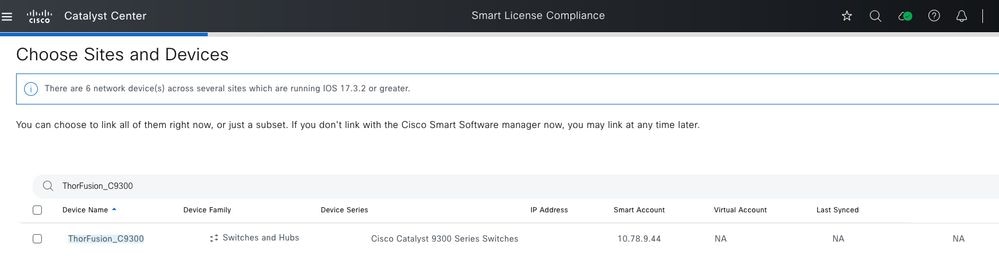
- If a device has not been linked or registered to a Virtual Account/Smart Account, then Smart License Compliance workflow is not executed automatically. Refer to this screenshot wherein Last Synced status is NA:
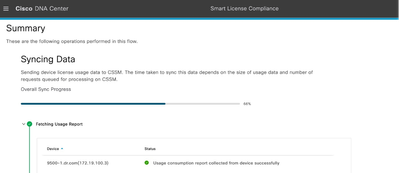
- To report the License utilization, customer needs to execute the Smart License Compliance workflow via Catalyst Center’s License Manager. From this point onwards Catalyst Center would execute the Smart License Compliance workflow automatically at interval scheduled by the customer during the first time execution of SLC workflow.
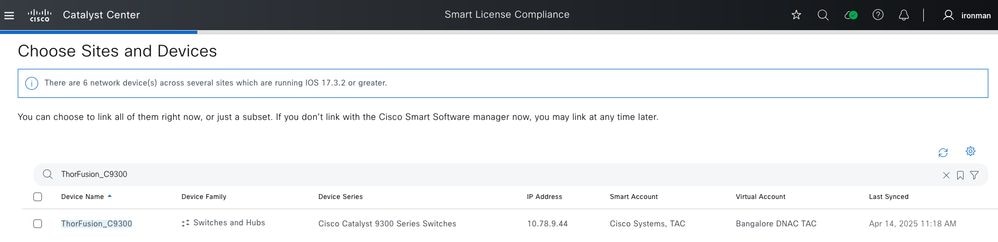
Refer to this screenshot wherein Last Synced status is shown:
Scenario 3: License Migration between Virtual Accounts
Step 1. Log into Cisco DNA via admin credentials or via a custom role with super-admin privileges.
Step 2. Log into software.cisco.com and select Manage Licenses.

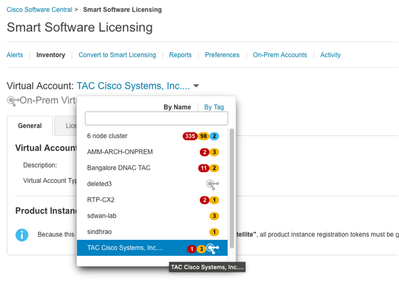
Step 3. Navigate to Inventory and select the source Virtual Account.
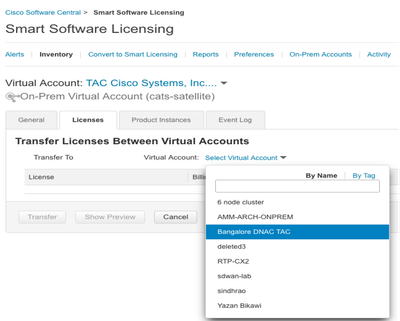
Step 4. Select the License tab and choose the Target Virtual Account.
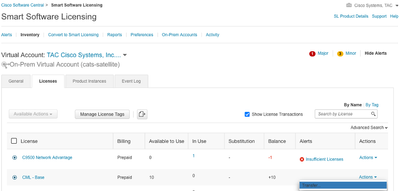
Step 5. Select the license you want to transfer and click Actions & Select Transfer.
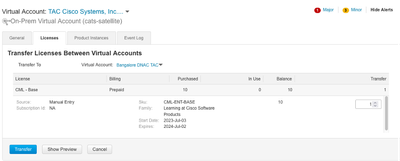
Step 6. Choose the quantity of licenses you want to transfer and click Transfer.
Scenario 4: License Migration between Smart Accounts
Migration of Licenses between different Smart Accounts can be done by the Cisco Licensing team. Please refer to these next steps to raise the case with the respective team.
Step 1. Log into Support Case Manager with Cisco credentials.
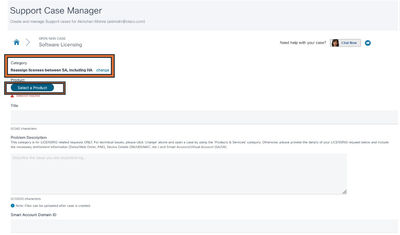
Step 2. Click Open New Case and select Software Licensing > Expand License Management > Select Move Licenses. Then select Reassign licenses between SA and click Open Case.
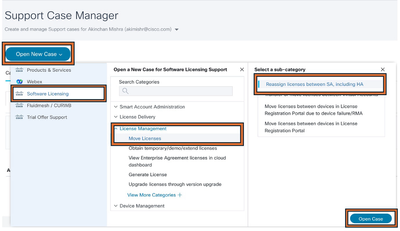
Step 3. Select the relevant product (for example, wireless, switching, and so), fill in the form, and submit the request.
Scenario 5: Change of SSM Connection Mode
Step 1. Log into Cisco DNA via admin credentials or custom role with super-admin privileges.
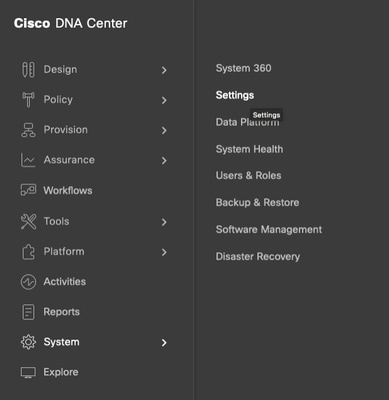
Step 2. Navigate to Hamburger and select System > Settings.
Step 3. Select SSM Connection Mode and choose the desired option (Direct/Smart Proxy/On-Prem). Click Save.
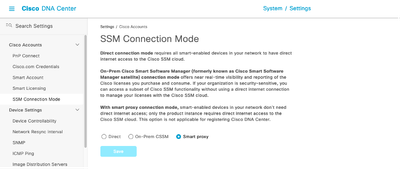
- Direct SSM Mode: In Direct Mode, Catalyst Center still acts as the proxy for the SLUP workflow wherein Catalyst Center collects the RUM report from the network devices and uploads it to the Cisco Smart Software Manager (CSSM) cloud.
- On-Prem CSSM SSM Mode: Run Reports are sent to the On-Prem CSSM and then it is sent to the Cisco Smart Software Manager (CSSM) cloud.
Scenario 6: Integration of Smart Account with Cisco DNA
Step 1. Log into Cisco DNA via admin credentials or via a custom role with super-admin privileges.
Step 2. Navigate to Hamburger and select System > Settings.

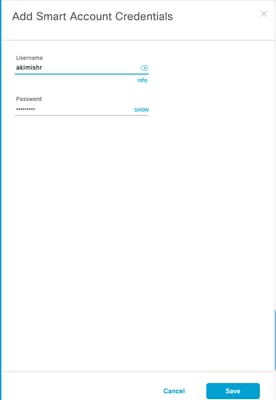
Step 3. Under Smart Account, click Add.
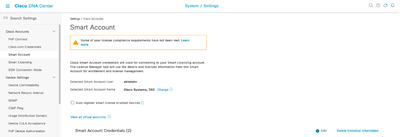
Step 4. Enter the Smart Account username and password, and click Save.
Step 5. If you have multiple Smart Accounts, repeat steps 3 and 4.

Note: If you have multiple Smart Accounts, choose one account to be the default. The License Manager uses the default account for visualization and licensing operations.
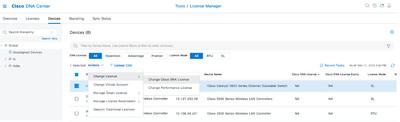
Scenario 7: Change of License Level
Step 1. Log into Cisco DNA via admin credentials or via a custom role with super-admin privileges.
Step 2. Navigate to Hamburger and select Tools > License Manager.
Step 3. Select Devices tab and use Find or scroll through the table to find the devices whose license level you want to change.
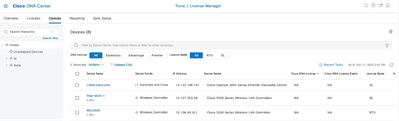
Step 4. Check the check box next to each device whose license level you want to change, then choose Actions > Change Cisco DNA License.
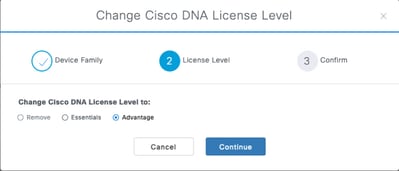
Step 5. Click the license level for either the Essentials or Advantage devices. Then click Continue.
Step 6. Cisco DNA prompts whether the change is to be applied immediately or later. Choose the desired option and click Confirm.
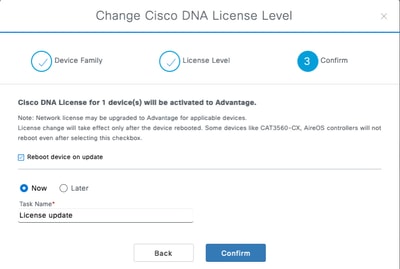
Note: You must also choose the option Reboot device on update for changes to take effect. Also, this activity needs to be performed in downtime.
Related Information
Revision History
| Revision | Publish Date | Comments |
|---|---|---|
3.0 |
03-Jun-2026
|
Updated Introduction, Style Requirements, and Formatting. |
2.0 |
15-Apr-2025
|
Added Alt Text.
Updated Style Requirements, Machine Translation, and Formatting. |
1.0 |
17-May-2024
|
Initial Release |
 Feedback
Contact Cisco
- Open a Support Case

- (Requires a Cisco Service Contract)