Introduction
This document describes the configuration of Call home in a Cisco ACI environment.
Prerequisites
Requirements
- Fabric has to be on 4.2(1) or higher.
- All fabric devices must have network connectivity to the SMTP/E-Mail server.
- Communication TCP port 25 must be allowed betweeb fabric devices and SMTP/E-Mail server.
Cisco recommends that you have knowledge of these topics
Components Used
This document is not restricted to specific software and hardware versions.
The information in this document was created from the devices in a specific lab environment. All of the devices used in this document started with a cleared (default) configuration. If your network is live, ensure that you understand the potential impact of any command.
Concept
The CallHome feature allows us to receive critical notifications about fabric functionality via email, including diagnostic information and environmental faults or events. It delivers these alerts to multiple recipients through CallHome destination profiles, which can be configured with specific message formats and content categories.
Configure
Configuration Steps
Step 1. Log in to APIC.
- Access APIC using admin credentials.
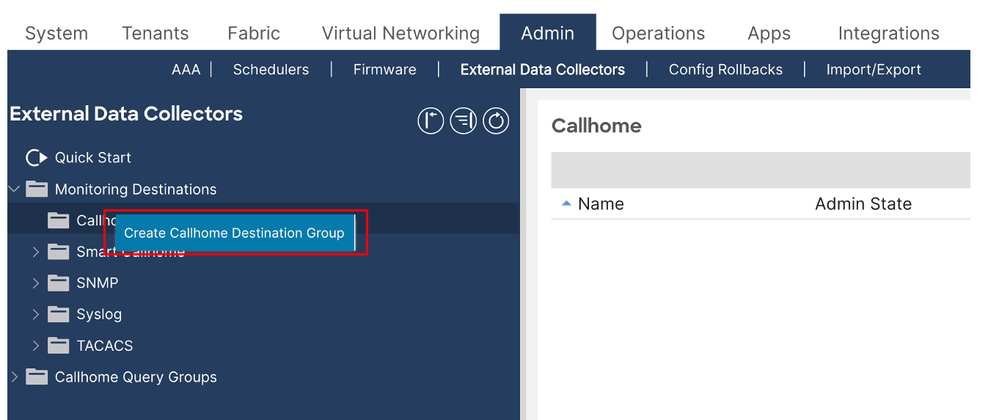
Step 2. Create CallHome destination group.
Navigate to APIC > Admin > External Data Collectors > Monitoring Destination
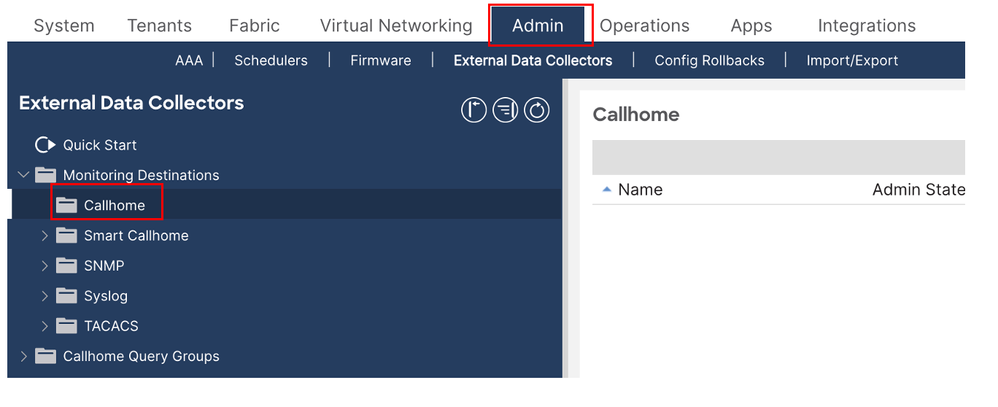
- Right click the CallHome folder and choose Create CallHome Destination Group.
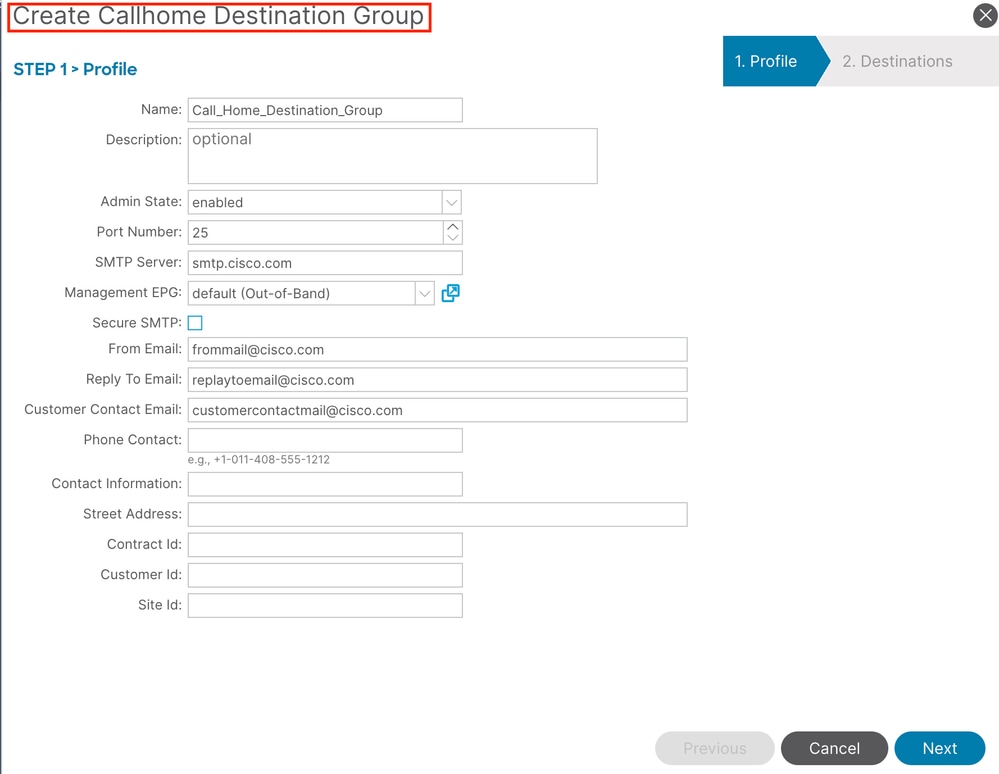
Step 3. Enter the required details.
Required details are mentioned below
- Name - Name of CallHome destination group
- Admin - enable this option
- Port - 25 ,Port Number on which SMTP will communicate.
- SMTP Server - DNS name or IP address of SMTP server
- From Email - email address from which fabric will send us messages
- Management EPG - OOB or INB EPG that has reachability to our SMTP server
- Contact Email - email address to which messages will received
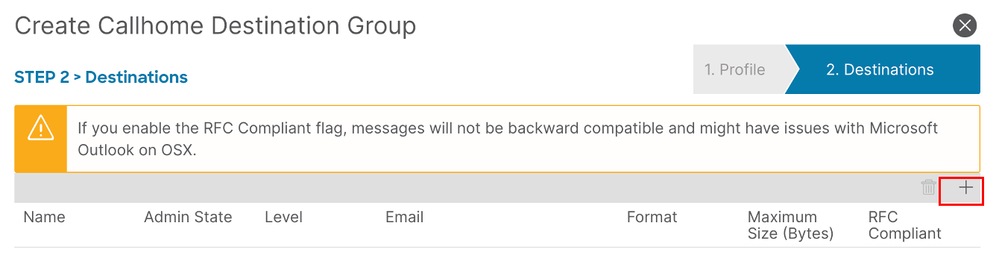
- On the next page, create the specific destinations—these are the email recipients for CallHome messages
- Click the + sign and fill fields
- Name- destination name
- Admin state - if disabled, then destination will not receive any messages
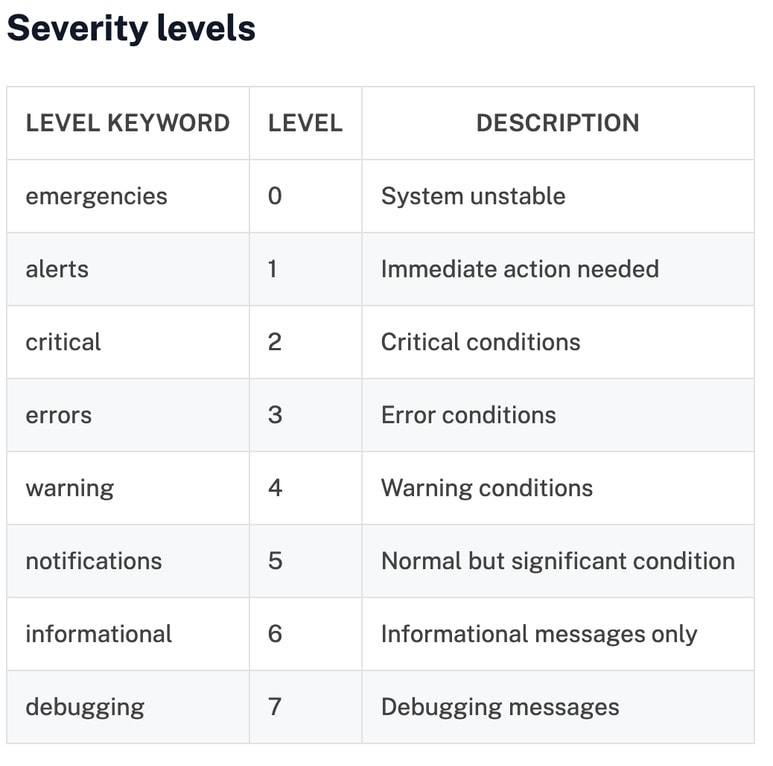
- Level - severity level of messages that will be sent to destination. I would recommend this set to error or higher. Table of severity levels will be provided below.
- Email - Actual email address where messages must be sent
- Format – Do not plan to automatically parse inbound messages, and set Format to short‑txt. Experiment with this setting to compare the differences between formats.
- Maximum Size (Bytes) – Defines the maximum size of a single email message. For aml or xml formats, messages can be quite large (100–200 KB is acceptable). Experiment to determine the optimal size. For short‑txt format, set this to 10 KB.
- RFC Compliant - Better to say does not enable this.

- Create as many destinations as needed. Additional destinations can be created by right‑clicking the CallHome Destination group and chooseing Create CallHome Destination
Step 4. Create Callhome Query Groups
Navigate to APIC > Admin > External Data Collectors > CallHome Query Groups
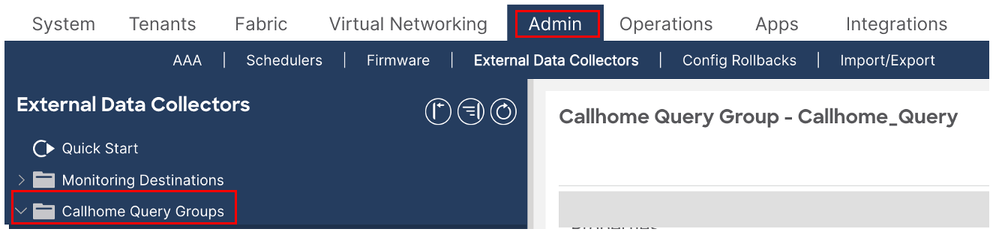
- Right-Click the CallHome Query Groups folder and choose Create CallHome Query Group.

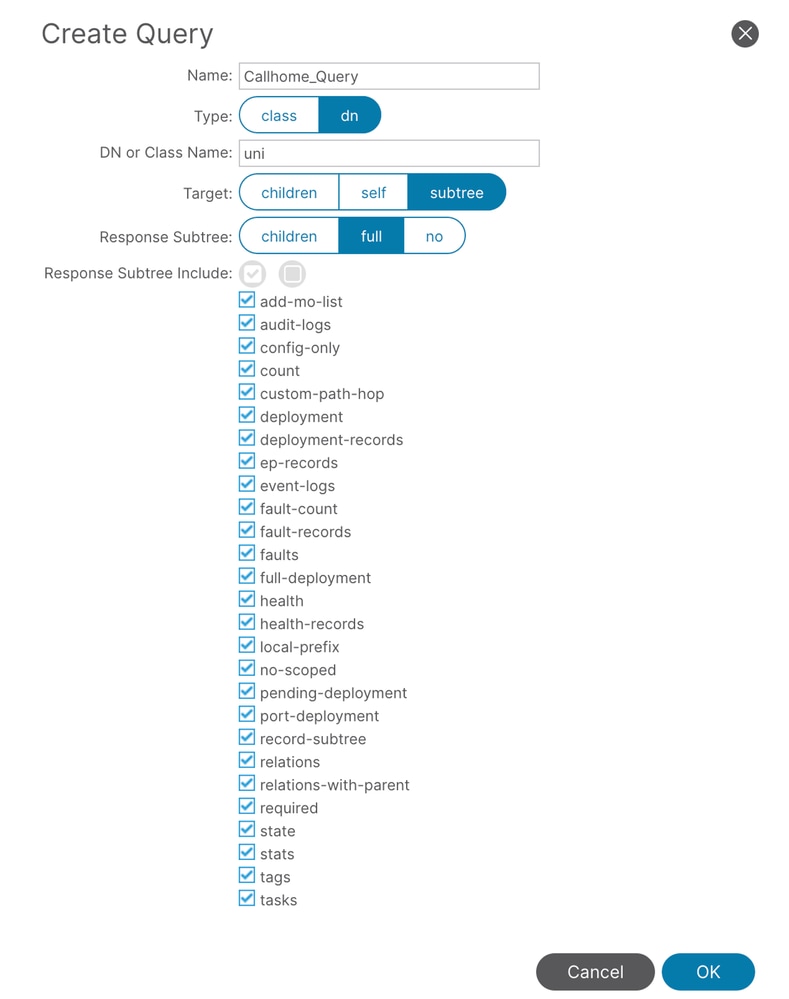
- Define the name of query group and Click the+sign to create query definition.
- Name- query name
- Type-choose or of object type that will be monitored for changes. I have herednchoose ed which means distinguished name.
- DN or Class Name – Specifies the monitored object. This field becomes mandatory starting with APIC version 4; in earlier releases, it could be left blank If Type is set to dn, enter
uni in this field. In Cisco’s terminology, that literally means Whole universe, i.e. All fabric objects
- Target - selects if subtree info must be included for object returned by query. I have subtree here selected.
- Subtree - selects subtree objects that must be returned from query. I have full selected here.
- Include- type of objects that will be returned by query. I have all selected.
Step 5 . Fabric Monitoring policies and create CallHome sources
Now that CallHome destinations and queries are configured, proceed to edit the monitoring policy
Navigate to APIC > Fabric > Fabric Policies > Policies > Monitoring
- Ensure that ALL is selected in the Monitoring Object dropdown and Source Type is set to CallHome
- Click the+sign in rightmost part of right pane
- Name- CallHome Source name (Callhome_Source)
- Include- select what kind of notifications are to be received
- Level- event severity that will trigger action (selected level or greater)
- Destination Group - here , select CallHome Destination Group that was created before
- Query Group- here , select CallHome Query Group that was created before

Note:With CallHome destinations and queries configured, proceed to fine‑tune the monitoring policy by creating separate CallHome sources for different monitoring objects and by using multiple CallHome destination and query groups
Step 6. Access Policies CallHome sources
- In the Access Policies section, configure fabric access policies to create CallHome sources.
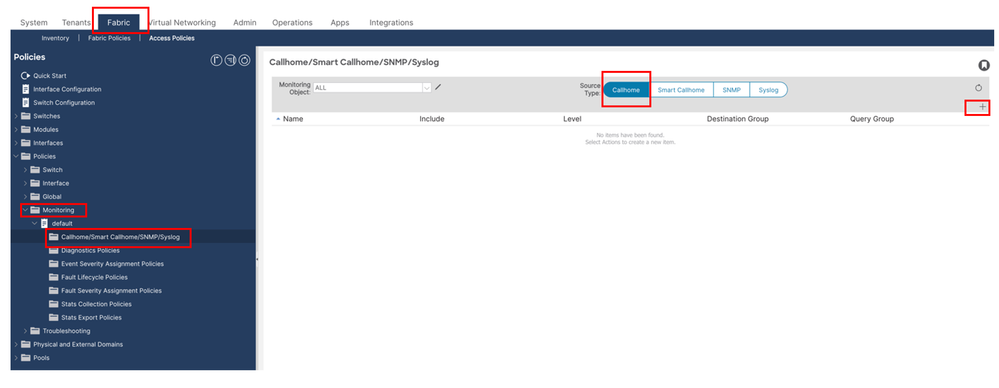
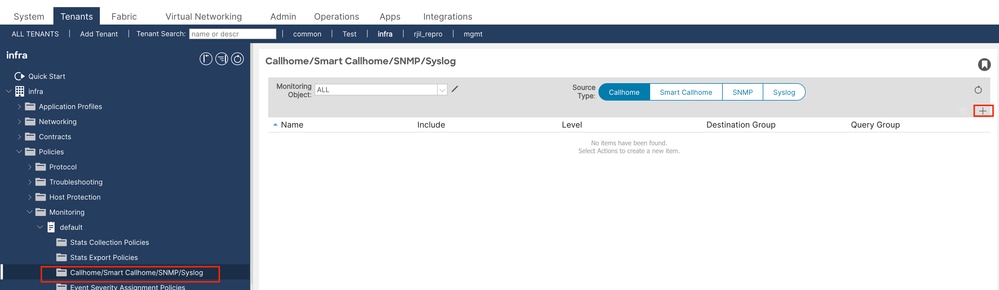
Navigate to APIC > Fabric > Access Policies > Policies > Monitoring
- Open the default monitoring policy within the Monitoring folder, then click the CallHome/Smart CallHome/SNMP/Syslog/TACACS section
- Make sure that ALL is selected in Monitoring Object drop-down and Source Type is set to CallHome.
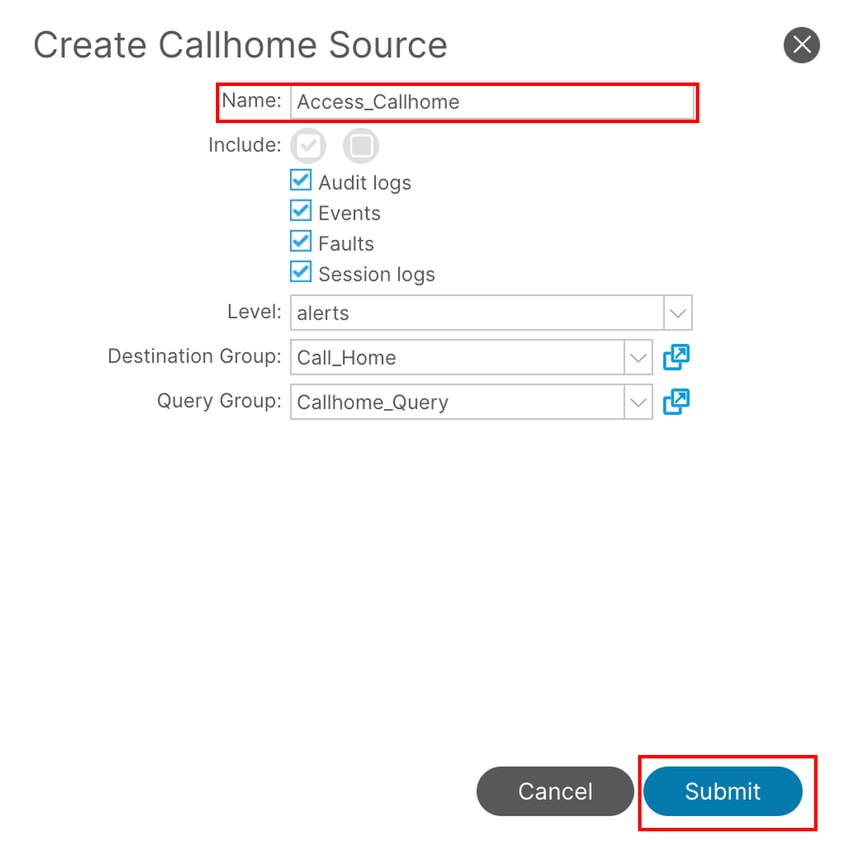
- Click the + sign in the rightmost part of the right pane and configure the following fields:
- Name – Enter the CallHome source name, e.g.Access_CallHome
- Include – Select the types of notifications to receive
- Level – Define the minimum event severity that will trigger an alert (selected level or greater)
- Destination Group – Select the previously created CallHome Destination Group
- Query Group – Select the previously created CallHome Query Group
Step 7. After making these changes, expect email alerts at the configured email address
Verify
Step 1. SMTP Server Connectivity Verification
To confirm that both APIC and Leaf devices can reach the SMTP server over TCP Port 25, perform ping and telnet tests.
Step 1.1. Ping Test
Use the commands below to check basic network reachability to the SMTP host:
On APIC:
APIC # ping x.x.x.x
On Leaf Switch:
Leaf# iping x.x.x.x
Step 1.2. Telnet Test (Port 25)
Run the following commands to verify that SMTP port 25 is open and reachable:
On APIC:
APIC # curl -v telnet://smtp_server_ip:port

Example :
APIC# curl -v telnet://x.x.x.x:25
On Leaf Switch:
Leaf# icurl -v telnet://smtp_server_ip:port

Example:
Leaf#icurl -v telnet://x.x.x.x:25
Step 2. CallHome Configuration Validation
Verify that CallHome is correctly configured on both the APIC and the leaf switches.
Step 2.1 CallHome Profile Validation
Ensure that the profile is configured with the correct port and parameters:
On APIC:
Apic# moquery -c callhomeProf
On Leaf Switch:
Leaf# moquery -c callhomeProf
Step 2.2. CallHome Destination Validation
Verify that the destination SMTP server and port are accurately set:
On APIC:
Apic# moquery -c callhomeDest
On Leaf Switch:
Leaf# moquery -c callhomeDest
Troubleshoot
Step 1. Use the following command to send a Call Home test alert message from the specified node. In this example, the node ID is 101.
The keyword alert specifies the severity level of the test message. You can replace it with other severity levels depending on your testing requirements, such as critical, debug, emergency, error, info, notice, or warning.
Example syntax
callhome test alert|critical|debug|emergency|error|info|notice|warning node <node-id>
Step 1.2. To manually trigger a Call Home alert on node 101 for troubleshooting, enter the following command in the Cisco APIC NX-OS style CL
callhome test alert node 101
Step 2 . Verifying CallHome Email Transmission
In a typical ACI fabric, CallHome messages are initiated from APIC2 in a three-node cluster. If APIC2 is unavailable, these messages can originate from a leaf switch. To confirm the source and transmission of CallHome messages, use tcpdump on the relevant interfaces.
Step 2.1. From APIC (Root Access Required)
If inband management is configured, replace bond0.330 with the VLAN used for inband management:
Apic# tcpdump -i bond0.330 port 25
From Leaf Switch:
Use the kpm_inb interface to monitor outgoing SMTP traffic:
Leaf# tcpdump -i kpm_inb port 25
Step 3. In certain cases, even after successful configuration and verification of CallHome, SMTP connectivity, and monitoring policies, interface fault alerts may not be received via email.
Use the steps below to Troubleshoot:
Use the Object Store Browser to Inspect the Fault.
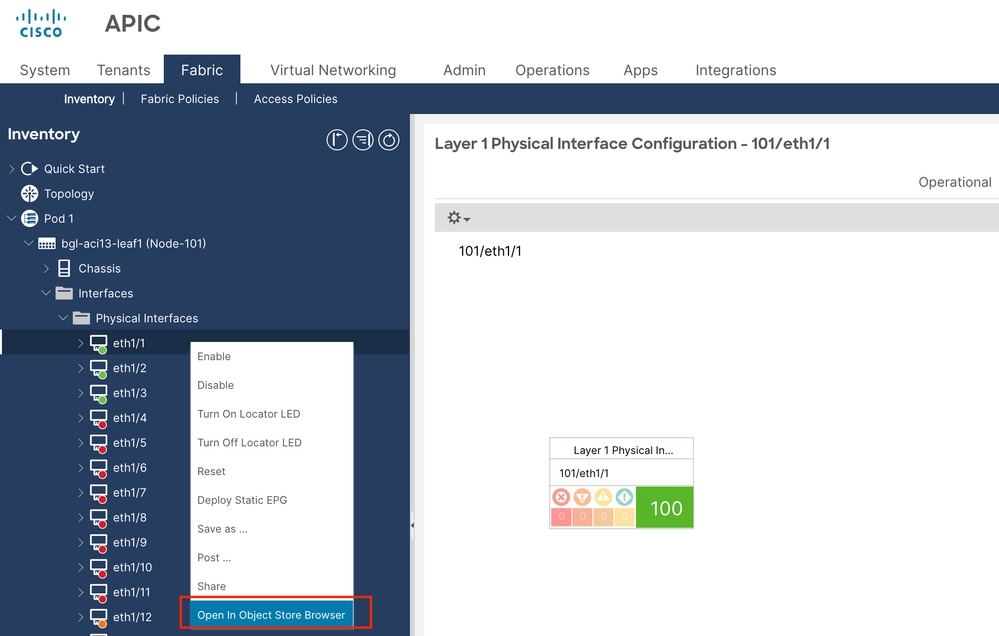
Step 3.1. Navigate to the affected interface in the Cisco ACI GUI.
Step 3.2. Right-Click the interface and select Open in Object Store Browser (refer to the screenshot below for visual guidance).
Step 3.3. In the Object Store Browser, locate the Distinguished Name (DN) associated with the fault object.
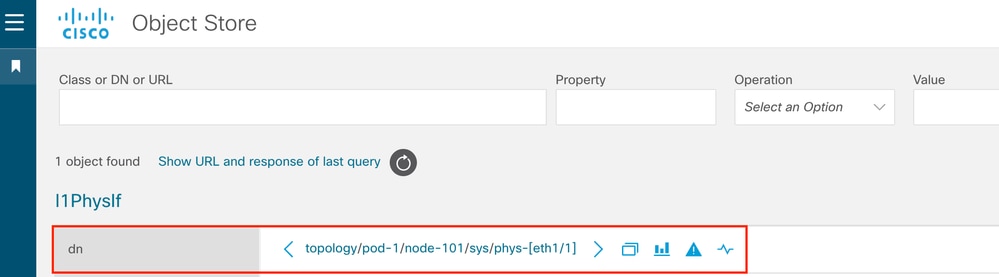
Step 3.4. After identifying the DN, access the APIC CLI and run the following command to query details for the object:
Example:-
apic# moquery -d "topology/pod-1/node-101/sys/phys-[eth1/1]"
Step 3.5. In the output of the previous command, locate the monPolDn field.
For example:
monPolDn : uni/infra/moninfra-default
This field indicates the monitoring policy distinguished name (DN) applied to the interface object.
Step 3.6. In this example, the monitoring policy is: uni/infra/moninfra-default
This shows that the default monitoring policy under the Infra tenant is applied to the interface.
Step 3.7. To ensure CallHome generates and sends alerts for interface faults:
Confirm that the CallHome configuration is present under the Infra tenant.
Ensure the monitoring policy (moninfra-default in this case) is linked to a properly configured CallHome profile.

 Feedback