Cisco DNA Management Mode to Meraki Management Mode Guide
Available Languages
Bias-Free Language
The documentation set for this product strives to use bias-free language. For the purposes of this documentation set, bias-free is defined as language that does not imply discrimination based on age, disability, gender, racial identity, ethnic identity, sexual orientation, socioeconomic status, and intersectionality. Exceptions may be present in the documentation due to language that is hardcoded in the user interfaces of the product software, language used based on RFP documentation, or language that is used by a referenced third-party product. Learn more about how Cisco is using Inclusive Language.
A simple guide for migrating Cisco Catalyst 9160 access points from Cisco DNA management mode to Meraki management mode.
Start your journey to cloud management today
Check device eligibility and license status using the short checklist to the right. ->
Perform management mode migration
Next, log in to the wireless LAN controller and follow the simple steps outlined on page 2.
Acquire a Meraki license
Once your devices are migrated to the Meraki Dashboard, there are two ways you can obtain appropriate entitlement. See page 4 for details.
That’s it! After the migration process is complete, head to the Meraki Dashboard and take that next step toward the cloud.
1. Deploy a Cisco Catalyst 9162, 9164, or 9166 Series Access Point.
2. Deploy a Cisco Catalyst 9800 Series Wireless Controller with Cisco IOS XE 17.9.1 or later image.
3. If you do not have a Cisco DNA license that qualifies for migration (see page 4), purchase a Meraki license.
4. The Catalyst access point must be able to reach the Meraki Dashboard before you obtain a Meraki cloud license and use the Meraki Dashboard.
Step 2: Perform management mode migration
1. Log in to the wireless LAN controller.
2. Go to Configure > Wireless > Change to Meraki Persona.
3. Select all target devices that will be migrated to a Meraki persona.
4. Click Change to Meraki Persona for a validation check. Once all checks are green, click Next.
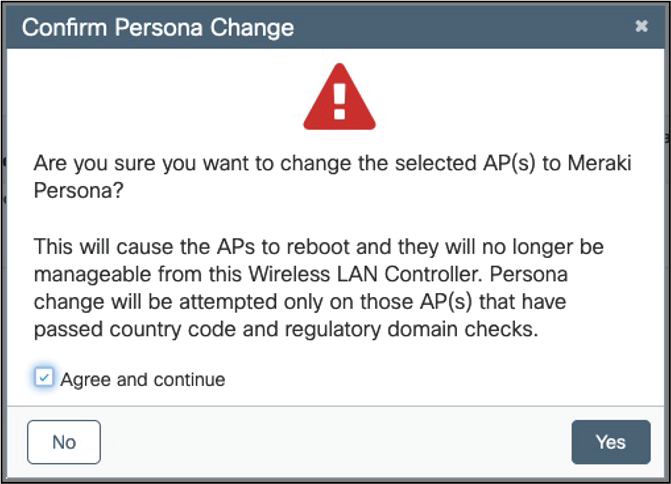
5. Read the warning message, check Agree and continue, and click Yes to confirm the persona change.
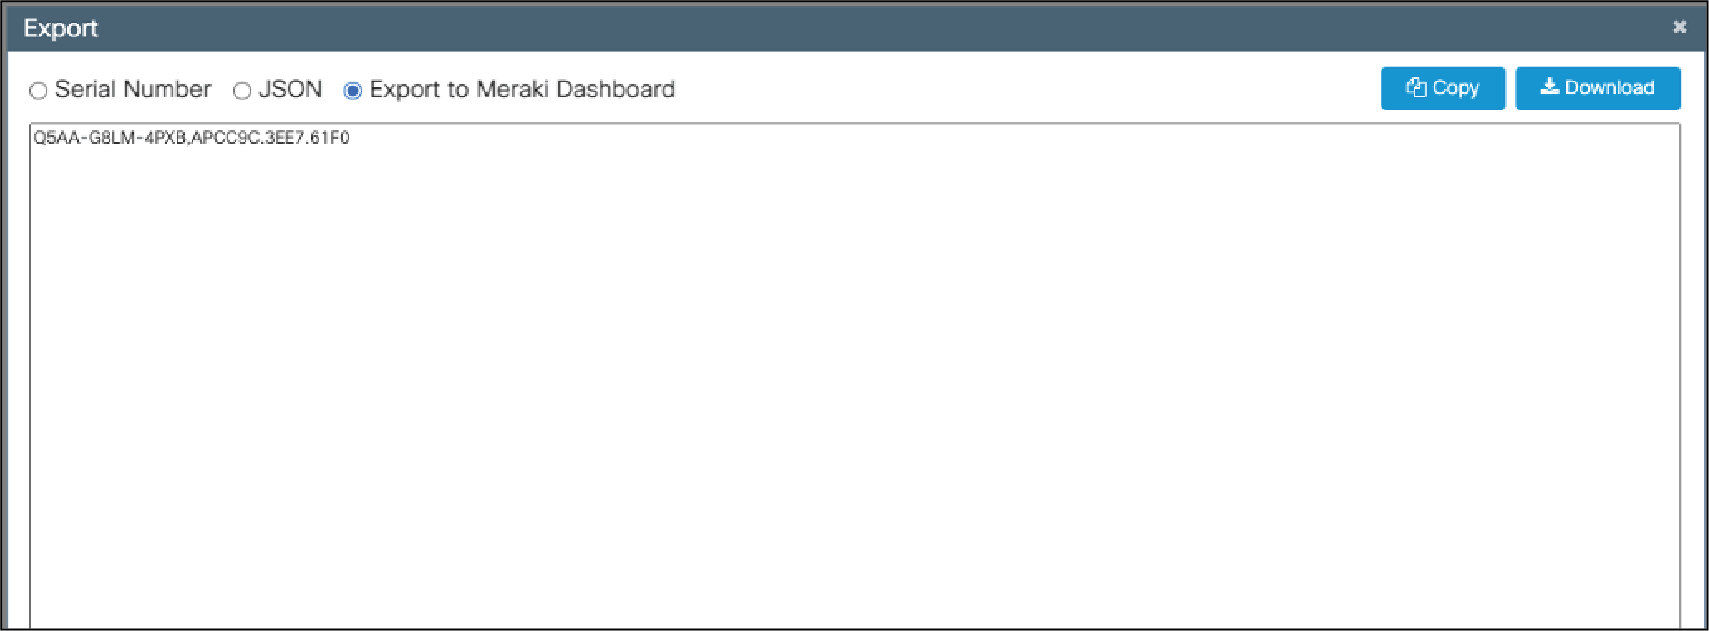
6. Export data in your preferred format. We recommend choosing Export to Meraki Dashboard, as this option will also bring over access point names. Download as a file, or copy. Please wait two to three minutes before unplugging access points from a PoE switch.
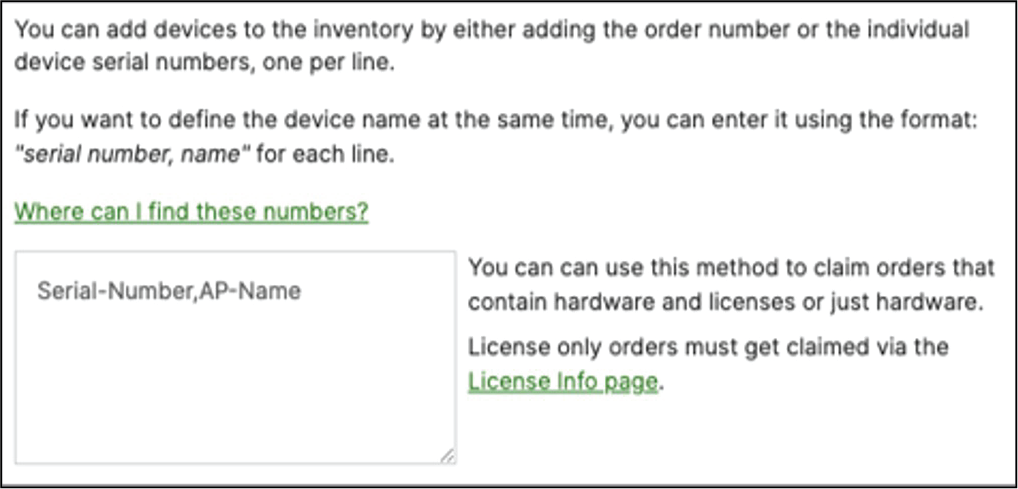
7. Claim the access point in your Meraki cloud management organization.
Note: Should you need to find the serial numbers of previously migrated access points, click Previously Changed AP in the Change to Meraki Persona dialog. [[Is this correct?]] This data is held only until a reboot, so we recommend that you download and save this data at the time of management mode migration.
Example of the validation check before confirming persona change

Example of the warning message before confirming persona change
Choose Export to Meraki Dashboard as the preferred format
Example of the message when importing an access point into Meraki Dashboard and keeping the current access point name
Once the access point is in Meraki management mode, there will be no console access.
● The access point needs to be able to reach the Meraki Dashboard:
◦ IP and ports should be open.
◦ Port 443 needs to be allowed.
● The below can be done via the Meraki API:
◦ An organization should exist or be created on the Meraki Dashboard. See Creating a Dashboard Account and Organization for details.
◦ A network should exist or be created. See Creating and Deleting Dashboard Networks for details.
◦ The access point must be claimed into an organization (good thing you downloaded the list of migrated access points in step 7 above). See Claiming Devices for details.
● If an RMA is done for a Cisco Catalyst 9162, 9164, or 9166 Series Access Point, the replacement access point will come in the management mode the case was opened for, regardless of the mode that was originally purchased.
Step 3: Obtain migrated licenses
Once your devices are migrated to the Meraki Dashboard, there are two ways you can obtain Meraki licenses:
Simply purchase new Meraki licenses OR obtain free Meraki licenses through the qualified promotion process (below).
The Meraki licenses will be matched as closely as possible to the existing Cisco DNA Center license:
● Level match:
◦ Cisco DNA Premier or Advantage -> Meraki Advanced.
◦ Cisco DNA Essentials -> Meraki Enterprise.
● Duration match:
◦ Duration will be equal to or greater than the remaining duration of your existing Cisco DNA license and support contract.
◦ For example, if you have 22 months remaining on your Cisco DNA license and support contract, you will receive a 2-year (24-month) Meraki license.
● Gather required information:
◦ Cisco sales order numbers for Cisco DNA licenses and support contracts.
◦ Serial numbers of devices to be migrated to cloud management.
● Fill out the qualified promotion intake form with the above information.
● Once approved, obtain license keys from the promotion fulfillment email.
● Claim license keys within the Meraki Dashboard following the steps on the left.
What happens to my existing Cisco DNA licenses and support contracts?
Existing licenses and support contracts will be noted as collateral for the free Meraki license but will otherwise be left as is. After the qualified promotion is applied, the licenses and support contracts will still be available for use, just as they were prior to the promotion.
Learn more at meraki.cisco.com