-
Cisco MDS 9000 Family Fabric Manager Configuration Guide, Release 1.3 (from Release 1.3(1) through Release 1.3(6))
-
Index
-
New and Changed Information
-
Preface
-
Product Overview
-
Getting Started with Cisco Fabric Manager
-
Overview of Fabric Manager Components
-
Before You Begin
-
Obtaining and Installing Licenses
-
Initial Configuration
-
Configuring High Availability
-
Software Images
-
Managing Modules
-
Managing System Hardware
-
Configuring and Managing VSANs
-
Configuring Interfaces
-
Configuring Trunking
-
Configuring PortChannels
-
Configuring and Managing Zones
-
Configuring Inter-VSAN Routing
-
Managing FLOGI, Name Server, FDMI, and RSCN Databases
-
Configuring Switch Security
-
Configuring Fabric Security
-
Configuring Port Security
-
Configuring Fibre Channel Routing Services and Protocols
-
Configuring IP Services
-
Configuring FICON
-
Configuring IP Storage
-
Configuring Call Home
-
Configuring Domain Parameters
-
Configuring Traffic Management
-
Configuring System Message Logging
-
Discovering SCSI Targets
-
Monitoring Network Traffic Using SPAN
-
Advanced Features and Concepts
-
Configuring Fabric Configuration Servers
-
Monitoring System Processes and Logs
-
Troubleshooting the Fabric
-
Troubleshooting Fabric Manager Issues
-
 Feedback
Table Of Contents
Initiating Customized Discovery
Creating an iSCSI Virtual Target
Discovering SCSI Targets
This chapter describes the SCSI LUN discovery feature provided in switches in the Cisco MDS 9000 Family. It includes the following sections:
This chapter contains the following topics:
•
Initiating Customized Discovery
•
About SCSI LUN Discovery
Small Computer System Interface (SCSI) targets include disks, tapes, and other storage devices. These targets do not register logical unit numbers (LUNs) with the name server.
The name server requires LUN information for the following reasons:
•
•
•
The SCSI LUN discovery feature uses the local domain controller Fibre Channel address. It uses the local domain controller as the source FC ID, and performs SCSI INQUIRY, REPORT LUNS, and READ CAPACITY commands on SCSI devices
The SCSI LUN discovery feature is initiated on demand, through CLI or SNMP. This information is also synchronized with neighboring switches, if those switches belong to the Cisco MDS 9000 Family.
Initiating Customized Discovery
Customized discovery consists of a list of VSAN and domain pairs that are selectively configured to initiate a discovery. Use the custom-list option to initiate this discovery. The domain ID is a number from 0 to 255 in decimal or a number from 0x0 to 0xFF in hex.
Authenticating iSCSI Targets
To authenticate iSCSI targets, first specify the initiators. To specify initiators, follow these steps:
Step 1
Step 2
Step 3
Step 4
Step 5
Step 6
Step 7
Step 8
Step 9
Specifying Targets
To specify targets, follow these steps:
Step 1
Step 2
Step 3
Step 4
You see a list of statically assigned and dynamically discovered Fibre Channel targets. Click Import to automatically discover and populate this list with existing targets. Click Create to assign a port address or control iSCSI access to certain targets.
Step 5
Step 6
Step 7
Step 8
Specifying LUN Mappings
To specify LUN mappings, follow these steps:
Step 1
Step 2
Step 3
Step 4
Step 5
Step 6
Step 7
Step 8
Viewing iSCSI Statistics
To view iSCSI statistics, follow these steps:
Step 1
Step 2
Step 3
Step 4
Viewing iSCSI Sessions
To view iSCSI sessions, follow these steps:
Step 1
Step 2
Step 3
Step 4
Viewing Session Statistics
To view session statistics, follow these steps:
Step 1
Step 2
Step 3
Step 4
Creating an iSCSI Initiator
To create an iSCSI Initiator using Device Manager, follow these steps:
Step 1
Step 2
Step 3
Step 4
Step 5
There are three options. The Auto option assigns the WWN from a pool of about 440,000 WWNs per switch and is returned to pool when you log out. The Persistent option also assigns the WWN from a pool. However, when you log out of the switch, the WWIN is not returned to the pool but is saved for the initiator. The third option is to statically assign the WWN by manually entering WWN that the initiator will use.
Step 6
Creating an iSCSI Virtual Target
To create an iSCSI Virtual Target using Device Manager, follow these steps:
Step 1
Step 2
Step 3
Step 4
Step 5
Step 6
The drop-down list shows all pWWNs that are logged into the name server.
Step 7
Choose All if you want all the initiators to access the target. Choose None, and then enter in the numbers (separated by commas) if you want only certain initiators to access the target.
Step 8
Using the iSCSI Wizard
You can use the iSCSI Wizard to configure a new or existing initiator on a switch.
To use the iSCSI Wizard, follow these steps:
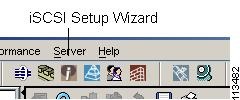
Step 1
Figure 29-1 iSCSI Wizard Icon
Step 2
Step 3
There are three options. The Auto option assigns the WWN from a pool of about 440,000 WWNs per switch and is returned to pool when you log out. The Persistent option also assigns the WWN from a pool. However, when you log out of the switch, the WWIN is not returned to the pool but is saved for the initiator. The third option is to statically assign the WWN by manually entering WWN that the initiator will use.
Step 4