Bring-up Cisco NCS 1004

After installing the hardware, boot the Cisco NCS 1004 system. You can connect to the XR console port and power on the system. NCS 1004 completes the boot process using the pre-installed operating system (OS) image. If no image is available, NCS 1004 can be booted using the iPXE boot, an external bootable USB drive, or Golden ISO.

After booting, create the root username and password, and then use it to log on to the XR console. From the XR console, access the System Admin console to configure system administration settings.


Note


The output of the examples in the procedures is not from the latest software release. The output will change for any explicit references to the current release.


Options to boot NCS 1004

This topic explains the boot options available on NCS 1004, including local SSD, network-based iPXE, Zero Touch Provisioning, and Golden ISO, to help you select the appropriate method for your deployment environment.

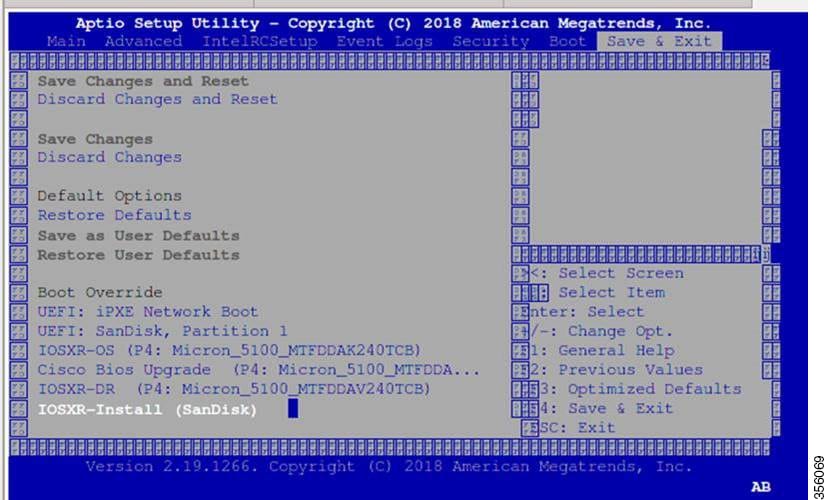
The boot options available on NCS 1004 are:

  • SSD (hard disk),

  • USB drive,

  • iPXE,

  • ZTP, and

  • Golden ISO.


Note


If bootable image is not available in any of these boot options, reboot the system.


Boot NCS 1004

Boot NCS 1004 by establishing a console terminal session and powering on the device.

Use the console port to connect to NCS 1004. By default, the console port connects to the XR mode. If necessary, you can establish subsequent connections through the management port after it is configured.

Procedure


Step 1

Connect a terminal to the console port of the Route Processor (RP).

Step 2

Start the terminal emulation program on your workstation.

The console settings are 115,200 bits per second (bps), eight data bits, one stop bit, and no parity.

Step 3

Power on NCS 1004 by pressing the power switch upward to turn on the power shelves.

When NCS 1004 boots up, the terminal emulation program displays the boot process details at the console.

Step 4

Press Enter.

The boot process is complete when the system prompts you to enter the root-system username. If the prompt does not appear, wait for NCS 1004 to complete the initial boot procedure, then press Enter.


NCS 1004 boots successfully, and the system prompts for the root-system username on your console terminal.

What to do next


Important


If the boot process fails, the preinstalled image on NCS 1004 may be corrupt. In this case, boot NCS 1004 using an external bootable USB drive.


Boot NCS 1004 from a USB drive

Reimage or recover the NCS 1004 by booting it from a USB drive when the internal SSD does not have a valid bootable image.

Before you begin

  • Obtain a USB drive that has at least 4 GB of storage and a single partition.

  • Download the NCS 1004 software image from the Software Download page on the website.

  • Copy the compressed boot file (for example, ncs1004-usb-boot-7.0.1.zip) from the website to your local machine.

The bootable USB drive is used to reimage NCS 1004 for system upgrade or to boot NCS 1004 in case of boot failure. A bootable USB drive is created by copying a compressed boot file to the drive. After you extract the contents of the compressed file, the USB drive becomes bootable.

You can complete this task using Windows, Linux, or macOS. The exact operation for each step depends on the operating system.

Procedure


Step 1

Connect the USB drive to your local machine and format it with the FAT32 file system.

Step 2

Copy the compressed boot file to the USB drive.

Step 3

Verify that the copy is successful by comparing the file size and MD5 checksum at the source and destination.

Step 4

Extract the content of the compressed boot file directly into the root folder of the USB drive.

Note


Extract the EFI and boot directories directly to the root of the USB drive. If the unzipping application places the extracted files in a new subfolder, move EFI and boot to the root of the USB drive.

Step 5

Insert the USB drive into one of the USB ports of NCS 1004.

Step 6

Reboot NCS 1004 using a power cycle or the console.

Step 7

Press Esc to enter BIOS.

Step 8

Select the Save & Exit tab in BIOS.

Step 9

Choose IOS-XR Install.

The system detects the USB drive and boots from it. You can observe the boot progress on the console.


Admin Console:
GNU GRUB version 2.00
Press F2 to goto grub Menu..
Booting from USB..
Loading Kernel..

Validating End Entity Certificate...

Validating SubCA Certificate...

Validating Root Certificate...
Loading initrd..

Validating End Entity Certificate...

Validating SubCA Certificate...

Validating Root Certificate...
CiscoSec: Image signature verification completed.
XR Console:
CiscoSec: Image signature verified.
[    9.957281] i8042: No controller found
Starting udev
udevd[972]: failed to execute '/etc/udev/scripts/network.sh' '/etc/udev/scripts/network.sh': No such file or directory
Populating dev cache
Running postinst /etc/rpm-postinsts/100-dnsmasq...
update-rc.d: /etc/init.d/run-postinsts exists during rc.d purge (continuing)
 Removing any system startup links for run-postinsts ...
  /etc/rcS.d/S99run-postinsts
Configuring network interfaces... done.

Step 10

Remove the USB drive when prompted.

NCS 1004 reboots automatically.


Setting maximal mount count to -1
Setting interval between checks to 0 seconds
Fri Dec 11 20:35:56 UTC 2015: Install EFI on /dev/mb_disk4
Fri Dec 11 20:35:57 UTC 2015: Install finished on mb_disk
Rebooting system after installation ...
[  116.973666] reboot: Restarting system
Version 2.17.1245. Copyright (C) 2015 American Megatrends, Inc.                 
BIOS Date: 11/29/2015 12:02:45 Ver: 0ACBZ1110                                   
Press <DEL> or <ESC> to enter setup.                                            
CiscoSec: Image signature verified.


GNU GRUB version 2.00
Press F2 to goto grub Menu..
Booting from Disk..
Loading Kernel..

Validating End Entity Certificate...

Validating SubCA Certificate...

Validating Root Certificate...
Loading initrd..

Validating End Entity Certificate...

Validating SubCA Certificate...

Validating Root Certificate...
CiscoSec: Image signature verification completed.
Initrd, addr=0xff69a000, size=0x955cb0
[    1.745686] i8042: No controller found

The NCS 1004 boots from the USB drive, successfully reimages, and reboots from the new installation.

iPXE network boot

iPXE (Preboot eXecution Environment) network boot feature enables you to download and install a fresh IOS XR ISO image from an HTTP, FTP, or TFTP server.

iPXE is a pre-boot execution environment included in the network card of the management interfaces. It operates at the system firmware (UEFI) level of the chassis. You can use iPXE to reimage the system and boot the chassis if there is a boot failure or no valid bootable partition. iPXE downloads the ISO image, installs the image, and then boots into the new installation.


Note


The time taken for iPXE to download the ISO image depends on the network speed. Ensure that the network speed is sufficient to complete the image download in less than ten minutes. The chassis reloads if the image is not downloaded within ten minutes.


iPXE acts as a bootloader and provides the flexibility to choose the image that the system will boot based on the Platform Identifier (PID), the Serial Number, or the management MAC address. You must define iPXE in the DHCP server configuration file.

Configure a DHCP server for iPXE boot

Ensure your DHCP server supports iPXE network boot for NCS 1004, allowing devices to receive correct boot files in IPv4-only, IPv6-only, or dual-stack setups.

A DHCP server must be configured for IPv4, IPv6, or both communication protocols.


Note


For DHCPv6, a routing advertisement (RA) message must be sent to all nodes to indicate how to obtain the IPv6 address. The Router Advertisement Daemon (radvd) enables clients to send DHCP requests.


interface eth3
{
        AdvSendAdvert on;
        MinRtrAdvInterval 60;
        MaxRtrAdvInterval 180;
        AdvManagedFlag on;
        AdvOtherConfigFlag on;
        prefix 2001:1851:c622:1::/64
        {
                AdvOnLink on;
                AdvAutonomous on;
                AdvRouterAddr off;
        };
};

Procedure


Step 1

Create the dhcpd.conf file (for IPv4, IPv6 or both communication protocols), dhcpd.conf file (for IPv6), or both in the /etc/ directory.

This configuration file stores network information, such as the path to the script, the location of the ISO install file, the location of the provisioning configuration file, the serial number, and the MAC address of the chassis. You can create this file for IPv4, IPv6, or both communication protocols.

Step 2

Test the server once the DHCP server is running.

  1. Use the MAC address of the chassis.

    Example:

    host ncs1004
    {
    hardware ethernet ab:cd:ef:01:23:45;
    fixed-address <ip address>;
    filename "http://<httpserver-address>/<path-to-image>/ncs1004-mini-x.iso";
    }
  2. Use the serial number of the chassis.

    Example:

    host demo {
    option dhcp-client-identifier "<chassis-serial-number>";
      filename "http://<IP-address>/<hardware-platform>-mini-x.iso";
      fixed-address <IP-address>;
    }

    The serial number of the chassis is derived from the BIOS and is used as an identifier.


The DHCP server is configured for iPXE boot, enabling NCS 1004 devices to obtain the correct boot file in IPv4, IPv6, or dual-stack environments.

host 10.89.205.202 {
    hardware ethernet 40:55:39:56:0c:e8;
    fixed-address 10.89.205.210;
    if exists user-class {
        if option user-class = "iPXE" or option user-class = "\x04iPXE" {
            filename "http://10.89.205.127/box1/ncs1004-x64.iso";
        } else {
            filename "http://10.89.205.127/box1/startup.cfg";
        }
    } else {
        filename "http://10.89.205.127/box1/startup.cfg";
    }
}

Boot NCS 1004 using iPXE

Boot NCS 1004 using iPXE to reimage the chassis with a network-based ISO image.

Use iPXE to reimage NCS 1004 from the network when you want to deploy or upgrade software without relying on local storage. This process uses DHCP and HTTP servers to deliver the ISO image.

Before you begin

Procedure


Step 1

Run the hw-module location all bootmedia network reload command in the System Admin console to start the iPXE boot process and reimage the chassis.

Example:


sysadmin-vm:0_RP0# hw-module location all bootmedia network reload
Tue Feb 12 15:29:57.376 UTC
Reload hardware module ? [no,yes]

Step 2

Enter yes when prompted to confirm the reload.

The iPXE bootloader contacts the DHCP server, downloads the ISO image, and installs it. Monitor the progress on the console.

iPXE 1.0.0+ (3e573) -- Open Source Network Boot Firmware -- http://ipxe.org
Features: DNS HTTP TFTP VLAN EFI ISO9660 NBI Menu
Trying net0...
net0: c4:72:95:a6:14:e1 using dh8900cc on PCI01:00.1 (open)
[Link:up, TX:0 TXE:0 RX:0 RXE:0]
Configuring (net0 c4:72:95:a6:14:e1).................. Ok
net0: 10.37.1.101/255.255.0.0 gw 10.37.1.0
Next server: 10.37.1.235
Filename: http://10.37.1.235/ncs1004/ncs1004-mini-x.iso
http://10.37.1.235/ncs1004/ncs1004-mini-x.iso... 58%

NCS 1004 boots and installs the specified ISO image from the network. You can monitor and verify installation progress in the System Admin console.

Zero Touch Provisioning (ZTP) boot

Zero Touch Provisioning (ZTP) allows you to deploy minimal configurations on several chassis. You can use ZTP to boot, set up, and configure the system. You can automate the configuration of the management Ethernet interface, the installation of SMUs, applications, and optional packages using ZTP. ZTP does not execute if a username is already configured in the system.

ZTP auto provisioning allows you to perform these actions:

  • Configuration: Downloads and runs the configuration files. The first line of the file must include the words "IOS XR" so ZTP can process the file as a configuration.

  • Script: Downloads and runs the script files. These scripts use a programmatic approach to complete a task. For example, scripts created using IOS XR commands to perform patch upgrades. The first line of the file must contain #! /bin/bash or #! /bin/sh for ZTP to process the file as a script.

You can use either the ZTP bash script or the ZTP configuration file.

host ncs1004 {
  #hardware ethernet 00:a0:c9:00:00:00;
  option dhcp-client-identifier "<chassis-serial-number>";
     filename "http://<IP-address>/<folder>/ncs1004-ztp.script";
     #filename "http://<IP-address>/<folder>/ncs1004-ztp.cfg";
  }

ZTP bash script sample

This is the sample content of the ZTP bash script:

#! /bin/bash
#
# NCS1004 Demo Sample
# ZTP installation of config and day-0 SMU's
#
source ztp_helper

wget http://downloads.sourceforge.net/project/yourcode/application.tgz
#install the downloaded application.tgz

#Run XR CLI's from the script
`xrcmd "show version"`

ZTP configuration file sample

This is the sample content of the ZTP configuration file. You can automate all the configurations.

!! IOS XR Configuration version = 7.0.1
!
telnet vrf default ipv4 server max-servers 20
!
vty-pool default 0 20 line-template default
!
interface MgmtEth0/RP0/CPU0/0
 ipv4 address dhcp
 no shutdown
!
router static
 address-family ipv4 unicast
  0.0.0.0/0 10.77.132.1
!
end

Golden ISO

A Golden ISO is a bootable image format that

  • packages the IOS XR mini ISO, optional Software Maintenance Updates (SMUs), and a startup configuration file,

  • enables NCS 1004 installation and configuration in a single boot cycle, and

  • reduces manual installation steps by automating image assembly and deployment.

Benefits of Golden ISO

  • Saves installation effort and time.

  • Makes the system available in a single command and boot.

Limitations

  • Install operation over IPv6 is not supported.

Building a Golden ISO

You can build a Golden ISO using the gisobuild.py script located at /pkg/bin/gisobuild.py. Before running the build command, copy the script from NCS 1004 to a Linux environment.

Example:

gisobuild.py -i ./ncs1004-mini-x.iso -r ./rpm-directory -c ./xr-config -l label

Where:

  • rpm-directory: Directory where SMUs (XR, Calvados, and host) are stored.

  • xr-config: IOS XR configuration applied after booting.

  • label : Label for the Golden ISO.

Use one of these formats when creating the Golden ISO file name:

  • platform-name-golden-x-version.label.iso (without k9sec RPM).

    Example: ncs1004-golden-x-7.0.1.014I-V1.iso

  • platform-name-goldenk9-x-version.label.iso (with k9sec RPM).

    Example: ncs1004-goldenk9-x-7.0.1.014I-V1.iso

Verify boot operation

Procedure


Use the show version command to compare the displayed version with the boot image version.

The versions must be the same.

Example:


RP/0/RP0/CPU0:ios# show version
Thu Apr 30 21:57:48.371 IST
Cisco IOS XR Software, Version 7.2.1 Copyright (c) 2013-2020 by Cisco Systems, Inc.

Build Information:
 Built By     : ahoang
 Built On     : Wed Apr 29 19:22:26 PDT 2020
 Built Host   : iox-lnx-023
 Workspace    : /auto/srcarchive14/prod/7.2.1/ncs1004/ws
 Version      : 7.2.1
 Location     : /opt/cisco/XR/packages/
 Label        : 7.2.1

cisco NCS-1004 () processor
System uptime is 5 hours 25 minutes

Golden ISO for Open ROADM

From Release 7.3.1, NCS 1004 supports booting with a GISO image specifically prepared for Open ROADM deployments.

The GISO image is bundled with these files:

  • Mini ISO image,

  • Open ROADM RPM,

  • OTN-XP RPM, and

  • Startup configuration file.

Components of Golden ISO image for Open ROADM deployment

This topic explains the Golden ISO support for Open ROADM on NCS 1004, available from Release 7.3.1, and describes the components that the GISO image must contain for a successful Open ROADM deployment.

The Golden ISO (GISO) image includes these bundled files:

  • Mini ISO image,

  • Open ROADM RPM,

  • OTN-XP RPM, and

  • Startup configuration file.

In new Open ROADM deployments, you must include the startup configuration file to enable Open ROADM. This file contains:

  • DHCP client configuration for IPv4 and IPv6 addresses,

  • SSH server configuration,

  • XR Netconf configuration, and

  • Telnet configuration for IPv4 and IPv6 addresses.

Build a GISO image for Open ROADM

Generate a bootable Golden ISO image that includes the necessary mini ISO, Open ROADM RPM files, and a startup configuration for Open ROADM deployments.

A Golden ISO image is required to install Open ROADM software in a single step. This procedure enables deployment consistency by packaging required files together. Place the mini ISO file, the RPM directory, and the startup configuration file in the same location before you start the build.

Procedure


Use the gisobuild.py script available at the /pkg/bin/gisobuild.py location to build the Golden ISO.

Syntax: gisobuild.py -i ./ncs1004-mini-x.iso -r ./rpm-directory -c ./xr-config -l label

Example:

gisobuild.py -i ./ncs1004-mini-xr-7.3.1.iso -r ./RPMS -c ./giso.startup.txt -1 V1

Where:

  • gisobuild.py: Python script to run the GISO image build. Download the script from the GitHub site.

  • rpm-directory: Directory containing Open ROADM RPM files and OTN-XP RPM files.

    Example: ncs1004-tp-sw-1.0.0.0-r731.rpm and ncs1004-sysadmin-otn-xp-dp-7.3.1-r731.rpm.

  • xr-config: IOS XR startup configuration file, for example, giso.startup.txt, which includes Open ROADM-specific configurations.

  • label: Label for identifying the Golden ISO image.

Example:


gisobuild.py -i ./ncs1004-mini-xr-7.3.1.iso -r ./RPMS -c giso.startup.txt -l V1

System requirements check [PASS]
Golden ISO build process starting...

Platform: ncs1004 Version: 7.3.1

XR-Config file (/.../giso.startup.txt) will be encapsulated in Golden ISO.

...RPM compatibility check [PASS]

Building Golden ISO...
Summary .....

XR rpms:
ncs1004-k9sec-2.1.0.0-r731.x86_64.rpm

XR Config file:
giso.startup.txt

...Golden ISO creation SUCCESS.

Golden ISO Image Location: /.../ncs1004-goldenk9-x-7.3.1-v1.iso

Golden ISO image is created successfully, consolidating the mini ISO, RPMs, and startup config. The output location for the Golden ISO image is displayed on completion.

Create a USB file for Open ROADM

Create a bootable USB file so you can deploy NCS 1004 for Open ROADM.

Once the Golden ISO image is available, create a bootable compressed USB file. Use this USB file to boot NCS 1004.

Procedure


Step 1

Generate the USB file using the GISO image.

Example:

./create_usb_zip ncs1004 ncs1004-golden-x-7.3.1-V1.iso

The bootable compressed USB file is created.

Step 2

Copy the generated boot file from the system to the USB drive, extract the contents of the USB file onto the drive, and reboot NCS 1004.

For more information, see Boot NCS 1004 using a USB file for Open ROADM.


NCS 1004 is ready to boot for an Open ROADM deployment using the USB drive you prepared.

Boot NCS 1004 from a USB file for Open ROADM

Initialize or reimage the NCS 1004 system with the Open ROADM image using a USB boot drive.

Before you begin

  • Obtain a USB drive that has at least 8 GB of storage and a single partition.

  • Download the NCS 1004 software image from the Software Download page on the website.

  • Copy the compressed boot file (for example, ncs1004-usb-boot-7.1.3.zip) from the website to your local machine.

  • Plug the USB drive into the USB 0 port on NCS 1004.

The bootable USB drive is used to reimage NCS 1004 for system upgrade or to boot NCS 1004 in case of boot failure. A bootable USB drive is created by copying a compressed boot file to the drive. After you extract the contents of the compressed file, the USB drive becomes bootable.

You can complete this task using Windows, Linux, or macOS. The exact operation for each step depends on the operating system.

Procedure


Step 1

Connect the USB drive to your local machine and format it with the FAT32 file system.

Step 2

Copy the compressed boot file to the USB drive.

Step 3

Verify that the copy is successful by comparing the file size and MD5 checksum at the source and destination.

Step 4

Extract the content of the compressed boot file directly into the root folder of the USB drive.

Note


Extract the EFI and boot directories directly to the root of the USB drive. If the unzipping application places the extracted files in a new subfolder, move EFI and boot to the root of the USB drive.

Step 5

Insert the USB drive into one of the USB ports of NCS 1004.

Step 6

Reboot NCS 1004 using a power cycle or the console.

Step 7

Press Esc to enter BIOS.

Step 8

Select the Save & Exit tab in BIOS.

Step 9

Choose IOS-XR Install.

The system detects the USB drive and boots the GISO image. The Open ROADM startup configuration is applied automatically on first boot.


TAM: Chip DB Verified
CiscoSec: Image Signature Verified
GNU GRUB version 2.00
Press F2 to goto grub Menu..
Booting from USB..
Loading Kernel..
Kernel Secure Boot Validation Result: PASSED
Loading initrd….
Initrd Secure Boot Validation Result: PASSED
Starting udev…..
Running postinst /etc/rpm-postinsts/100-dnsmasq...
Sun Mar  7 19:22:30 UTC 2021: pd_download_giso
Write at Address 0x7bbe000098 (mmap addr 0x7fe08ec87000(0x98)) value 0x1 len 4 width 4 byte 
Write at Address 0x7bbe000098 (mmap addr 0x7f54fc88b000(0x98)) value 0x2 len 4 width 4 byte 
 Watchdog timer reset done, next reset needed within 10 minutes 
Golden ISO type = 1.1 and PKG_VER = 1.0
Current Boot: IOSXR-Install 
Current Boot: USB…
 * First booting, filesystem will be relabeled...
Finished Calvados patch for lxc
Starting to prepare calvados logical volume---
 Create sub partition on /dev/panini_vol_grp/calvados_lv0
 Create data sub partition on /dev/panini_vol_grp/calvados_data_lv0
 File system creation on /dev/panini_vol_grp/calvados_lv0 took 6 seconds
 Install sysadmin-vm image on /dev/panini_vol_grp/calvados_lv0
 RP based installation
 Starting Calvados patch for lxc for sysadmin-vm
 Uninstalling rpm task-nxos-core
 Uninstalling rpm gdb
 Uninstalling rpm smartmontools
NCS1004: Complete Patch Calvados
Enable selinux to relabel filesystem from initramfs
Checking SELinux security contexts: 
 * First booting, filesystem will be relabeled...
 Finished Calvados patch for lxc
 Installing sysadmin-vm image size of 1.9G took 53 seconds
---Starting to prepare repository---
 File system creation on /dev/cpu_disk2 took 3 seconds
 Check for unwanted iso and remove if required.
 Copying /iso/host.iso to repository /iso directory
 Copying /iso/ncs1004-sysadmin.iso to repository /iso directory
 Copy Sysadmin rpms to repository
 Copy XR rpms to repository
 Copy giso_info.txt to repository
 Copying /iso/ncs1004-xr.iso to repository /iso directory
 Copying all ISOs to repository took 12 seconds
 Install EFI on /dev/cpu_disk4
pd_notify_img_install_done
Checking disk error for: sdb
 Chassis disk smartctl -a output 
 Chassis disk smartctl output done
 Disk model: Micron_5100_MTFDDAV240TCB
 No failures found in dmesg
 Checking Chassis disk mount failures.
 No mount failures found in Chassis disk /dev/sdb2
 No mount failures found in Chassis disk /dev/BHDisasterRecovery/golden_image
 Chassis disk partitions exist
 Install finished on cpu_disk

Step 10

Remove the USB drive.

NCS 1004 reboots automatically.


Rebooting system after installation ...
[201.715171] reboot: Restarting system
ERROR: Class:0; Subclass:10000; Operation: 1004
NCS1004: Initializing Devices
Version 2.19.1266. Copyright (C) 2020 American Megatrends, Inc. 
BIOS Date: 10/23/2020 09:03:42 Ver: 0ACHI470 
Press <DEL> or <ESC> to enter setup 
TAM: Chip DB  
CiscoSec: Image Signature Verified 
GNU GRUB version 2.00 
Press F2 to goto grub Menu.. 
Booting from Disk.. 
Loading Kernel.. 
Kernel Secure Boot Validation Result: PASSED 
Loading initrd.. 
Initrd Secure Boot Validation Result: PASSED
[3.836637] i8042: No controller found  
Enable selinux to relabel filesystem from initramfs                                                                                                                                                                                          
Load IMA appraise policy: OK                                                                                                                                                                                                                 
Switching to new root and running init.                                                                                                                                                                                                      
Sourcing /etc/sysconfig/udev                                                                                                                                                                                                                 
Starting udev: [  OK  ]                                                                                                                                                                                                                      
Starting udev                                                                                                                                                                                                                                
Running postinst /etc/rpm-postinsts/100-dnsmasq...                                                                                                                                                                                           
update-rc.d: /etc/init.d/run-postinsts exists during rc.d purge (continuing)                                                                                                                                                                 
 Removing any system startup links for run-postinsts 
  /etc/rcS.d/S99run-postinsts
Configuring network interfaces... done.
Starting system message bus: dbus.
Starting OpenBSD Secure Shell server: sshd
  generating ssh RSA key...
  generating ssh ECDSA key...
  generating ssh DSA key...
  generating ssh ED25519 key...
sshd start/running, process 3559
Starting rpcbind daemon...done.
Starting kdump:[  OK  ]
Starting random number generator daemon.
Starting system log daemon...0
Starting kernel log daemon...0
tftpd-hpa disabled in /etc/default/tftpd-hpa
Starting internet superserver: xinetd.
Starting S.M.A.R.T. daemon: smartd.
Starting Lighttpd Web Server: lighttpd.
Starting libvirtd daemon: [  OK  ]
Starting crond: OK
Starting cgroup-init
Network ieobc_br defined from /etc/init/ieobc_br_network.xml
Network local_br defined from /etc/init/local_br_network.xml
Network xr_local_br defined from /etc/init/xr_local_br_network.xml
Network ieobc_br started
Network local_br started
Network xr_local_br started
mcelog start/running, process 4647
diskmon start/running, process 4653
Creating default host password file
Start serial incoming on , Clearing ..
initctl: Unknown instance: /dev/ttyS0
Connecting to 'default-sdr--1' console
bootlogd: ioctl(/dev/pts/2, TIOCCONS): Device or resource busy
Running postinst /etc/rpm-postinsts/100-dnsmasq...
update-rc.d: /etc/init.d/run-postinsts exists during rc.d purge (continuing)
Removing any system startup links for run-postinsts ...
  /etc/rcS.d/S99run-postinsts
Configuring network interfaces... done.
Starting system message bus: dbus.
Starting OpenBSD Secure Shell server: sshd
  generating ssh RSA key...
  generating ssh ECDSA key...
  generating ssh DSA key...
  generating ssh ED25519 key...
sshd start/running, process 2197
Starting rpcbind daemon...done.
Starting random number generator daemon.
Starting system log daemon...0
Starting kernel log daemon...0
tftpd-hpa disabled in /etc/default/tftpd-hpa
Starting internet superserver: xinetd.
net.ipv4.ip_forward = 1
Libvirt not initialized for container instance
Starting crond: OK
SIOCADDRT: File exists
Start serial incoming on , Clearing ..
ios con0/RP0/CPU0 is now available
Press RETURN to get started.
This product contains cryptographic features and is subject to United 
States and local country laws governing import, export, transfer and 
use. Delivery of Cisco cryptographic products does not imply third-party 
authority to import, export, distribute or use encryption. Importers, 
exporters, distributors and users are responsible for compliance with 
U.S. and local country laws. By using this product you agree to comply 
with applicable laws and regulations. If you are unable to comply with 
U.S. and local laws, return this product immediately. 

A summary of U.S. laws governing Cisco cryptographic products may be 
found at:
http://www.cisco.com/wwl/export/crypto/tool/stqrg.html

If you require further assistance please contact us by sending email to 
export@cisco.com.


NCS 1004 boots from the USB drive and installs the Open ROADM image. Upon completion, the system reboots and applies the Open ROADM startup configuration, with confirmation messages indicating successful installation and startup.

Verify the boot operation for Open ROADM

Ensure NCS 1004 is running the correct Open ROADM GISO image and is ready for operation.

Procedure


Use the show version command to compare the displayed version with the intended Open ROADM boot image version.

The displayed version and label must match the GISO image intended for this device.

Example:

RP/0/RP0/CPU0:ios#show version
Sun Mar  7 19:31:38.139 UTC
Cisco IOS XR Software, Version 7.3.1
Copyright (c) 2013-2021 by Cisco Systems, Inc.

Build Information:
Built By     : ingunawa
Built On     : Thu Feb 25 19:10:10 PST 2021
Built Host   : iox-lnx-070
Workspace    : /auto/srcarchive17/prod/7.3.1/ncs1004/ws
Version      : 7.3.1
Location     : /opt/cisco/XR/packages/
Label        : 7.3.1-0

cisco NCS-1004 () processor
System uptime is 1 minute

NCS 1004 successfully runs the intended Open ROADM GISO version and label, confirming proper boot operation.

Bring up a line card

Procedure


Step 1

Insert the line card into the designated slot.

Step 2

Wait until the LED on the line card turns green, indicating successful hardware initialization.

Step 3

Configure the OTN-XP card with LC mode.

For more information, see LC mode on OTN-XP card.

Step 4

Upgrade the FPDs (field-programmable devices) of the line card if required based on the output of show hw-module location 0 /line-card-slot fpd .


The line card is successfully installed and operational, ready for further network configuration and use.

Disaster recovery

The disaster recovery feature on NCS 1004 enables you to quickly and automatically restore node software and configuration after hardware replacement, minimizing system downtime and manual intervention. The feature operates without requiring console access. Before replacing a CPU, use the graceful-recovery backup initiate command to back up the XR configuration. The node also creates a backup of the running XR configuration after 20 minutes. After rebooting, the node immediately backs up the XR configuration.

CPU replacement

Consider these points for CPU replacement:

  • The node runs in headless mode.

  • You can insert the CPU with SSD, and the node then starts to boot the OS from the CPU SSD.

  • The system compares the versions of the images in the CPU SSD and the chassis SSD.

  • If the version is different, configuration is taken from chassis SSD as the chassis golden image has priority.

  • If the version is the same, the node boots up. The node performs this version comparison during every reboot, including power cycles.

  • The node always uses the configuration from the chassis. If the chassis SSD is not functional, the node boots using only the CPU.

Chassis replacement

Consider these points for chassis replacement:

  • Chassis replacement results in minimum downtime.

  • When you receive the chassis, connect the CPU and boot the system. After receiving the empty chassis through RMA, insert the CPU to restore the configuration.

  • You can also swap the CPU from other units; however, the chassis image and configuration will be replaced on the CPU.

Health check for proper backup ISO image

This feature performs a basic validation of the backup ISO image intended for use during disaster recovery.

Table 1. Feature history

Feature name

Release information

Feature description

Health check for proper backup ISO image

Release 7.5.2

This feature performs a basic validation of the backup ISO image intended for use during disaster recovery. The validation happens before copying the image to the CPU disk and motherboard disks, and thereafter the copied image is audited every 12 hours. Image corruption triggers the Disaster recovery is disabled due to corrupted ISO alarm. This health check feature ensures error-free booting of NCS 1004 during disaster recovery operations.


Note


To clear the DISASTER-RECOVERY-DISABLED alarm, log in to the Technical Support website at http://www.cisco.com/c/en/us/support/index.html for more information or call Cisco TAC (1 800 553-2447).


Note


Verify that there is no Disaster recovery is disabled due to corrupted ISO alarm using the show alarms command before sending the CPU for RMA.


Access the system admin console

All system administration and hardware management setup is performed from the System Admin console.

Procedure


Step 1

Log in to the XR console as the root user.

Step 2

Press Ctrl+O to disconnect from the XR console and connect to the System Admin console.

Example:

RP/0/RP0/CPU0:ios#
Disconnecting from 'default-sdr--1' console. Continue(Y/N)?

Y
Connecting to 'sysadmin' console

System Admin Username: root
Password:
root connected from 127.0.0.1 using console on sysadmin-vm:0_RP0
sysadmin-vm:0_RP0#

After you enter the System Admin console, the prompt changes to:

sysadmin-vm:0_RP0#

Configure the management interface

Establish management connectivity for NCS 1004 by setting up its management Ethernet interface.

Before you begin

  • Consult your network administrator or system planner to obtain IP addresses and a subnet mask for the management port.

  • Ensure that the management port is physically connected to the management network.

Procedure


Step 1

Enter configuration mode.

Example:

RP/0/RP0/CPU0:ios# configure

Step 2

Use the interface mgmtEth rack/slot/instance/port command to enter the interface configuration mode for the management interface.

Example:

RP/0/RP0/CPU0:ios(config)# interface mgmtEth 0/RP0/CPU0/0

Step 3

Use the ipv4 address ipv4-address subnet-mask command to assign an IP address and a subnet mask to the interface.

Example:

RP/0/RP0/CPU0:ios(config-if)# ipv4 address 10.1.1.1 255.0.0.0

Step 4

Use the no shutdown command to bring the interface up.

Example:

RP/0/RP0/CPU0:ios(config-if)# no shutdown

Step 5

Exit the interface configuration mode.

Example:

RP/0/RP0/CPU0:ios(config-if)# exit

Step 6

Use the router static address-family ipv4 unicast command to configure a default static route.

Example:

RP/0/RP0/CPU0:ios(config)# router static address-family ipv4 unicast 0.0.0.0/0 192.0.2.1

Specifies the IP address of the default gateway to configure a static route. Use this IP address for communication with devices on other networks.

Step 7

Use the commit or end command.

  • commit — saves the configuration changes and remains within the configuration session.

  • end — prompts you to save (Yes), discard (No), or stay in the session (Cancel).


The management Ethernet interface is configured with an IP address, subnet mask, and default route, enabling remote management connectivity.

What to do next

Proceed to configure Telnet and SSH access for remote administration, if required.

Configure the Telnet server access on NCS 1004

Enable and configure the Telnet server on NCS 1004, specify the maximum allowed connections, and verify server accessibility.

Telnet allows remote access for management and troubleshooting. By default, Telnet is disabled on NCS 1004 systems.

Procedure


Step 1

Enter configuration mode.

Example:

RP/0/RP0/CPU0:ios# configure

Enters the configuration mode.

Step 2

Use the telnet {ipv4 | ipv6} server max-servers limit command to specify the number of allowable Telnet servers.

Example:

RP/0/RP0/CPU0:ios(config)# telnet ipv4 server max-servers 10

This command specifies the number of allowable Telnet servers (up to 100). By default, Telnet servers are not allowed. You must configure this command to enable Telnet servers.

Step 3

Use the commit or end command.

  • commit — saves the configuration changes and remains within the configuration session.

  • end — prompts you to save (Yes), discard (No), or stay in the session (Cancel).


The Telnet server is enabled on NCS 1004, allowing remote connections according to your configured session limit.

Configure SSH server access on NCS 1004

Enable SSH server version 2 on NCS 1004 to allow secure remote administration.

Before you begin

  • Install the ncs1004-k9sec package on NCS 1004. For package installation, see the Install Packages section.

  • Generate the crypto key for SSH using the crypto key generate dsa command.

Enabling SSH server access ensures secure connections to the management interface port using the IP address.

Procedure


Step 1

Enter configuration mode.

Example:

RP/0/RP0/CPU0:ios# configure

Step 2

Use the ssh server v2 command to enable the SSH server to accept only SSHv2 client connections:

Example:

RP/0/RP0/CPU0:ios(config)# ssh server v2

Step 3

Use the commit or end command.

  • commit — saves the configuration changes and remains within the configuration session.

  • end — prompts the user to save (Yes), discard (No), or stay in the session (Cancel).

Step 4

Use the show ssh session details command to verify that the SSH sessions are established.

Example:


RP/0/RP0/CPU0:ios# show ssh session details

Tue Feb 12 16:03:51.455 UTC
SSH version : Cisco-2.0

id  key-exchange          pubkey              incipher   outcipher  inmac         outmac
---------------------------------------------------------------------------------------------
Incoming Sessions
1   ecdh-sha2-nistp256    ecdsa-sha2-nistp256 aes128-ctr aes128-ctr hmac-sha2-256 hmac-sha2-256

Displays a detailed report of the SSHv2 connections to and from NCS 1004.


SSH server version 2 is enabled, and you can establish a secure SSH session to the management interface of NCS 1004 using its configured IP address.

Synchronize the system clock with an NTP server

Connect the NCS 1004 system clocks (XR and System Admin) to a Network Time Protocol (NTP) server to ensure they remain accurate and synchronized with network management systems.

Before you begin

Configure and connect to the management port. See Configure the management interface.

NCS 1004 has distinct system clocks for the XR and System Admin. When you synchronize the XR clock with an NTP server, both system clocks align. Synchronizing the clocks reduces the risk of time drift.

Procedure


Step 1

Enter configuration mode.

Example:

RP/0/RP0/CPU0:ios# configure
Enters XR configuration mode.

Step 2

Use the ntp server command to configure the NTP server.

Example:

RP/0/RP0/CPU0:ios(config)# ntp server 192.0.2.55

The XR clock is configured to synchronize with the specified NTP server.


The XR clock is synchronized with the NTP server. The System Admin clock automatically synchronizes with the XR clock, ensuring accurate time throughout NCS 1004.