Appendix

Policy parameters

Reference the following tables for the policy parameters. These parameters let you control specific client functionality in Webex App.

Feature parameters

Parameter

Description and Values

Supported platforms

CucmCallBargeMode

Parameter: CucmCallBargeMode

  • OFF (default)—The barge button does not show in the Webex App.

  • BARGE—The barge initiator sends a barge invite, and the barge target acts as a conference server.

    Example: <CucmCallBargeMode>BARGE</CucmCallBargeMode>

E911EdgeLocationWhiteList

Parameter: E911EdgeLocationWhiteList

Specifies a whitelist of up to 30 Service Set IDs (SSIDs) separated by a semicolon.

You must configure this parameter when the E911EdgeLocationPolicy parameter is set to true. Then the client monitors users who connect to the corporate network through Expressway for Mobile and Remote Access network.

Example:

<EnableE911EdgeLocationPolicy>true</EnableE911EdgeLocationPolicy>
<E911EdgeLocationWhiteList>SSID1;SSID2</E911EdgeLocationWhiteList>

Desktop and mobile

EnableCallPark

Parameter: EnableCallPark

Specifies whether the call park feature is available in the client.

To access the call park feature, users can choose the More option in the call window.

  • true (default)—Call park is enabled.

  • false—Call park is disabled. There is no call park option under the More button.

Desktop

EnableCallPickup

Parameter: EnableCallPickup

Specifies if a user can pickup a call in their call pickup group.

  • true—Enables call pickup.

  • false—Disables call pickup (default).

Desktop and mobile

EnableE911EdgeLocationPolicy

Parameter: EnableE911EdgeLocationPolicy

Specifies it the client uses the wireless location monitoring service when users connect to the corporate network through Expressway for Mobile and Remote Access.

  • trueWebex App monitors wireless location over MRA. You must also configure the E911EdgeLocationWhiteList parameter with Service Set IDs (SSIDs). You can configure a list of up to 30 SSIDs, separated by a semicolon.

  • falseWebex App doesn’t monitor wireless location (default).

Example:

<EnableE911EdgeLocationPolicy>true</EnableE911EdgeLocationPolicy>
<E911EdgeLocationWhiteList>SSID1;SSID2</E911EdgeLocationWhiteList>

Desktop and mobile

EnableE911OnPrem

LocationPolicy

Parameter: EnableE911OnPremLocationPolicy

Specifies it the client uses wireless location monitoring service in an on-premises deployment.

  • trueWebex App always monitors wireless location when connected on-premises.

  • falseWebex App never monitors wireless location when connected on-premises (default).

Desktop and mobile

EnableGroupCallPickup

Parameter: EnableGroupCallPickup

Specifies if a user can pickup incoming calls in another call pickup group, by entering the call pickup group number.

  • true—Enables group call pickup.

  • false—Disables group call pickup (default).

Desktop and mobile

EnableHuntGroup

Parameter: EnableHuntGroup

Specifies if a user can log into a hunt group.

  • true—Users can log into their hunt group.

  • false—Users cannot log into their hunt group (default).

Desktop and mobile

EnableMeetingPowerUp

Parameter: EnableMeetingPowerUp

Specifies if a user can move an active call to a meeting.

  • true—Enables move a call to a meeting.

  • false—Disables move a call to a meeting (default).

Desktop

EnableOtherGroupPickup

Parameter: EnableOtherGroupPickup

Specifies if a user can pickup an incoming call in a group that is associated with their own call pickup group.

  • true—Enables other group call pickup.

  • false—Disables other group call pickup (default).

Desktop and mobile

EnableRecordingTone

Parameter: EnableRecordingTone

Enables recording tones for the user. This parameter works with these other parameters: LocalRecordingToneVolume, NearEndRecordingToneVolume, RecordingToneDuration, and RecordingToneInterval.

Note


Enable the Unified CM service parameter to play recording notification tones before adding the rrecording tone parameters.

See the monitoring and recording chapter of the Features and Services Guide for Cisco Unified Communications Manager for details

  • true—Enable recording tones. (Default)

  • false—Disable recording tones.

Desktop and mobile

EnableSIPURIDialling

Parameter: EnableSIPURIDialling

Enables URI dialing with Webex and allows users to make calls with URIs.

  • true—Users can make calls with URIs. (Default)

  • false—Users cannot make calls with URIs.

Example:

<EnableSIPURIDialling>false</EnableSIPURIDialling>

Desktop and mobile

LocalPushSSIDList

Parameter: LocalPushSSIDList

Admin must specify supported WiFi list in Jabber-config.xml file.

Specifies a whitelist of up to 10 Service Set IDs (SSIDs) separated by a semicolon.

You must configure this parameter when the Local Push Notification Connectivity feature is enabled on CUCM.

Example:

<LocalPushSSIDList>SSID1;SSID2</LocalPushSSIDList>

Mobile: iOS and iPad OS

LocalRecordingToneVolume

Parameter: LocalRecordingToneVolume

Specifies the volume at which the client plays the recording tone locally.

The range is 0-100 and defaults to 10.

Example:

<LocalRecordingToneVolume>25</LocalRecordingToneVolume>

See 'EnableRecordingTone' for details on properly configuring recording tones.

Desktop and mobile

NearEndRecording

ToneVolume

Parameter: NearEndRecordingToneVolume

Specifies the volume of the recording tone which Webex sends to the remote device and to the near-end recording server.

The range is 0-100 and defaults to 10.

Example:

<NearEndRecordingToneVolume>25</NearEndRecordingToneVolume>

See EnableRecordingTone for details on properly configuring recording tones.

Desktop and mobile

PreventDeclineOnHuntCall

Parameter: PreventDeclineOnHuntCall

Specifies if the Decline button is displayed for an incoming call in a hunt group.

  • true—Decline button is not displayed for an incoming call in a hunt group.

  • false—Decline button is displayed for an incoming call in a hunt group (default).

Desktop and mobile

RecordingToneDuration

Parameter: RecordingToneDuration

Specifies the milliseconds of a single tone.

The range is 100-2000 and defaults to 500.

Example:

<RecordingToneDuration>500</RecordingToneDuration>

See 'EnableRecordingTone' for details on properly configuring recording tones.

Desktop and mobile

RecordingToneInterval

Parameter: RecordingToneInterval

Specifies the milliseconds between consecutive tones.

The range is 8000-32000 and defaults to 11500.

Example:

<RecordingToneInterval>11500</RecordingToneInterval>

See 'EnableRecordingTone' for details on properly configuring recording tones.

Desktop and mobile

ShowSelectiveCall

RecordingButton

Parameter: ShowSelectiveCallRecordingButton

  • true (default)— The recording button is shown on the Webex app.

  • false— The recording button is hidden on the Webex app, so users cannot start or stop recording, but you could still use a 3rd party CTI to record.

    Example:

    <ShowSelectiveCallRecordingButton>false</ ShowSelectiveCallRecordingButton>

Note


This parameter will only take effect if the Recording Option field on the "Cisco Unified CM Administration portal" for the user's line is set to Selective Call Recording Enabled.

Desktop and mobile

Customization parameters

Parameter

Description and values

Supported platforms

DeskPhoneModeWindowBehavior

Controls whether to show the call control window in desk phone control mode.

  • OnCall (default)— Conversation window is always displayed when a call is answered.

  • Never—Conversation window is never displayed when a call is answered.

  • NotOnHold— Conversation window is not displayed when call is held by a shared line device. In other scenarios, the window is displayed.

Desktop (Windows only)

E911NotificationFrequency

Controls the frequency of the emergency calling disclaimer.

  • FirstSignIn (default)—Shows the disclaimer only when users sign in for the first time.

  • EverySignIn—Shows the disclaimer whenever users sign out and sign in again.

  • Never—Hides the disclaimer.

An example that shows the disclaimer only for first-time sign in:

<E911NotificationFrequency>FirstSignIn</E911NotificationFrequency>

Desktop and mobile

E911NotificationURL

Shows a customizable disclaimer message or notification to users each time they sign in, which they must accept before their telephony capabilities are enabled. This prompt allows users to acknowledge the disclaimer or notification.

Set the value of this parameter to a valid HTML web page URL where you are hosting your notification message.

Example:
<E911NotificationURL>http://www.example.com/e911.html</E911NotificationURL>

To ensure that the web page renders correctly for all apps that are operating outside the corporate network, the web page must be a static HTML page because the scripts and link tags are not supported by the E911NotificationURL parameter.

Desktop and mobile

EnableADLockPrevention

You can configure your Active Directory server for a maximum number of failed signin attempts. This setting can lead to incorrect account lockouts in some Webex deployments. For example, in a deployment without SSO authentication, all Webex services can send the same incorrect credentials to the AD server, rapidly incrementing the failure counter.

If you encounter this issue, you can use EnableADLockPrevention to prevent services from sending the same incorrect credentials to the AD server. The allowed values are:

  • true—Webex stops all services which have the same credentials after one service receives an invalid credentials error.

  • false (default)—Webex ignores invalid credential errors and continues sign-in attempts.

Example: <EnableADLockPrevention>true</EnableADLockPrevention>

Desktop and mobile

EnablePhoneDialerOptionOverMRA

Due to regulation in India, users cannot use VoIP apps to place a PSTN call when they are not in the corporate network.

When Webex mobile users are outside and they want to call the contact phone number in Webex, the app gives the option to use the built-in phone app to make calls.

  • true—Every call from an MRA environment shows the phone options dialog.

  • false (default)

    —The phone options dialog never shows, regardless of the network that the user is on.

Mobile

EnableVideo

Specifies if a user can have video for outgoing and incoming calls.

  • true (default)—User can have video for outgoing and incoming calls.

  • false—User cannot have video for outgoing and incoming calls; all the calls are audio only call.

Important


If this key is configured, the key's setting always takes priority over the Control Hub setting. If the key is not configured with any value, the Control Hub setting takes effect and determines whether video is enabled or disabled.

Desktop and mobile

RemoteDestinationEditingWithMultipleDevices

Allows you to determine whether users with multiple devices can edit or add remote destinations.

  • true (default)—Users with multiple devices can edit or add remote destinations. (Default)

  • false—Users with multiple devices cannot edit or add remote destinations.

Desktop

RemoteInUsePresencePrimaryLineOnly

Specifies the presence behavior when a user with multiple lines is on a call.

  • true—RemoteInUse presence is shown only when primary line is in use by the user. For example, if a user's second line shares the same number with a deskphone and a call is made from the deskphone, the user's status does not show "On a Call."

  • false (default)—RemoteInUse presence is shown for all lines when in use by the user. For example, if a user's second line shares the same number with a deskphone and a call is made from the deskphone, the user's status shows as "On a Call."

Note


This parameter is not a selectable preset in Unified CM. You must add it as a custom parameter under policies.

Desktop and mobile

SelfCareURL

Specifies the fully qualified domain name (FQDN) of Cisco Unified Communications Manager service.

Defines the URL for the Self Care Portal when no default service profile is selected in Cisco Unified Communications Manager.

Example:

<SelfCareURL>https://selfcare.example.com</SelfCareURL>

Desktop and mobile

ShowSelfCarePortal

Determines whether the Self Care Portal tab displays in the Options dialog.

  • true (default)—The Self Care Portal tab displays in the Options dialog.

  • false—The Self Care Portal tab does not display in the Options dialog.

Desktop and mobile

ShowCallAlerts

Specifies whether incoming call alerts are displayed.

  • true (default)—Incoming call alerts are always displayed.

  • false—Incoming call alerts are never displayed.

Desktop (Windows only)

ShowPhoneNumberInLineSelection

Controls whether the phone number shows in the line selection dropdown.

  • true (default)—users see the phone number (DID, or extension number) of the line in the line selection drop down menu. If there is a text label configured for the line, they see the number and the label.

  • false—users don't see the phone number (DID, or extension number) of the line in the line selection drop down menu. They only see the line text label.

Desktop (Windows only)

SoftPhoneModeWindowBehavior

Controls whether to show the call control window in softphone mode.

  • OnCall (default)— Conversation window is always displayed when a call is answered.

  • Never—Conversation window is never displayed when a call is answered.

  • NotOnHold— Conversation window is not displayed when call is held by a shared line device. In other scenarios, the window is displayed.

Desktop (Windows only)

StartCallWithVideo

Specifies if a user can start video for incoming calls.

  • true (default)—Send video for incoming calls.

  • false—Do not send video for incoming calls, but the user can receive the video.

Desktop and mobile

UserDefinedRemoteDestinations

Lets users add, edit, and delete remote destinations through the client interface. Use this parameter to change the default behavior when you provision Extend and Connect capabilities.

By default, if a user's device list contains only a CTI remote device, the client does not let that user add, edit, or delete remote destinations. This occurs to prevent users from modifying dedicated remote devices that you assign. However, if the user's device list contains a software device or a desk phone device, the client lets users add, edit, and delete remote destinations.

  • true—Users can add, edit, and delete remote destinations.

  • false (default)—Users cannot add, edit, and delete remote destinations.

Desktop

Jabber to Webex App migration parameters

Parameter

Description and values

Supported platforms

EnableJabber2TeamsMigration

Tags users as candidates for moving their data from Jabber to Webex App. This process brings over the users' contact (buddy) list and common preferences to Webex App.

  • true—Moving data from Jabber to Webex App is available to the user if they have a matching email address for both applications. The data move starts between 5 minutes–3 hours after a user signs into Jabber or when they manually initiate the migration from the help menu.

  • false—Moving data from Jabber to Webex App does not appear for the user. (Default)

Note


This parameter is not a selectable preset in Unified CM. You must add it as a custom parameter under policies.

Desktop

WebexTeamsDownloadURL

Specifies where users can download Webex App if they did not download while doing the upgrade. Add a value for this URL, otherwise users are asked to contact an administrator for help.

For example (using the official download page):

<WebexTeamsDownloadURL>https://www.webex.com/downloads.html
</WebexTeamsDownloadURL>

Note


This parameter is not a selectable preset in Unified CM. You must add it as a custom parameter under policies.

Desktop

Protocol handlers for calling

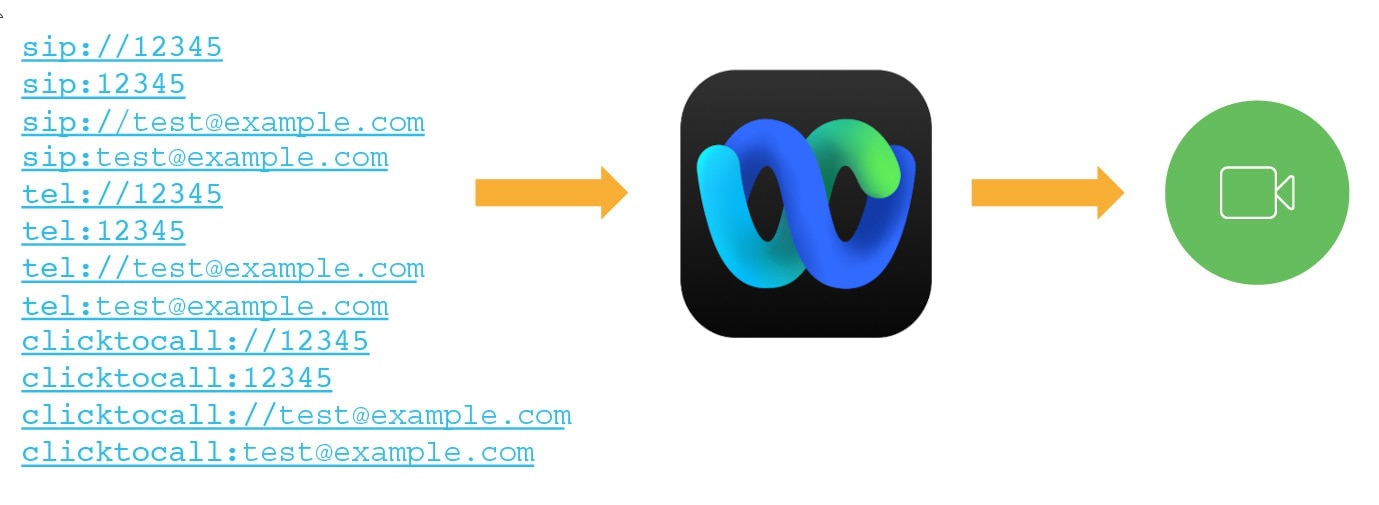
Calling in Webex App (Unified CM) registers the following protocol handlers with the operating system to enable click-to-call functionality from web browsers or other applications. The following protocols start an audio or video call in Webex App when it's the default calling application on Mac or Windows:

  • CLICKTOCALL: or CLICKTOCALL://

  • SIP: or SIP://

  • TEL: or TEL://

  • WEBEXTEL: or WEBEXTEL://


Note


If Unified CM is not connected when the app is launched for these protocols, Webex App waits three minutes for Unified CM to connect. If three minutes passes with no connection, the call request stops. If using SIP address to start a call (for example, sip:test@example.com), the call may go through the cloud or Unified CM, depending on your organization's SIP address routing configuration in Control Hub.


Protocol Handlers for Windows

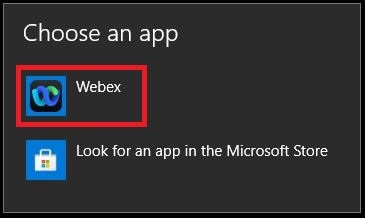
Other apps can register for the protocol handlers before the Webex App. In Windows 10, the system window to ask users to select which app to use to launch the call. The user preference can be remembered if the user checks Always use this app.

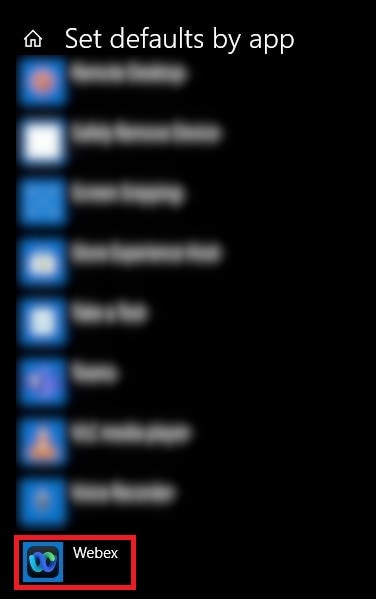
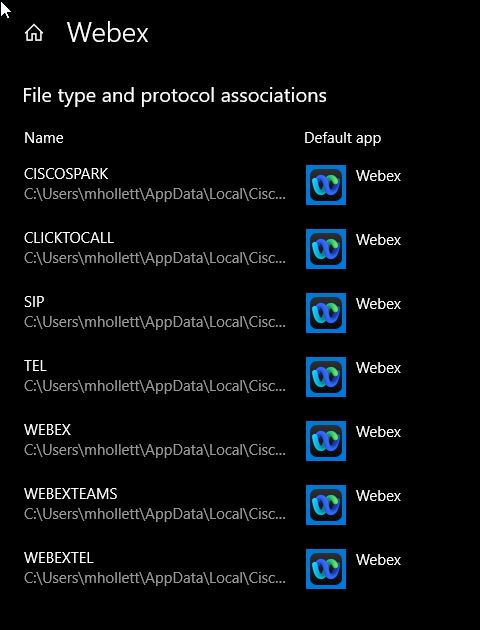
If users need to reset the default calling app settings so that they can pick Webex App, you can instruct them to change the protocol associations for Webex App in Windows 10:

  1. Open the Default app settings system settings, click Set defaults by app,and then choose Webex App.

  2. For each protocol, choose Webex App.

Protocol handlers for macOS

On Mac OS, if other apps registered to the calling protocols before Webex App, users must configure their Webex App to be the default calling option.

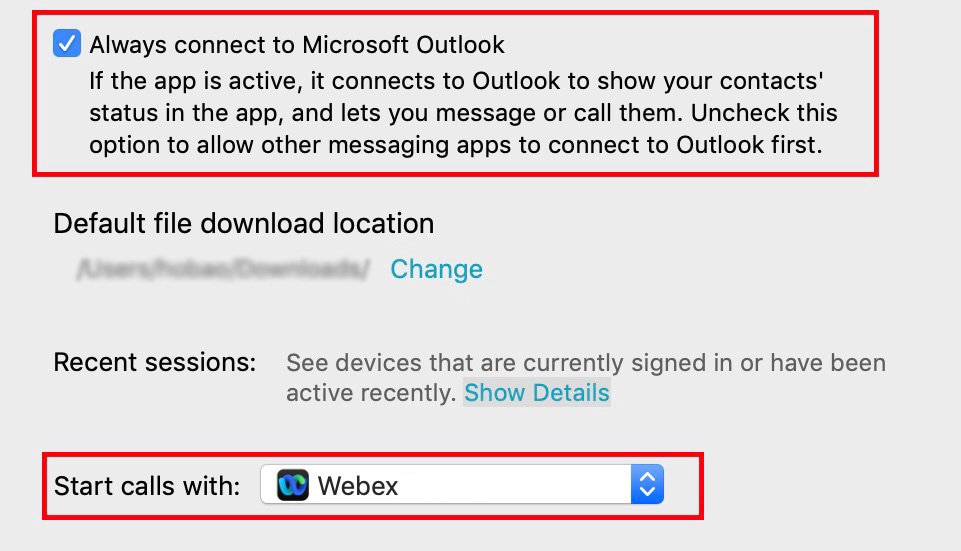
In Webex App for Mac, users can confirm that Webex App is selected for the Start calls with setting under general preferences. They can also check Always connect to Microsoft Outlook if they want to make calls in Webex App when they click an Outlook contact's number.

Quality of service

Supported codecs

Type

Codec

Codec Type

Webex App for Mac

Webex App for Windows

Audio

G.711

A-law

Yes

Yes

µ-law/Mu-law

Yes

Yes

G.722

Yes

Yes

G.722.1

24 kb/s and 32 kb/s

Yes

Yes

G.729

No

No

G.729a

Yes

Yes

Opus

Yes

Yes

Video

H.264/AVC

Yes

Yes

Define a port range on the SIP profile

The client uses the port range to send RTP traffic across the network. The client divides the port range equally and uses the lower half for audio calls and the upper half for video calls. As a result of splitting the port range for audio media and video media, the client creates identifiable media streams. You can then classify and prioritize those media streams by setting DSCP values in the IP packet headers.

Procedure


Step 1

Open the Cisco Unified CM Administration interface.

Step 2

Select Device > Device Settings > SIP Profile.

Step 3

Find the appropriate SIP profile or create a new SIP profile.

The SIP Profile Configuration window opens.

Step 4

Specify whether you want common or separate port ranges for audio and video. If you are separating your audio and video port ranges, provide audio and video ports. Specify the port range in the following fields:

  • Start Media Port — Defines the start port for media streams. This field sets the lowest port in the range.

  • Stop Media Port — Defines the stop port for media streams. This field sets the highest port in the range.

Step 5

Select Apply Config and then OK.


Set DSCP values

Set Differentiated Services Code Point (DSCP) values in RTP media packet headers to prioritize Webex App traffic as it traverses the network.

Set DSCP values on Unified CM

You can set DSCP values for audio media and video media on Unified CM. Webex App can then retrieve the DSCP values from the device configuration and apply them directly to the IP headers of RTP media packets.


Restriction


Operating systems such as Microsoft Windows 10 have a security feature that prevents applications from setting DSCP values on IP packet headers. For this reason, you should use an alternate method for marking DSCP values, such as Microsoft Group Policy.


Procedure

Step 1

Open the Cisco Unified CM Administration interface.

Step 2

Select System > Service Parameters.

The Service Parameter Configuration window opens.

Step 3

Select the appropriate server and then select the Cisco CallManager service.

Step 4

Locate the Clusterwide Parameters (System - QOS) section.

Step 5

Specify DSCP values as appropriate and then select Save.


Set DSCP Values with group policy

If you deploy Webex App for Windows on an operating system such as Microsoft Windows 7 or later, you can use Microsoft Group Policy to apply DSCP values.

Complete the steps in the following Microsoft support article to create a group policy: http://technet.microsoft.com/en-us/library/cc771283%28v=ws.10%29.aspx

You should create separate policies for audio media and video media with the following attributes:

These directions apply to Unified CM calls that go through Webex App. For calls on Webex App only, use the guidelines in the Network Requirements documentation for Webex App.

Attributes

Audio Policy

Video Policy

Signaling Policy

Application name

CiscoCollabHost.exe

CiscoCollabHost.exe

CiscoCollabHost.exe

Protocol

UDP

UDP

TCP

Port number or range

Corresponding port number or range from the SIP profile on Cisco Unified Communications Manager.

Corresponding port number or range from the SIP profile on Cisco Unified Communications Manager.

5060 for SIP

DSCP value

46

34

24

Set DSCP values on the network

You can configure switches and routers to mark DSCP values in the IP headers of RTP media.

To set DSCP values on the network, you must identify the different streams from the client application.

  • Media Streams — Because the client uses different port ranges for audio streams and video streams, you can differentiate audio media and video media based on those port range. Using the default port ranges in the SIP profile, you should mark media packets as follows:

    • Audio media streams in ports from 16384 to 24575 as EF

    • Video media streams in ports from 24576 to 32767 as AF41

  • Signaling Streams—You can identify signaling between the client and servers based on the various ports required for SIP, CTI QBE, and XMPP. For example, SIP signaling between Webex App and Cisco Unified Communications Manager occurs through port 5060.

    You should mark signaling packets as CS3.

  • For port ranges for Webex App only calls, use the guidelines in the Network Requirements documentation for Webex App.

Allow untrusted certificates on Unified CM

If needed, you can use Control Hub to allow untrusted certificates from your Unified CM. They may be untrusted because they're self-signed or if the certificate doesn't match the address that is being used for the connection.


Caution


This setting downgrades your deployment's security. We strongly advise that you use a more secure method for certificate trust. Use this method as a last resort for limited deployments, such as those in a lab testing environment.


Before you begin

  • Before you use this option, understand certificate requirements and best practices: Certificate requirements.

  • For iOS devices, you must install a custom root CA on the devices themselves if you're using a private enterprise certificate. Otherwise, Webex App fails to navigate to the SSO authorization URL.

Procedure


Step 1

From the customer view in https://admin.webex.com, go to Services > Calling, and then choose Client Settings.

Step 2

In Unified CM Settings, toggle on Allow Unified CM registration without trusted certificate.

After this toggle is enabled, Webex App registers to the Unified CM environment, regardless of what type of certificate is being used.