Enable and Collect Trace Logs in CCCSP
This document describes the various options available in Cisco Contact Center SIP Proxy (CCCSP) to enable and collect trace logs. Traces can be enabled and collected either from the GUI or from the CLI. This document explains each procedure in detail.
Enable Trace Logs
From the GUI
Procedure
|
Step 1 |
Log in to the CCCSP GUI (http://<IP Address of CCCSP application>/). |
|
Step 2 |
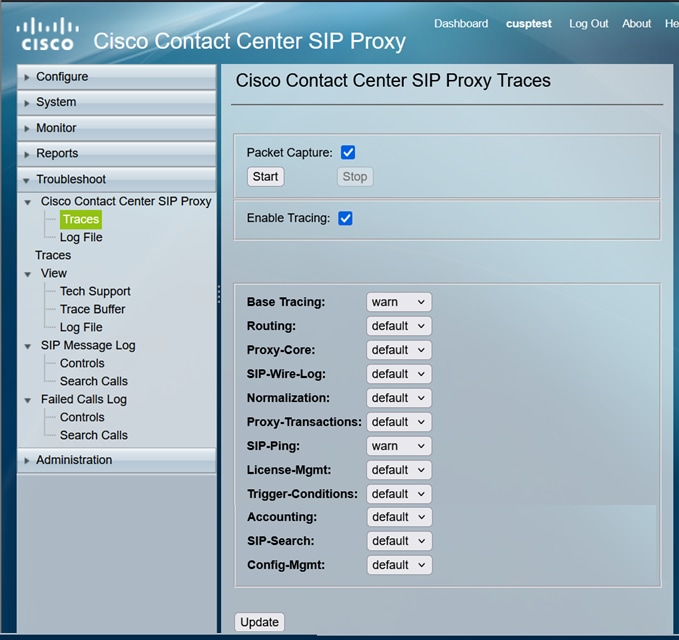
Navigate to .
|
|
Step 3 |
Check the Packet Capture check-box, and click Start to start capturing packets. |
|
Step 4 |
Check the Enable Tracing check-box, and then select the required component(s) to troubleshoot the issue and set the level to debug. |
|
Step 5 |
Click Update after you make the required changes. |
From the CLI
Procedure
|
Step 1 |
Start a CLI session. |
|
Step 2 |
Access the CCCSP application. |
|
Step 3 |
Use the cusp command to enter the cusp configuration mode: |
|
Step 4 |
Use the trace enable command to enable tracing: |
|
Step 5 |
Use the trace level debug component command and select the required component. Set the trace level to debug. |
|
Step 6 |
You can repeatedly run the trace level debug component command with required component selected to enable debug for multiple components. |
|
Step 7 |
Use the show trace options command to view the current trace setting. |
Trace Log Collection
From the GUI
Procedure
|
Step 1 |
Log in to the CCCSP GUI. |
|
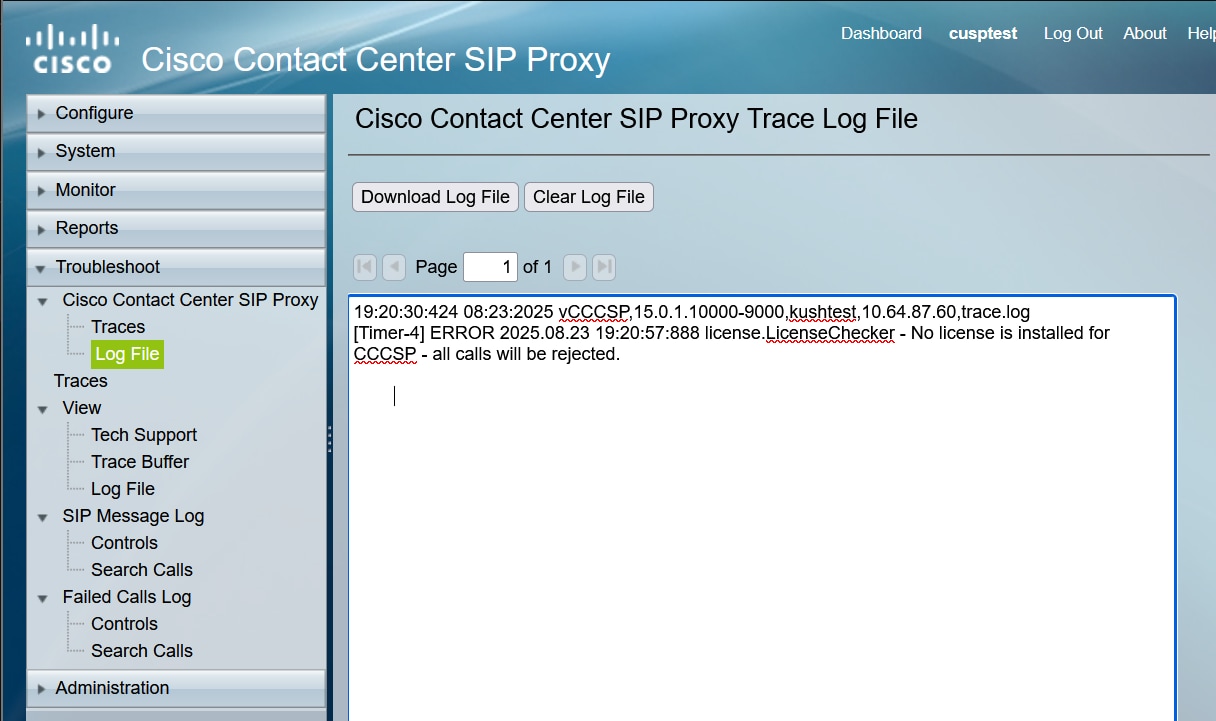
Step 2 |
Navigate to . The screen displays the collected logs. |
|
Step 3 |
You can either view or download the file or clear the log.
|
From the CLI
Procedure
|
Step 1 |
Start a CLI session. |
|
Step 2 |
Access the CCCSP application. |
|
Step 3 |
Use the cusp command to enter the cusp configuration mode: |
|
Step 4 |
Use the show trace log command to display the log content: |
|
Step 5 |
Press CTRL+C to break the scrolling. |
|
Step 6 |
Use the show trace log | p command to show the trace output page-by-page. |
From the Public File System (PFS)
Procedure
|
Step 1 |
Start a CLI session. |
||
|
Step 2 |
Access the CCCSP application. |
||
|
Step 3 |
Use the config command to enter the configuration mode: |
||
|
Step 4 |
Use the username username create command to create a username.
|
||
|
Step 5 |
Use the username username group pfs-privusers command to assign the PFS privilege to this user. |
||
|
Step 6 |
Access the URL ftp://<IP of CUSP>/cusp/log/trace/ using the credentials defined in the previous step. You can download .log files that contain the trace log. |
SIP Message logging
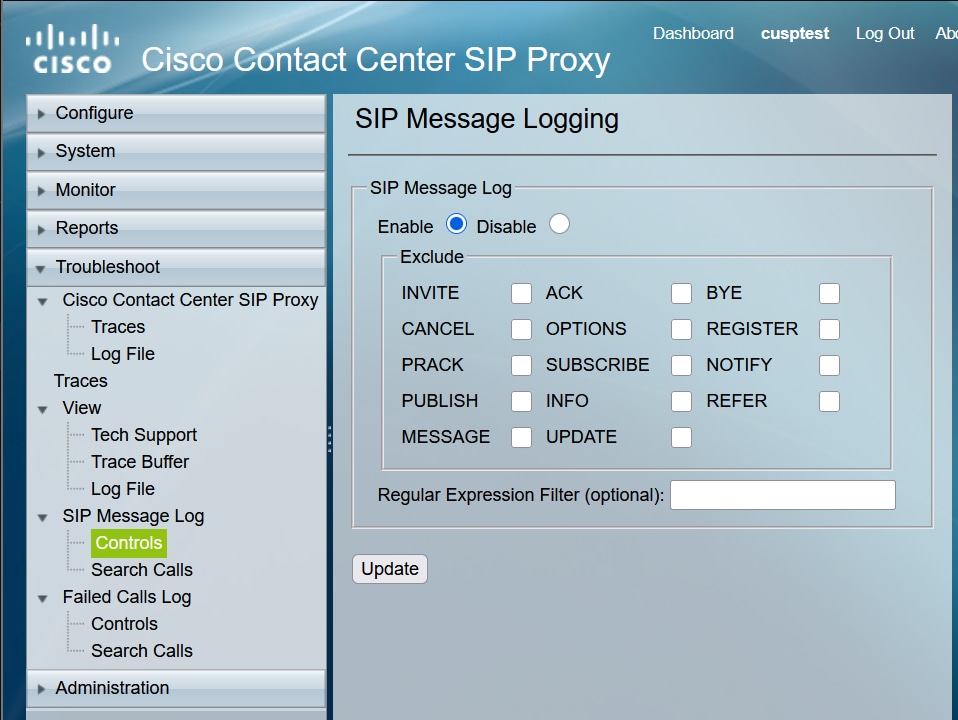
Apart from the trace logs mentioned in the previous sections, Session Initiation Protocol (SIP) message logs are also available in CCCSP. This log only shows the SIP messages that come into and go out from the CCCSP. You can enable SIP message logs from the GUI.
Procedure
|
Step 1 |
Go to . |
||
|
Step 2 |
Select the radio button option to enable SIP Message Log. |
||
|
Step 3 |
Check the check-box to exclude the messages that you want to exclude from logging. |
||
|
Step 4 |
Click Update to confirm the filter settings.
|
||
|
Step 5 |
To view the SIP message logs, go to .
|
Log Storage Information
Log collection on CCCSP-15.0(1)
New logs are not written if the buffer gets full on CCCSP-15.0(1).
Once the upgrade is done, collect the latest logs using CLI or GUI, as the SFTP (PFS user) does not reflect in the latest logs.
-
Use the show logs command to view latest log files.
Hostname# show logs SIZE LAST_MODIFIED_TIME NAME 298 Thu Sep 04 22:23:14 IST 2025 gls-registration.log 2253 Wed Sep 03 20:36:06 IST 2025 kdump.log 776 Thu Sep 04 22:23:14 IST 2025 cisco.amp.log 33408 Thu Sep 04 22:32:01 IST 2025 dnf.librepo.log 8352 Thu Sep 04 22:32:01 IST 2025 dnf.rpm.log 3116 Wed Sep 03 20:35:10 IST 2025 vmware-vgauthsvc.log.0 106399 Thu Sep 04 22:32:01 IST 2025 dnf.log 0 Wed Sep 03 21:01:02 IST 2025 boot.log 5853 Wed Sep 03 20:35:10 IST 2025 vmware-vmsvc-root.log 1949 Wed Sep 03 20:35:10 IST 2025 vmware-vmtoolsd-root.log 189 Tue Aug 26 23:29:20 IST 2025 vmware-network.2.log 187 Wed Sep 03 20:35:10 IST 2025 vmware-network.log 0 Tue Aug 26 23:39:25 IST 2025 messages.log 241 Wed Sep 03 20:34:46 IST 2025 vmware-network.1.log Hostname# -
Copy the file to SFTP server, using copy log command.
Hostname# copy log <logfilename> url sftp://<username>:<password>@<ftphost>/path/to/filename
Go to .
 Feedback