DMP Access and Security Settings
Concepts
Understand DMP User Accounts and Passwords
You use the Web Account when you log in to DMPDM itself.
In contrast, the Service Account is a user account with FTP and SFTP login privileges. It is available only on DMPs whose FTP service is enabled.

Note![]() Unless or until you change these passwords individually, they are both identical to the master password that you configured in the “Log in to DMPDM” section. You can change them when they should differ. However, they will become identical again in the future if you edit the master password.
Unless or until you change these passwords individually, they are both identical to the master password that you configured in the “Log in to DMPDM” section. You can change them when they should differ. However, they will become identical again in the future if you edit the master password.
Understand Whether to Change DMP Passwords Centrally
Procedures
- Edit the Splash Screen Duration to Obscure the DMP IP Address
- Protect Your DMP from Unauthorized Management
- Manage and Edit Passwords
- Enable or Disable Types of Access to Your DMP
- Enable or Disable Centralized Management
Edit the Splash Screen Duration to Obscure the DMP IP Address

Timesaver Complete this optional procedure at your discretion.
You can change how long your DMP shows its splash screen during startup. This is useful when, for example, your organization prefers not to reveal an IP address casually to all observers.
- A duration of 30,000 milliseconds (30 seconds) is the factory default.
- A duration of 1 millisecond turns off the splash screen.
- Any duration in the range from 2 to 5,000 milliseconds (5 seconds) does not have any effect.
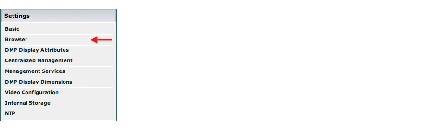
Step 1![]() Click Browser in the Settings list.
Click Browser in the Settings list.
Step 2![]() Enter a new duration in milliseconds in the Splash Screen Display Time (in milliseconds) field.
Enter a new duration in milliseconds in the Splash Screen Display Time (in milliseconds) field.
Step 4![]() Click Save Configuration in the Administration list, and then click Save.
Click Save Configuration in the Administration list, and then click Save.
Step 5![]() Stop. You have completed this procedure.
Stop. You have completed this procedure.
Protect Your DMP from Unauthorized Management

When you use Cisco Digital Signs to manage a network of DMPs centrally, you must configure each DMP to secure and trust its communication with Cisco Digital Signs.
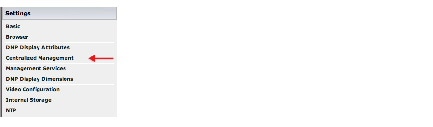
Step 1![]() Click Centralized Management in the Settings list.
Click Centralized Management in the Settings list.
Step 2![]() Enter in the Digital Signs Server Timeout (sec) field the maximum number of seconds that your DMP should wait for a response from your DMM appliance.
Enter in the Digital Signs Server Timeout (sec) field the maximum number of seconds that your DMP should wait for a response from your DMM appliance.
Step 3![]() Enter the routable DMM appliance IP address or DNS-resolvable hostname in the DMM Appliance IP Address field.
Enter the routable DMM appliance IP address or DNS-resolvable hostname in the DMM Appliance IP Address field.
Note![]() Has Cisco Digital Signs autodiscovered your new DMP? If so, the DMM Appliance IP Address field might already be populated with the correct information for your DMM appliance.
Has Cisco Digital Signs autodiscovered your new DMP? If so, the DMM Appliance IP Address field might already be populated with the correct information for your DMM appliance.
Step 4![]() Click Apply to confirm and test your choices.
Click Apply to confirm and test your choices.
Your entries are recorded to volatile memory and take effect — but only until you change them or restart your DMP.
Step 5![]() When you are satisfied that you chose the correct settings, click Save Configuration in the Administration list, and then click Save.
When you are satisfied that you chose the correct settings, click Save Configuration in the Administration list, and then click Save.
Your entries take effect permanently and will persist even after your DMP restarts.
Note![]() Your DMM appliance and your DMP use HTTPS to communicate securely over TCP port 7777 when centralized management is enabled.
Your DMM appliance and your DMP use HTTPS to communicate securely over TCP port 7777 when centralized management is enabled.
Step 6![]() Stop. You have completed this procedure.
Stop. You have completed this procedure.
Manage and Edit Passwords
Note![]() Until you change these passwords individually, they will be identical to the master password that you configured in the “Log in to DMPDM” section. You can change them when they should differ. However, they will become identical again in the future if you edit the master password.
Until you change these passwords individually, they will be identical to the master password that you configured in the “Log in to DMPDM” section. You can change them when they should differ. However, they will become identical again in the future if you edit the master password.
You can use DMPDM to change the DMP Web Account password and Service Account password on one DMP.
Step 1![]() Change the Web Account password.
Change the Web Account password.
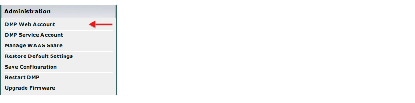
a.![]() Click DMP Web Account in the Administration list.
Click DMP Web Account in the Administration list.
b.![]() Enter your new password in the Password field and again in the Repeat Password field.
Enter your new password in the Password field and again in the Repeat Password field.
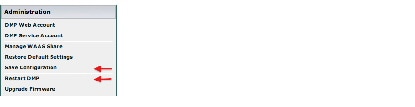
d.![]() Click Save Configuration in the Administration list, and then click Save.
Click Save Configuration in the Administration list, and then click Save.
e.![]() Click Restart DMP in the Administration list, and then click Restart.
Click Restart DMP in the Administration list, and then click Restart.
Note![]() Because you changed the password, your trusted DMM appliance — if any — is prevented temporarily from communicating with this DMP.
Because you changed the password, your trusted DMM appliance — if any — is prevented temporarily from communicating with this DMP.
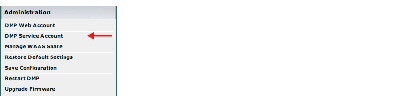
Step 2![]() Change the DMP Service Account password.
Change the DMP Service Account password.
a.![]() Click DMP Service Account in the Administration list.
Click DMP Service Account in the Administration list.
b.![]() Enter your new password in the Password field and again in the Repeat Password field.
Enter your new password in the Password field and again in the Repeat Password field.
d.![]() Click Save Configuration in the Administration list, and then click Save.
Click Save Configuration in the Administration list, and then click Save.
Step 3![]() (Optional) Is your DMP managed centrally? If so, repeat Step 3
(Optional) Is your DMP managed centrally? If so, repeat Step 3![]() in the s/dmp/user/guide/5_x/5_3_x/dmpdm/access.html#88015">“Protect Your DMP from Unauthorized Management” section.
in the s/dmp/user/guide/5_x/5_3_x/dmpdm/access.html#88015">“Protect Your DMP from Unauthorized Management” section.
Step 4![]() Stop. You have completed this procedure.
Stop. You have completed this procedure.
Proper communication is restored between your DMP and your trusted DMM appliance.
Enable or Disable Types of Access to Your DMP
You can enable or disable various kinds of administrative access to your DMP.
Step 1![]() Click Management Services in the Settings list.
Click Management Services in the Settings list.
Step 2![]() Enter or edit the required values, and then click Apply.
Enter or edit the required values, and then click Apply.
Step 3![]() Choose Administration > Save Configuration and, when the Save Configuration page appears, click Save.
Choose Administration > Save Configuration and, when the Save Configuration page appears, click Save.
Step 5![]() Stop. You have completed this procedure.
Stop. You have completed this procedure.
Enable or Disable Centralized Management
You can enable a remote DMM appliance to manage your DMP as part of a digital signage network.
Step 1![]() Click Centralized Management in the Settings list.
Click Centralized Management in the Settings list.
Step 2![]() Enter or edit the required values.
Enter or edit the required values.
Step 3![]() Click Apply to confirm that you are satisfied with the entries or changes that you made and to record them in volatile memory,.
Click Apply to confirm that you are satisfied with the entries or changes that you made and to record them in volatile memory,.
After you click Apply, the entries or changes take effect. However, the previously defined values will return the next time that your DMP restarts.
Step 4![]() (Optional) Would you like to put all changed values into effect permanently, so that they persist even after your DMP restarts?
(Optional) Would you like to put all changed values into effect permanently, so that they persist even after your DMP restarts?
a.![]() Choose Administration > Save Configuration.
Choose Administration > Save Configuration.
b.![]() Click Save when the Save Configuration page appears.
Click Save when the Save Configuration page appears.
Step 5![]() Stop. You have completed this procedure.
Stop. You have completed this procedure.
Reference
SSL Encryption Ciphers That DMPs Support
DMPs support the following SSL ciphers in HTTPS connections.
 Feedback