Installing the Front Mezzanine Module

This chapter includes the following topics:

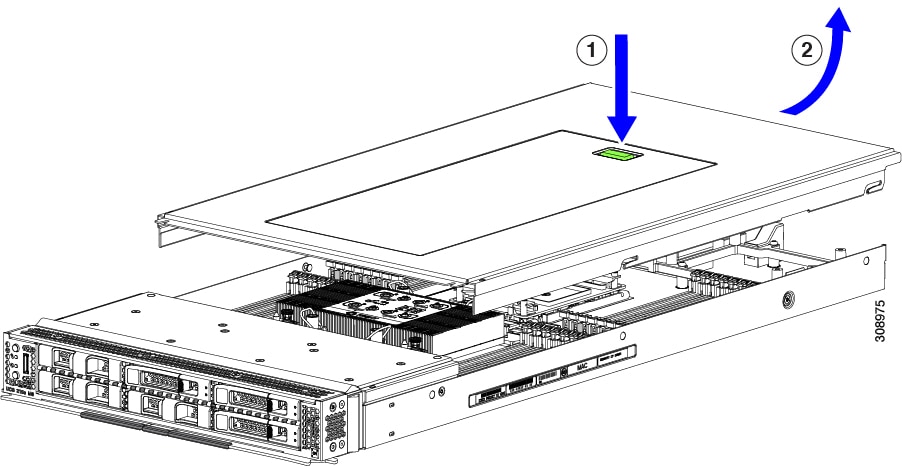
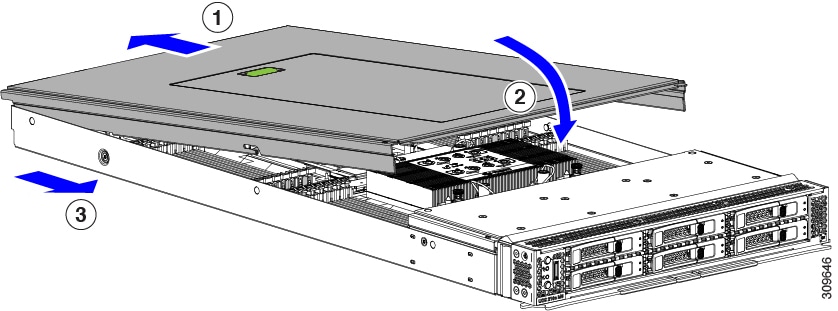
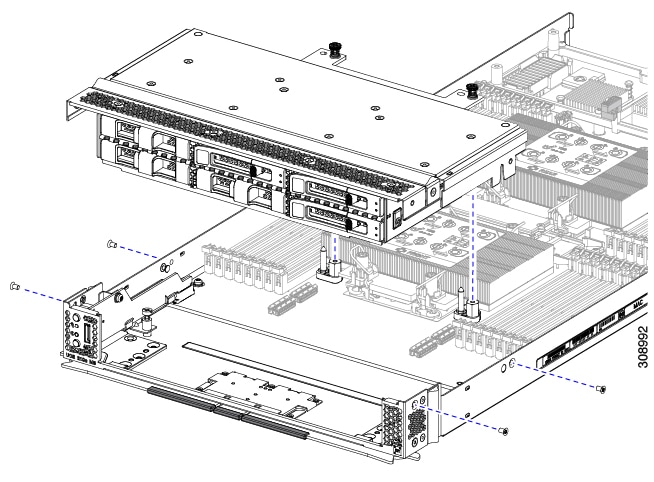
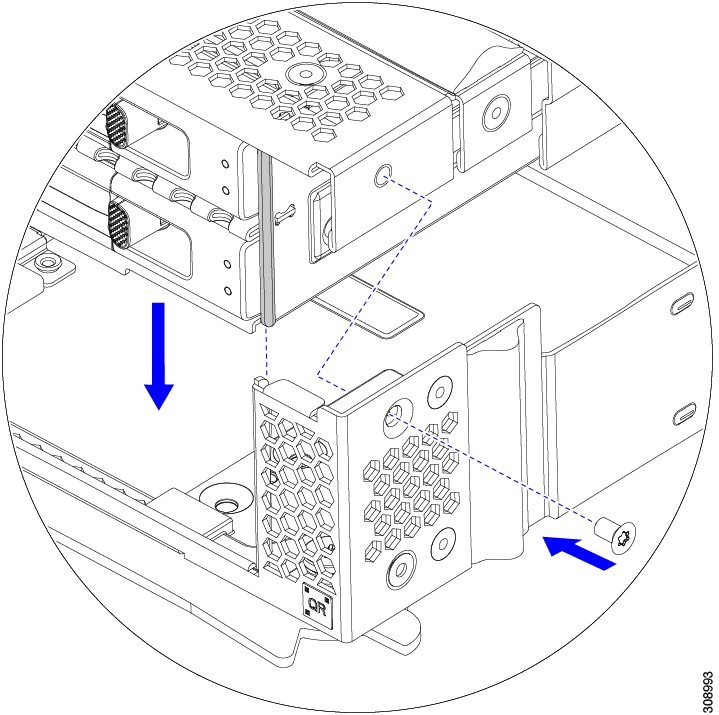
Installing and Removing The UCS X24g M1 Front Mezzanine Module

The front mezzanine module installs into the front mezzanine slot of Cisco UCS X-Series compute nodes.

Required Equipment

There is no special kit required to install the Cisco UCS X24g M1 front mezzanine module. However make the following items are available during installation:

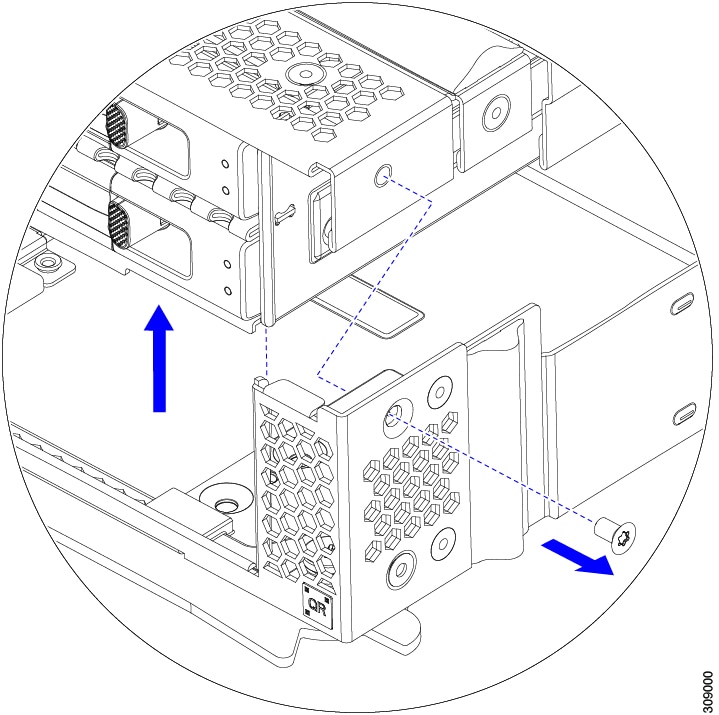
  • The front mezzanine including:

    • Support for a maximum of 6 SAS/SATA/U.3 NVMe drives.

    • Filler blanks.


    Note


    If you order the Cisco UCS X24g M1 front mezzanine module with one U.3 drive, the unused drive slots are pre-populated with filler blanks. You can purchase additional filler blanks from Cisco UCSC-BBLKD-S2.


The following additional equipment, which is not provided by Cisco, is required to install or remove the UCS X24g M1 front mezzanine module.

  • T8 Torx screwdriver

  • #2 Phillips screwdriver

  • Torque driver

Removing and Installing the Compute Node Cover

The top cover for the Cisco UCS X-series compute node can be removed to allow access to internal components, some of which are field-replaceable. The green button on the top cover releases the compute node so that it can be removed from the chassis.

Removing a Compute Node Cover

To remove the cover of a UCS X-Series compute node, follow these steps:

Procedure


Step 1

Press and hold the button down (1, in the figure below).

Step 2

While holding the back end of the cover, slide it back, then pull it up (2).

By sliding the cover back, you enable the front edge to clear the metal lip on the rear of the front mezzanine module.


Installing a Compute Node Cover

Use this task to install a removed top cover for the UCS X-Series compute node.

Procedure


Step 1

Insert the cover angled so that it hits the stoppers on the base.

Step 2

Lower the compute node's cover until it reaches the bottom.

Step 3

Keeping the compute node's cover flat, slide it forward until the release button clicks.


Removing the Front Mezzanine Module

Use the following procedure to remove the front mezzanine module. This procedure applies to the following modules:

  • RAID Controller module (UCSX-RAID-M1L6)

Before you begin

To remove the front mezzanine module, you need a T8 screwdriver and a #2 Phillips screwdriver.

Procedure


Step 1

If the compute node's cover is not already removed, remove it now.

See Removing a Compute Node Cover.

Step 2

Remove the securing screws:

  1. Using a #2 Phillips screwdriver, loosen the two captive screws on the top of the front mezzanine module.

    Note


    This step may be skipped if removing the front mezzanine blank (UCSX-M8A-FMEZZBLK).

  2. Using a T8 screwdriver, remove the two screws on each side of the compute node that secure the front mezzanine module to the sheet metal.

Step 3

Making sure that all the screws are removed, lift the front mezzanine module to remove it from the compute node.


What to do next

To install the front mezzanine module, see Install the Front Mezzanine module.

Installing the Front Mezzanine Module

Use the following procedure to install the front mezzanine module. This procedure applies to the following modules:

  • RAID Controller Module (UCSX-RAID-M1L6)

Before you begin

To install the front mezzanine module, you need a T8 screwdriver and a #2 Phillips screwdriver.

Procedure


Step 1

Align the front mezzanine module with its slot on the compute node.

Step 2

Lower the front mezzanine module onto the compute node, making sure that the screws and screwholes line up.

Step 3

Secure the front mezzanine module to the compute node.

  1. Using a #2 Phillips screwdriver, tighten the captive screws on the top of the front mezzanine module.

  2. Using a T8 screwdriver, insert and tighten the four screws, two on each side of the sever node.


What to do next

If you removed the drives from the front mezzanine module, reinstall them now. See Replacing a Drive.

Front Mezzanine Drive Configuration

The Cisco UCS X24g M1 front mezzanine U.3 drives can be configured and managed using the Cisco Intersight management platform in Intersight Managed Mode (Cisco Intersight Managed Mode). For details, see the Cisco Intersight Managed Mode Configuration Guide, which is available at the following URL: Cisco Intersight Managed Mode Configuration Guide