Manage Device Configuration

In order to manage a device, Security Cloud Control must have its own copy of the device's configuration stored in its local database. When Security Cloud Control "reads" a configuration from a device it manages, it takes a copy of the device's configuration and saves it. The first time Security Cloud Control reads and saves a copy of a device's configuration is when the device is onboarded. These choices describe reading a configuration for different purposes:

  • Discard Changes: This action is available when a device's configuration status is "Not Synced." In the Not Synced state, there are changes to the device's configuration pending on Security Cloud Control. This option allows you to undo all pending changes. The pending changes are deleted and Security Cloud Control overwrites its copy of the configuration with copy of the configuration stored on the device.

  • Check for Changes: This action is available if the device's configuration status is Synced. Clicking Checking for Changes directs Security Cloud Control to compare its copy of the device's configuration with the copy of the configuration stored on the device. If there is a difference, Security Cloud Control immediately overwrites its copy of the device's configuration with the copy stored on the device.

  • Review Conflict and Accept Without Review: If you have enabled Conflict Detection on a device, Security Cloud Control checks for configuration changes made on the device every 10 minutes. If the copy of the configuration stored on the device has changed, Security Cloud Control notifies you by displaying the "Conflict Detected" configuration status.

    • Review Conflict: Click Review Conflict allows you to review changes made directly on a device and accept or reject them.

    • Accept Without Review: This action overwrites Security Cloud Control's copy of a device's configuration with the latest copy of the configuration stored on the device. Security Cloud Control does not prompt you to confirm the differences in the two copies of the configuration before taking the overwriting action.

Read All: This is a bulk operation. You can select more than one device, in any state, and click Read All to overwrite all the devices' configurations stored on Security Cloud Control with the configurations stored on the devices.

  • Deploy Changes: As you make changes to a device's configuration, Security Cloud Control saves the changes you make to its own copy of the configuration. Those changes are "pending" on Security Cloud Control until they are deployed to the device. When there are changes to a device's configuration that have not been deployed to the device, the device is in the Not Synced configuration state.

    Pending configuration changes have no effect on the network traffic running through the device. Only after Security Cloud Control deploys the changes to the device do they have an effect. When Security Cloud Control deploys changes to the device's configuration, it only overwrites those elements of the configuration that were changed. It does not overwrite the entire configuration file stored on the device. Deployments can be initiated for a single device or on more than one device simultaneously.

  • Discard All is an option that is only available after you click Preview and Deploy.... After clicking Preview and Deploy, Security Cloud Control shows you a preview of the pending changes in Security Cloud Control. Clicking Discard All deletes all pending changes from Security Cloud Control and does not deploy anything to the selected device(s). Unlike "Discard Changes" above, deleting the pending changes is the end of the operation.


Note


You can schedule deployments or recurring deployments. See Schedule an Automatic Deployment for more information.


Reading, Discarding, and Deploying Configuration Changes

Read All Device Configurations

If a configuration change is made to a device outside of Security Cloud Control, the device's configuration stored on Security Cloud Control and the device's local copy of its configuration are no longer the same. You many want to overwrite Security Cloud Control's copy of the device's configuration with the configuration stored on the device to make the configurations the same again. You can perform this task on many devices simultaneously using the Read All link.

See Reading, Discarding, Checking for, and Deploying Configuration Changes for more information about how Security Cloud Control manages the two copies of the device's configuration.

Here are three configuration statuses where clicking Read All will overwrite Security Cloud Control's copy of the device's configuration with the device's copy of the configuration.
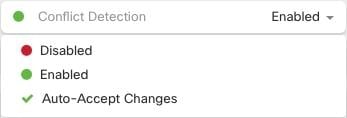
  • Conflict Detected-If conflict detection is enabled, Security Cloud Control polls the devices it manages every 10 minutes for changes made to their configurations. If Security Cloud Control finds that the configuration on the device has changed, Security Cloud Control displays a "Conflict detected" configuration status for the device.

  • Synced-If the device is in a synced state, and you click Read All, Security Cloud Control immediately checks the devices to determine if there have been any changes made to its configurations directly. After clicking Read All, Security Cloud Control confirms your intent to overwrite its copy of the device's configuration and then Security Cloud Control performs the overwrite.

  • Not Synced-If the device is in the Not Synced state, and you click Read All, Security Cloud Control warns you that there are pending changes made to to the device's configuration using Security Cloud Control and that proceeding with the Read All operation will delete those changes and then overwrite Security Cloud Control's copy of the configuration with the configuration on the device. This Read All functions like Discard Changes.

Procedure


Step 1

In the left pane, click Security Devices.

Step 2

Click the Devices tab.

Step 3

Click the appropriate device type tab.

Step 4

(Optional) Create a change request label to identify the results of this bulk action easily in the Change Log.

Step 5

Select the devices whose configurations you want to save Security Cloud Control. Notice that Security Cloud Control only provides command buttons for actions that can be applied to all the selected devices.

Step 6

Click Read All.

Step 7

Security Cloud Control warns you if there are configuration changes staged on Security Cloud Control, for any of the devices you selected, and asks if you want to continue with the bulk reading configurations action. Click Read All to continue.

Step 8

Look at the notifications tab for the progress of the Read All configurations operation. If you want more information about how individual actions in the bulk operation succeeded or failed, click the blue Review link and you will be directed to the Jobs page.

Step 9

If you created and activated a change request label, remember to clear it so that you don't inadvertently associate other configuration changes with this event.


Read Configuration Changes from FDM-Managed Device to Security Cloud Control

Why Does Security Cloud Control Read FDM-managed device Configurations?

In order to manage an FDM-managed device, Security Cloud Control must have its own stored copy of the FDM-managed device's configuration. When Security Cloud Control reads a configuration from an FDM-managed device, it takes a copy of the FDM-managed device's deployed configuration and saves it to its own database. The first time Security Cloud Control reads and saves a copy of the device's configuration file is when the device is onboarded. See Reading, Discarding, Checking for, and Deploying Configuration Changes for more information.

Pending and Deployed Changes

Configuration changes made to the FDM-managed device directly through the Firepower Device Manager (FDM) or its CLI are referred to as staged changes on the FDM-managed device until they are deployed. A staged, or pending, change can be edited or deleted without having any affect on traffic running through the FDM-managed device. Once the pending changes are deployed, however, they are enforced by the FDM-managed device and affect traffic running through the device.

Conflict Detected

If you enable Conflict Detection on the device, Security Cloud Control checks for configuration changes every 10 minutes. If the copy of the configuration stored on the device has changed, Security Cloud Control notifies you by displaying the "Conflict Detected" configuration status. If you do not have Conflict Detection enabled, or a change has been made to the device's configuration within the 10 minute interval between automatic polling, clicking Check for Changes prompts Security Cloud Control to immediately compare the copy of the configuration on the device with the copy of the configuration stored on Security Cloud Control. You can choose to Review Conflict to examine the differences between the device configuration and the configuration saved to Security Cloud Control, then select Discard Changes to remove the staged changes and revert to the saved configuration or confirm the changes. You can also choose to Accept without Review; this option takes the configuration and overwrites what is currently saved to Security Cloud Control.

Discard Changes Procedure

To discard configuration changes from the FDM-managed device, follow this procedure:

Procedure

Step 1

In the left pane, click Security Devices.

Step 2

Click the Devices tab.

Step 3

Click the appopriate device type tab.

Step 4

Select the device whose configuration is set to Conflict Detected and gives you the link to Revert Pending Changes. The message explains that you can click the link to revert pending changes or you can log on to the device using the local manager FDM and deploy the changes first.

Note


You can use filters to find the device in a conflict state.

Caution


Clicking the Revert Pending Changes link deletes pending changes on FDM-managed device immediately. You are not given an opportunity to review the changes first.

Step 5

Review the changes on FDM before clicking Revert Pending Changes:

  1. Open a browser window and enter https://<IP_address_of_the_FTD>.

  2. Look for the deployment icon in FDM. It will have an orange circle indicating that there are changes ready to deploy .

  3. Click the icon and review the pending changes:

  • If the changes can be deleted, return to Security Cloud Control and click "Revert Pending Changes." At this point, the configuration on the FDM-managed device and the copy of the configuration on Security Cloud Control should be the same. You are done.

  • If you want to deploy the changes to the device, click Deploy Now. Now the deployed configuration on the FDM-managed device and the configuration on stored on Security Cloud Control are different. You can then return to Security Cloud Control and poll the device for changes. Security Cloud Control identifies identifies that there has been a change on the FDM-managed device, and gives you an opportunity to review the conflict. See Conflict Detected-Review Conflict to resolve that state.


If Reverting Pending Changes Fails

Changes to the system databases and security feeds can't be reverted by Security Cloud Control. Security Cloud Control recognizes that there are pending changes, attempts to revert them and then fails. To determine if the revert failure is due to pending database updates or security feed updates, log into the device's FDM console. It will have an orange circle indicating that there are changes ready to deploy . Click the deploy button to review the pending changes and deploy them or discard them as is appropriate.

Review Conflict Procedure

To review configuration changes from the FDM-managed device, follow this procedure:

Procedure

Step 1

In the left pane, click Security Devices.

Step 2

Click the Devices tab.

Step 3

Click the appropriate device type tab.

Step 4

Select the device whose configuration is marked Conflict Detected and gives you a link to Review Conflict in the Conflict Detected pane on the right.

Step 5

Click Review Conflict.

Step 6

Compare the two configurations presented to you.

Step 7

Take one of these actions:

  • Click Accept to overwrite the last known configuration on Security Cloud Control with the one found on the device. Note: The entire configuration stored on Security Cloud Control will be completely overwritten by the configuration found on the device.

  • Click Reject to reject the changes made on the device and replace them with the last known configuration on Security Cloud Control.

  • Click Cancel to stop the action.

Note


You can prompt Security Cloud Control to immediately check a device for an out-of-band change by clicking Check for Changes while the device is in the Synced state.


Accept Without Review Procedure

To accept configuration changes from the FDM-managed device without reviewing, follow this procedure:

Procedure

Step 1

In the left pane, click the Security Devices tab.

Step 2

Click the appopriate device type tab.

Step 3

Select the device whose configuration is marked Conflict Detected and gives you a link to Accept Without Review in the Conflict Detected pane on the right.

Step 4

Click Accept Without Review. Security Cloud Control accepts and overwrites the current configuration.


Preview and Deploy Configuration Changes for All Devices

Security Cloud Control informs you when you have made a configuration change to a device in your tenant, but you have not deployed that change, by displaying an orange dot on the Deploy icon . The devices affected by these changes show the status "Not Synced" in the Security Devices page. By clicking Deploy, you can review which devices have pending changes and deploy the changes to those devices.

This deployment method is available for all supported devices.

You can use this deployment method for single configuration changes or wait and deploy multiple changes at once.

Procedure


Step 1

In the menu bar of Security Cloud Control click the Deploy button .

Step 2

Select the devices with changes you want to deploy. If a device has a yellow caution triangle, you can not deploy changes to that device. Hover your mouse over the yellow caution triangle to find out why you can't deploy changes to that device.

Step 3

(Optional) If you want to see more information about a pending change, click the View Detailed Changelog link to open the change log associated with that change. Click the Deploy icon to return to the Devices with Pending Changes page.

Step 4

Click Deploy Now to deploy the changes immediately to the devices you selected. You'll see the progress in the Active jobs indicator in the Jobs tray.

Step 5

(Optional) After the deployment has finished, click Jobs in the Security Cloud Control navigation bar. You will see a recent "Deploy Changes" job showing the results of the deployment.

Step 6

If you created a change request label, and you have no more configuration changes to associate with it, clear it.


Deploy Configuration Changes from Security Cloud Control to FDM-Managed Device

Why Does Security Cloud Control Deploy Changes to an FDM-Managed Device?

As you manage and make changes to a device's configuration with Security Cloud Control, Security Cloud Control saves the changes you make to its own copy of the configuration file. Those changes are considered staged on Security Cloud Control until they are deployed to the device. Staged configuration changes have no effect on the network traffic running through the device. Only after Security Cloud Control deploys the changes to the device do they have an affect on the traffic running through the device. When Security Cloud Control deploys changes to the device's configuration, it only overwrites those elements of the configuration that were changed. It does not not overwrite the entire configuration file stored on the device.

Like Security Cloud Control, FDM-managed device has the concept of pending changes and deployed changes. Pending changes on FDM-managed device are the equivalent of staged changes on Security Cloud Control. A pending change can be edited or deleted without having any affect on traffic running through the FDM-managed device. Once the pending changes are deployed, however, they are enforced by the FDM-managed device and affect traffic running through the device.

Because of FDM-managed devices two step process for editing configuration files, Security Cloud Control deploys changes to an FDM-managed device slightly differently than it does to other devices it manages. Security Cloud Control first deploys the changes to FDM-managed device and the changes are in the pending state. Then, Security Cloud Control deploys the changes on the devices and they become live. Now that the changes have been deployed, they are enforced and affect traffic running through the FDM-managed device. This applies to both standalone and high availability (HA) devices.

Deployments can be initiated for a single device or on more than one device simultaneously. You can schedule individual deployments or recurring deployments for a single device.

Two things will prevent Security Cloud Control from deploying changes to an FDM-managed device:

  • If there are staged changes on the FDM-managed device. See Conflict Detected for more information on how to resolve this state.

  • Security Cloud Control does not deploy changes if there are changes in the process of being deployed to the FDM-managed device.

Scheduling Automatic Deployments

You can also configure your tenant to schedule deployments to a single device with pending changes scheduling automatic deployments.

Deploy Changes to a Device

Procedure


Step 1

After you make a configuration change for a device using Security Cloud Control and save it, that change is saved in Security Cloud Control instance of the device's configuration.

Step 2

In the navigation bar, click Security Devices.

Step 3

Click the Devices tab.

Step 4

Click the appropriate device type tab. You should see that the configuration status of the device you made changes to is now "Not synced."

Step 5

Deploy the changes using one of these methods:

  • Select the device and in the Not Synced pane on the right, click Preview and Deploy. On the Pending Changes screen, review the changes. If you are satisfied with the pending version, click Deploy Now.

    After the changes are deployed successfully, you can view the change log to confirm what just happened.

  • Click the Deploy icon at the top-right of the screen. See Preview and Deploy Configuration Changes for All Devices for more information.


Cancelling Changes

If, when deploying a change from Security Cloud Control to a device, you click Cancel, the changes you made are not deployed to the device. The process is canceled. The changes you made are still pending on Security Cloud Control and can be edited further before you finally deploy them to FDM-managed device.

Discarding Changes

If, when previewing changes, you click Discard all, the changes you made, and any other changes any other user made but did not deploy to the device, are deleted. Security Cloud Control reverts its pending configuration to the last read or deployed configuration before any changes were made.

Bulk Deploy Device Configurations

If you have made changes to multiple devices, for instance by editing a shared object, you can apply those change to all of the affected devices at once:

Procedure


Step 1

In the left pane, click Security Devices.

Step 2

Click the Devices tab.

Step 3

Click the appropriate device type tab.

Step 4

Select all of the devices for which you have made configuration changes on Security Cloud Control. These devices should show "Not Synced" status.

Step 5

Deploy the changes using one of these methods:

  • Click the button at the top-right of the screen to view the Devices with Pending Changes window. This gives you a chance to review the pending changes on the devices you selected before you deploy them. Click Deploy Now to deploy the changes.

    Note


    If you see a yellow warning triangle next to a device on the Devices with Pending Changes screen, you cannot deploy a change to that device. Hover your mouse over the warning triangle for information about why changes cannot be deployed to that device.

  • Click Deploy All on the details pane. Review any warnings and click OK. The bulk deployment starts immediately without a review of the changes.

Step 6

(Optional) Click the Jobs icon in the navigation bar to view the results of the bulk deploy.


About Scheduled Automatic Deployments

Using Security Cloud Control, you can make configuration changes to one or more of the devices it manages and then schedule the changes to be deployed to those devices at a time that is convenient for you.

You can only schedule deployments if you Enable the Option to Schedule Automatic Deployments in the Tenant Settings tab of the Settings page. Once this option is enabled, you can create, edit, or delete scheduled deployments. A scheduled deployment deploys all the staged changes saved on Security Cloud Control at the date and time set. You can also view and delete scheduled deployments from the Jobs page.

If there were changes made directly to the device that have not been read to Security Cloud Control, the scheduled deployment will be skipped until that conflict is resolved. The Jobs page will list any instance where a scheduled deployment fails. If Enable the Option to Schedule Automatic Deployments is turned off, all scheduled deployments are deleted.


Caution


If you schedule a new deployment for multiple devices, and some of those devices already have deployments scheduled, the new scheduled deployment overwrites the existing scheduled deployments.


Note


When you create a scheduled deployment, the schedule is created in your local time, not in the time zone of the device. Scheduled deployments do not automatically adjust for daylight savings time.


Schedule an Automatic Deployment

The deployment schedule can be a single event or a recurring event. You may find recurring automatic deployments a convenient way to line up recurring deployments with your maintenance window. Follow this procedure to schedule a one-time or a recurring deployment for a single device:


Note


If you schedule a deployment for a device that has an existing deployment scheduled, the new scheduled deployment overwrites the existing deployment.


Procedure

Step 1

In the left pane, click Security Devices.

Step 2

Click the Devices tab.

Step 3

Click the appropriate device type tab.

Step 4

Select one ore more devices.

Step 5

In the Device Details pane, locate the Scheduled Deployments tab and click Schedule.

Step 6

Select when the deployment should occur.

  • For a one-time deployment, click the Once on option to select a date and time from the calendar.

  • For a recurring deployment, click the Every option. You can choose either a daily or once a week deployment. Select the Day and Time the deployment should occur.

Step 7

Click Save.


Edit a Scheduled Deployment

Follow this procedure to edit a scheduled deployment:

Procedure

Step 1

In the left pane, click Security Devices.

Step 2

Click the Devices tab.

Step 3

Click the appropriate device type tab.

Step 4

Select one or more devices.

Step 5

In the Device Details pane, locate the Scheduled Deployments tab and click Edit .

Step 6

Edit the recurrence, date, or time of a scheduled deployment.

Step 7

Click Save.


Delete a Scheduled Deployment

Follow this procedure to delete a scheduled deployment:


Note


If you schedule a deployment for multiple devices, and then change or delete the schedule for some of the devices, the original scheduled deployment for the remaining devices will be preserved.


Procedure

Step 1

In the left pane, click Security Devices.

Step 2

Click the Devices tab.

Step 3

Click the appropriate device type tab.

Step 4

Select one or more devices.

Step 5

In the Device Details pane, locate the Scheduled Deployments tab and click Delete .


What to do next

Check for Configuration Changes

Check for Changes to determine if the device's configuration has been changed directly on the device and it is no longer the same as the copy of the configuration stored on Security Cloud Control. You will see the this option when the device is in the "Synced" state.

To check changes:

Procedure


Step 1

In the left pane, click Security Devices.

Step 2

Click the Devices tab.

Step 3

Click the appropriate device type tab.

Step 4

Select the device, whose configuration you suspect may have been changed directly on the device.

Step 5

Click Check for Changes in the Synced pane on the right.

Step 6

The behavior that follows is slightly different depending on the device:

  • For FTD device if there has been a change to the device's configuration, you will receive the message:

    Reading the policy from the device. If there are active deployments on the device, reading will start after they are finished.

    • Click OK to continue. The configuration on the device will overwrite the stored configuration on Security Cloud Control.

    • Click Cancel to cancel the action.

  • For device:

  1. Compare the two configurations presented to you. Click Continue. The configuration labeled Last Known Device Configuration is the configuration stored on Security Cloud Control. The configuration labeled Found on Device is the configuration saved on the ASA.

  2. Select either:

    1. Reject the out-of-band changes to keep the "Last Known Device Configuration."

    2. Accept the out-of-band changes to overwrite the device's configuration stored in Security Cloud Control with the configuration found on the device.

  3. Click Continue.


Discard Configuration Changes

Click Discard Changes when you want to "undo" all the undeployed configuration changes you made to a device's configuration using Security Cloud Control. When you click Discard Changes, Security Cloud Control completely overwrites its local copy of a device's configuration with the configuration stored on the device.

When you click Discard Changes, your device's configuration status is in a Not Synced state. After you discard your changes, the copy of the configuration on Security Cloud Control will be the same as the copy of the configuration on the device and the configuration status in Security Cloud Control will return to Synced.

To discard, or "undo," all of your undeployed configuration changes for a device:

Procedure


Step 1

In the left pane, click Security Devices.

Step 2

Click the Devices tab.

Step 3

Click the appropriate device type tab.

Step 4

Select the device you have been making configuration changes to.

Step 5

Click Discard Changes in the Not Synced pane on the right.

  • For FDM-managed devices-Security Cloud Control warns you that "Pending changes on Security Cloud Control will be discarded and the Security Cloud Control configuration for this device will be replaced with the configuration currently running on the device." Click Continue to discard your changes.

  • For Meraki devices-Security Cloud Control deletes the change immediately.

  • For AWS devices-Security Cloud Control displays what you are about to delete. Click Accept or Cancel.


Out-of-Band Changes on Devices

Out-of-band changes refer to changes made directly on the device without using Security Cloud Control. These changes may be made using the device's command-line interface over an SSH connection or by using a local manager like the Adaptive Security Device Manager (ASDM) for the ASA, the FDM for the FDM-managed device, or for an On-Premises Firewall Management Center on the On-Premises Firewall Management Center user interface. An out-of-band change causes a conflict between the device's configuration stored on Security Cloud Control and the configuration stored on the device itself.

Detecting Out-of-Band Changes on Devices

If Conflict Detection is enabled for an ASA, or an FDM-managed device, a Cisco IOS device, or an On-Premises Firewall Management Center, Security Cloud Control checks the device every 10 minutes searching for any new changes made directly to the device's configuration outside of Security Cloud Control.

If Security Cloud Control finds that there are changes to the device's configuration that are not stored on Security Cloud Control, it changes the Configuration Status of that device to the "Conflict Detected" state.

When Security Cloud Control detects a conflict, one of two conditions is likely:

  • There have been configuration changes made to the device directly that have not been saved to Security Cloud Control's database.

  • In the case of an FDM-managed device, there may be "pending" configuration changes on the FDM-managed device that have not been deployed.

  • In the case of an On-Premises Firewall Management Center, there may be changes made, for instance, to objects outside Security Cloud Control, which are pending to be synchronized with Security Cloud Control or changes made in Security Cloud Control which are pending to be deployed to the On-Premises Firewall Management Center.

Synchronizing Configurations Between Security Cloud Control and Device

About Configuration Conflicts

In the Security Devices page, you may see devices or services have the status "Synced," "Not Synced," or "Conflict Detected." To know the status of an On-Premises Firewall Management Center that you manage using Security Cloud Control, navigate Administration > Integrations > Firewall Management Center.

  • When a device is Synced, the configuration on Security Cloud Control) and the configuration stored locally on the device are the same.

  • When a device is Not Synced, the configuration stored in Security Cloud Control was changed and it is now different that the configuration stored locally on the device. Deploying your changes from Security Cloud Control to the device changes the configuration on the device to match Security Cloud Control's version.

  • Changes made to devices outside of Security Cloud Control are called out-of-band changes. When out-of-band changes are made, you'll see the device state change to "Conflict Detected," if conflict detection is enabled for the device. Accepting the out-of-band changes, changes the configuration on Security Cloud Control to match the configuration on the device.

Conflict Detection

When conflict detection is enabled, Security Cloud Control polls the device for the default interval to to determine if a change has been made to the device's configuration outside of Security Cloud Control. If Security Cloud Control detects that a change was made, it changes the configuration status for the device to Conflict Detected. Changes made to a device outside of Security Cloud Control are called "out-of-band" changes.

In the case of an On-Premises Firewall Management Center that is managed by Security Cloud Control, if there are changes that are staged and the device is in Not Synced state, Security Cloud Control stops polling the device to check for changes. When there are changes made outside Security Cloud Control which are pending to be synchronized with Security Cloud Control and changes made in Security Cloud Control which are pending to be deployed to the on-premises management center, Security Cloud Control declares the on-premises management center to be in the Conflict Detected state.

Once this option is enabled, you can configure how often conflicts or OOB changes are detected per device. See Schedule Polling for Device Changes for more information.

Enable Conflict Detection

Enabling conflict detection alerts you to instances where changes have been made to a device outside of Security Cloud Control.

Procedure

Step 1

In the left pane, click Security Devices.

Step 2

Click the Devices tab.

Step 3

Select the appropriate device type tab.

Step 4

Select the device or devices for which you want to enable conflict detection.

Step 5

In the Conflict Detection box at the right of the device table, select Enabled from the list.


Automatically Accept Out-of-Band Changes from your Device

You can configure Security Cloud Control to automatically accept any change made directly to a managed device by enabling auto-accept changes. Changes made directly to a device without using Security Cloud Control are referred to as out-of-band changes. An out-of-band change creates a conflict between the device's configuration stored on Security Cloud Control and the configuration stored on the device itself.

The auto-accept changes feature is an enhancement to conflict detection. If you have auto-accept changes enabled on your device, Security Cloud Control checks for changes every 10 minutes to determine if there have been any out-of-band changes made to the device's configuration. If there have been configuration changes, Security Cloud Control automatically updates its local version of the device's configuration without prompting you.

Security Cloud Control will not automatically accept a configuration change if there are configuration changes made on Security Cloud Control that have not yet been deployed to the device. Follow the prompts on the screen to determine your next action.

To use auto-accept changes, you first enable the tenant to display the auto-accept option in the Conflict Detection menu on the Security Devices page; then, you enable auto-accept changes for individual devices.

If you want Security Cloud Control to detect out-of-band changes but give you the option to accept or reject them manually, enable Conflict Detection instead.

Configure Auto-Accept Changes

Procedure

Step 1

Log in to Security Cloud Control using an account with Admin or Super Admin privileges.

Step 2

In the left pane, click Administration > General Settings.

Step 3

In the Tenant Settings area, click the toggle to Enable the option to auto-accept device changes. This enables the Auto-Accept Changes menu option to appear in the Conflict Detection menu on the Security Devices page.

Step 4

In the left pane, click Security Devices and select the device for which you want to automatically accept out-of-band changes.

Step 5

In the Conflict Detection menu, select Auto-Accept Changes in the drop-down menu.


Disabling Auto-Accept Changes for All Devices on the Tenant

Procedure

Step 1

Log-in to Security Cloud Control using an account with Admin or Super Admin privileges.

Step 2

In left pane, click Administration > General Settings.

Step 3

In the Tenant Settings area, disable the "Enable the option to auto-accept device changes" by sliding the toggle to the left so it shows a grey X. This disables Auto-Accept Changes option in the Conflict Detection menu and disables the feature for every device on your tenant.

Note


Disabling "Auto-Accept" will require you to review each device conflict before you can accept it into Security Cloud Control. This includes devices previously configured to auto-accept changes.


Resolve Configuration Conflicts

This section provides information about resolving configuration conflicts that occur on the device.

Resolve the Not Synced Status

Use the following procedure to resolve a device with a "Not Synced" Configuration Status:

Procedure

Step 1

In the navigation bar, click Security Devices.

Note


For an On-Premises Firewall Management Center, click Administration > Integrations > Firewall Management Center and select the FMC that is in Not Synced state and continue from Step 5.

Step 2

Click the Devices tab to locate the device or the Templates tab to locate the model device.

Step 3

Click the appropriate device type tab.

Step 4

Select the device reported as Not Synced.

Step 5

In the Not synced panel to the right, select either of the following:

  • Preview and Deploy... -If you want to push the configuration change from Security Cloud Control to the device, preview and deploy the changes you made now, or wait and deploy multiple changes at once.

  • Discard Changes -If you do not want to push the configuration change from Security Cloud Control to the device, or you want to "undo" the configuration changes you started making on Security Cloud Control. This option overwrites the configuration stored in Security Cloud Control with the running configuration stored on the device.


Resolve the Conflict Detected Status

Security Cloud Control allows you to enable or disable conflict detection on each live device. If Conflict Detection is enabled and there was a change made to the device's configuration without using Security Cloud Control, the device's configuration status will show Conflict Detected.

To resolve a "Conflict Detected" status, follow this procedure:

Procedure

Step 1

In the navigation bar, click Security Devices.

Note


For an On-Premises Firewall Management Center, click Administration > Integrations > Firewall Management Center and select the FMC that is in Not Synced state and continue from Step 5.

Step 2

Click the Devices tab to locate your device.

Step 3

Click the appropriate device type tab.

Step 4

Select the device reporting the conflict and click Review Conflict in the details pane on the right.

Step 5

In the Device Sync page, compare the two configurations by reviewing the highlighted differences.

  • The panel labeled "Last Known Device Configuration" is the device configuration stored on Security Cloud Control.

  • The panel labeled "Found on Device" is the configuration stored in the running configuration on the ASA.

Step 6

Resolve the conflict by selecting one of the following:

  • Accept Device changes: This will overwrite the configuration and any pending changes stored on Security Cloud Control with the device's running configuration.

    Note


    As Security Cloud Control does not support deploying changes to the Cisco IOS devices outside of the command line interface, your only choice for a Cisco IOS device will be to select Accept Without Review when resolving the conflict.

  • Reject Device Changes: This will overwrite the configuration stored on the device with the configuration stored on Security Cloud Control.

Note


All configuration changes, rejected or accepted, are recorded in the change log.


Schedule Polling for Device Changes

If you have Conflict Detection enabled, or if you Enable the option to auto-accept device changes from the Settings page,Security Cloud Control polls the device for the default interval to determine if a change has been made to the device's configuration outside of Security Cloud Control. You can customize how often Security Cloud Control polls for changes per device. These changes can be applied to more than one device.

If there is no selection configured for a device, the interval is automatically configured for "tenant default".


Note


Customizing the interval per device from the Security Devices page overrides the polling interval selected as the Default Conflict Detection Interval from the General Settings page.


After you enable Conflict Detection from the Security Devices page or Enable the option to auto-accept device changes from the Settings page, use the following procedure to schedule how often you want Security Cloud Control to poll your devices:

Procedure


Step 1

In the left pane, click Security Devices.

Step 2

Click the Devices tab to locate your device.

Step 3

Click the appropriate device type tab.

Step 4

Select the device or devices for which you want to enable conflict detection.

Step 5

In the same area as Conflict Detection, click the drop-down menu for Check every and select the desired polling interval:


Schedule a Security Database Update

This section provides information about scheduling a security database update on the device.

Create a Scheduled Security Database Update

Use the following procedure to create a scheduled task to check and update the security databases for an FDM-managed device:

Procedure

Step 1

In the navigation bar, click Security Devices.

Step 2

Click the Devices tab to locate your device.

Step 3

Click the FTD tab.

Step 4

Select a device.

Step 5

In the Actions pane, locate the Security Database Updates section and click theadd + button.

Note


If there is an existing scheduled task for the selected device, click the edit icon to create a new task. Creating a new task will overwrite the existing one.

Step 6

Configure the scheduled task with the following:

  • Frequency . Choose for the update to occur daily, weekly, or monthly.

  • Time. Choose the time of day. Note that the time displayed is UTC.

  • Select Days. Choose which day(s) of the week you want the update to occur.

Step 7

Click Save.


The device's Configuration Status will change to "Updating Databases".

Edit a Scheduled Security Database Update

Use the following procedure to edit an existing scheduled task to check and update the security databases for an FDM-managed device.

Procedure

Step 1

In the left pane, click Security Devices.

Step 2

Click the Devices tab to locate your device.

Step 3

Click the FTD tab.

Step 4

Select a device.

Step 5

In the Actions pane, locate the Security Database Updates section and click the edit icon .

Step 6

Edit the scheduled task with the following:

  • Frequency . Choose for the update to occur daily, weekly, or monthly.

  • Time. Choose the time of day. Note that the time displayed is UTC.

  • Select Days. Choose which day(s) of the week you want the update to occur.

Step 7

Click Save.

Step 8

The device's Configuration Status will change to "Updating Databases".


Update FDM-Managed Device Security Databases

By updating the security databases on an FDM-managed device, you are updating the following: SRUs (intrusion rules), security intelligence (SI), vulnerability databases (VDB), and geolocation databases. If you opt into updating the security databases through the Security Cloud Control UI, note that all of the mentioned databases are updated; you cannot select which databases you want to update.

Please note that security database updates cannot be reverted.


Note


When you update the security databases, some packets may be dropped or pass uninspected. We recommend you schedule your security database updates during a maintenance window.


Update FDM-Managed Device Security Database While Onboarding

When you onboard an FDM-managed device to Security Cloud Control, part of the onboarding process allows you to Enable scheduled recurring updates for databases. This option is checked by default. When enabled, Security Cloud Control immediately checks for and applies any security updates as well as automatically schedules the device to check for additional updates. You are able to modify the date and time of the scheduled task after the device is onboarded.

We recommend enabling the automatic scheduler during the onboarding process to regularly check for and apply security database updates. This way your device will always be up to date. To update the security databases while onboarding your FDM-managed device, see Onboard an FDM-Managed Device with a Registration Key.


Note


If you onboard your device with the registration key method, the device must not be registered with a smart license. We recommend registering an license. As an alternative method, you can onboard your device using the device's username, password, and IP address.


Update FDM-Managed Device Security Database After Onboarding

After an FDM-managed device is onboarded to Security Cloud Control, you can configure a device to check for security database updates by scheduling an update. You can modify this scheduled task at any time by selecting the device the update is scheduled for. See Schedule a Security Database Update for more information.

Workflows

Device licenses

Security Cloud Control cannot update the security databases if there is no license. We recommend that your FDM-managed device has at least an license.

If you are onboarding a device that has no license, this does not inhibit Security Cloud Control from onboarding the device. Instead, the device will experience a Connectivity status of "insufficient licenses". To resolve this issue, you must apply the correct licenses through the FDM-managed device UI.


Note


If you onboard an FDM-managed device and opt in to schedule future security database updates and the device does not have a registered license, Security Cloud Control still creates the scheduled task but does not trigger the task until the appropriate licenses have been applied and the device is successfully synchronized.


Security database updates are pending in FDM

If you update the security databases through the FDM-managed device UI, and you have conflict detection enabled on your device, Security Cloud Control detects the pending update as a conflict.


Note


If you onboard your FDM-managed device and opt to schedule the updates, Security Cloud Control automatically updates the security databases as well as any other pending changes to the stored configuration during the next deploy. does not have to be a configuration deploy


Device has OOB changes, or staged changes, during a security database update

If you schedule a security database update for an FDM-managed device that has out of band (OOB) changes, or staged changes that have not been deployed, Security Cloud Control only checks and updates the security databases. Security Cloud Control does not deploy OOB or staged changes.

Device already has a scheduled task to update the security databases

Each device can only have one scheduled task. If the device already has a scheduled task to update the security databases, creating a new one overwrites it. This applies to tasks that are created in either Security Cloud Control or an FDM-managed device.

No security database updates available

If there are no updates available, Security Cloud Control does not deploy anything to the device.

Security database updates for FDM-managed High Availability (HA) pair

Security database updates are applied only to the primary device of an HA pair.