Manage Device Software Images

Set Up Software Image Management

Manually upgrading your devices to the latest software version can be error prone and time consuming. Cisco Prime Infrastructure simplifies the version management and routine deployment of software updates to your devices by helping you plan, schedule, download, and monitor software image updates. You can also view software image details, view recommended software images, and delete software images. The software image management page provides a consolidated view of the various aspects of image management such as software image management lifecycle widget, software image summary, and job details.

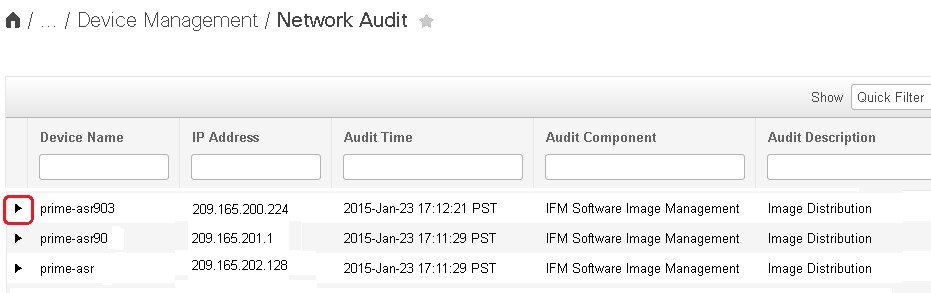
Prime Infrastructure stores all of the software images for the devices in your network. The images are stored according to the image type and version.

Before you can upgrade software images, you must configure your devices with Telnet or SSH credentials. Also SNMP read-write community strings that match the community strings entered when the device was added to Prime Infrastructure must be configured.

SSH or Telnet must be configured for importing the images from a device.


Note


The IOS images downloaded from http://cisco.com/should be validated manually on downloaded machine before being uploaded to Prime server. The downloaded image's integrity needs to be validated after distribution to routers/switches but before they are activated and reloaded. This is applicaple for all Release 3.x version of Prime Infrastructure.


Make Sure Devices Are Configured Correctly

Prime Infrastructure can transfer files to and from devices only if the SNMP read-write community strings configured on your devices match the strings that were specified when the devices were added to Prime Infrastructure.


Note


To improve security, Prime Infrastructure no longer uses some of the SSH CBC (Cipher Block Chaining) ciphers that older Cisco IOS-XE and IOS-XR versions use, as they have been deemed weak. For devices running Cisco IOS-XE, ensure that you upgrade to version 16.5.x or later. And for devices running Cisco IOS-XR, upgrade to version 6.1.2 or later. Otherwise, several Software Image Management operations will fail.


Note


SWIM operations are not supported in the NAT environment and Child Virtual Device Contexts (VDCs) of Cisco Nexus 7000 Series Switches.


Verify the FTP/TFTP/SFTP/SCP Settings on the Prime Infrastructure Server

If you will be using FTP, TFTP, SFTP, or SCP make sure that it is enabled and properly configured.

How to Control Images that are Saved to the Image Repository During Inventory Collection

Because collecting software images can slow the data collection process, by default, Prime Infrastructure does not collect and store device software images in the image repository when it performs inventory collection. Users with Administration privileges can change that setting using the following procedure.

Procedure


Step 1

Choose Administration > Settings > System Settings, then choose Inventory > Software Image Management.

Step 2

To retrieve and store device images in the image repository when Prime Infrastructure performs inventory collection, check the Collect images along with inventory collection check box.

Step 3

Click Save.

Step 4

To view retrieved images, Choose Inventory > Device Management > Software Images and click Link adjacent to Software Image Repository under Useful Links section.

Note


Click Image Dashboard icon in the top-right corner of Software Image page to view the top 10 running software images from Network Devices page.

The Image Dashboard page will not list the last 10 swim jobs if the data clean-up job is running. The number of retain days for user jobs is 7, by default.


Software Image Management Processes and Supported Devices

The following table describes the different processes involved in managing software images and whether the processes are supported in the Unified Wireless LAN Controllers and devices.

Note


Refer the Supported Device List for additional information on Platforms such as Protocols supported during Image Import, Image Distribution via Local File Server, Software Image Management Server and Support for TFTP FallBack, or ISSU and Activation without Distribution.


Table 1. Software Image Management Processes and Supported Devices

Software Image Management Processes

Description

Unified WLCs

3850 Cisco IOS XE 3.2.2

5760 Cisco IOS XE 3.2.2

Image import from device

Ability to import software image from devices that are already managed by Prime Infrastructure. The software image can then be distributed to other devices.

Not supported because the software image cannot be reassembled into a package.

Supported

Note

 
When the device is running in install mode, the running image will be “packages.conf”. Prime Infrastructure does not support importing of image in this format in the install mode.

Supported

Note

 
When the device is running in install mode, the running image will be “packages.conf”. Prime Infrastructure does not support importing of image in this format in the install mode.

Image import from file

Ability to import software image from known location on a file server to Prime Infrastructure. The software image can then be distributed to other devices.

Supported

Supported

Supported

Image import from URL

Ability to import software image from network accessible locations (URI/URL) to Prime Infrastructure . The software image can then be distributed to other devices.

Supported

Supported

Supported

Import Image using Protocol

Ability to import software image from an FTP location to Prime Infrastructure. The software image can then be distributed to other devices.

Supported

Supported

Supported

Image upgrade/distribution

Ability to upgrade software image on the managed devices from. This allows you to upgrade the soPrime Infrastructureftware image for multiple devices based on demand or at a later point in time as scheduled. The feedback and status are displayed during the upgrade and devices can be restarted, if required. In large deployments, you can stagger reboots so that the service at a site is not completely down during the upgrade window.

Supported

Supported

Supported

Image recommendation

Ability to recommend a compatible image for the devices that are managed from Prime Infrastructure and downloaded from Cisco.com.

Not supported because the flash requirement is not available.

Supported

Supported

Image upgrade analysis

Ability to analyze the software images to determine the hardware upgrades required before you can perform the software upgrade.

Not supported because there is no minimum requirement for RAM or ROM. The newly upgraded image replaces the existing image after an upgrade.

Supported

Supported


Note


Prime Infrastructure does not support software image distribution on Cisco Catalyst 4500 devices configured with a redundant supervisor engine.

Prime Infrastructure supports software image distribution on Cisco Catalyst 6000 and Cisco Catalyst 9400 devices with dual supervisors; Prime Infrastructure distributes the software image on both the active and the standby supervisor engine.


Note


Currently, Prime Infrastructure supports only the install to install mode of operation for the eWLC devices. You can manage devices in the bundle mode. However, you cannot perform the SWIM operation in this mode.


Adjust Criteria for Cisco.com Image Recommendations

You can use Cisco.com to get information about recommended images based on criteria you provide. The following procedure shows how you can adjust those recommendations. The following table also lists the default settings.


Note


To use these features, the device must support image recommendations.


Note


Currently, Prime Infrastructure recommends only the latest first link of the image version from Cisco.com.


Procedure


Step 1

Choose Administration > Settings > System Settings, then choose .

Step 2

Adjust the recommendation settings as follows.

Setting

Description

Default

Recommend latest maintenance version of each major release

Only considers images if it is the latest maintenance version of each major release

Disabled

Recommend same image feature

Only considers images with same feature set as running device image

Disabled

Recommend versions higher than the current version

Only considers images that are higher than the running device image

Disabled

Include CCO for recommendation

Retrieves images from Cisco.com and the image repository

Enabled

Step 3

Click Save.


Adjust Image Transfer and Distribution Preferences

Use this procedure to specify the default protocols Prime Infrastructure should use when transferring images from the software image management server to devices. You can also configure Prime Infrastructure to perform, by default, a variety of tasks associated with image transfers and distributions—for example, whether to back up the current image before an upgrade, reboot the device after the upgrade, continue to the next device if a serial upgrade fails, and so forth. Users with Administration privileges can change that setting using the following procedure.

This procedure only sets the defaults. You can override these defaults when you perform the actual distribute operation.

Procedure


Step 1

Choose Administration > Settings > System Settings, then choose Inventory > Sofware Image Management > Protocol.

Step 2

On the Basic tab, specify the tasks that Prime Infrastructure should perform when distributing images:

Setting

Description

Default

Job Preferences

Continue distribution on failure

If distributing images to multiple devices and distribution to a device fails, continues the distribution to other devices

Enabled

TFTP fallback

Inserts the TFTP fallback command into the running image so that it can be reloaded if image distribution fails

Disabled

Backup running image

Disabled

Insert boot command

Inserts the boot command into the running image, after image distribution

Disabled

Smart Flash Delete Before Distribution

Delete the unnecessary files from flash to free up the memory space before distribution

Disabled

Other Preferences

Collect images along with inventory collection

Choose this option if you want the software image to be collected from the device and store in the image repository during inventory collection.

Disabled

Show latest images for the available major releases

Choose this option if you want to view the latest maintenance release.

Disabled

Show images with same feature support

Choose this option if you want to view the available images with the same features supported by the running image.

Disabled

Show available higher image versions

Choose this option if you want to view the available higher image versions for the running image.

Disabled

Remove the option to activate software during distribution jobs

Choose this option to remove the option to activate the software during distribution jobs.

Disabled

Copy operation to be initiated by the EPN Manager server

Choose this option if you want the copy operation to be initiated by the EPN Manager server.

Disabled

Step 3

Specify the default protocol Prime Infrastructure should use when transferring images in the Image Transfer Protocol Order. Arrange the protocols in order of preference. If the first protocol listed fails, Prime Infrastructure will use the next protocol in the list.

Note


When distributing an image to a device, use the most secure protocols supported by the device (for example, SCP instead of TFTP). TFTP tends to time out when transferring very large files or when the server and client are geographically distant from each other. If you choose SCP for the image distribution, ensure that the device is managed in Prime Infrastructure with full user privilege (Privileged EXEC mode); otherwise the distribution will fail due to copy privilege error (SCP: protocol error: Privilege denied).

Step 4

Click Save.


Add a Software Image Management Server to Manage Groups of Devices

To distribute images to a group of devices, add a software image management server and specify the protocol it should use for image distribution. You can add a maximum of three servers. Prime Infrastructure supports only Linux server as an external server.

Procedure


Step 1

Add the server.

  1. Choose Administration > Servers > Software Image Management Servers.

  2. Click Save.

Step 2

Configure the server protocol settings.

  1. Check the check box next to the server name, then click Manage Protocols.

  2. Click Save.

Note


When distributing image using the image management server, the image will be copied to the server and it will be deleted after the job gets completed. This image file will not be deleted for TFTP protocol.

The software image distribution and image import may fail due to authentication issues, if you use special characters in the protocol password.


Change Cisco.com Credentials for Software Image Operations

When Prime Infrastructure connects to Cisco.com to perform software image management operations (for example, to check image recommendations), it uses the credentials stored in the Account Settings page. You can change those settings using the following procedure.

Procedure


Step 1

Choose Administration > Settings > System Settings, then choose General > Account Settings.

Step 2

Click the Cisco.com Credentials tab.

Step 3

Change the settings, then click Save.


Copy Software Images from Devices to the Image Repository (Create a Baseline)

Depending on your system settings, Prime Infrastructure may copy device software images to the image repository during inventory collection (see How to Control Images that are Saved to the Image Repository During Inventory Collection). If you need to perform this operation manually, use the following procedure, which imports software images directly from devices into the image repository.

Before you begin, ensure that images are physically present on the devices (rather than remotely loaded).


Note


If you are importing many images, perform this operation at a time that is least likely to impact production.

The software image import may fail with authentication error, if you use special characters in the protocol password.


Procedure


Step 1

Choose Inventory > Device Management > Software Images.

Step 2

Click the Add/Import icon.

Step 3

In the Import Images dialog box, complete the following:

  1. Choose Device.

  2. Click Device Selection tab.

  3. You can click the Select devices by toggle button to choose devices from Group or Device option.

  4. If you choose Group option, choose the Device groups and select the devices listed under Choose Devices pane. The selected devices are listed under the Selected Devices pane.

  5. In the Schedule area, schedule the job to run immediately, at a later time, or on a regular basis.

Step 4

Click Submit.


How Do I Find Out Which Images Are Used by Network Devices?

To view a list of the images used by network devices, choose Reports > Reports Launch Pad > Device > Detailed Software.

To list the top ten images use by network devices (and how many devices are using those images), choose Inventory > Device Management > Software Images. Click Software Image Repository under Useful Links, then then click the Image Dashboard icon in the top-right corner of the page.

How Do I Know a Device Has the Latest Image?

If your device type supports image recommendations, you can use the following procedure to check if a device has the latest image from Cisco.com. Otherwise, use the Cisco.com product support pages to get this information.

Procedure


Step 1

Choose Inventory > Device Management > Network Devices, then click the device name hyperlink to open the Device Details page.

Step 2

Click the Software Image tab and scroll down to the Recommended Images area. Prime Infrastructure lists all of the images from Cisco.com that are recommended for the device.


How Do I Know Whether I have Permission to Download Software from Cisco.com

Prime Infrastructure displays only the recommended latest initial version of the software images for the device type you specify, and it allows you to download the software images directly from Cisco.com. In order to download a EULA or K9 software image from Cisco.com, you must accept/renew the EULA agreement or K9 Agreement periodically.

Prime Infrastructure does not display deferred software images. For detailed information, see Cisco Prime Infrastructure 3.2 Supported Devices list.

If you encounter any error message while importing software image from Cisco.com, see ASD Exceptions and Error Conditions.

Note


You cannot fetch the suggested and other image versions from Cisco.com based on the ASD implementation.


View the Images That Are Saved in the Image Repository

Use this procedure to list all the software images saved in the image repository. The images are organized by image type and stored in the corresponding software image group folder.

Procedure


Step 1

Choose Inventory > Device Management > Software Images. Prime Infrastructure lists the images that are saved in the image repository within the Software Image Summary panel.

Step 2

Go to Software Image repository and click a software image hyperlink to open the Image Information page that lists the file and image name, family, version, file size, and so forth.

From here you can:

Note


Version information is captured from the image name. For example, if the image name is asr9k-mgbl-px-6.8.2 (EPNM supported format), then the version is shown as 6.8.2. For ASR9k 64-bit images with format asr9k-services-x64-1.0.0.0-r761, version is displayed as the build version, that is, 1.0.0.0.


Find Out Which Devices Are Using an Image

Procedure


Step 1

Choose Inventory > Device Management > Software Images.

Step 2

In the Software Image Summary panel, locate the image that you are interested in by expanding the image categories in the navigation area or entering partial text in one of the Quick Filter fields. For example, entering 3.1 in the Version field would list Versions 3.12.02S, 3.13.01S, and so forth.


View Recommended Images on Cisco.com

If your devices support Cisco.com image recommendations, you can use this procedure to check which images your devices should be using.

Procedure


Step 1

Choose Inventory > Device Management > Software Images.

Step 2

Click Software Image Repository under Useful Links.

Step 3

Choose one of the following image sources:

  • Recommend Image from Cisco.com to select an image available on Cisco.com. You need to login with your Cisco credentials. Provide your CEC username, password, and click Login . Specify options, click Start Recommendation (Currently, Prime Infrastructure recommends only the latest first link of the image version from Cisco.com).

  • Select Image from Local Repository to select an image stored locally. Then, under Local Repository:

Step 4

Select the image to distribute, then click Apply .

Step 5

Choose the image name in the Distribute Image Name field to change your selection and pick a new image, then click Save .


Download Images from Cisco.com

Depending on your device type, Prime Infrastructure can display only the latest first link of image version from Cisco.com (see Adjust Criteria for Cisco.com Image Recommendations).

Prime Infrastructure will use the Cisco.com credentials that are set by the administrator. If default credentials are not set, you must enter valid credentials. (See Change Cisco.com Credentials for Software Image Operations).


Note


For better performance of Automated Software Distribution, the number of images, downloadable from Cisco.com is restricted to 15 count per second.


Procedure


Step 1

Choose Inventory > Device Management > Software Images.

Step 2

Click the Add/Import icon.

Step 3

In the Import Images dialog:

  1. Click Cisco.com.

  2. If the credentials are not auto-populated, enter a valid Cisco.com user name and password.

  3. Click Login.

Step 4

Click Device Selection tab.

Step 5

You can click the Select devices by toggle button to choose devices from Group or Device option. You can select maximum 20 devices.

Step 6

If you choose Group option, select the Device groups and select the devices listed under Choose Devices pane. The selected devices are listed under the Selected Devices pane.

Step 7

Click Image Selection tab.

Step 8

Select images and click the Schedule tab.

Step 9

Click Submit.

Step 10

Verify that the images are listed on the Software Images page. (Click the Software Image Repository Link in the Useful Links section.)


Add (Import) Software Images to the Repository

Prime Infrastructure displays the recommended latest software images for the device type that you specify.

The following topics explain the different ways that you can add software images to the image repository. For an example of how to troubleshoot a failed import, see Manage Jobs Using the Jobs Dashboard.


Note


Sometimes Prime Infrastructure does not show the correct memory utilization using CISCO-MEMORY-POOL-MIB for a cat6k device which runs with s72033-advipservicesk9-vz.122-33.SXxx.bin image.


Add a Software Image That Is Running on a Managed Device

This method retrieves a software image from a managed device and saves it in the image repository.


Note


When distributing an image to a device, use the most secure protocols supported by the device (for example, SCP instead of TFTP). TFTP tends to time out when transferring very large files or when the server and client are geographically distant from each other. If you choose SCP for the image distribution, ensure that the device is managed in Prime Infrastructure with full user privilege (Privileged EXEC mode); otherwise the distribution will fail due to copy privilege error (SCP: protocol error: Privilege denied).

The software image distribution and image import may fail with authentication error, if you use special characters in the protocol password.

Note that TFTP is supported only when copying images from the device to the server and not the other way around.


Limitations:

  • For Cisco IOS-XR devices, direct import of images from the device is not supported by Prime Infrastructure; SMU and PIE imports are also not supported on these devices.

  • For Cisco IOS-XE devices, if the device is loaded with the 'packages.conf' file, then images cannot be imported directly from that device.

Procedure


Step 1

Choose Inventory > Device Management > Software Images.

Step 2

Click the Add/Import icon.

Step 3

In the Import Images dialog:

For Cisco Catalyst 3850 Ethernet Stackable Switch and Cisco 5760 Series Wireless Controller there are two modes for importing the software images:

  • Install mode —When the device is running in install mode, the running image will be “packages.conf”. Prime Infrastructure does not support importing of any image in install mode.

  • Bundle mode —When the device is running in Bundle mode, the running image will be in “.bin” format. Prime Infrastructure supports importing of any image in bundle mode.

You can check the running image in one of the following ways:

  • Choose Inventory > Network Devices, click the device name and click Image tab in the device page.

  • Use Show version command in device CLI.

  1. Choose Device.

  2. Click Device Selection tab.

  3. You can click the Select devices by toggle button to choose devices from Group or Device option.

  4. If you choose Group option, choose the Device groups and select the devices listed under Choose Devices pane. The selected devices are listed under the Selected Devices pane.

  5. In the Schedule area, schedule the job to run immediately, at a later time, or on a regular basis.

  6. Click Submit.

Step 4

To view the status of the job, click the job link in the pop-up message or choose Administration > Job Dashboard .

Step 5

Verify that the image is listed on the Software Images page (Inventory > Device Management > Software Images).


Add a Software Image from an IPv4 or IPv6 Server (URL)

You can import software image from network-accessible IPv4 or IPv6 servers or FTP/HTTP servers. Prime Infrastructure supports to import Non-Cisco standard images (Engineering images which are not posted on Cisco.com). Hence, Prime Infrastructure allows you to import any type of file format.

Prime Infrastructure supports to import Non-Cisco standard image.

Procedure


Step 1

Choose Inventory > Device Management > Software Images.

Step 2

Click the Add/Import icon.

Step 3

In the Import Images dialog:

  1. Click URL .

  2. In the URL To Collect Image field, enter a URL in the following format (you can also use an HTTP URL where user credentials are not required):

    http://username:password@server-ip/filename
  3. In the Schedule area, schedule the job to run immediately, at a later time, or on a regular basis.

  4. Click Submit .

Step 4

To view the status of the job, click the job link in the pop-up message or choose Administration > Job Dashboard .

Step 5

Verify that the image is listed on the Software Images page (Inventory > Device Management > Software Images).


Add a Software Image for an FTP Protocol Server (Protocol)

Procedure


Step 1

Choose Inventory > Device Management > Software Images.

Step 2

Click the Add/Import icon.

Note

 
The software image import may fail with authentication error, if you use special characters in the protocol password.

Step 3

In the Import Images dialog:

  1. Click Protocol .

  2. Enter FTP in the Protocol field, then enter the FTP user name, password, server name or IP address, and file name. The following is a file name example:

    /ftpfolder/asr901-universalk9-mz.154-3.S4.bin

  3. In the Schedule area, schedule the job to run immediately, at a later time, or on a regular basis.

  4. Click Submit .

Step 4

To view the status of the job, click the job link in the pop-up message or choose Administration > Job Dashboard .

Step 5

Verify that the image is listed on the Software Images page (Inventory > Device Management > Software Images).


Add a Software Image from a Client Machine File System

Before you begin

When you import the software image file, the browser session is blocked temporarily. If the upload operation exceeds the idle timeout limit of the browser session, then you will be logged out of Prime Infrastructure and the file import operation will be aborted. So it is recommended that you increase the idle timeout limit before you begin with this import operation. To increase the idle timeout, see Configure the Global Timeout for Idle Users.

Procedure


Step 1

Choose Inventory > Device Management > Software Images.

Step 2

Click the Add/Import icon.

Step 3

In the Import Images dialog:

  1. Click File .

  2. Click the Browse button and navigate to the software image file.

  3. In the Schedule area, schedule the job to run immediately, later, or on a regular basis.

  4. Click Submit .

    Note


    You must use the URL or Protocol options to import files of larger size (say, greater than 200 MB), as importing through the File option is not recommended.

Step 4

To view the status of the job, click the job link in the pop-up message or choose Administration > Job Dashboard .

Step 5

Verify that the image is listed on the Software Images page (Inventory > Device Management > Software Images).

Note


Submit button will be enabled only after you select Now or Date for each Activation job.


Import Software Images to the Virtual Image Repository

You can use the Prime Infrastructure Virtual Image Repository (VIR) to automatically retrieve and store device images from specified URLs or files. You can schedule these downloads to occur regularly.

Currently, the VIR supports FTP or HTTP downloads only.

To import software images to the VIR:

Procedure


Step 1

Choose Inventory > Device Management > Virtual Image Repository. The page lists the number of images currently retained in the repository.

Step 2

Click Import.

Step 3

Specify the Source from which to import the software image. You can specify one of the following sources:

  • URL—Specify the FTP or HTTP URL from which to import the software image. You can use an HTTP URL where user credentials are not required.

  • File—A local file on the client machine.

Step 4

Click Collection Options and then enter the required information.

Step 5

Click Schedule and specify the schedule on which to import image file. You can run the collection job immediately or schedule it to run at a later time. You can also schedule the job to recur automatically

Step 6

Click Submit.

Step 7

Choose Administration > Dashboards > Job Dashboard > User Jobs > Software Image Import to view the status about the image collection job. The Duration field is updated after the job completes.


Change the Device Requirements for Upgrading a Software Image

Use this procedure to change the RAM, flash, and boot ROM requirements that a device must meet for a software image to be distributed to the device. These values are checked when you perform an upgrade analysis (see Verify That Devices Meet Image Requirements (Upgrade Analysis)).

Procedure


Step 1

Choose Inventory > Device Management > Software Images.

Step 2

In the Software Image Summary panel, locate and select the software image by clicking its associated hyperlink.

Step 3

Click the software image name hyperlink to open its image information.

Step 4

Adjust the device requirements:

  • Minimum RAM (from 1 – 999999999999999)

  • Minimum FLASH (from 1 – 999999999999999)

  • Minimum Boot ROM Version

Step 5

Click Save .

Step 6

Click Restore Defaults, if you want to retain the previous requirements.


Verify That Devices Meet Image Requirements (Upgrade Analysis)

An upgrade analysis verifies that the device , the image is compatible with the device family, and the software version is compatible with the image version running on the device. After the analysis, Prime Infrastructure displays a report that provides the results by device. The report data is gathered from:

  • The software image repository, which contains information about minimum RAM, minimum Flash, and so on, in the image header.
  • The Prime Infrastructure inventory, which contains information about the active images on the device, as well as Flash memory, modules, and processor details.

Note


Upgrade analysis is supported on all Cisco IOS-XR devices (such as Cisco NCS 1000, Cisco NCS 4000, Cisco NCS 5000, Cisco NCS 5500, and Cisco NCS 6000), except on Cisco ASR 9000 devices.


If you want to adjust the device requirements for an image, see Change the Device Requirements for Upgrading a Software Image.

Procedure


Step 1

Choose Inventory > Device Management > Software Images.

Step 2

Click Software Image Upgrade Analysis under Useful Links. (Do not select an image from the Software Images page.)

Step 3

In the Upgrade Analysis dialog:

  1. Choose the source for the software images (the image repository or Cisco.com).

  2. Click the Device selection page to select the devices you want to analyze.

  3. You can click the Select devices by toggle button to choose devices from Group or Device option.

  4. If you choose Group option, select the Device groups and choose the devices listed under Choose Devices section. The selected devices are listed under the Selected Devices section.

  5. Select the software images you want to analyze the devices against.

  6. Click Run Report.

The report groups devices by their IP address.


Distribute a New Software Image to Devices

You can distribute a software image to a device or set of similar devices in a single deployment. Prime Infrastructure verifies that the device and software image are compatible.

Based on a device’s capabilities, Prime Infrastructure can use different transport protocols (SCP, TFTP, FTP, SFTP) to distribute images to devices. For better reliability and security, we recommend you to use secure protocols only (SFTP, SCP) for distributing software images. If you choose SCP protocol for the image distribution, ensure that the device is managed in Prime Infrastructure with full user privilege (Privileged EXEC mode), otherwise the distribution will fail due to copy privilege error (SCP: protocol error: Privilege denied).

We do not recommend using TFTP or FTP. If you choose TFTP protocol for the image distribution and if the device and the server are in different subnet, the image should be copied within the specified session time limit (one hour) which is maintained by the application otherwise the distribution will fail due to timeout error.

For Software Image Distribution to work efficiently, the device and server from which the distribution is performed must be in the same geographical location or site. If you want to distribute software images into different geographical location of Prime Infrastructure and device, create location group and map this location into Software Image Management server. This external server will transfer images from Prime Infrastructure to Software Image Management server and then start distributing to mapped device location. The Software Distribution job would return error if the distribution takes more time due to network slowness or low speed.


Note


To ensure that there are no SNMP views blocking access to the CISCO-FLASH-MIB, remove the following command from the configuration for all routers and switches (if present) on which you want to download a software image:

The software image distribution and image import may fail with authentication error, if you use special characters in the protocol password.


snmp-server view ViewName ciscoFlashMIB excluded

Procedure


Step 1

Choose Inventory > Device Management > Software Images

Step 2

Click Distribute in the Software Image Management Lifecyle widget.

Step 3

In the Image Selection window, choose the software images that you want to distribute.

Step 4

Click the Device Selection tab, to choose the devices that you want to distribute the image.

  1. You can click the Select devices by toggle button to choose devices from Group or Device option.

  2. If you choose Group option, select the Device group and select the devices listed under Choose Devices pane. The selected devices are listed under the Selected Devices pane.

By default, the devices for which the selected image is applicable are shown.

Step 5

Click the Image Details Verification tab and click the image row to do the following:

  • Choose the image name in the Distribute Image Name field to change your selection and pick a new image, then click Save.

  • Choose the value displayed in the Distribute Location field, select a new location in which to store the software image, then click Save.

  • Choose the value displayed in the Software Image Management Server field, then click Save. You can choose either a Local file server or one of the servers created under Administration > Servers > Software Image Management Servers.

The Status and Status Message fields display the validity of the selections you made. For example, if the status is green, there is adequate space available to store the image on the specified location on the device.

Step 6

Click the Image Deployment tab and set the image deployment options as required:

  • Backup Current Image—Before distributing new images, import the running images from the device to software images repository page.

  • Insert boot command—To set the boot variable in the device boot path list.

  • Activate—To enable the Activate option, you must check the Insert Boot Command check box.

    • Activate OFF—New image will be distributed and boot variable is set in device boot path list. Device will not be rebooted in this mode and will continue to run with the running image.

    • Activate Sequential—Once the image distribution is completed for all the selected devices, the devices will reboot sequentially.

    • Activate Parallel— Once the image distribution is completed for all the selected devices, the devices will reboot simultaneously.

  • Smart Flash Delete Before Distribution—Clears the flash memory before image distribution if there is no sufficient space in the device.

  • Continue on Failure—If the image distribution fails for one image, the next device in queue will be picked up for activation.

  • TFTP Fallback—It prompts the device to reload the current running image from the TFTP server location during image distribution failure.

Step 7

Prime infrastructure allows you to use a maximum of one Local file server and three Software Image Management Servers for software image distribution. Each server can distribute the image to five devices at one instance. When the image distribution is completed for one device, the next subsequent device will be taken up for the image distribution.Click the Schedule Distribution tab and specify the schedule options, then click Submit.

The details about the image distribution job is displayed in the Software Image Management dashboard. You can also view the image distribution job details from Administration > Dashboards > Job Dashboard > User Jobs > Software Image Distribution. The Duration field is updated after the job completes.

Note


Submit button will be enabled only after you select Now or Date for each Activation jobs


Activate a New Software Image on Devices

When a new image is activated on a device, it becomes the running image on the disk. Deactivated images are not removed when a new image is activated; you must manually delete the image from the device.

If you want to distribute and activate an image in the same job, see Distribute a New Software Image to Devices.

To activate an image without distributing a new image to a device — for example, when the device has the image you want to activate—use the following procedure. The activation uses the distribution operation but does not distribute a new image.

Note


EPNM supports up to 20 active Activate operations in parallel. These Activate operations will not include the Distribute operation.


Procedure


Step 1

Choose Inventory > Device Management > Software Images.

Step 2

Click the Activate icon in the Software Image Management Lifecycle widget.

Step 3

In the Activation Source tab, choose Activate from Library or Activate from Completed Distribution Jobs.

Step 4

If you choose Activate from Completed Distribution Jobs, go to Job selection tab and select the distributed success or partial success jobs. Then, go to Activate preview tab and select the Device list displayed with image name and flash details. Click the Activate Job Options tab.

Step 5

In the Activate Job Options window, choose the required settings and go to Step 10:

  • Activate Options: Off, Sequential or Parallel

  • Continue on failure: Continue the activation even if it fails on a device.

  • Commit: Commit the image on the device post distribution.

Step 6

If you choose Activate from Library in the Activation Source tab, then click the Image Selection tab.

Step 7

In the Image Selection tab, choose the software images that you want to distribute.

Step 8

Click the Device Selection tab, to choose the devices that you want to activate the image.

  1. You can click the Select devices by toggle button to choose devices from Group or Device option.

  2. If you choose Group option, select the Device groups and choose the devices listed under Choose Devices pane. The selected devices are listed under the Selected Devices pane.

Step 9

Go to Image Details Verification tab, change the Activate Location field and validate the verification status message.

Step 10

Click the Activate Image tab, and verify whether the selected devices and software images are mapped correctly for activation. While using standby images for activation, click the Verify Image Selection tab.

Note

 
When you are activating a standby/alternate image, if the version of the standby/alternate image is lower than that of the image running on the device, the Verification Status Message column displays in red that you are downgrading to a lower version.

Step 11

Click the Activate Job Options tab, and choose the required Activate Job options.

If you choose the ISSU option from the Activate drop-down list, the software image in the device gets upgraded without the need for rebooting the device.

For ISO XR devices, if you check the ISSU checkbox, stateful switch over will be configured on the devices.

Step 12

Go to Schedule Activation tab, select Now or Date and Click Submit to activate the software image in the selected devices.

Note

 
Submit button will be enabled only after you select Now or Date for each Activation jobs.

Deploy Software Images to Wireless/DC Devices

You can view the Device Upgrade Mode option only during image upgrade for Cisco 5760 Series Wireless Controller and Cisco Catalyst 3850 Ethernet Stackable Switch. The following table describes the possible device upgrade options and the corresponding image format for Cisco 5760 Series Wireless Controller and Cisco Catalyst 3850 Ethernet Stackable Switch.

Table 2. Upgrade/ Downgrade Mode Options

Device Upgrade Mode

Device Image Format Before Distribution

Device Image Format After Distribution

Change Install mode to Bundle mode

packages.conf

.bin

Change Install mode to Currently Existing mode

packages.conf

packages.conf

Change Bundle mode to Currently Existing mode

.bin

.bin

Change Bundle mode to Install mode

.bin

packages.conf

If the image distribution status is “Success”, you can check the new image version using any of the following options:

  • ChooseInventory > Network Devices.
    • View the Software Version column in the Network Devices page.
    • Click the device name and click the Image tab.
  • Use the show versioncommand in the device CLI.

Supported Image Format for Stack Devices

Prime Infrastructure supports only .tar images for upgrade and downgrade for stacked devices. Stack device do not support.bin format. The list of supported stack devices are:

  • Stack of CBS3100 switch modules
  • Cisco Catalyst Switch Module 3110X for IBM Blade Center
  • Cisco Catalyst Blade Switch 3120X for HP
  • Cisco Catalyst Blade Switch 3130X for Dell M1000E
  • Cisco Catalyst 2975 Switch
  • Cisco 3750 Stackable Switches
  • Cisco Catalyst 29xx Stack-able Ethernet Switch
  • Cisco ME 3600X-24FS-M Switch
  • Cisco ME 3600X-24TS-M Switch
  • Cisco ME 3800X-24FS-M Switch Router

Note


Cisco Catalyst 3650 and 3850 switches do not have.tar images on Cisco.com. For these switches, Prime Infrastructure supports .bin format.

Commit Cisco IOS XR Images Across Device Reloads


Note


For Cisco IOS XR devices, we recommend that you do not commit the package change until the device runs with its configuration for a period of time, until you are sure the change is appropriate.

When you commit a Cisco IOS XR package to a device, it persists the package configuration across device reloads. The commit operation also creates a rollback point on the device which can be used for roll back operations.

If you want to distribute, activate, and commit an image in the same job, use the procedure described in Distribute a New Software Image to Devices.

To commit an activated image, use the following procedure.


Note


If you are only working on a single device, perform the commit operation from the Device Details page (click the Image tab, choose the image, and click Commit ).

Procedure


Step 1

Choose Inventory > Device Management > Software Images.

Step 2

Click the Commit icon in the Software Image Management Lifecycle widget.

Step 3

Select the devices with the image you want to commit and click Submit. (Images can only be committed if they have been activated.)

Step 4

You can click the Select devices by toggle button to choose devices from Group or Device options.

Step 5

If you choose Group option, select the Device groups and choose the devices listed under Choose Devices pane. The selected images are listed under Selected Devices pane.

Note

 
(Images can only be committed if they have been activated.)

Step 6

Select the software image you want to activate, then click Submit.

Step 7

In the Schedule Distribution area, schedule the commit job to run immediately, at a later time, or on a regular basis.

Step 8

Click Submit.

Step 9

Choose Administration > Job Dashboard to view details about the image activation job.


Check the Network Audit for Software Image Operations

To get historical information about device software image changes, check the Network Audit.

Procedure


Step 1

Choose Inventory > Device Management > Network Audit. To filter the results to show only image management operations, enter software image in the Audit Component field.

Step 2

Expand an event drawer to get details about a device change. For example, if you expand the drawer highlighted in the above figure, you can see that the image listed in the job was successfully distributed to the device.


Device/Module ID
Distribution Option : ActivatePatches
Distribution Option : BackUpCurrentImageFetch
Distribution Option : CfgXferProtocolOrder
Distribution Option : Commit
Distribution Option : DeviceUpgradeMode
Distribution Option : HaltUponError
Distribution Option : ISSUUpgrade
Distribution Option : ImgXferProtocolOrder
Distribution Option : InsertBootCommand
Distribution Option : JobDirectory
Distribution Option : RebootImmediately
Distribution Option : RebootMode
Distribution Option : SCPDirectory
Distribution Option : SkipDistribution
Distribution Option : TftpDirectory
Distribution Option : TftpFallback
Distribution Option : UpgradeMode
Distribution Option : UseSSH
Operation
Running Image File Name

544544
Yes
No
TELNET, SSH
No
currentlyExists
No
No
SCP,SFTP,FTP,TFTP
No
/opt/CSCOlumos/conf/ifm/swim/jobs
No
Sequential
/localdisk/sftp
No
/localdisk/sftp
No
Sequential
Yes
Starting distribution of image to device
asr903rsp1-universalk9_npe.03.13.00.S.154-3.S-ext.bin

ASD Exceptions and Error Conditions

Cisco Prime Infrastructure uses the Cisco Automated Software Distribution (ASD) service to provide software information and download URLs to assist you in upgrading your device/application to the latest version.

The table describes the ASD exceptions and error conditions returned by ASD API in Prime Infrastructure while importing the software image from cisco.com.

Table 3. ASD Exceptions and Error Conditions

Error Code

Error Description

PID_INVALID

PID provided in the request is invalid. Please invoke the service with the valid PID.

IMG_NM_INVALID

Image_name provided is invalid. Please provide the valid image_name.

SWTID_INVALID

Software_type_id provided is invalid. Please provide a valid software_type_id.

INVALID_INPUT

Invalid input or No data found for the input provided.

INVALID_MTRANSID

Invalid metadata_trans_id.

INVALID_DWLDSID

Invalid download_session_id.

INVALID_DRETRYID

Invalid download_retry_id.

IMAGE_GUID_INVALID

The image_guid provided in the request is invalid. Please provide a valid image_guid.

PID_MISSING

PID is missing in the request. Please provide a valid PIDin the request.

CUR_REL_MISSING

Current_release is missing in the request. Please provide a valid current_release in the request.

OUT_REL_MISSING

Output_release is missing in the request. Please provide a valid output_release in the request.

IMG_NM_MISSING

Image_names is missing in the request. Please provide at least one valid image_names.

MISSING_DW_RETRY_ID

Download_retry_id is missing in the request. Please provide a valid download_retry_id in the request.

MTRANSID_MISSING

Metadata_trans_id is missing in the request. Please provide a valid metadata_trans_id in the request.

IMAGE_LIMIT_EXCEEDED

The number of image names entered in the request has exceeded the limit.

DRETRYID_EXPIRED

You were previously granted a download_retry_id that has expired

DWLDSID_EXPIRED

You were previously granted a download_session_id that has expired. \nPlease initiate the download service without the download_session_id.

MTRANSID_EXPIRED

Metadata_trans_id had been previously granted that has expired due to time limit on its validity. Please invoke the metadata service and initiate the download.

NO_DATA_FOUND

No Data Found.

IMAGE_GUID_MISSING

Image_guid is missing in the request. Please provide a valid image_guid in the request.

TIMEOUT

10000

CART_EMPTY

There are no items in the cart.

DWLD_WARN

You are receiving this warning message because our records indicates that you may not be authorized to download for the following product(s)

DWLD_WARN1

If you feel this message is in error, please: Email technical support <mailto:ent-dl@cisco.com> for 24x7 assistance. To expedite your request, please include the following information: User ID (Cisco.com ID used to download software) \Contact Name \Company Name \Contract Number \Product ID \Desired Software Release or File Name Please include the above message in your email. \Contact your Cisco representative, Partner or Reseller to ensure product(s) listed above are covered on a service contract that is associated to your Cisco.com profile. The Partner Locator link may assist in locating your nearest partner. You can add the service contracts for these products to your profile using the Cisco Profile Manager, or have your service administrator do this for you.

DWLD_WARN2

Please follow one of the options below to ensure that you are fully covered for service in the future and that your Cisco.com profile is accurate and up-to-date: Contact your Cisco representative, partner or reseller to ensure the products listed above are covered on a service contract that is associated with your Cisco.com profile. The Partner Locator link may assist in locating the nearest partner. You can add the service contracts for these products to your profile using the Cisco Profile Manager, or have your service access administrator do this for you. Your prompt attention to take action per this notice is appreciated in order to avoid unnecessary interruptions or delays in the process of downloading software.

K9_FORM_AR

K9 form have not been accepted or rejected to continue download.

EULA_FORM_AR

Eula form have not been accepted or rejected to continue download.

K9_FORM_ACC

K9 form have not been accepted to continue download.

EULA_FORM_ACC

EULA form have not been accepted to continue download.

K9_EULA_FORM_AR

Both Eula and k9 form have not been accepted or rejected to continue download.

SER_UNEXPECT_FAIL

Service has encountered an unexpected failure. Please contact the support with the data requested.

Upgrade Controller Software using Rolling AP Upgrade

You can upgrade APs and Controller software versions from Prime Infrastructure using Rolling AP Upgrade feature. You can add APs to an upgrade group and prevent all Access Points from rebooting simultanously. AP Upgrade groups will reboot sequentially in the order of your preference.

To enable Rolling AP Upgrade, follow the below procedure:

Before you begin

  1. N+1 controller should be upgraded to new version.

  2. Primary controller should be configured to boot from primary image.

  3. Prime Infrastructure should be added as a trap receiver and AP register trap control should be enabled on both controllers.

  4. N+1 controller should have the following configurations same as the primary controller:

    • WLANs

    • AP Groups

    • Mobility Groups

    • RF Groups

    • RF Profiles

Procedure


Step 1

Click Configure and then click Network Devices under Network.

Step 2

Select the APs that you want to add to a group by clicking the corresponding checkboxes.

Step 3

Click Groups and Sites and then click Add to Group.

Step 4

Select the group that you want to add you APs to and then click Add.

The recommendation is to not have more than 10 groups per controller and 1000 APs per group.
 Now that you have added APs to a group, you need to intiailize the upgrade process.

Step 5

Click Configuration and then click Rolling AP Upgrade under Wireless Technologies.

Step 6

Select the Primary and the N+1 controllers.

Note

 
The controllers can either be standalone or redundancy paired controllers.

Step 7

If you want to move your APs back to the primary controller, check the corresponding checkbox. Otherwise, the APs, after reboot will get associated with the N+1 controller.

Step 8

To set the order in which the AP groups reboot, select an AP group and move it Up or Down the list.

Step 9

Select the transfer Protocol and enter the necessary details.

Step 10

To view the status of the job, click Administration and then click Job Dashboard under Dashboards.