Table Of Contents
Deleting an Existing Interface Profile
Interface Profiles
The CGM software allows you to create and apply profiles to interfaces. Profiles allow you to apply a set of existing parameters to a number of similar type objects, eliminating the need to enter the same data numerous times. Once you have created a profile, you can apply that same profile to many interfaces, as applicable.
This chapter contains the following information:
•
Creating an Interface Profile
•
Applying an Interface Profile
Creating an Interface Profile
To open any type of interface profile window, proceed as follows:
Step 1
Right-click on a selected chassis object, then choose CGM Management>Physical>Interface, then go to the specific type of profile you wish to create, either: POS, HSRP (located under the IP menu), or ATM. Now go to Profile or Configuration Profile to select. One of the following windows appears.
Figure 6-1 POS Profile Window—POS Config Tab
![]()
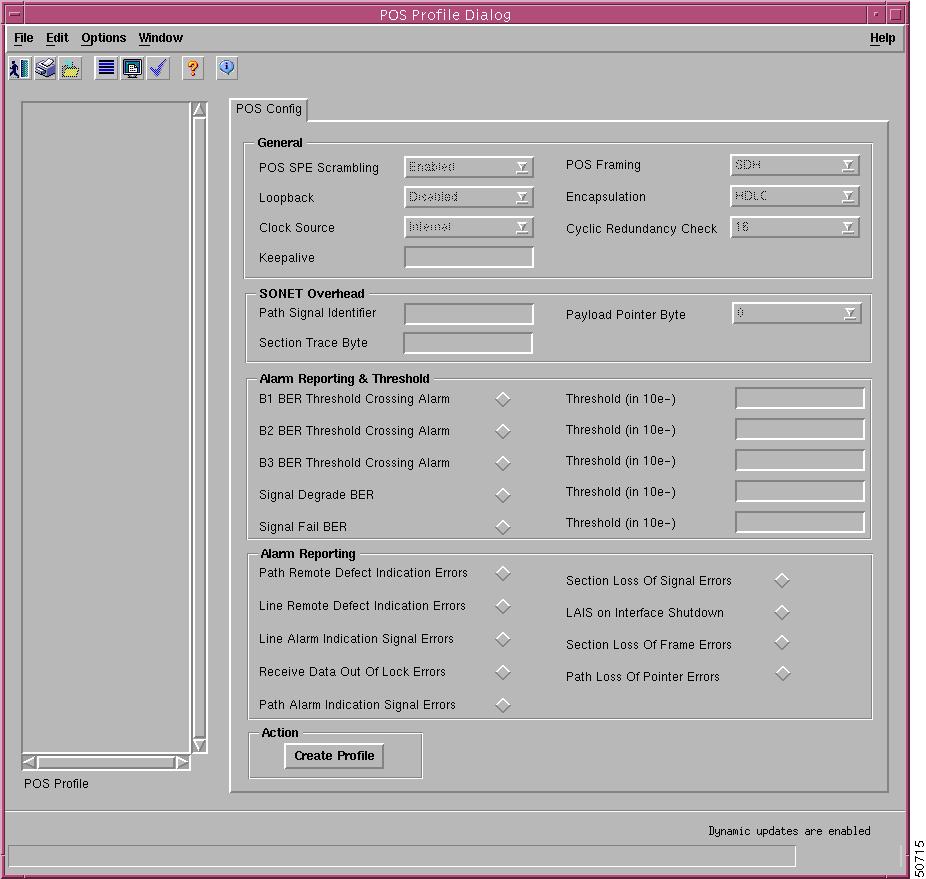
For details on the configuration fields within this window, refer to the "POS/APS Interface Configuration" section on page 7-8.
Figure 6-2 HSRP IP Profile Window
![]()
For details on the configuration fields within this window, refer to the "IP Configuration" section on page 7-4.
Figure 6-3 ATM Interface Configuration Profile Window—Configuration (1) Tab
![]()
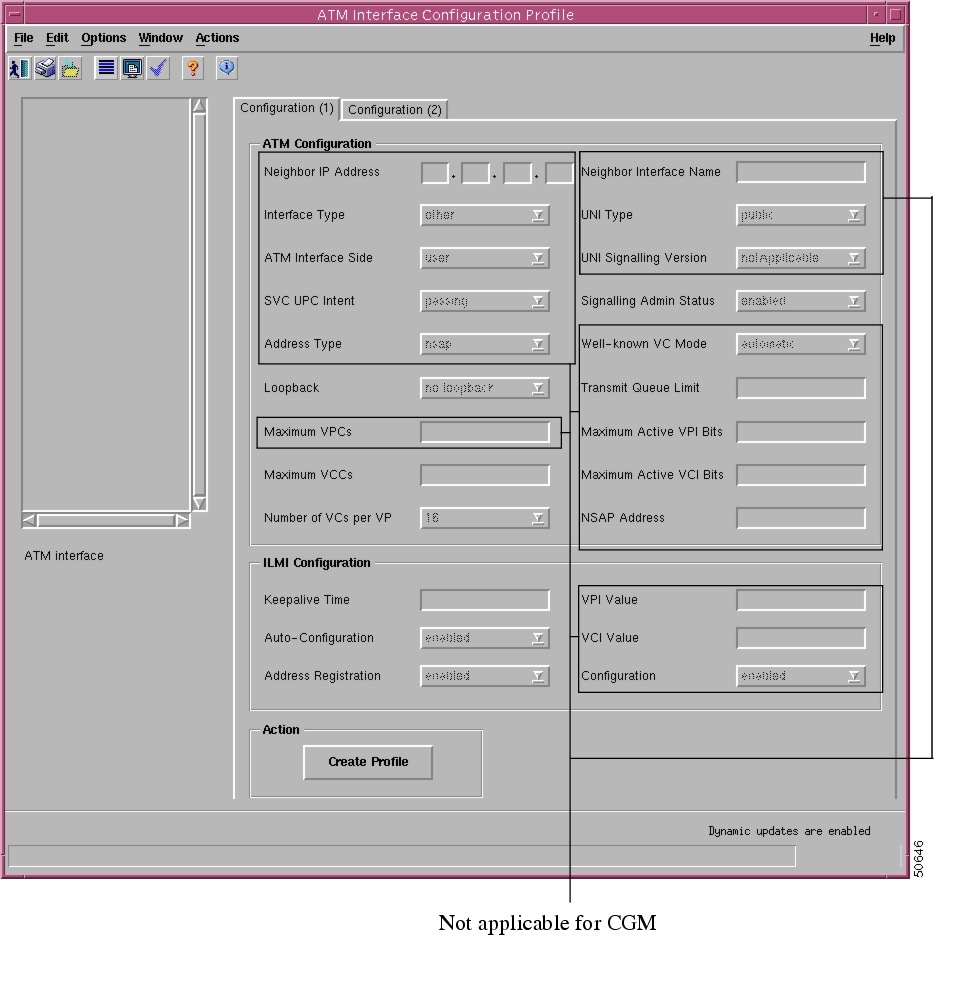
For details on the configuration fields within this window, refer to the "ATM Interface Configuration" section.
Step 2
Create a new profile in one of two ways, as follows:
a.
To create a profile based on an existing profile, click the profile you want to model from the profile list box at left. Now follow the steps for creating a new profile.
b.
To create a new profile, proceed as follows:
–
Click Create Profile.
–
Type in the new profile name, then click Ok.
![]()
Tips
When you choose a profile name, it is highly recommended to use a naming convention that describes the profile type. For example, an ATM profile might be called ATM1, a POS profile might be called POS2, and an HSRP profile could be HSRP1.
–
Fill in the required fields (for detailed descriptions on the fields within these tabs, refer to "Interface Configuration.")
–
Click the Save icon to save your changes.
![]()
Note
Choose the Copy and Copy Page Configuration options in the Edit menu to cut and paste between different profiles. This is useful when you wish to copy profile information from one to the next.
Applying an Interface Profile
You can apply an interface profile to any appropriate interface.
Step 1
Right-click on a chassis object, then choose CGM Management>Physical>Interface>POS or IP or ATM>Configuration.
Step 2
Choose the interface you want to apply the profile to from the list box at left. For POS and IP profiles, you can select multiple interfaces by holding down Shift and selecting multiple profiles, then you can apply the same profile to them.
Step 3
From the Edit menu, choose the Apply Profile option.
Step 4
Choose the relevant profile from the list of profiles. The configuration information stored in the profile is copied to the selected interface.
Step 5
Save the changes.
Deleting an Existing Interface Profile
To delete an existing Interface profile, follow these steps:
Step 1
Right-click on a chassis object, then choose CGM Management>Physical>Interface>POS or IP or ATM>Configuration.
Step 2
Select the profile you wish to delete from the list of existing profiles displayed in the Interface list at the left-hand-side of the window.
Step 3
Select the Delete Profile option from the Edit menu. Select the profile you wish to delete from the list displayed. A Deletion Prompt window appears for you to confirm that you wish to delete the selected profile.
Step 4
Click Yes to delete the selected profile or click No to close the window without deleting the profile.
When a profile is deleted it disappears from the list of existing profiles displayed in the Interface list at the left-hand-side of the window.