Configurations

About Configurations

Cisco DNA Center platform provides you with Configurations to configure a customized network experience using the following options:

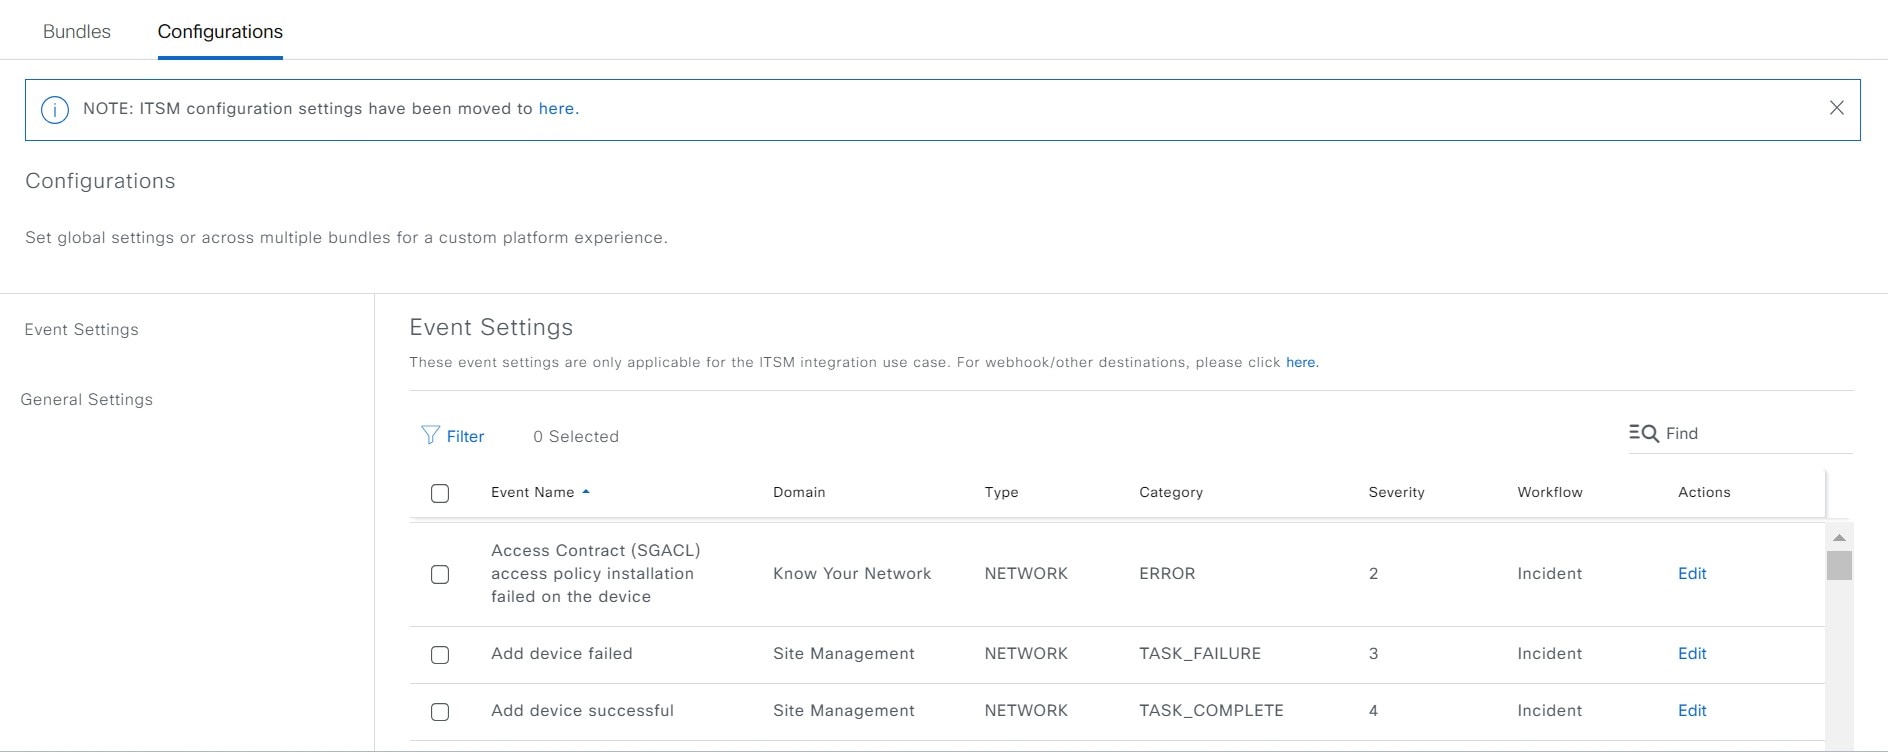
  • Event Settings: Cisco DNA Center platform supports specific Cisco DNA Assurance events (or incidents) that may occur within your network. This means that Cisco DNA Center platform can recognize these events and permits you to configure settings that customize the type, category, and severity under which Cisco DNA Center reports them. Configuring this information in the GUI also permits you to customize the information that Cisco DNA Center sends to an external system, such as ServiceNow (or perhaps to one or more REST endpoints that you can configure).

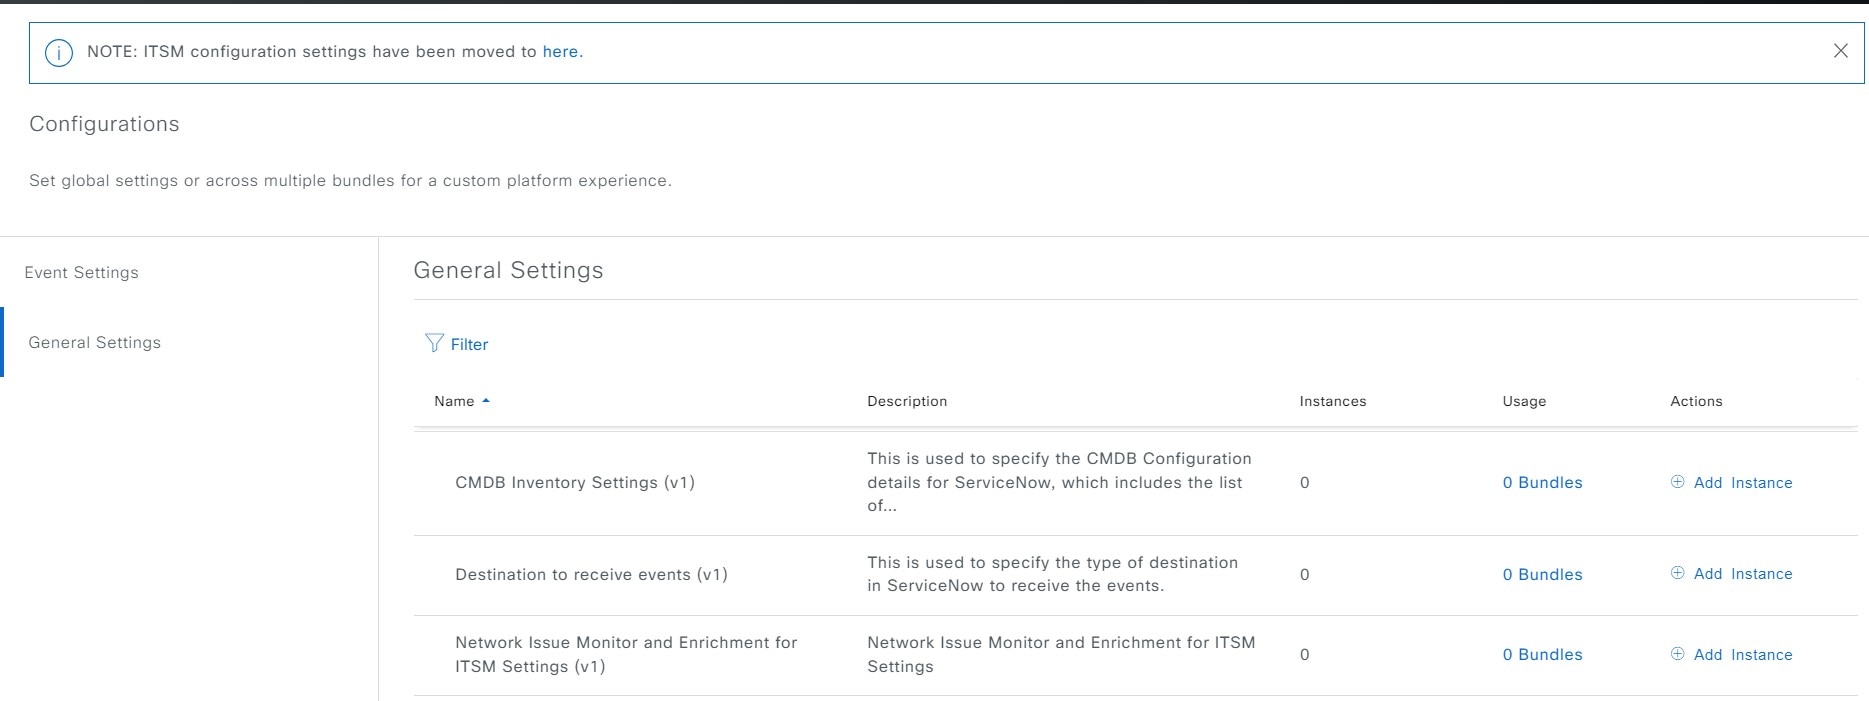
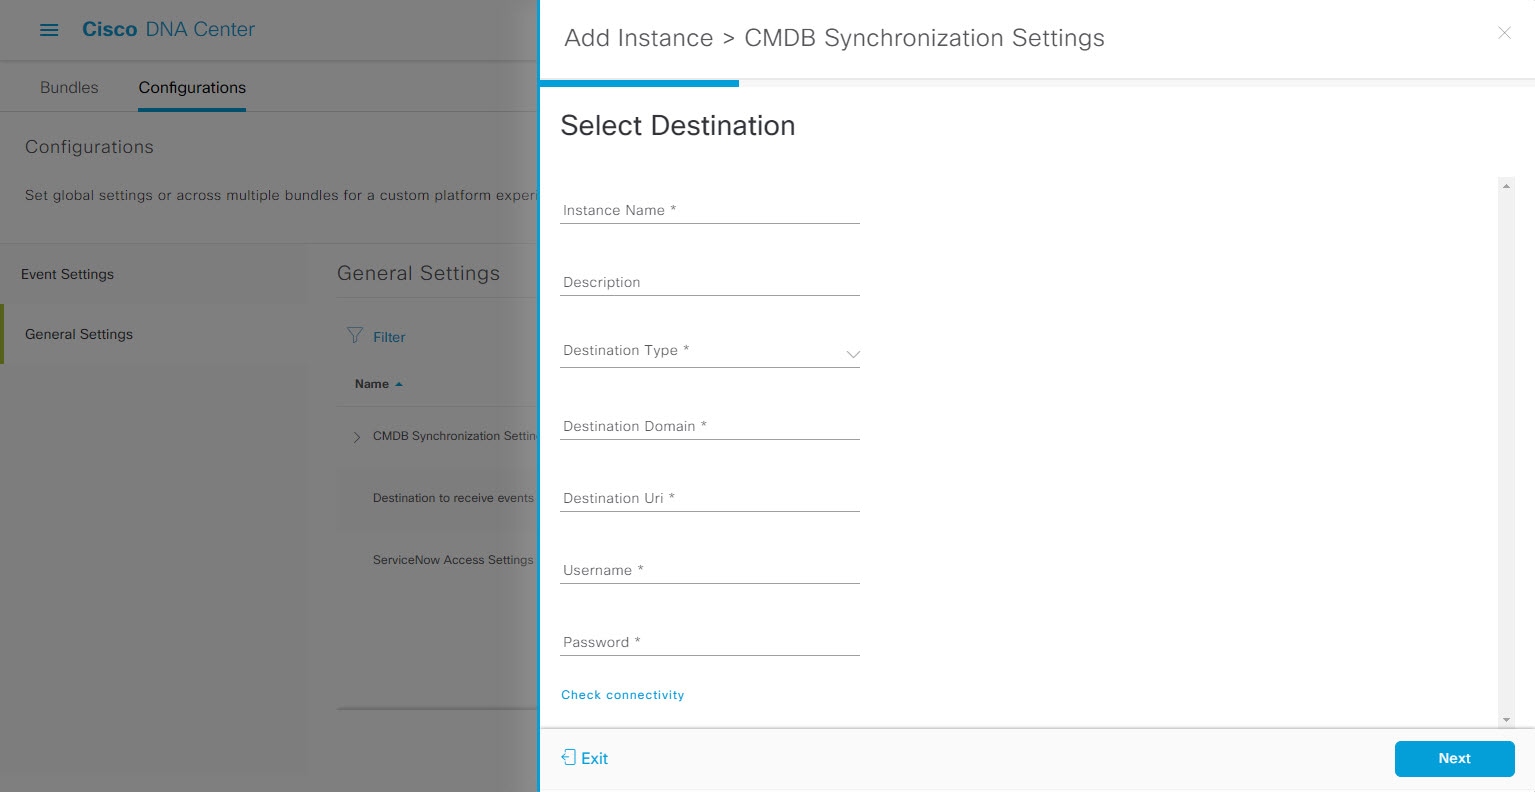
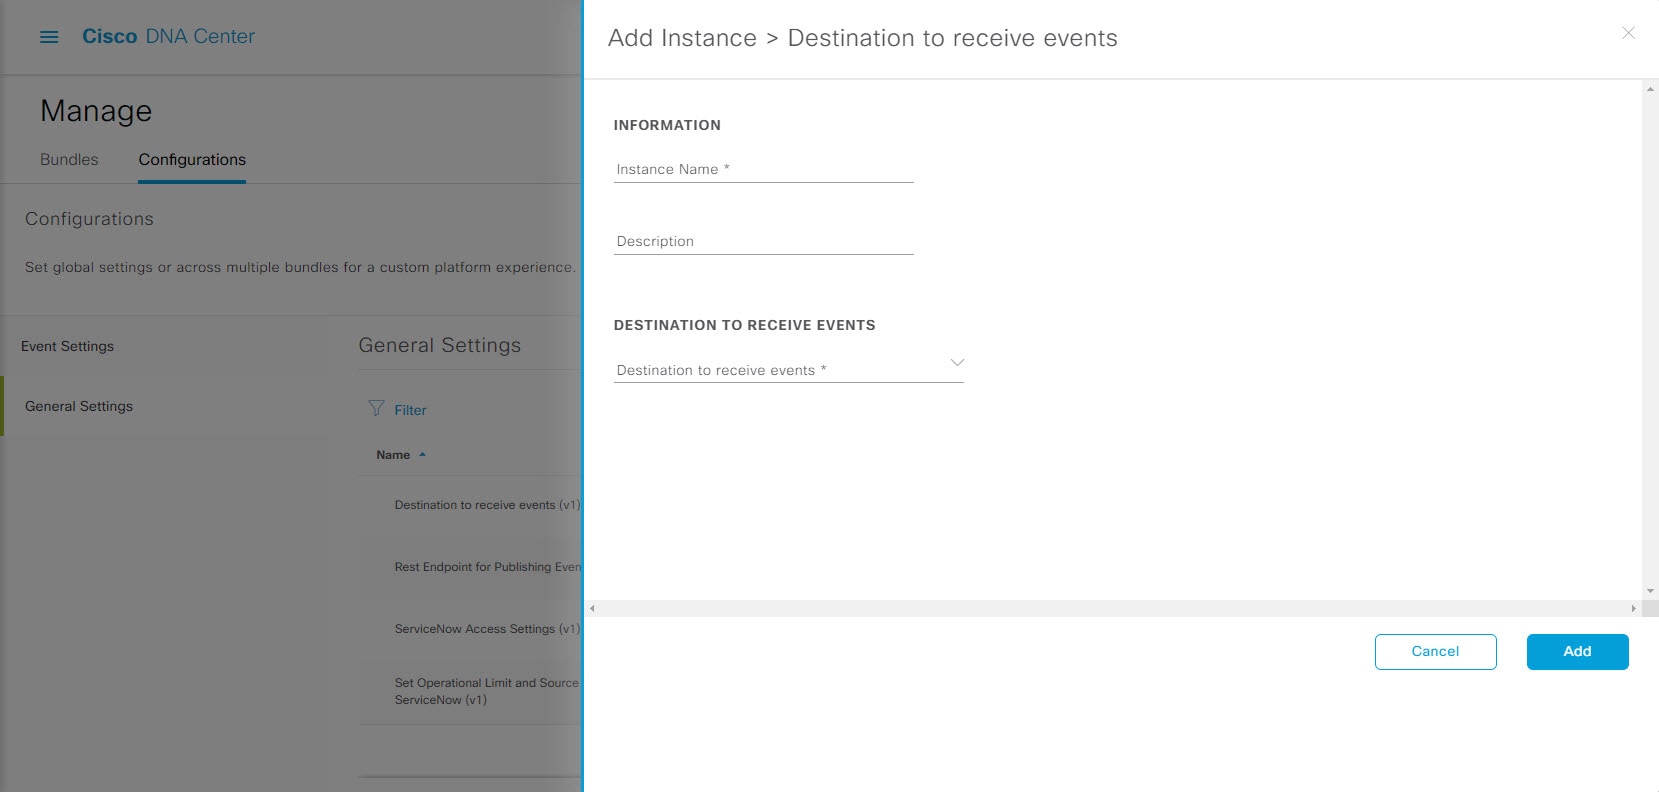
  • General Settings: You can add or edit REST and ITSM endpoint instances within a single or multiple bundles.


Note


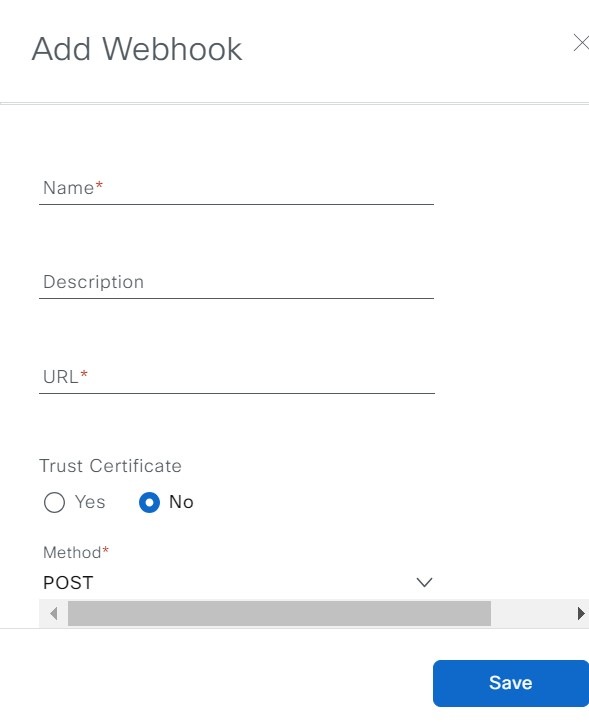
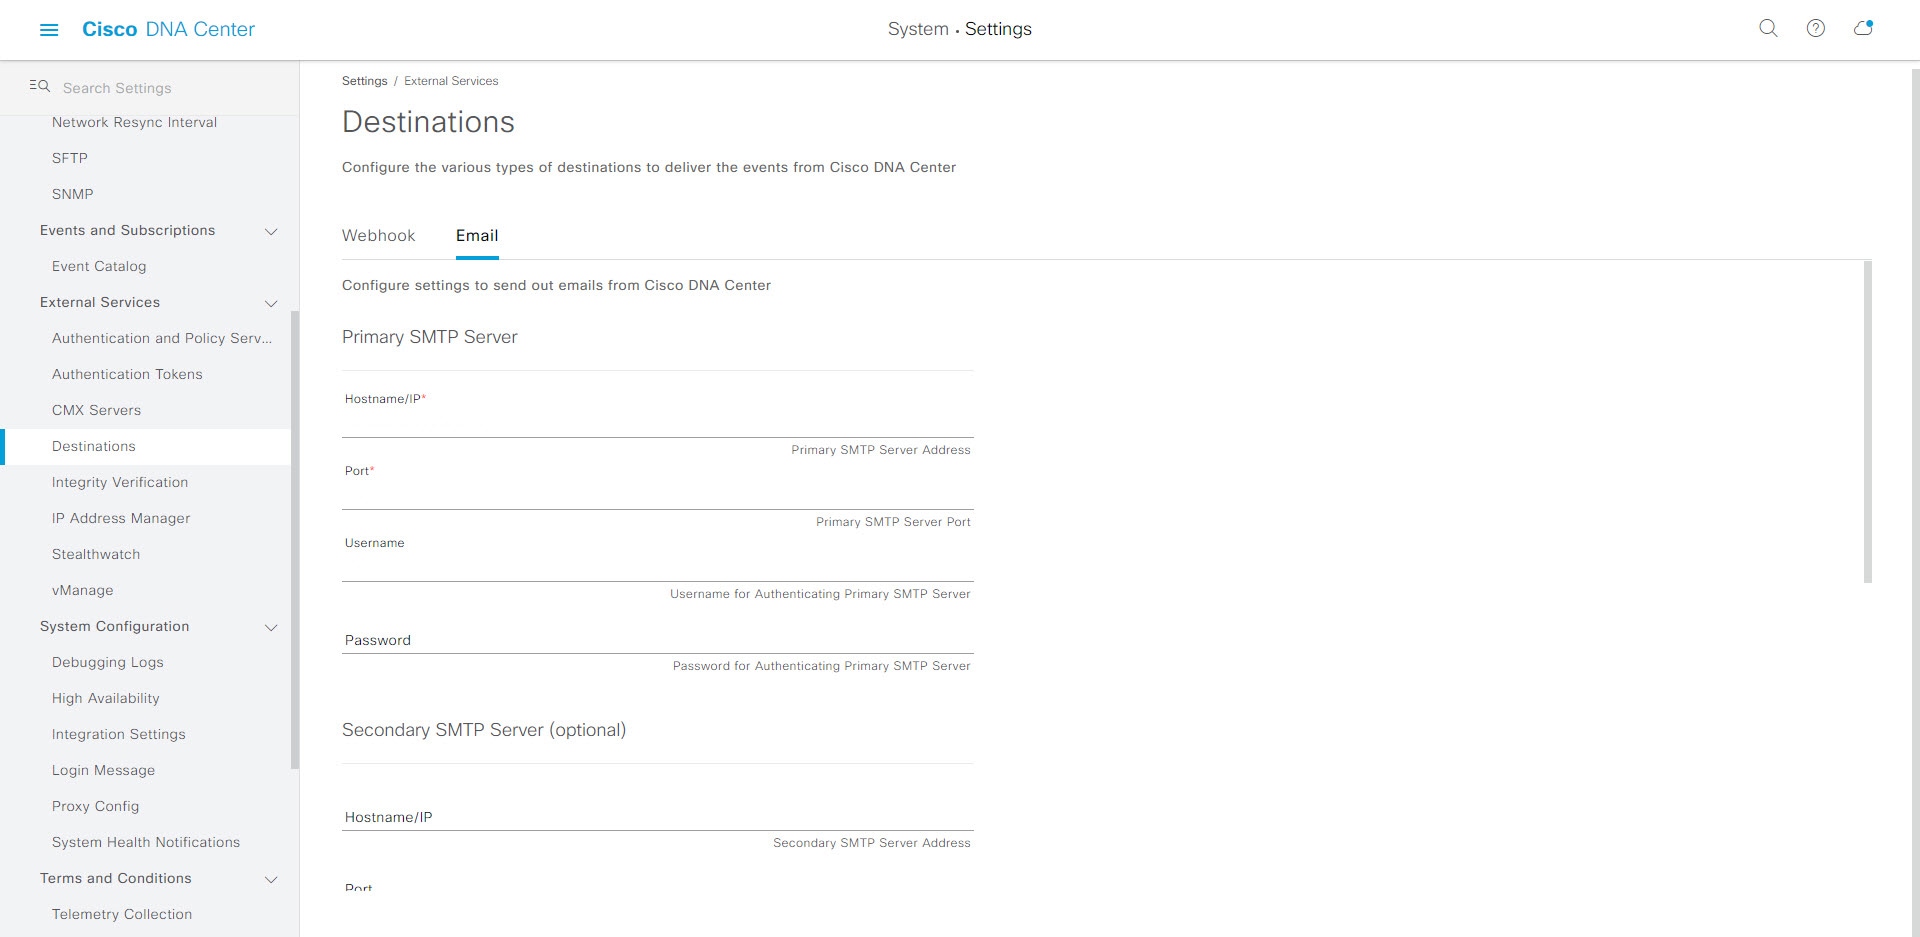
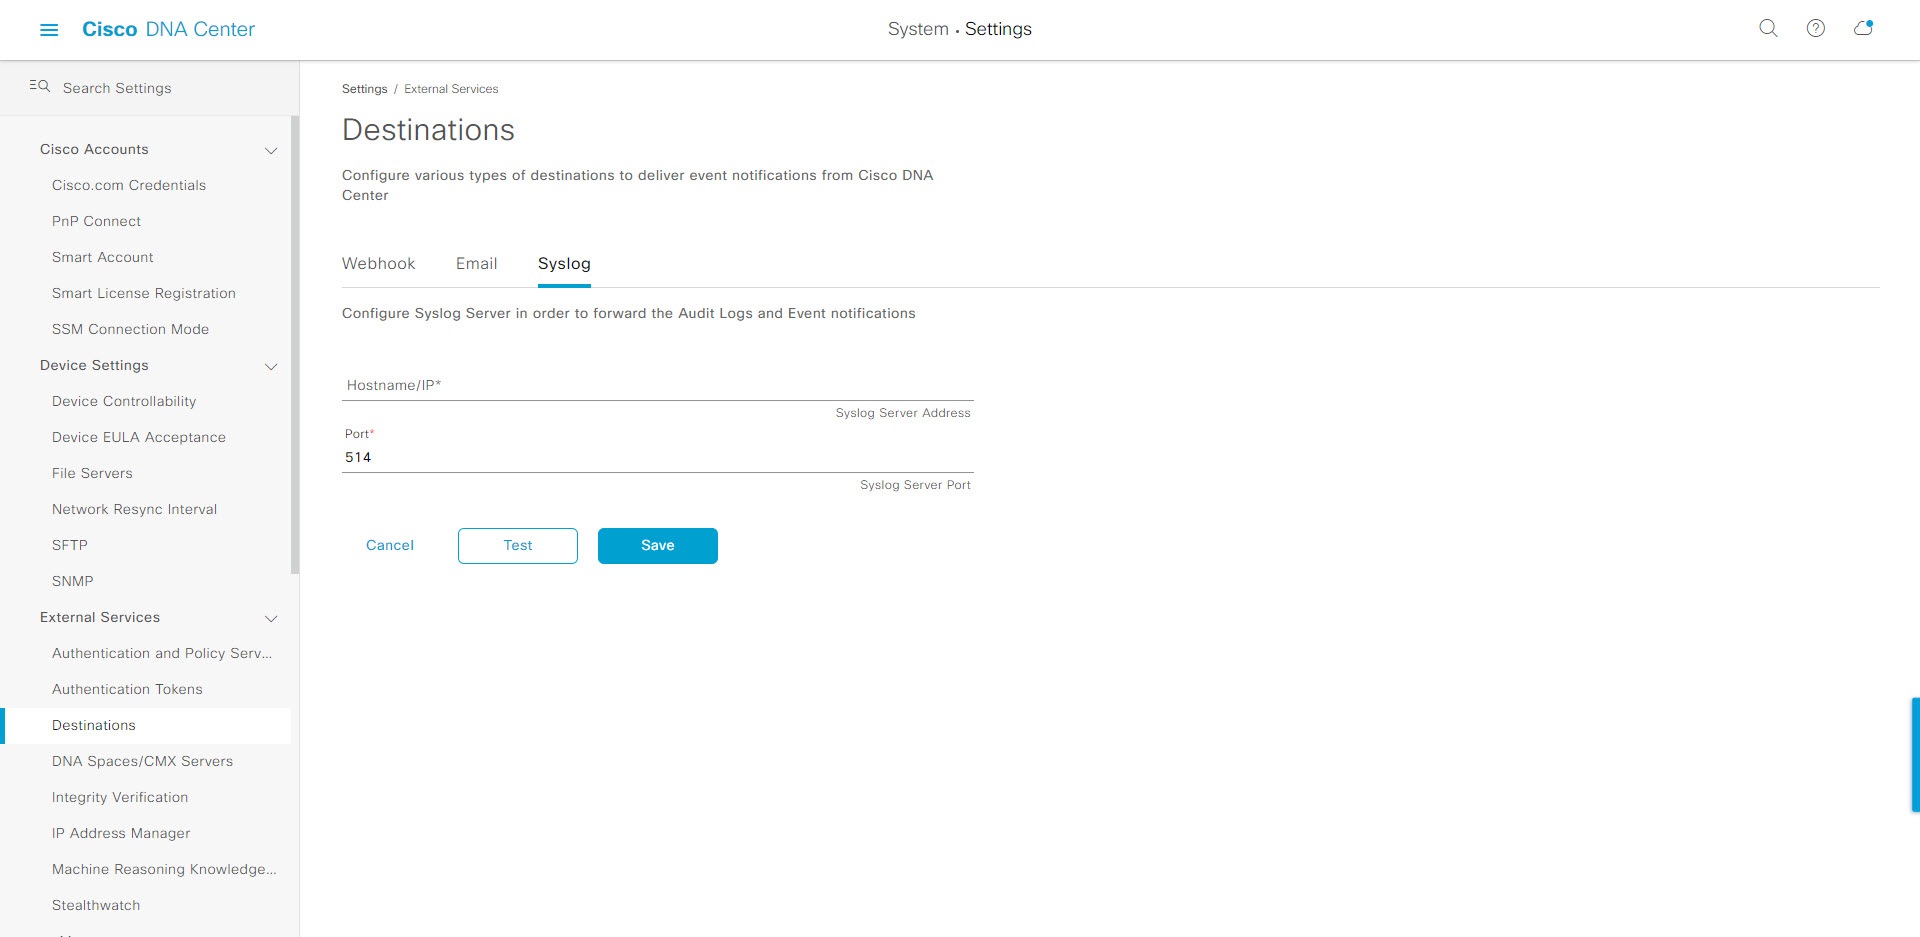
You can also configure various types of destinations to deliver the events from the Cisco DNA Center Platform. Click the Menu icon () and choose System > Settings > External Services > Destinations to access the GUI window to configure a webhook, email, syslog, SNMP trap, or ITSM destination.


Configure Event Settings

A preset number of issues (or events) that may occur within your network can be found in Event Settings in the Configurations window. You can configure the type, category, severity, and workflow of these events.


Note


The Event Settings window functionality is only applicable for an ITSM (ServiceNow) integration and not for generic event notifications. For guidance about how to use this procedure within a larger set of procedures to configure ITSM integration between Cisco DNA Center and ServiceNow, see the Cisco DNA Center ITSM Integration Guide. See the text at the top of this window and click the link (here) to access the Events window in platform, where you can subscribe to events and receive notifications by email, webhook (REST API), SNMP trap, or syslog server.


Figure 1. Event Settings Window

Before you begin

  • Ensure that you have installed Cisco DNA Center Release GA 2.2.1. For information about installing the latest Cisco DNA Center release, see Cisco Digital Network Architecture Center Installation Guide.

  • You must have the appropriate permissions to perform the tasks as described in this procedure. For information about Role-Based Access Control for the Cisco DNA Center platform, see Role-Based Access Control Support for Platform.

  • Enable, configure, and activate the bundles for your network in Bundles. For information about Bundles see Bundle Features.

Procedure


Step 1

In the Cisco DNA Center GUI, click the Menu icon () and choose Platform > Manage > Configurations > Event Settings.

Step 2

Review the Event Settings table that appears.

The following Event Settings information is displayed:

  • Event Name: Name of the Cisco DNA Center event.

  • Domain: Domain of the Cisco DNA Center event.

  • Type: Network, App, System, Security, or Integrations type of event.

  • Category: Error, Warn, Info, Alert, Task Progress, Task Complete

  • Severity: 1 through 5.

    Note


    Severity 1 is the most important or critical priority and should be assigned as such.

  • Workflow: Incident, Problem, Event, or RFC

  • Actions: Edit

You can adjust what is displayed in the table by clicking the Filter icon and using the filter, or by typing a keyword in the Find field. For example, to display all access point notifications, type 'AP' in the Find field. To view all network notifications, type 'Network' in the Find field. To view all severity 1 notifications, type '1' in the Find field.

You can edit the event, so that its notification is customized to your network standards and conventions.

Step 3

Click Edit in the Actions column to edit an event.

Choose a setting by clicking on the downward pointing angle and adjust the value. For example, click Network and adjust to App. This changes the event type from a network type to an application type. Click Severity and adjust to 1 from 5. This raises the severity level from 5 to 1.

Step 4

Click the box next to the event name to enable notifications.

This enables notifications through Cisco DNA Center when the event occurs in the future.

Step 5

Click Save to save your configuration.


What to do next

  • From the Cisco DNA Center home page, click the Menu icon () > Platform > Runtime Dashboard.

    Notifications for events will display in the Events Summary field.

  • Click View Details to view the notifications.

Configure General Settings: Edit an Instance

You can edit an instance within a single or multiple bundles using Configurations.

Figure 2. Cisco DNA Center Platform Configurations Window

Before you begin

  • Ensure that you have installed Cisco DNA Center Release GA 2.2.1. For information about installing the latest Cisco DNA Center release, see Cisco Digital Network Architecture Center Installation Guide.

  • You must have the appropriate permissions to perform the tasks as described in this procedure. For information about Role-Based Access Control for the Cisco DNA Center platform, see Role-Based Access Control Support for Platform.

  • Enable, configure, and activate the bundles for your network in Bundles. For information about Bundles see Bundle Features.

Procedure


Step 1

In the Cisco DNA Center GUI, click the Menu icon () and choose Platform > Manage > Configurations > General Settings.

Step 2

Review the General Settings table that appears.

The following General Settings information is displayed:

  • Name: Name of the instance and version,.

  • Description: Description of the settings that contain the instances.

  • Instances: Number of instances currently configured.

  • Usage: Number of bundles where the instance or instances are used.

  • Actions: Specific task that you could perform for the setting (for example, edit or add an instance for the setting).

You can adjust what is displayed in the table by clicking the Filter icon and using the filter, or by entering a keyword in the Find field.

Step 3

Click the arrow for one of the displayed instances. For example, click the CMDB Synchronization Settings (v1) or Destination to Receive Events (v1) arrow.

The list of instances for that setting is displayed.

Step 4

In the Usage column, hover your mouse pointer over Bundles.

Cisco DNA Center displays the bundles that use the specified instance.

Step 5

Click the Edit icon ('Pad and Pen' icon) in the Actions column to edit an existing instance.

Proceed to edit the appropriate instance for your requirements in the following steps.

Step 6

(Optional) To edit the CMDB synchronization details for a CMDB Synchronization Settings instance, click Edit > Actions and proceed to edit one of more of the following instance fields in the slide-in panes that appear:

  • Select Destination: Enter the Instance Name, Description, Discovery Source, Destination Domain, Destination URL, Username and Password. Click Check connectivity to check connection to the ServiceNow or other destination server before clicking Next.

  • Select Inventory Data Fields: Select both the Inventory Data Fields to synchronize, as well as whether the data field is an attribute or reference.

  • Update Transforms: Accept or update the CI class to the device family.

  • Set Source Identifier and Operational Limit: Configure the discovery source and maximum limit.

Step 7

(Optional) To edit a Destination to receive events instance, click Edit > Actions and proceed to edit one of more of the following instance fields in the slide-in pane:

  • Instance Name: Name of instance.

  • Description: Description of instance.

  • Destination to Receive Events: Choose either Event Management or REST API endpoint.

    Event Management is the option to choose if you are using the Event Management plugin provided by ServiceNow. For detailed information about integrating Cisco DNA Center with ServiceNow, see the Cisco DNA Center ITSM Integration Guide for this release.

Step 8

(Optional) To edit a ServiceNow Access Settings instance, review the Note text at the top of the window and click here. In the System Settings window, click Destinations > ITSM. Next, click the Edit icon ('Pad and Pen' icon).

Proceed to edit one of more of the following instance fields in the slide-in pane:

  • Instance Name: Name of instance.

  • Description: Description of instance.

  • Host name (ServiceNow): Hostname of ServiceNow.

  • Username: Username for ServiceNow access.

  • Password: Password for ServiceNow access.

Click Check connectivity to check connection to the ServiceNow or other destination server before clicking Update.

Step 9

Click Update to save your edits to the instance.

The edits to the instance immediately take effect.


Configure General Settings: Add an Instance

You can add an instance within a single or multiple bundles using Configurations.

Figure 3. Cisco DNA Center Platform Configuration Window

Before you begin

  • Ensure that you have installed Cisco DNA Center Release GA 2.2.1. For information about installing the latest Cisco DNA Center release, see Cisco Digital Network Architecture Center Installation Guide.

  • You must have the appropriate permissions to perform the tasks as described in this procedure. For information about Role-Based Access Control for the Cisco DNA Center platform, see Role-Based Access Control Support for Platform.

  • Enable, configure, and activate the bundles for your network in Bundles. For information about Bundles see Bundle Features.

Procedure


Step 1

In the Cisco DNA Center GUI, click the Menu icon () and choose Platform > Manage > Configurations > General Settings.

Step 2

Review the General Settings table that appears.

The following General Settings information is displayed:

  • Name: Name of the instance and version.

  • Description: Description of the settings that contain the instances.

  • Instances: Number of instances in setting.

  • Usage: Number of bundles where the instance or instances are used.

  • Actions: Specific task that you could perform for the setting (for example, edit or add an instance for the setting).

You can adjust what is displayed in the table by clicking the Filter icon and using the filter, or by entering a keyword in the Find field.

Step 3

Click the arrow for one of the displayed instances. For example, click the CMDB Synchronization Settings (v1) or Destination to Receive Events (v1) arrow.

The list of instances for that setting is displayed.

Step 4

In the Usage column, hover your mouse pointer over Bundles.

Cisco DNA Center displays the bundles that use the specified instance.

Step 5

Click the Add Instances link in the Actions column to add an instance.

Proceed to add the appropriate instance or instances for your requirements in the following steps.

Step 6

(Optional) To add a CMDB Synchronization Settings instance, click Add Instance in the Actions column and proceed to enter the following instance fields in the slide-in panes that appear:

  • Select Destination: Enter the Instance Name, Description, Discovery Source, Destination Domain, Destination URL, Username and Password. Click Check connectivity to check connection to the ServiceNow or other destination server before clicking Next.

  • Select Inventory Data Fields: Select both the Inventory Data Fields to synchronize, as well as whether the data field is an attribute or reference.

  • Update Transforms: Accept or update the CI class to the device family.

  • Set Source Identifier and Operational Limit: Configure the discovery source and maximum limit.

Figure 4. CMDB Synchronization Settings Instance

Step 7

(Optional) To add a Destination to receive events instance, click Add Instance in the Actions column and proceed to enter the following instance fields in the slide-in pane:

  • Instance Name: Name of instance.

  • Description: Description of instance.

  • Destination to Receive Events: Choose either Event Management or REST API endpoint.

    Event Management is the option to choose if you are using the Event Management plugin provided by ServiceNow. For detailed information about integrating Cisco DNA Center with ServiceNow, see the Cisco DNA Center ITSM Integration Guide for this release.

Figure 5. Destination to receive event Instance

Step 8

(Optional) To add a ServiceNow Access Settings instance, review the Note text at the top of the window and click here. In the System Settings window, click Destinations > ITSM. Next, click the Edit icon ('Pad and Pen' icon).

Proceed to enter values in the following instance fields in the slide-in pane:

  • Instance Name: Name of instance.

  • Description: Description of instance.

  • Host name (ServiceNow): Hostname of ServiceNow.

  • Username: Username for ServiceNow access.

  • Password: Password for ServiceNow access.

Click Check connectivity to check connection to the ServiceNow or other destination server before clicking Add.

Step 9

Click Add to save your instance addition.

The additions to the instance immediately take effect.


Configure a Webhook Destination

Cisco DNA Center supports a webhook destination for both events and reports.

Perform the following steps to configure a webhook destination for events or reports using the Cisco DNA Center GUI.

Before you begin

Ensure that you have installed Cisco DNA Center Release GA 2.2.1. For information about installing the latest Cisco DNA release, see the Cisco Digital Network Architecture Center Installation Guide.

You must have the appropriate permissions to perform the tasks as described in this procedure. For information about Role-Based Access Control for the Cisco DNA Center platform, see Role-Based Access Control Support for Platform.

Procedure


Step 1

In the Cisco DNA Center GUI, click the Menu icon () and choose System > Settings > External Services > Destination > Webhook.

Step 2

Review the Webhook tab.

Figure 6. Webhook Tab

The following fields are displayed:

  • Name: Name of the webhook.

  • Description: Description (user provided) of the webhook.

  • URL: URL of webhook (callback URL).

  • Method: REST API method of webhook (POST).

  • Edit: Link that opens field to edit the configured webhook fields. After editing the webhook configuration, click Update to save your changes.

For this release, you can configure an IPv6 value for the URL.

Step 3

Click the Add link/icon to configure a webhook.

An Add Webhook slide-in pane opens.

Step 4

Enter values in the fields in the Add Webhook slide-in pane to configure the webhook.

Figure 7. Add Webhook
  • Name: Name of the webhook.

  • Description: Description of the webhook.

  • URL: URL address of the webhook (callback URL).

Step 5

Choose whether a trust certificate is associated with the webhook URL.

Depending upon your webhook configuration, with the Trust Certificate field click Yes or No.

Step 6

Choose the authentication type associated with your webhook URL.

Depending upon your webhook configuration, within the Authentication field click one of the following:

  • Basic: Authentication where the client sends HTTP requests with the Authorization header that contains the word 'Basic', followed by a space and a base64-encoded string 'username:password'. If you select Basic in the GUI, the Header Key field below enters the value Authorization.

  • Token: Authentication where users are authenticated using a security token that is provided by the server. If you select Token, the Header Key field below enters the value X-Auth-Token.

  • No Authentication: No authentication needed.

Step 7

Within the Headers field, enter values for the Header Name and Header Value.

Click Add to add the header name and value.

Note


The Headers field may be auto-populated depending upon your Authentication selection above.

Step 8

Click Save to save your webhook destination configuration.


What to do next

You configure a webhook destination for either an event or a report. For information about the procedures to configure an event or a report using the webhook destination, see Work with Events and Run Your First Report.

Configure an Email Destination

Cisco DNA Center supports email notification for both events and reports.


Note


Emails are sent out from Cisco DNA Center using the SMTP protocol. Cisco DNA Center only supports cleartext SMTP for email event notifications. If you use an email server that requires SSL/TLS support, you will not be able to receive the email event notifications.


Perform the following steps to configure an email destination for events or reports using the Cisco DNA Center GUI.

Figure 8. Email Configuration Tab

Before you begin

Ensure that you have installed Cisco DNA Center Release GA 2.2.1. For information about installing the latest Cisco DNA release, see the Cisco Digital Network Architecture Center Installation Guide.

You must have the appropriate permissions to perform the tasks as described in this procedure. For information about role-based access control for the Cisco DNA Center platform, see Role-Based Access Control Support for Platform.


Important


For the emails to have the correct Cisco DNA Center hyperlink, enter the IP address or hostname of Cisco DNA Center in the Integrations Settings window. To enter this information using the GUI, click the Menu icon () > System > Settings > System Configuration > Integration Settings.


Procedure


Step 1

In the Cisco DNA Center GUI, click the Menu icon () and choose System > Settings > External Services > Destination > Email.

Step 2

Configure the SMTP Server Configuration fields. Options include the following:

  • Primary SMTP Server (Required):

    • Hostname/IP address: Hostname or IP address of the primary SMTP server.

    • Port number: Port number of the server.

    • Username: Username required to access server.

    • Password: Password required to access server.

    • Confirm Password: Reenter password to access server.

For this release, you can configure an IPv6 value for the Hostname/IP address.

Step 3

(Optional) Configure the Secondary SMTP Server Configuration fields. Options include the following:

  • Hostname/IP address: Hostname or IP address of the secondary SMTP server.

  • Port number: Port number of the server.

  • Username: Username required to access server.

  • Password: Password required to access server.

  • Confirm Password: Reenter password to access server.

Step 4

Configure the Senders and Receivers test email fields. Options include the following:

  • Senders and Receivers:

    • From: Sender of test email.

    • To: Recipient of test email.

    • Subject: Enter text (maximum of 200 characters) for a subject line for the test email.

Step 5

Click Test to test the email configuration.

Once the Test button is clicked, a test email is sent using the parameters that are configured (for both primary and secondary SMTP Server settings with subject line as ‘DNA Center SMTP configuration test email’). A success (configuration validation) or failure message should appear depending on the test email connectivity results.

Step 6

Click Save to save the configuration.

Click Cancel to cancel the configuration.


What to do next

You configure an email destination for either an event or a report. For information about the procedures to configure an event or a report using the email destination, see Work with Events and Run Your First Report.

Configure a Syslog Server Destination

Cisco DNA Center supports a syslog server destination for event notifications.

Perform the following steps to configure a syslog server destination for event notifications using the Cisco DNA Center GUI.

Before you begin

Ensure that you have installed Cisco DNA Center Release GA 2.2.1. For information about installing the latest Cisco DNA release, see the Cisco Digital Network Architecture Center Installation Guide.

You must have the appropriate permissions to perform the tasks as described in this procedure. For information about Role-Based Access Control for the Cisco DNA Center platform, see Role-Based Access Control Support for Platform.

Procedure


Step 1

In the Cisco DNA Center GUI, click the Menu icon () and choose System > Settings > External Services > Destination > Syslog.

Step 2

Review the Syslog tab.

Figure 9. Syslog Tab

The following fields are displayed:

  • Hostname/IP: Hostname or IP address of the syslog server.

    For this release, you can configure an IPv6 value for the Hostname/IP address.

  • Port: Port number of the syslog server.

Step 3

Enter a hostname or IP address in the Syslog Server Address field.

Step 4

Enter a port number in the Syslog Server Port field.

Step 5

(Optional) Click Test to test out the configuration.

Note


If your configuration was successful, then you will be presented with a validation message.

Step 6

Click Save to save your syslog server destination configuration.

Click Cancel if you must cancel your configuration.


What to do next

You configure a syslog server destination for an event notification. For information about the procedure to configure an event notification using the syslog server destination, see Work with Events.

Configure a Trap Notification

Cisco DNA Center supports SNMP trap notifications.

Before you begin

Ensure that you have installed Cisco DNA Center Release GA 2.2.1. For information about installing the latest Cisco DNA Center release, see the Cisco Digital Network Architecture Center Installation Guide.

You must have the appropriate permissions to perform the tasks as described in this procedure. For information about Role-Based Access Control for the Cisco DNA Center platform, see Role-Based Access Control Support for Platform.

Procedure


Step 1

In the Cisco DNA Center GUI, click the Menu icon () and choose System > Settings > External Services > Destination > Trap.

Step 2

Review the Trap window.

The Trap window consists of a table with the following headers:

  • Name

  • Description

  • Hostname/IP

  • Port

  • SNMP Version

Step 3

Click Add to configure a trap.

Step 4

Configure the following fields in the slide-in pane:

  • Name: Name of the event.

  • Description

  • Hostname/IP Address: Enter the hostname/IP address for the SNMP trap receiver (server).

    For this release, you can configure an IPv6 value for the Hostname/IP address.

  • Port: Enter the port number for the SNMP trap receiver (server).

  • SNMP Version: Enter the SNMP version from the drop-down list for the community configuration.

    • SNMP V2C: For SNMP Version 2C, enter the community string.

    • SNMP V3: For SNMP Version 3, enter the following additional information:

      • Username

      • Mode: Authentication and Privacy, Authentication, No Privacy, or No Authentication, No Privacy

        • For No Authentication, No Privacy selection, no further configuration is required.

        • For Authentication, No Privacy, configure the Authentication Type (SHA or MD5), Authentication Password, Confirm Authentication Password.

        • For Authentication and Privacy, configure the Authentication Type (SHA or MD5), Authentication Password, Confirm Authentication Password, Additionally, configure the Privacy Type (AES128, DES), Privacy Password, and Confirm Privacy Password.

Step 5

Click Save to save your configuration.


What to do next

Access the Events window to select one or more events and subscribe them to the configured SNMP trap destination.

Configure ITSM Integration

Cisco DNA Center supports ITSM configuration.

Before you begin

Ensure that you have installed Cisco DNA Center Release GA 2.2.1. For information about installing the latest Cisco DNA Center release, see the Cisco Digital Network Architecture Center Installation Guide.

You must have the appropriate permissions to perform the tasks as described in this procedure. For information about Role-Based Access Control for the Cisco DNA Center platform, see Role-Based Access Control Support for Platform.

Procedure


Step 1

In the Cisco DNA Center GUI, click the Menu icon () and choose System > Settings > External Services > Destination > ITSM.

Step 2

Review the ITSM options.

The ITSM window consists of a table with the following headers:

  • Name

  • Description

  • Usage

  • Actions

Step 3

Click Add to configure an ITSM instnace.

Proceed to configure the following instance fields in the slide-in pane:

  • Instance Name: Name of instance.

  • Description: Description of instance.

  • Host name (ServiceNow): Hostname of ServiceNow.

  • Username: Username for ServiceNow access.

  • Password: Password for ServiceNow access.

Click Check connectivity to check connection to the ServiceNow or other destination server.

Step 4

Click Save to save your configuration.


What to do next

Access the Events window to select one or more events and subscribe them to the configured ITSM destination.

Configure Notification Categories

Cisco DNA Center supports notification categories.

Perform the following steps to configure notification categories for events or reports using the Cisco DNA Center GUI.

Before you begin

Ensure that you have installed Cisco DNA Center Release GA 2.2.1. For information about installing the latest Cisco DNA Center release, see the Cisco Digital Network Architecture Center Installation Guide.

You must have the appropriate permissions to perform the tasks as described in this procedure. For information about Role-Based Access Control for the Cisco DNA Center platform, see Role-Based Access Control Support for Platform.

Procedure


Step 1

In the Cisco DNA Center GUI, click the Menu icon () and choose System > Settings > External Services > Destination > Notification Category.

Step 2

Review the Notification Category options.

Step 3

TBD

Step 4

TBD

Step 5

Click Save to save your configuration.


What to do next

TBD

Configure Notification Preferences

Cisco DNA Center supports notification preferences.

Perform the following steps to configure notification preferences for events or reports using the Cisco DNA Center GUI.

Before you begin

Ensure that you have installed Cisco DNA Center Release GA 2.2.1. For information about installing the latest Cisco DNA Center release, see the Cisco Digital Network Architecture Center Installation Guide.

You must have the appropriate permissions to perform the tasks as described in this procedure. For information about Role-Based Access Control for the Cisco DNA Center platform, see Role-Based Access Control Support for Platform.

Procedure


Step 1

In the Cisco DNA Center GUI, click the Menu icon () and choose System > Settings > External Services > Destination > Notification Preferences.

Step 2

Review the Notification Preferences options.

Step 3

TBD

Step 4

TBD

Step 5

Click Save to save your configuration.


What to do next

TBD