Cluster Management Overview
The Cisco Crosswork platform uses a cluster architecture. The cluster distributes platform services across a unified group of virtual machine (VM) hosts, called nodes. The underlying software architecture distributes processing and traffic loads across the nodes automatically and dynamically. This architecture helps Cisco Crosswork respond to how you actually use the system, allowing it to perform in a scalable, highly available, and extensible manner.
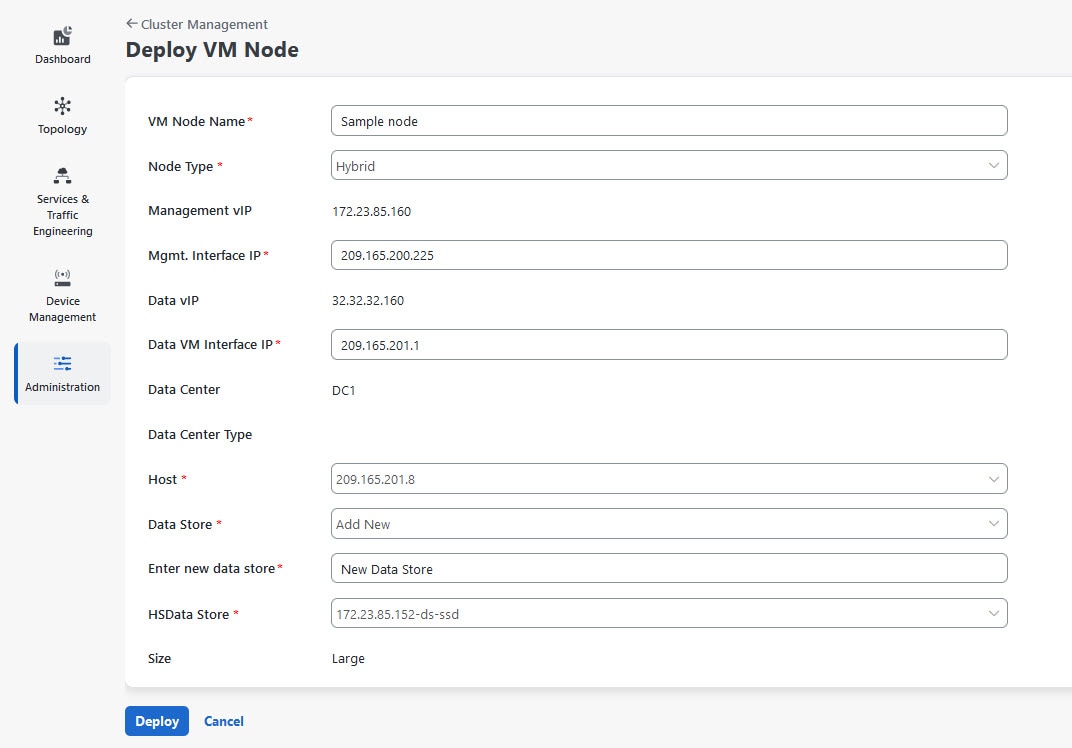
A single Crosswork cluster consists of a minimum of three nodes, all operating in a hybrid configuration. These three hybrid nodes are mandatory for all Cisco Crosswork deployments. If you have more demanding scale requirements, you can add up to two worker nodes. For more information, see Deploy New Cluster Nodes.
Only users assigned to the admin role or a role with proper permissions will have access to all of the cluster configuration.
|
Action |
Description |
||||
|---|---|---|---|---|---|
|
Navigation |
Use the Crosswork Manager window to check the health of the cluster. To display this window, from the main menu, choose . |
||||
|
Crosswork Summary window |
The Crosswork Manager window gives you summary information about the status of the nodes, the Platform Infrastructure, and the applications you have installed. 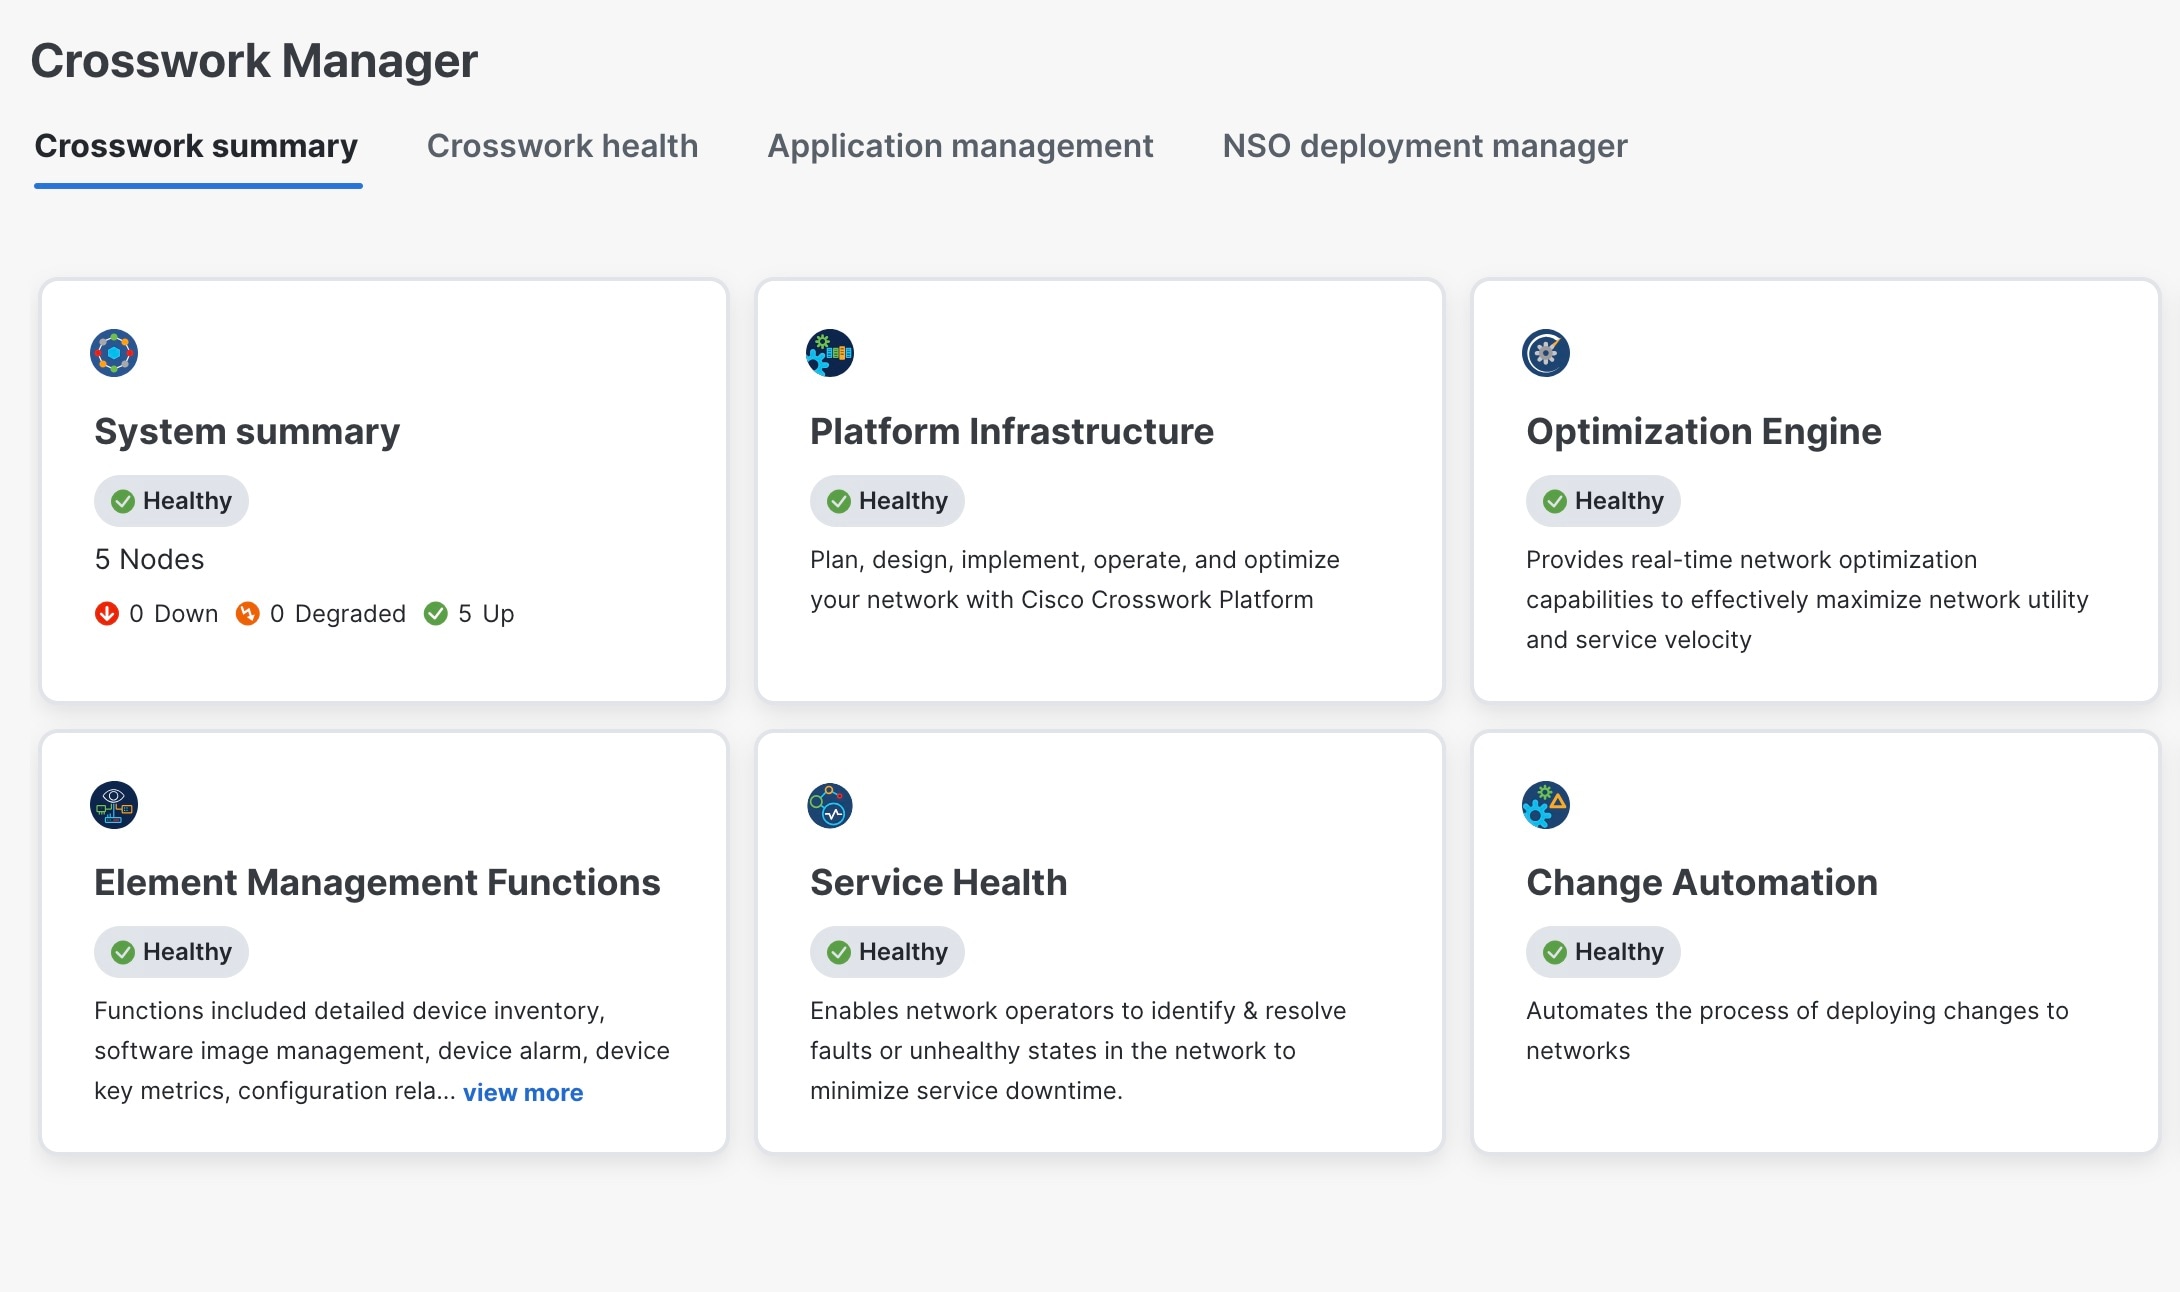
|
||||
|
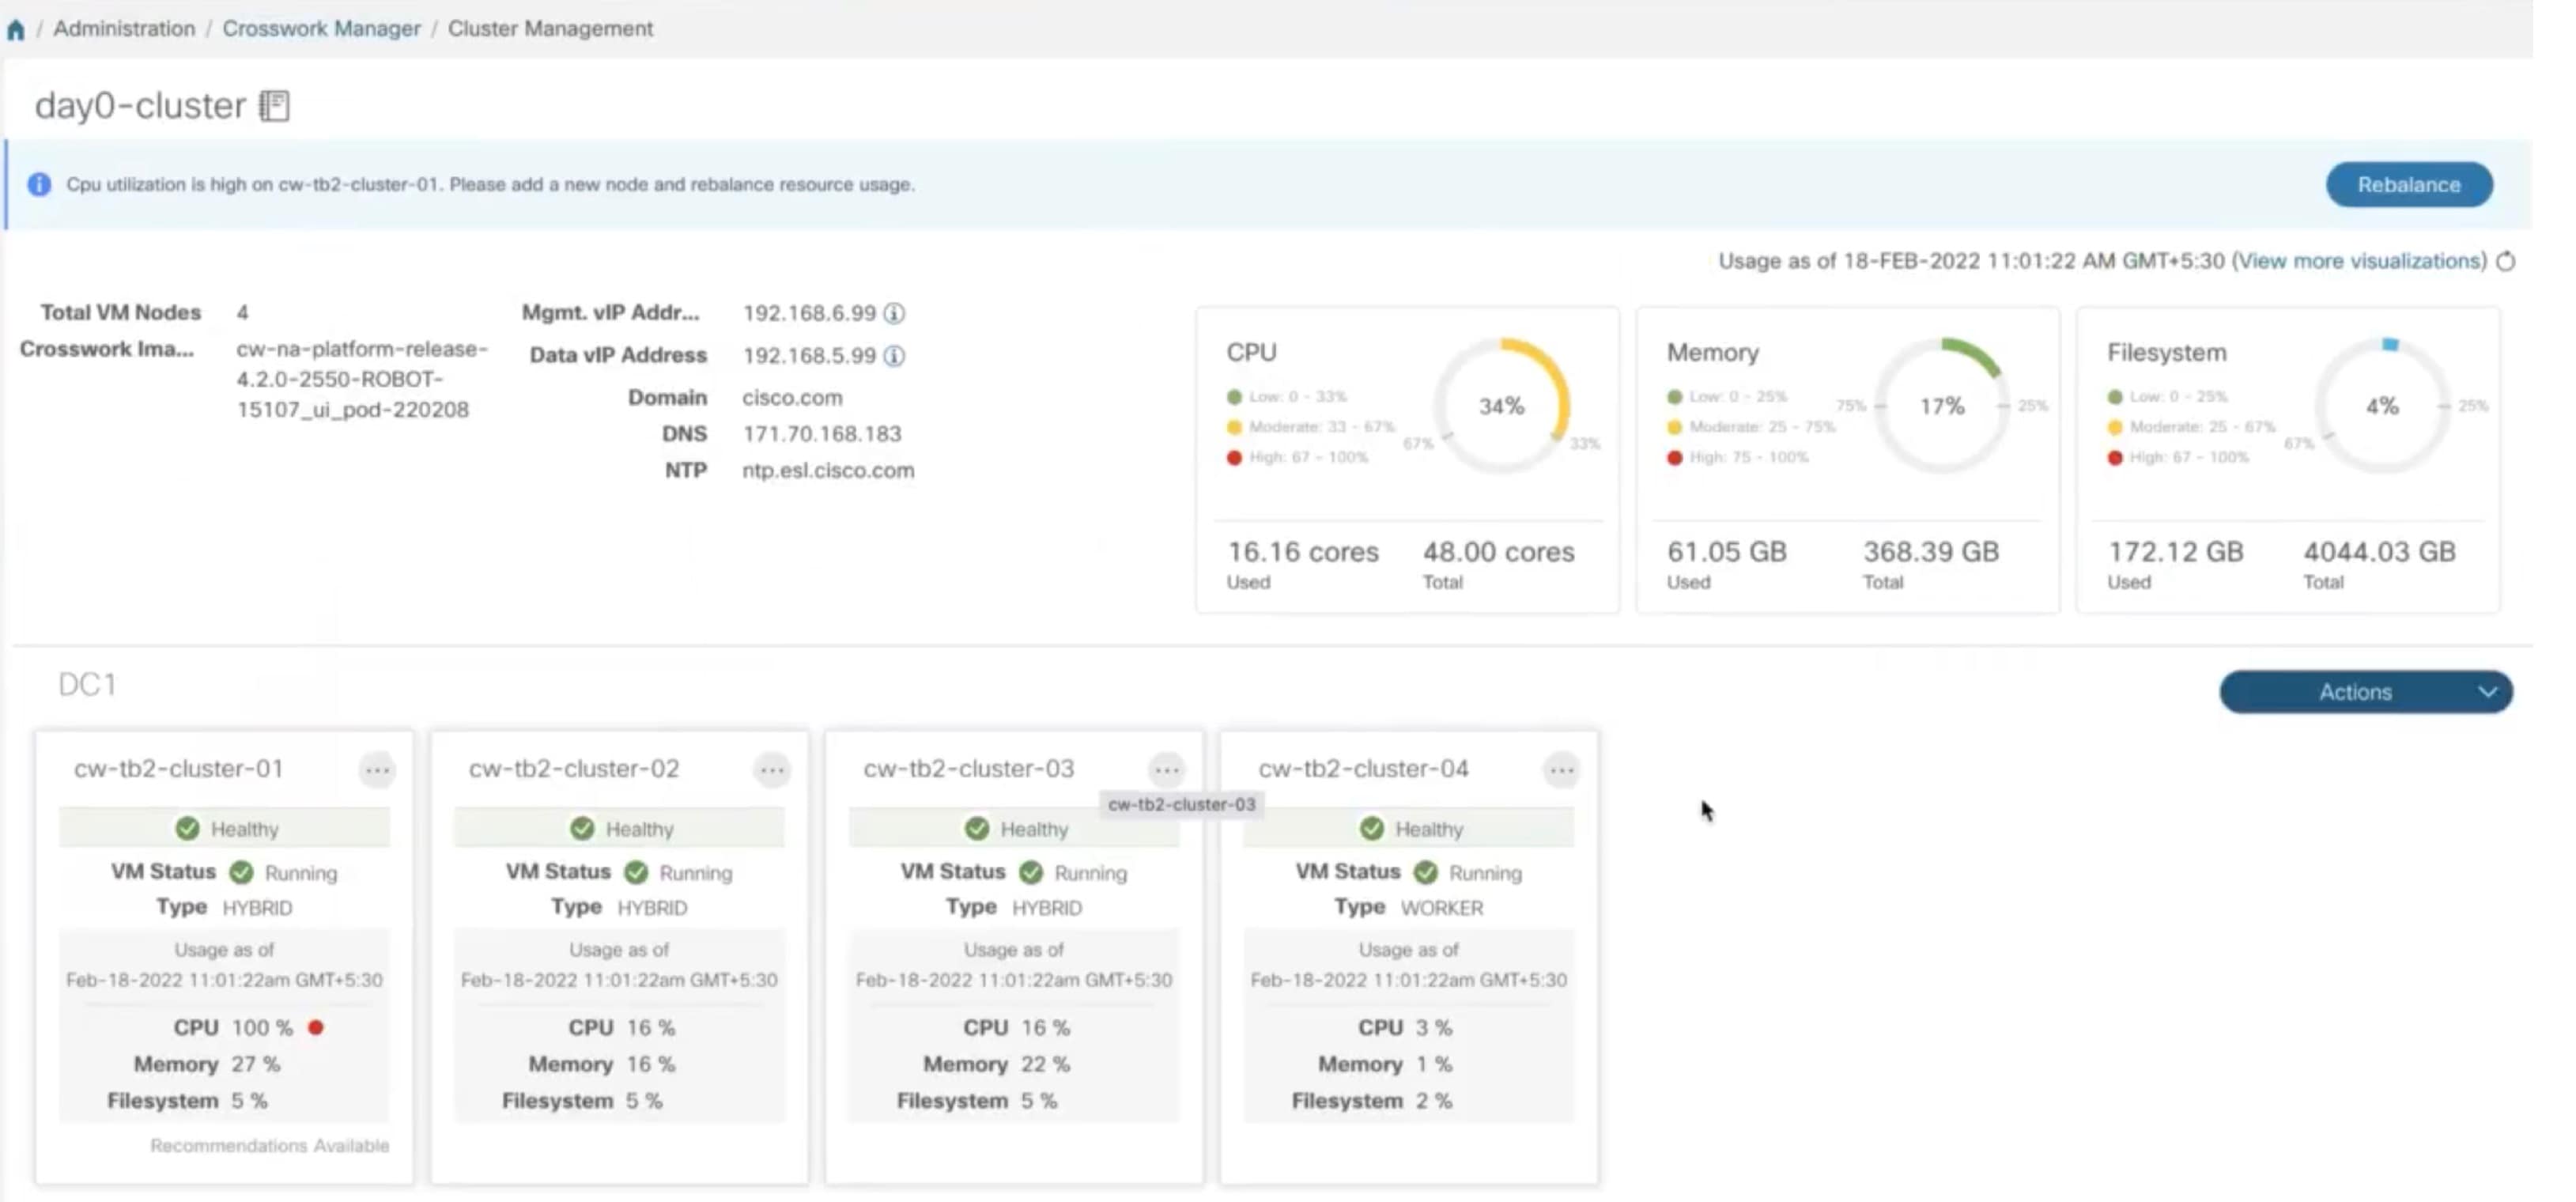
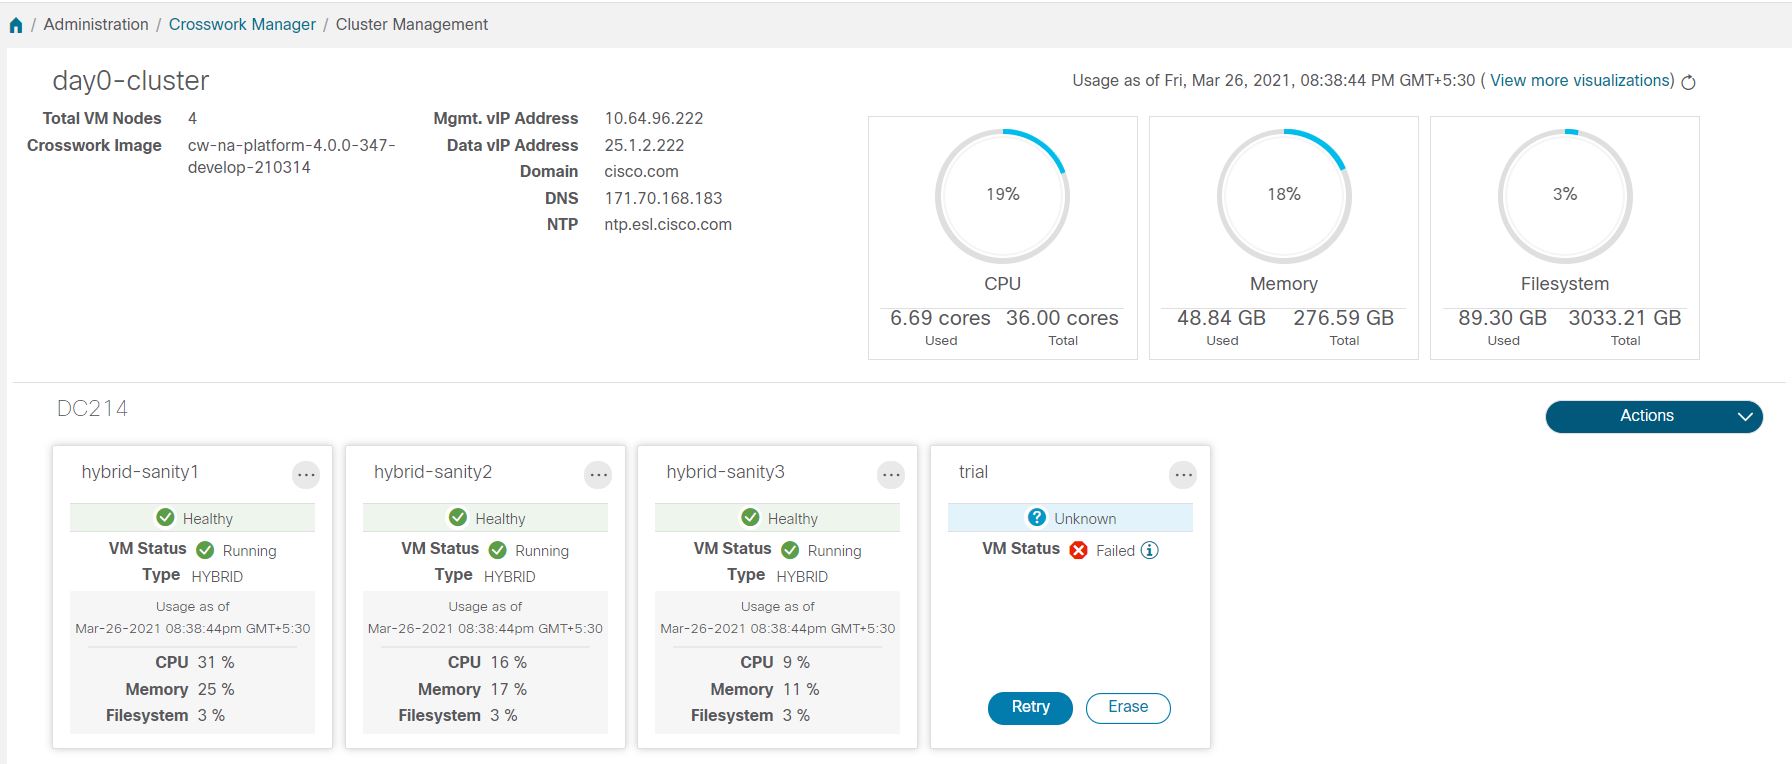
Cluster Management window |
Click on the System Summary tile to see the details of the nodes in the cluster. 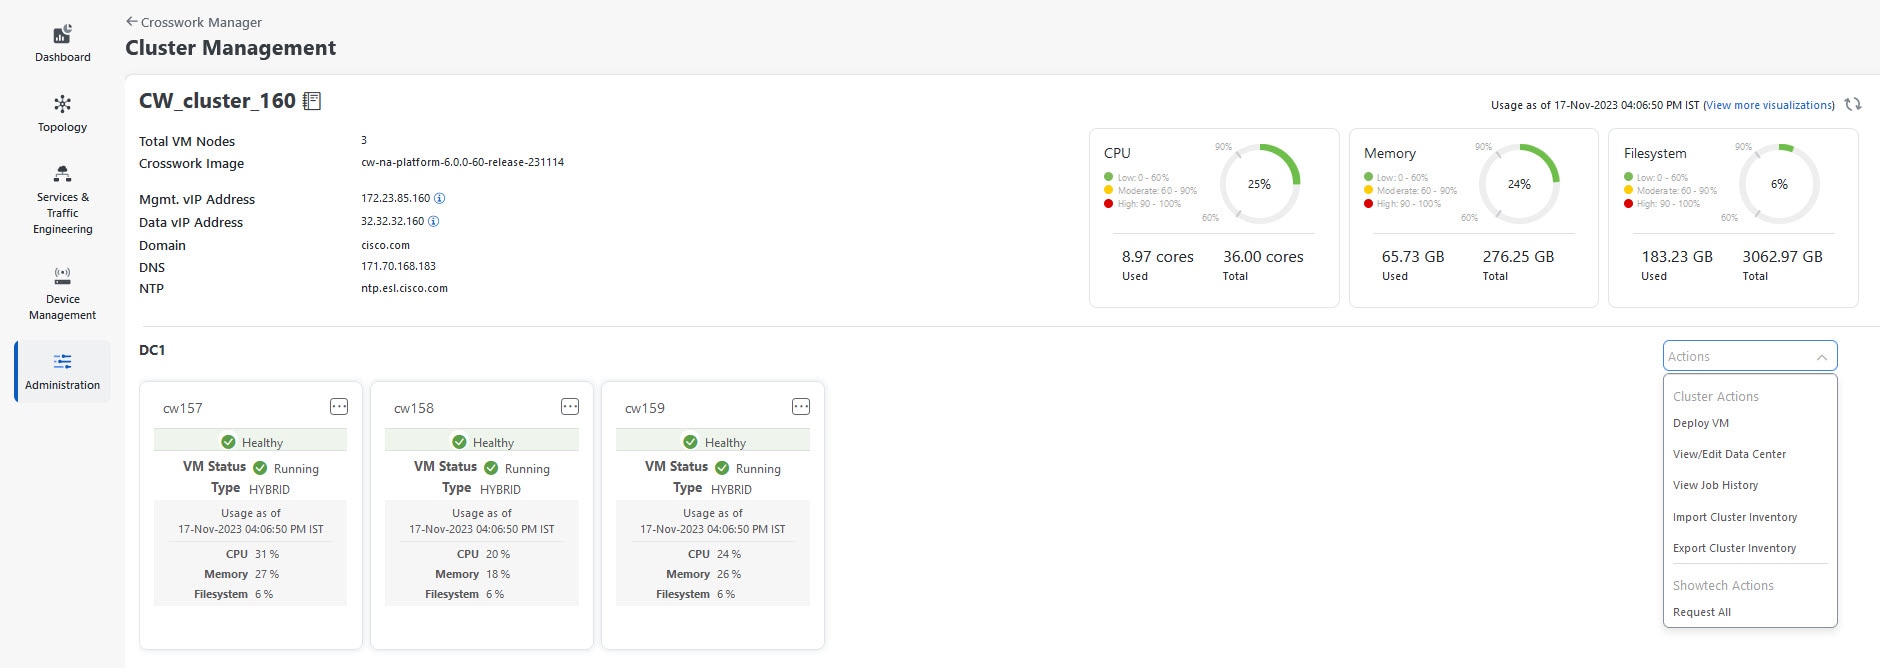
The top left section of the window provides details about the cluster while the top right provides details about overall cluster resource consumption. The bottom section breaks down the resource utilization by node, with a separate detail tile for each node. The window shows other details, including the IP addresses in use, whether each node is a hybrid or worker, and so on.
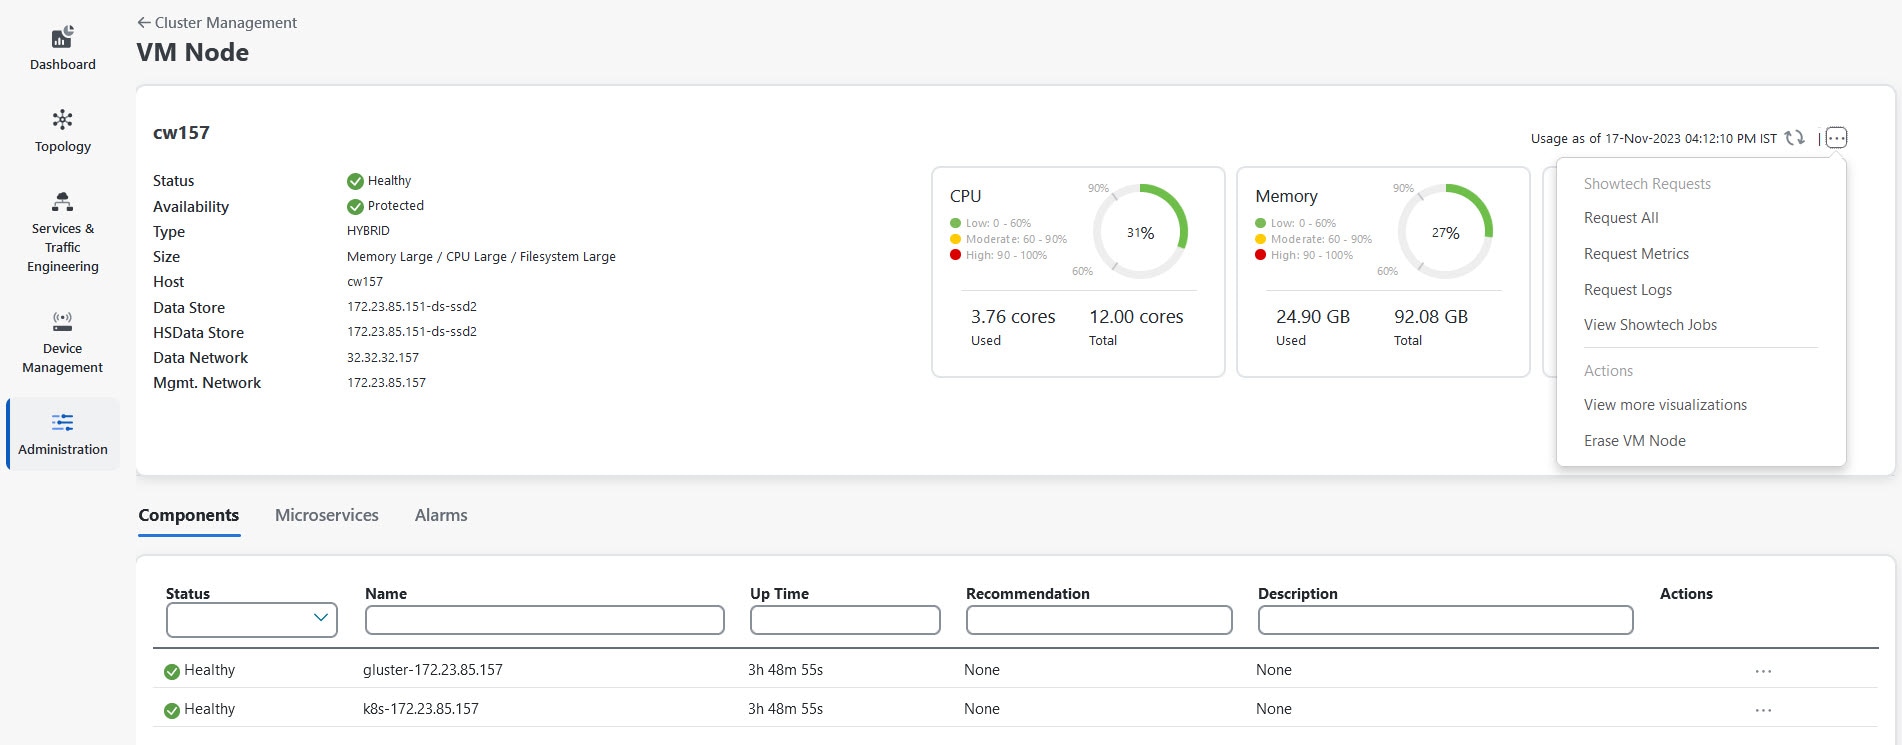
On the top-right corner, click the View more visualizations link to Visually Monitor System Functions in Real Time. To see details for a specific node, click
For information on how to use the Crosswork Health tab, see Monitor Platform Infrastructure and Application Health. |
Single VM based Crosswork Network Controller
Starting with 7.0 release, Crosswork can also be deployed on a single VM that delivers all the functionality with a limited capacity for devices. When deployed as a single VM, all the functions run on a single machine with limited redundancy.
|
Action |
Description |
||
|---|---|---|---|
|
Navigation |
Use the Crosswork Manager window to check the health of the cluster. To display this window, from the main menu, choose . |
||
|
Crosswork Summary window |
The Crosswork Manager window gives you summary information about the status of the nodes, the Platform Infrastructure, and the applications you have installed. 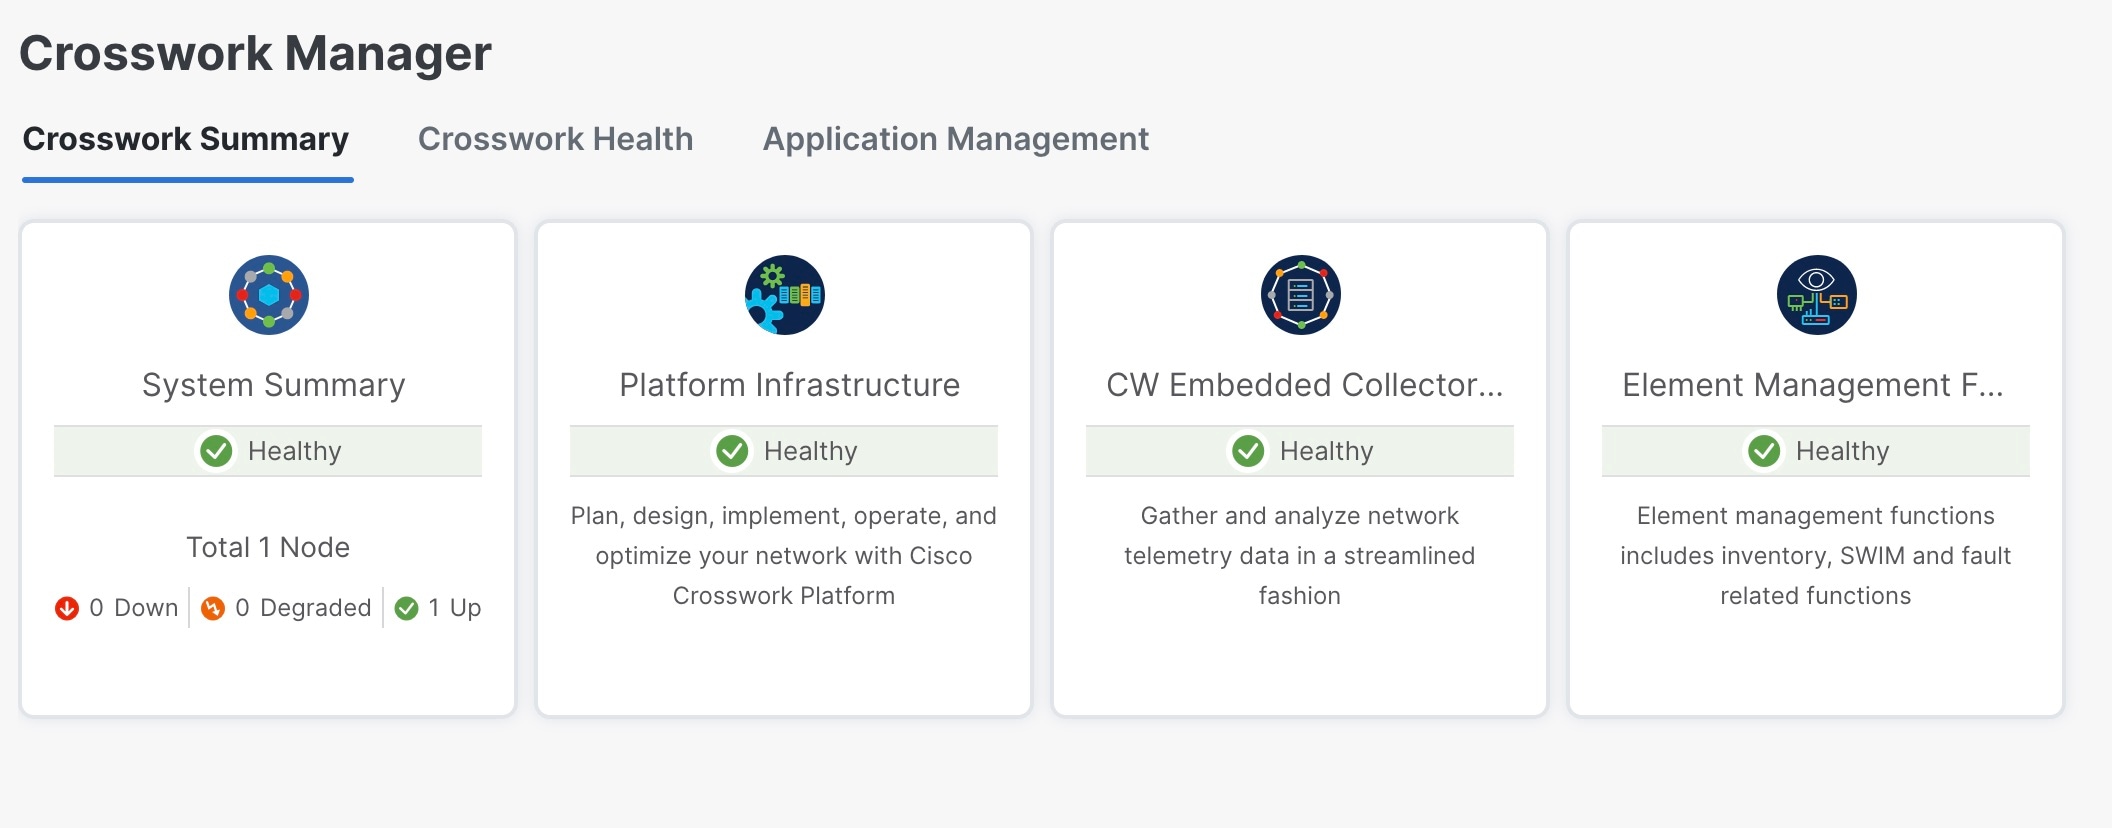
|
||
|
System Summary window |
Click on the System Summary tile to see the VM details. 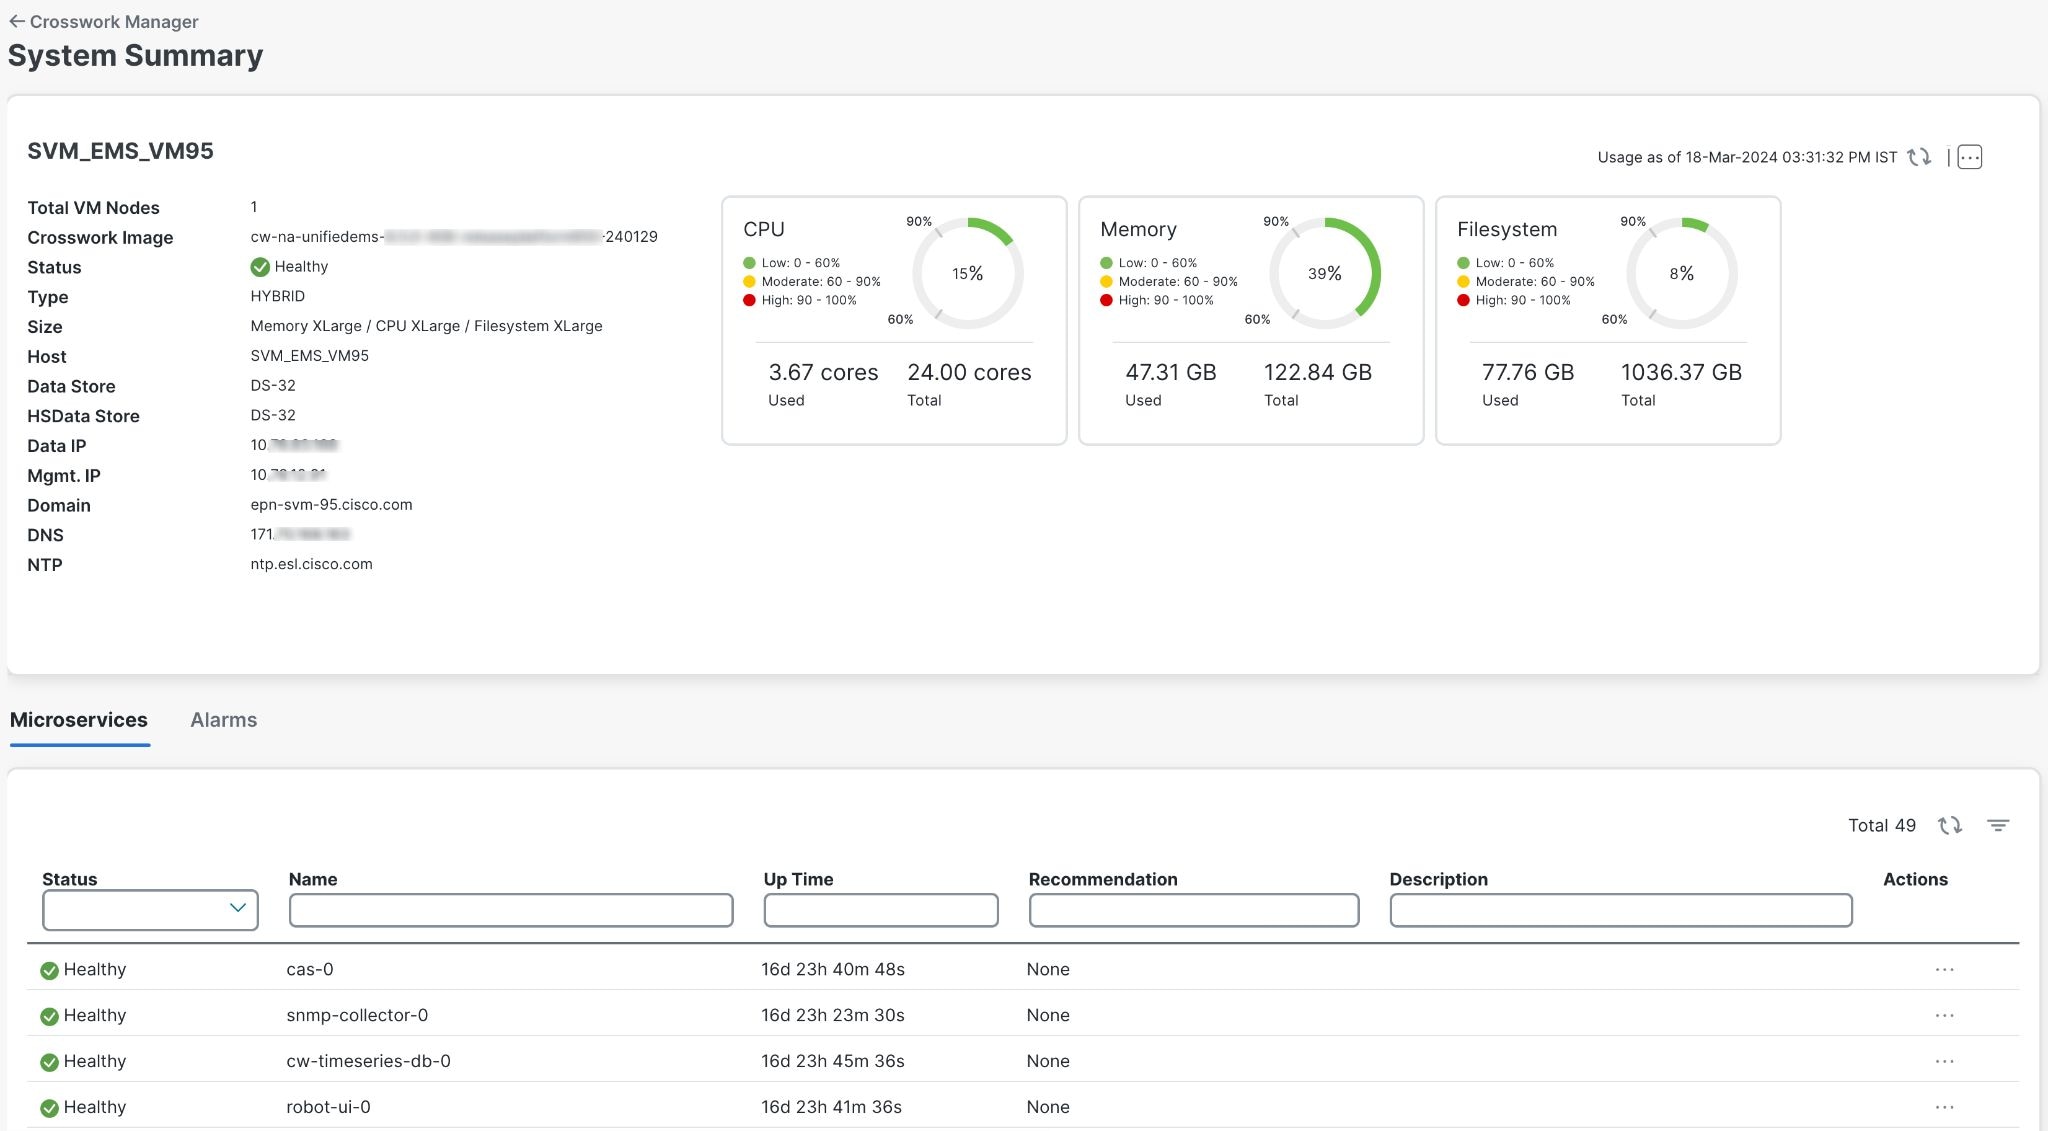
|
 Note |
|


 Feedback