Information About Configuring PROFINET
PROFINET is the leading Industrial Ethernet standard that uses TCP/IP and IT standards to connect and control machines in real time. It is widely used in industrial automation and process control networks, especially for motion control and precision instrumentation. PROFINET emphasizes fast, reliable data exchange and defines communication paths to meet different speed requirements.
Communication Levels: PROFINET communication is scalable across three levels:
-
Non-Real-Time (NRT): Uses TCP/IP with bus cycle times around 100 ms.
-
Real-Time (RT): Enables faster cycle times, approximately 10 ms.
-
Isochronous Real-Time (IRT): Achieves highly precise synchronization with cycle times as low as 1 ms (not supported in Class B).
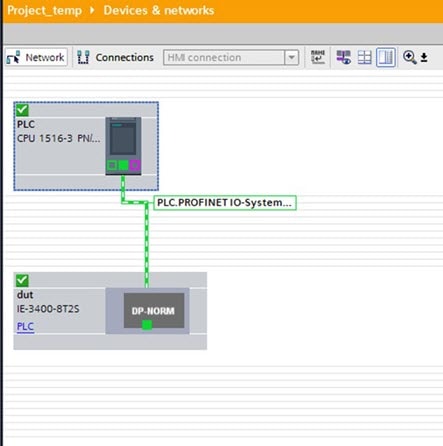
PROFINET I/O System: PROFINET I/O is a flexible communication framework for distributed automation. It uses cyclic data transfer to exchange information, alarms, and diagnostics between controllers, I/O devices, and automation systems like motion controllers.
PROFINET Conformance Class B Support
All Cisco IE switches support PROFINET Conformance Class B.
Conformance Classes: PROFINET has different conformance classes that define supported features.
-
Class B: Common in factory automation, it supports fast, real-time communication and diagnostics — ideal for applications like production lines and equipment monitoring. Class B includes PROFINET Real Time (RT), which prioritizes important data to reduce delays, with cycle times around 10 ms. This makes RT suitable for tasks like conveyor belt and packaging machine control. However, the switches do not support Isochronous Real Time (IRT), which is required for ultra-precise synchronization.
PROFINET Device Roles
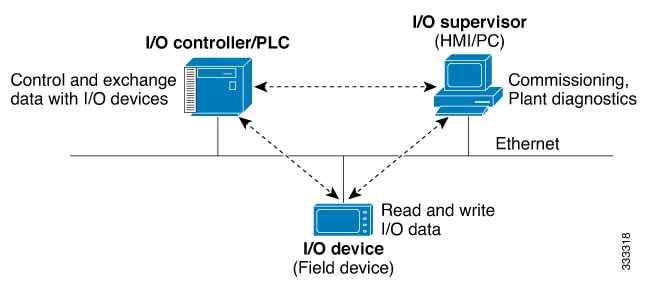
An I/O controller is a programmable logic controller (PLC) that controls I/O devices and exchanges data such as configuration, alarms, and I/O data through an automation program. The I/O controller and the I/O supervisor exchange diagnostic information. The I/O controller shares configuration and I/O information with an I/O device and receives alarms from the I/O device.
There are three main types of I/O devices:
-
I/O Devices: Field devices connected to controllers.
-
I/O Controllers: Manage and control field devices.
-
I/O Supervisors: Tools for diagnostics and configuration.
PROFINET is designed to serve as the sole or primary management system platform for industrial networks. It streamlines device configuration and communication, reducing the need for manual setup.
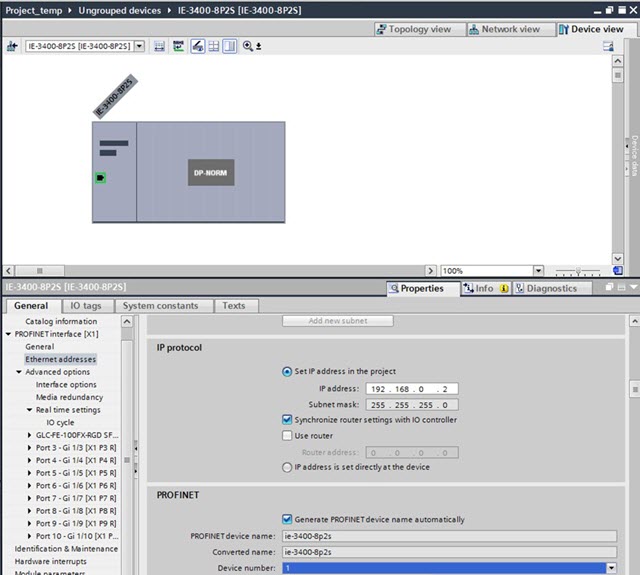
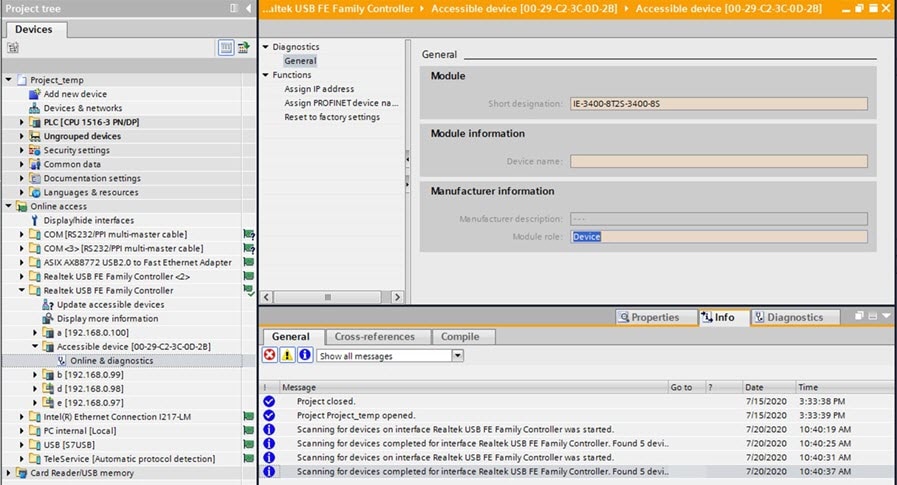
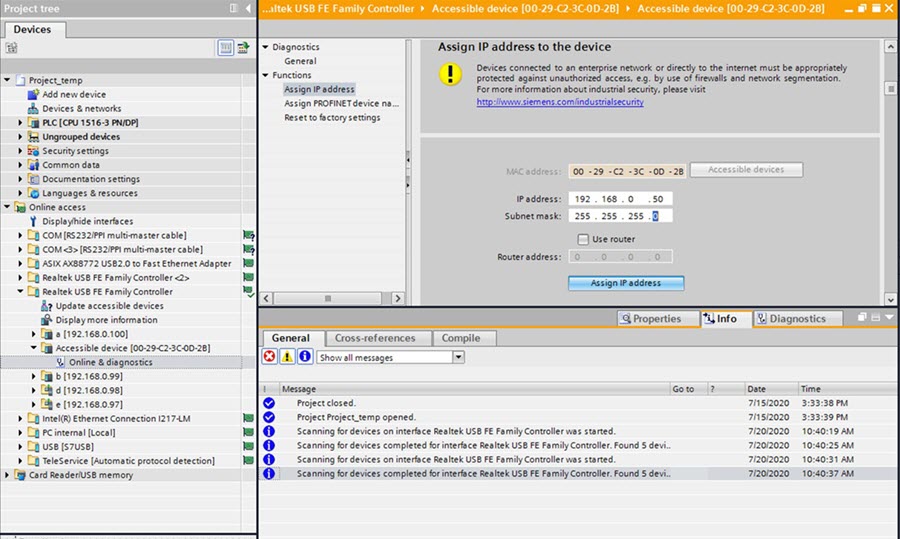
Automatic Device Detection and Configuration:The I/O controller automatically detects switches using the Discovery and Configuration Protocol (DCP). It sets the device name and IP address, so you don’t need to enter Cisco IOS commands for basic configurations.
Advanced Configuration with Cisco IOS: For advanced features, like Quality of Service (QoS), DHCP, and similar capabilities, you’ll need to configure the switch using Cisco IOS commands. These advanced settings cannot be managed directly through PROFINET.
An I/O supervisor is an engineering station, such as a human machine interface (HMI) or PC, used for commissioning, monitoring, and diagnostic analysis. The I/O supervisor exchanges diagnostic, status, control, and parameter information with the I/O device.
An I/O device is a distributed I/O device such as a sensor, an actuator, or a motion controller.
 Note |
If Profinet DCP cannot detect the switch, PLC, or IO mac addresses, temporarily disable the firewall or virus scan from the Windows PC that installed the Siemens STEP7 or TIA Portal Automation application. |
In a PROFINET I/O system, all the I/O devices communicate over an Ethernet communication network to meet the automation industry requirement for bus cycle times of less than 100 ms. The network uses switches and full-duplex data exchange to avoid data collisions. The switches play the role of I/O device in PROFINET Device Roles.
PROFINET Device Data Exchange
After PROFINET uses DCP to discover devices, including the switch, the devices establish application relationships (ARs) and communication relationships (CRs). After a connection is established and information about device parameters is exchanged, I/O data is exchanged. The switch uses non-real-time CRs to exchange the data attributes listed below.
|
PROFINET I/O Switch Configuration Attributes |
Value or Action |
||
|---|---|---|---|
|
Device name |
Configures a name for the device. |
||
|
TCP/IP |
IP address, subnet mask, default gateway, and switch virtual interface (SVI). |
||
|
Primary temperature alarm |
Enables or disables monitoring for the specified alarm. |
||
|
Secondary temperature alarm |
Enables or disables monitoring for the specified alarm. |
||
|
SD card alarm |
Enables or disables monitoring for the specified alarm. |
||
|
RPS failed alarm |
Enables or disables monitoring for the redundant power supply alarm.
|
||
|
Relay major alarm |
Enables or disables monitoring for the specified alarm. |
||
|
Reset to factory |
Reset to factory (Mode 2: Communication parameter) Uses the PROFINET I/O controller to reset the switch communication parameter. This action removes the Profinet device ID, IP address, and configured SNMP writable MIBs. |
||
|
Relay major configuration |
Specifies the type of port alarm, for example, link fault, that triggers the major relay. Any port configured with the specified alarm type can trigger the major relay. |
|
PROFINET I/O Port Configuration Attributes |
Value or Action |
|---|---|
|
Speed |
10, 100, 1000, or auto. |
|
Duplex |
half, full, or auto. |
|
Port mode |
access or trunk. |
|
Link status |
shut down or no shut down. |
|
Configure rate limiting |
Broadcast, unicast, or multicast threshold exceeds configured levels. |
|
Port link fault alarm |
Enables or disables monitoring for specified alarm. |
|
Port not forwarding alarm |
Enables or disables monitoring for specified alarm. |
|
Port not operating alarm |
Enables or disables monitoring for specified alarm. |
|
Port FCS threshold alarm |
Enables or disables monitoring for specified alarm. |
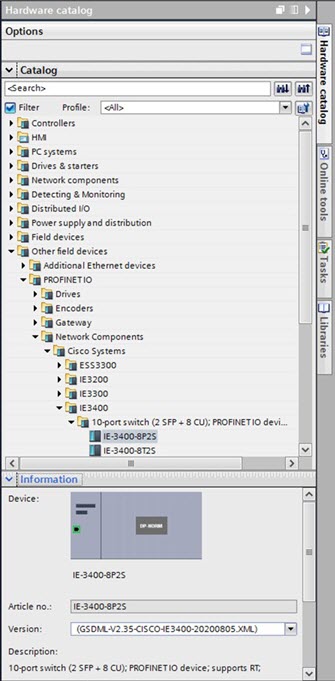
General Station Description File
PROFINET devices are integrated by using a general station description (GSD) file that contains the data for engineering and data exchange between the I/O controller, the I/O supervisor, and the I/O devices, including the switch. Each PROFINET I/O field device must have an associated GSD file that describes the properties of the device and contains all this information required for configuration:
-
Device identification information (device ID, vendor ID and name, product family, number of ports)
-
Number and types of pluggable modules
-
Error text for diagnostic information
-
Communication parameters for I/O devices, including the minimum cycle time, the reduction ratio, and the watch dog time
-
Configuration data for the I/O device modules, including speed, duplex, VLAN, port security information, alarms, and broadcast rate limiting thresholds
-
Parameters configured for I/O device modules for the attributes listed above
The PROFINET GSD file is bundled with the Cisco IOS release. After the switch boots at least one time, the GSD files for the switch are located in a directory called ProfinetGSD. In this directory, there is a zip file containing all the GSDs for all Cisco IE3500 Series Switch SKUs. The file is called CISCO_product_id.zip, for example, CISCO_IE35xx.zip.
The GSD file is in the switch and the I/O supervisor uses this file to manage the switch. For IOS XE-based platforms, the GSD file can be found in the Flash: or SDFlash: file system. If you want to load the GSD file for the Cisco IOS XE platform into the I/O supervisor, you need to copy it from the switch.
Note |
You must use the GSD file that is associated with the Cisco IOS release on the switch to manage your PROFINET network. Both the I/O supervisor and the Cisco IOS software alert you to a mismatch between the GSD file and the switch's Cisco IOS software version. The status of GSD match or mismatch can be determined using the show profinet status command. |


 Feedback