Introduction
This document describes how to use the Access Point (AP) Packet Capture feature.
Prerequisites
Requirements
Cisco recommends that you have knowledge of these topics:
- Command Line Interface (CLI) or Graphic User Interface (GUI) access to the wireless controllers.
- FTP server
- .pcap files
Components Used
- 9800 WLC v16.10
- AP 3700
- FTP server
The information in this document was created from the devices in a specific lab environment. All of the devices used in this document started with a cleared (default) configuration. If your network is live, ensure that you understand the potential impact of any command.
Background Information
Feature is only available for Cisco IOS® APs (like AP 3702) and is therefore deprecated after Cisco IOS® XE version 17.3.
This solution is superseded by Intelligent Capture with Cisco DNA, or as an alternative, by setting the AP to sniffer mode.
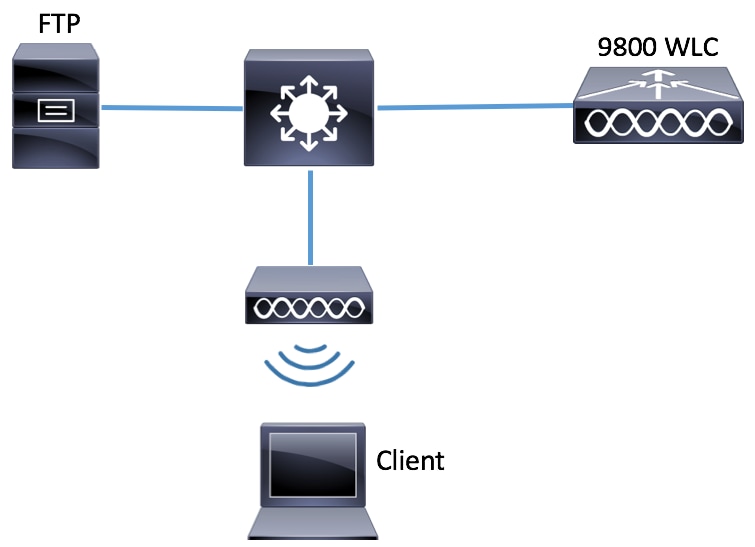
AP Packet Capture feature allows you to perform packet captures over the air with little effort. When the feature is enabled, a copy of all the specified wireless packets and frames sent and received from/to APs from/to a specific wireless mac address over the air, is forwarded to a File Transfer Protocol(FTP) server, where you can download it as .pcap file and open it with your preferred packet analysis tool.
Once the packet capture is started, the AP where the client is associated to, creates a new .pcap file on the FTP server (ensure the username specified for FTP log in has write rights). If the client roams, the new AP creates a new .pcap file on the FTP server. If the client moves between Service Set Identifiers (SSIDs), the AP does keep the packet capture alive so you can see all the management frames when the client associates to the new SSID.
If you make the capture on an open SSID (no security), you are able to see content of the data packets, but if the client is associated to a secured SSID (a password protected SSID or 802.1x security), then the data portion of the data packets is encrypted and cannot be seen in clear text.
Configuration
Network Diagram
Configurations
Prior to the configuration, check which would be the APs to which the wireless client could connect.
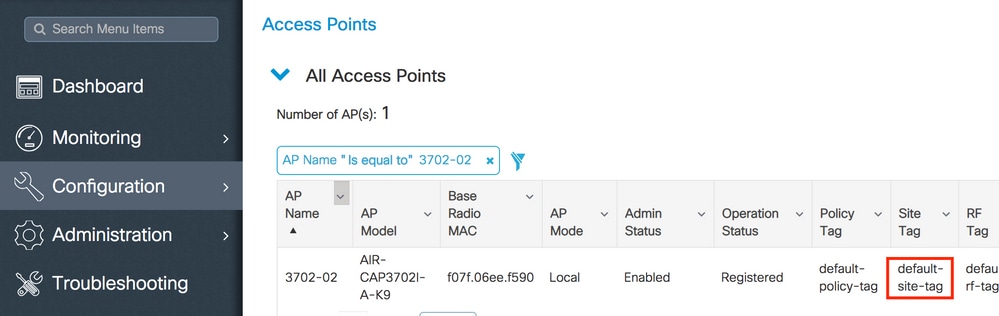
Step 1. Verify the current Site tag associated to the APs that the wireless client could use to connect.
GUI:
Navigate to Configuration > Wireless > Access Points.
CLI:
# show ap tag summary | inc 3702-02

3702-02 f07f.06e1.9ea0 default-site-tag default-policy-tag default-rf-tag No Default
Step 2. Check the AP Join Profile associated to that Site Tag.
GUI:
Navigate to Configuration > Tags & Profiles > Tags > Site > Site Tag Name.
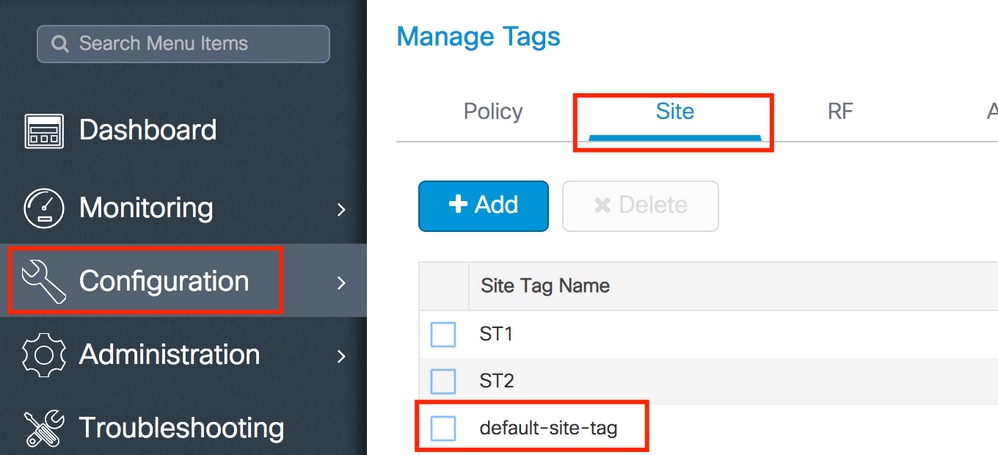
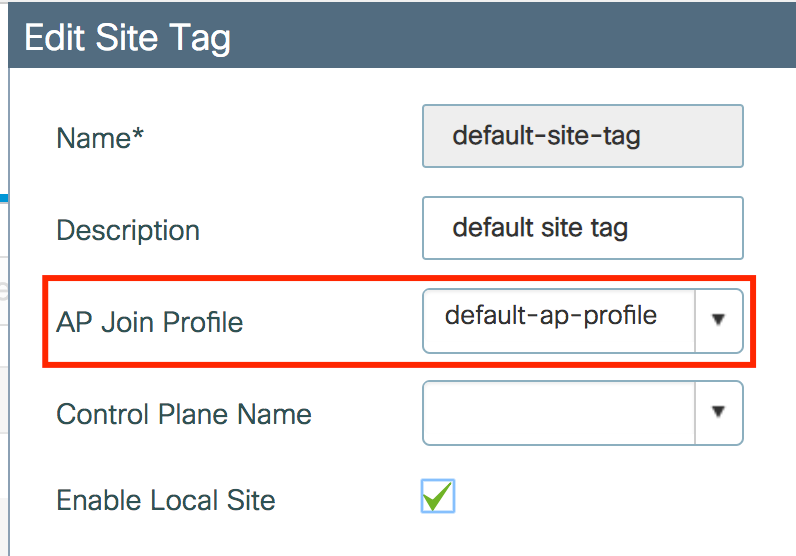
Take note of the AP Join Profile associated.
CLI:
# show wireless tag site detailed default-site-tag

Site Tag Name : default-site-tag
Description : default site tag
----------------------------------------
AP Profile : default-ap-profile
Local-site : Yes
Image Download Profile: default-me-image-download-profile
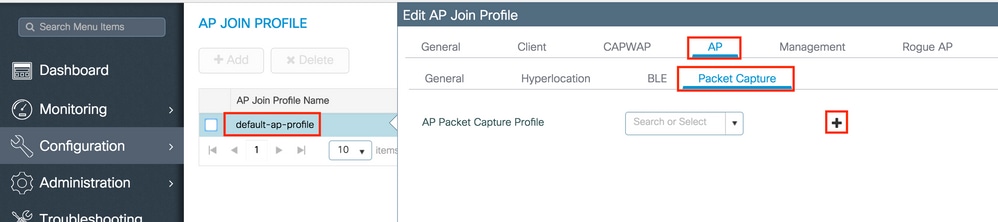
Step 3. Add the Packet Capture settings on the AP Join profile.
GUI:
Navigate to Configuration > Tags & Profiles > AP Join > AP Join Profile Name > AP > Packet Capture and add a new AP Packet Capture Profile.
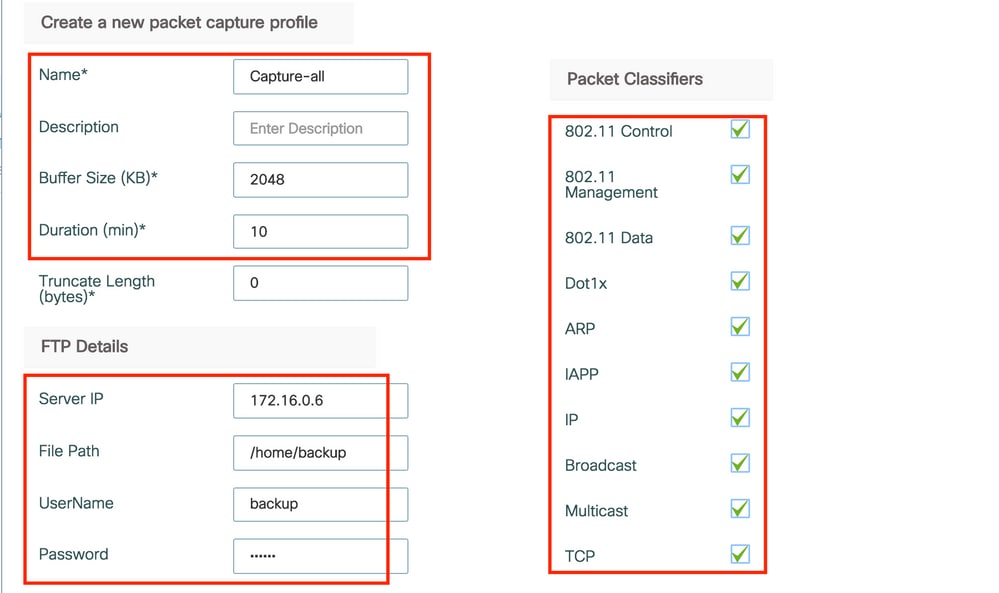
Select a Name for the Packet Capture Profile, and enter the FTP server details to which the APs send the packet capture. Also, ensure you select the kind of packets that you want to monitor.
Buffer Size = 1024-4096
Duration = 1-60
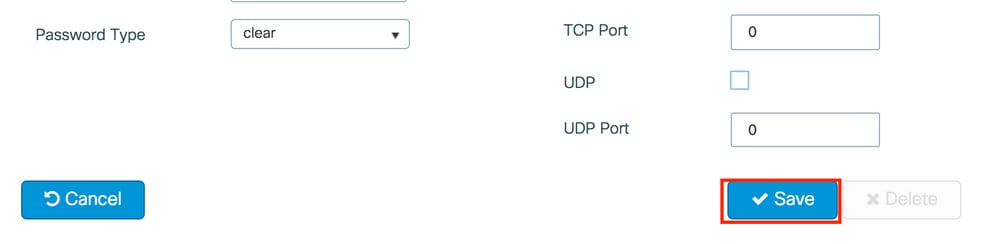
Once the Capture profile is saved, click Update & Apply to Device.

CLI:
# config t
# wireless profile ap packet-capture Capture-all
# classifier arp
# classifier broadcast
# classifier data
# classifier dot1x
# classifier iapp
# classifier ip
# classifier tcp
# ftp password 0 backup
# ftp path /home/backup
# ftp serverip 172.16.0.6
# ftp username backup
# exit

# ap profile default-ap-profile
# packet-capture Capture-all
# end
# show wireless profile ap packet-capture detailed Capture-all

Profile Name : Capture-all
Description  :
---------------------------------------------------
Buffer Size       : 2048 KB
Capture Duration  : 10 Minutes
Truncate Length   : packet length
FTP Server IP     : 172.16.0.6
FTP path          : /home/backup
FTP Username      : backup

Packet Classifiers
  802.11 Control  : Enabled
  802.11 Mgmt     : Enabled
  802.11 Data     : Enabled
  Dot1x           : Enabled
  ARP             : Enabled
  IAPP            : Enabled
  IP              : Enabled
  TCP             : Enabled
  TCP port        : all
  UDP             : Disabled
  UDP port        : all
  Broadcast       : Enabled
  Multicast       : Disabled
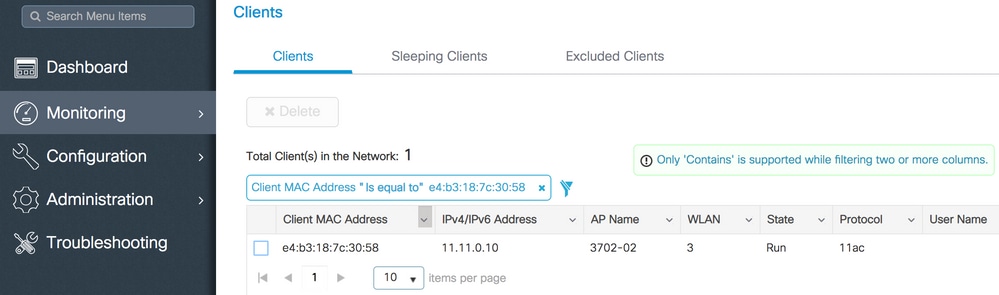
Step 4. Ensure that the wireless client that you want to monitor is already associated to any of the SSIDs and to one of the APs that has assigned the Tag where the AP join profile with the packet capture settings were assigned, otherwise the capture cannot be started.
Tip: If you wish to troubleshoot the reason why a client is not able to connect to an SSID, then you could connect to an SSID that works fine and then roam to the failing SSID, the capture follows the client and captures all its activity.
GUI:
Navigate to Monitoring > Wireless > Clients.
CLI:
# show wireless client summary | inc e4b3.187c.3058

e4b3.187c.3058 3702-02 3 Run 11ac
Step 5. Start the Capture.
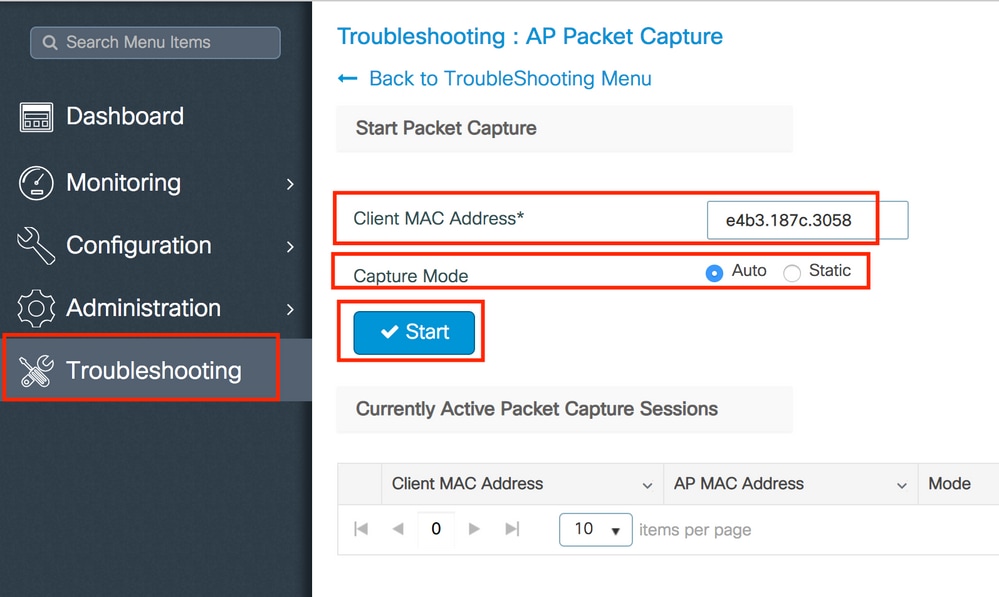
GUI:
Navigate to Troubleshooting > AP Packet Capture.
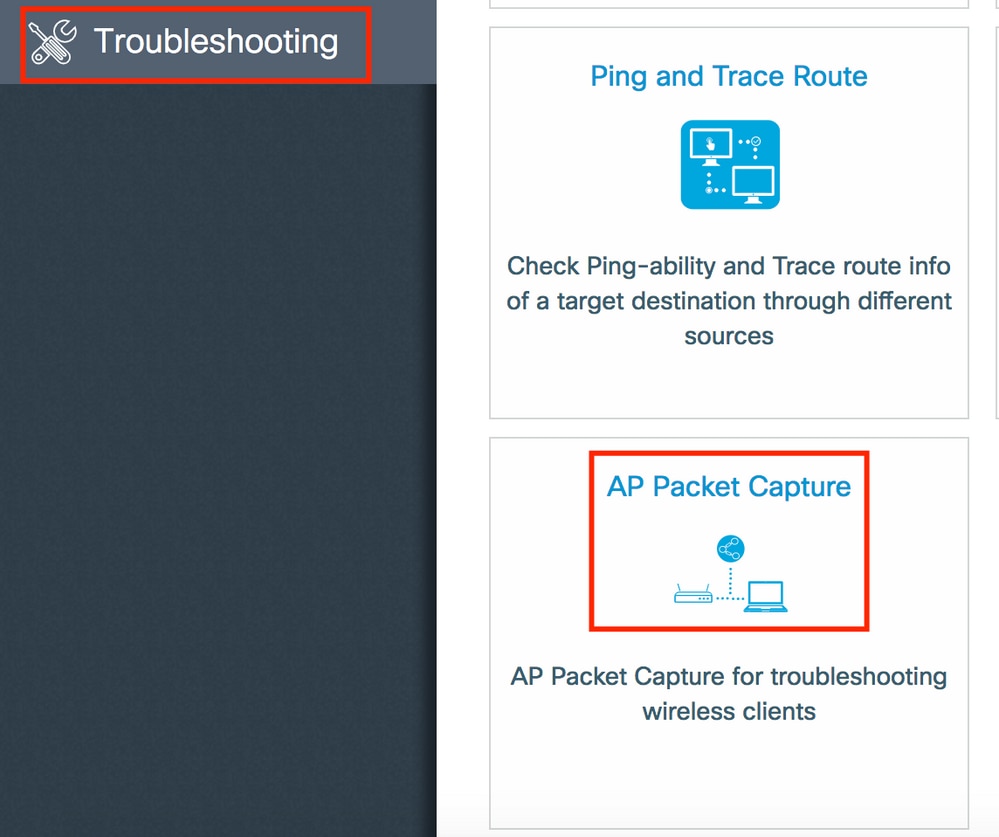
Enter the mac address of the client that you want to monitor and select the Capture Mode. Auto means that every AP to which the wireless client connects, creates a new .pcap file automatically. Static lets you choose one specific AP to monitor the wireless client.
Start the capture with Start.
Then, you can see the current state of the capture:

CLI:
# ap packet-capture start <E4B3.187C.3058> auto
Step 6. Stop the capture.
Once the desired behavior has been captured, stop the capture either by GUI or CLI:
GUI:


CLI:
# ap packet-capture stop <E4B3.187C.3058> all
Step 7. Collect the .pcap file from the FTP server.
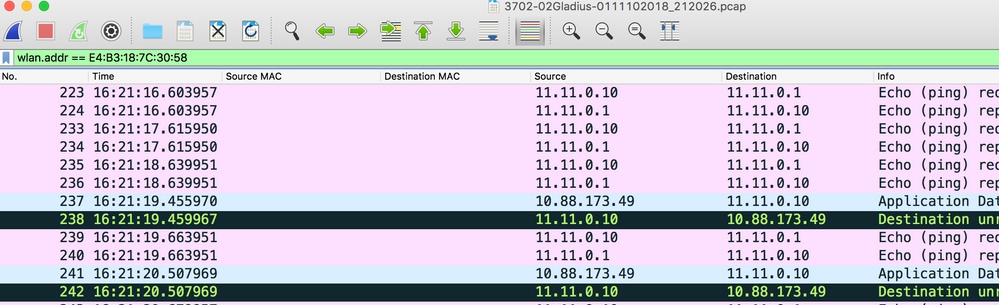
You must find a file with a name as <ap-name><9800-wlc-name>-<##-file><day><month><year>_<hour><minute><second>.pcap.

Step 8. You can open the file with your preferred packet analysis tool.
Verify
You can use these commands to verify the configuration of the packet capture feature.
# show ap status packet-capture

Number of Clients with packet capture started : 1

Client MAC      Duration(secs)   Site tag name            Capture Mode
-------------------------------------------------------------------------
e4b3.187c.3058  600              default-site-tag         auto
# show ap status packet-capture detailed e4b3.187c.3058

Client MAC Address    : e4b3.187c.3058
Packet Capture Mode   : auto
Capture Duration      : 600 seconds
Packet Capture Site   : default-site-tag

Access Points with status
AP Name                   AP MAC Addr     Status
----------------------------------------------------
APf07f.06e1.9ea0          f07f.06ee.f590  Started
Troubleshoot
Use these steps to troubleshoot this feature:
Step 1. Enable debug condition.
# set platform software trace wireless chassis active R0 wncmgrd all-modules debug
Step 2. Reproduce the behavior.
Step 3. Check the current controller time to be able to track the logs in time.
# show clock
Step 4. Collect the logs.
# show logging process wncmgrd internal | inc ap-packet-capture
Step 5. Set back the logs condition to defaults.
# set platform software trace wireless chassis active R0 wncmgrd all-modules notice
Note: It is very important that after a troubleshooting session, you set back the logs levels to avoid the generation of unnecessary logs.
 Feedback