Manage User Accounts on the WAP125 or WAP581 Access Point
Available Languages
Objective
A User Account on a Wireless Access Point (WAP) is created in order for authorized persons to have access to the device and manage it. By default, there is one pre-configured management user account on the WAP and it has the only Read/Write privileges, while up to four additional user accounts can be added and have Read Only access to the web-based utility.
Why do we need to configure User Accounts on the WAP?
Configuring User Accounts on the WAP is necessary in order to have the authority to access the device and properly manage it. The web-based utility on the WAP contains all the settings and configuration of the device so it is recommended to set proper limitations and restrictions to whoever person in the network that has access to it.
This article explains how to edit, create, and delete user accounts on the WAP125 or WAP581 Access Point.
Applicable Devices
- WAP125
- WAP581
Software Version
- 1.0.0.5 — WAP125
- 1.0.0.4 — WAP581
Manage User Accounts
Step 1. Log in to the access point web-based utility by entering your Username and Password in the fields provided and then click Login.
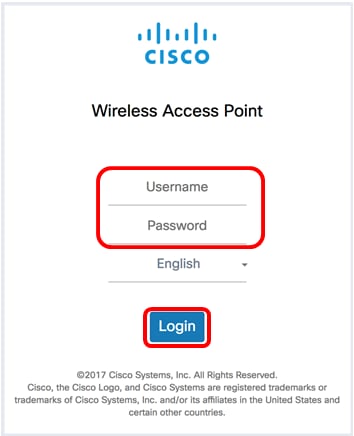
Note: The default username/password is cisco/cisco.
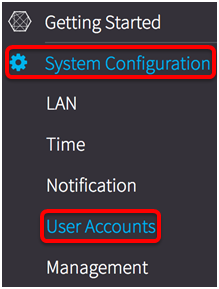
Step 2. Choose System Configuration > User Accounts.
The User Account Table will show the configured user accounts (if there are any) and the default management user account that has the Read/Write Access.
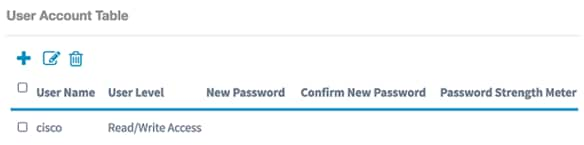
Note: In this example, the table shows no other existing user accounts except for the default management user account. The default user name for this account is cisco.
Edit the User Account
Step 1. Check the box beside the User Name of the account that you want to edit and then click on the Edit icon at the upper left portion of the table.
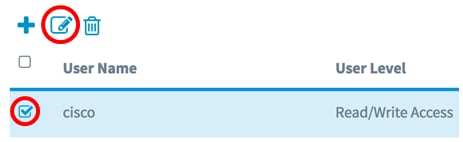
Note: In this example, the default management user account named cisco is chosen. The User Level area shows that this account has the Read/Write Access.
Step 2. (Optional) Change the User Name to your preferred name.
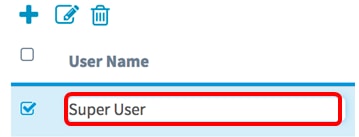
Note: In this example, the default name cisco is changed to Super User.
Step 3. Enter a new password for this account and then confirm it in the fields provided.

Note: The Password Strength Meter indicates the strength of the password you have entered.
Step 4. Click the  button.
You should now have successfully edited a user account.
Add a User Account
Step 1. Click on the Plus icon at the upper left portion of the table.
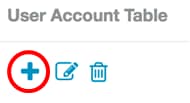
Note: An empty row would appear in the table.
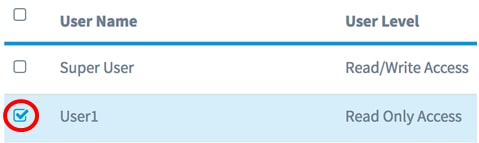
Step 2. In the User Name field, enter a name for the new user account that you want to add.

Note: In this example, User1 is used. The User Level area automatically shows that this additional account has a Read Only Access. This means that this user can only access the web-based utility and view the configuration settings but cannot make any changes to it.
Step 3. Enter a password for this account and then confirm it in the fields provided. This will be the password used to access the web-based utility when using this account.

Note: The Password Strength Meter indicates the strength of the password you have entered.
Step 4. Click the  button.
Step 5. (Optional) Repeat Steps 1 to 4 for each user account that you want to add. You can add up to four user accounts on the WAP.
You should now have successfully added a user account.
Delete a User Account
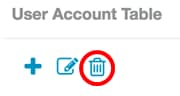
Step 1. Check the box beside the User Name of the account that you want to delete.
Step 2. Click on the Trash bin icon at the upper left portion of the table. This will automatically delete the user account.
Note: The user account will no longer be in the list.
You should now have successfully deleted a user account.
 Feedback