Configure Active Directory Guest Authentication on WAP571 or WAP571E
Available Languages
Objective
The objective of this document is to show you how to configure the Active Directory guest authentication on the WAP571 or WAP571E.
Introduction
Microsoft provides Windows Active Directory Service, an internal Active Directory (AD). It stores all of the essential information for the network including users, devices, and policies. Administrators use the AD as a single place to create and manage the network. AD guest authentication allows a client to configure a captive portal infrastructure using the AD for authentication. Captive Portal (CP) is a feature that allows an administrator to grant access to pre-defined users connecting to a Wireless Access Point (WAP). Clients are directed to a web page for authentication and conditions of access before they are able to connect to the network. CP verification is for both guests and authenticated users of the network. This feature makes use of the web browser and turns it into an authentication device.
CP instances are a defined set of configurations used to authenticate clients on the WAP network. Instances can be configured to respond in different ways to users as they attempt to access the associated virtual access points (VAPs) which simulate multiple access points within one physical WAP device. To learn more about VAP and the steps involved in configuring it, click here.
Captive portals are often employed at Wi-Fi hotspot locations to ensure users agree to terms and conditions as well as provide security credentials prior to gaining access to the Internet. For some organizations they offer the joining user the opportunity to be contacted in the future about the brand. There are many marketing use cases to a feature like this. To support AD authentication, the WAP will need to communicate with one to three Windows Domain Controllers (also known as servers) to provide authentication. It can support multiple domains for authentication by choosing domain controllers from different AD domains.
Applicable Devices
-
WAP571
-
WAP571E
Software Version
-
1.1.0.3
Configure Active Directory Guest Authentication
Step 1. Log in to the web configuration utility of the WAP by entering the username and password. The default username and password is cisco/cisco. If you have configured a new username or password, enter those credentials instead. Click Login.
Note: In this article, the WAP571E is used to demonstrate the configuration of AD guest authentication. Menu options may slightly vary depending on the model of your device.

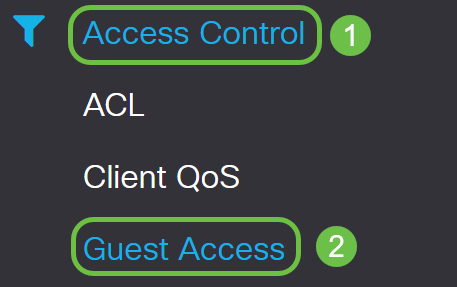
Step 2. Choose Access Control > Guest Access.
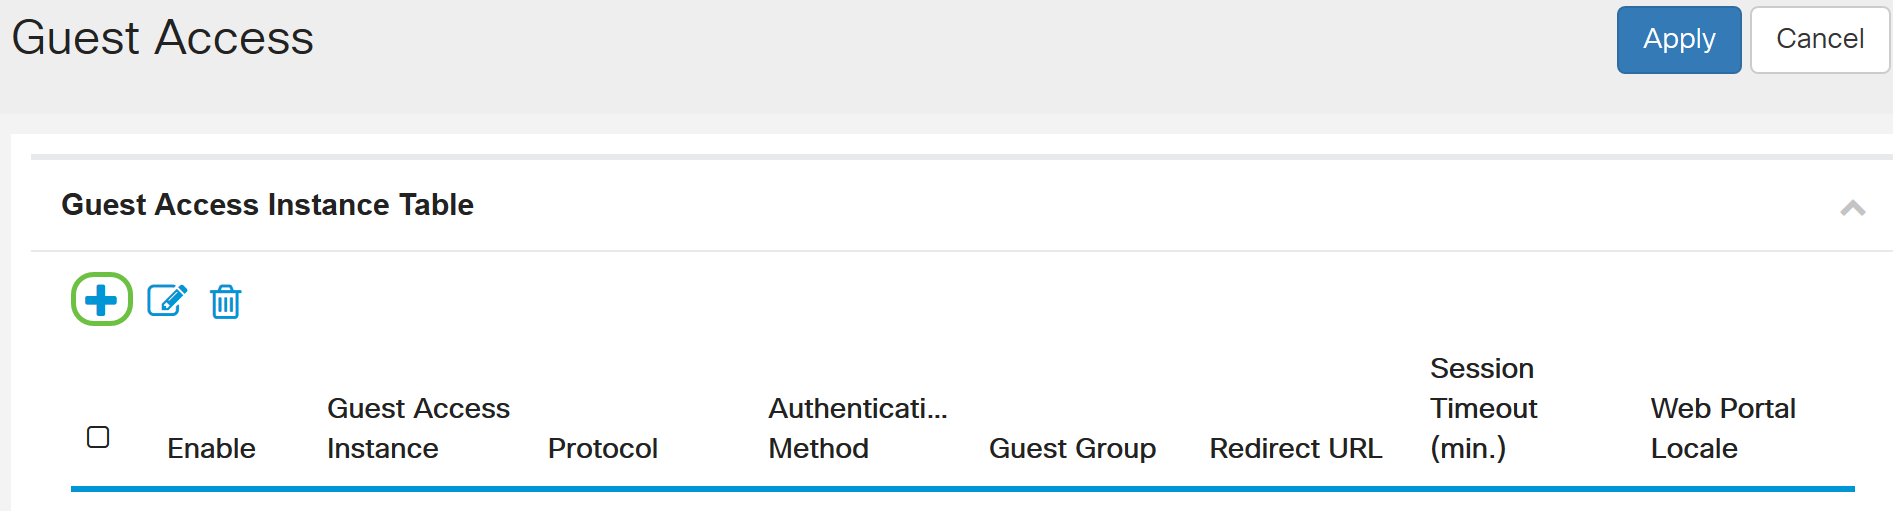
Step 3. In the Guest Access Instance Table, you can either select the plus icon to add a new Guest Access Instance or the pencil and paper icon to edit an existing one. The Guest Access feature of the WAP571 or WAP571E access point provides wireless connectivity to temporary wireless clients within the range of the device. The access point will broadcast the Service Set Identifier (SSID) specific for the guest network. Guests are then redirected to a CP where they are required to enter their credentials. In effect, this keeps the main network secure while still giving guests access to the Internet.
The settings of the CP are configured at the Guest Access Instance Table of the web-based utility of the WAP. The Guest Access feature is particularly useful in hotel and office lobbies, restaurants, and malls.
In this example, a new Guest Access instance is added by clicking on the plus icon.
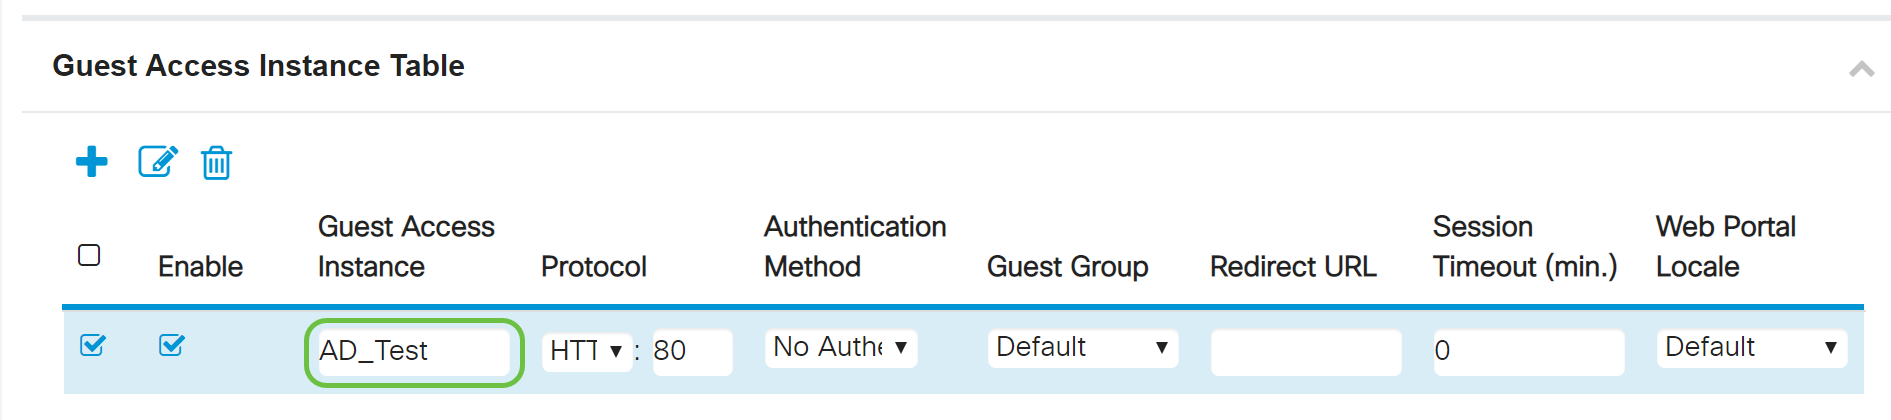
Step 4. Name the Guest Access Instance. In this example, it is named AD_Test.
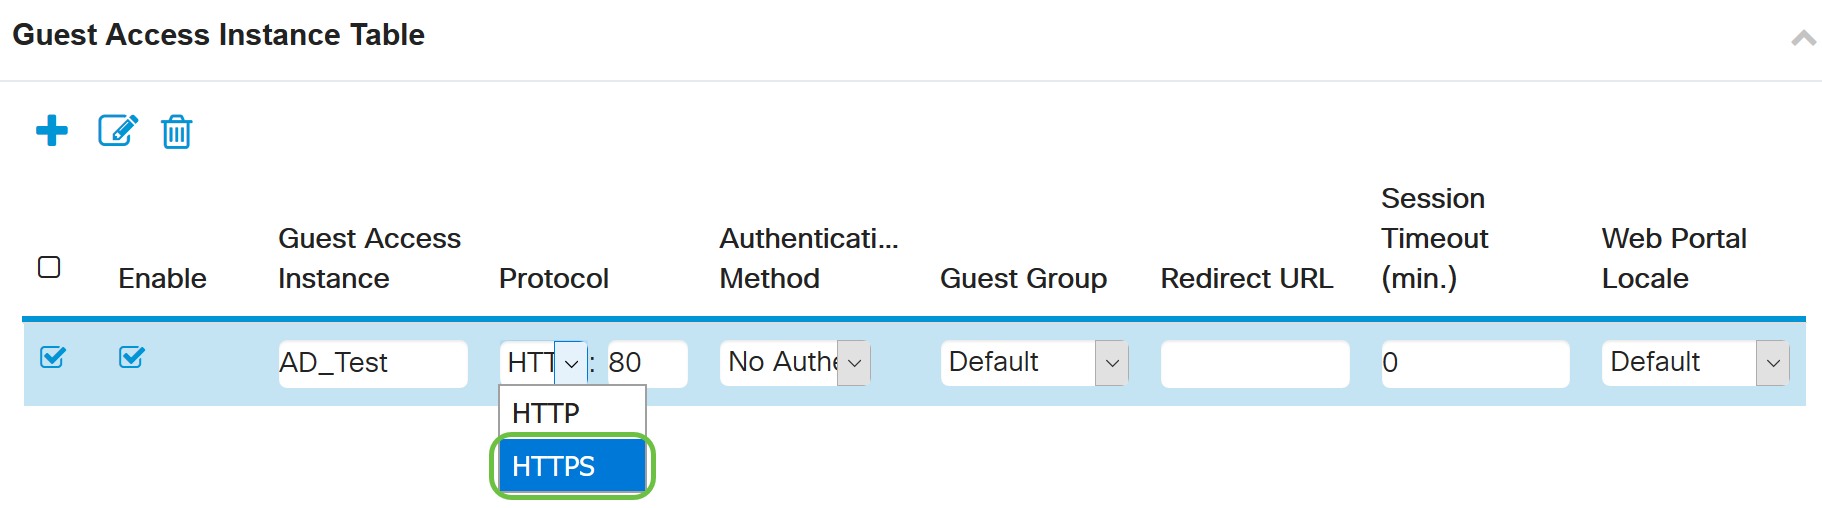
Step 5. Choose the Protocol for the CP instance to use during the verification process from the drop-down menu.
-
HTTP - Does not use encryption during verification.
-
HTTPS - Uses the Secure Sockets Layer (SSL), which requires a certificate to provide encryption. The certificate is presented to the user at connection time.
Note: It is very important that a client configure the captive portal page to use HTTPS and not HTTP as the former is more secure. If a client chooses HTTP, they can inadvertently expose usernames and passwords by transmitting them in unencrypted clear text. It is best practice to use a HTTPS captive portal page.
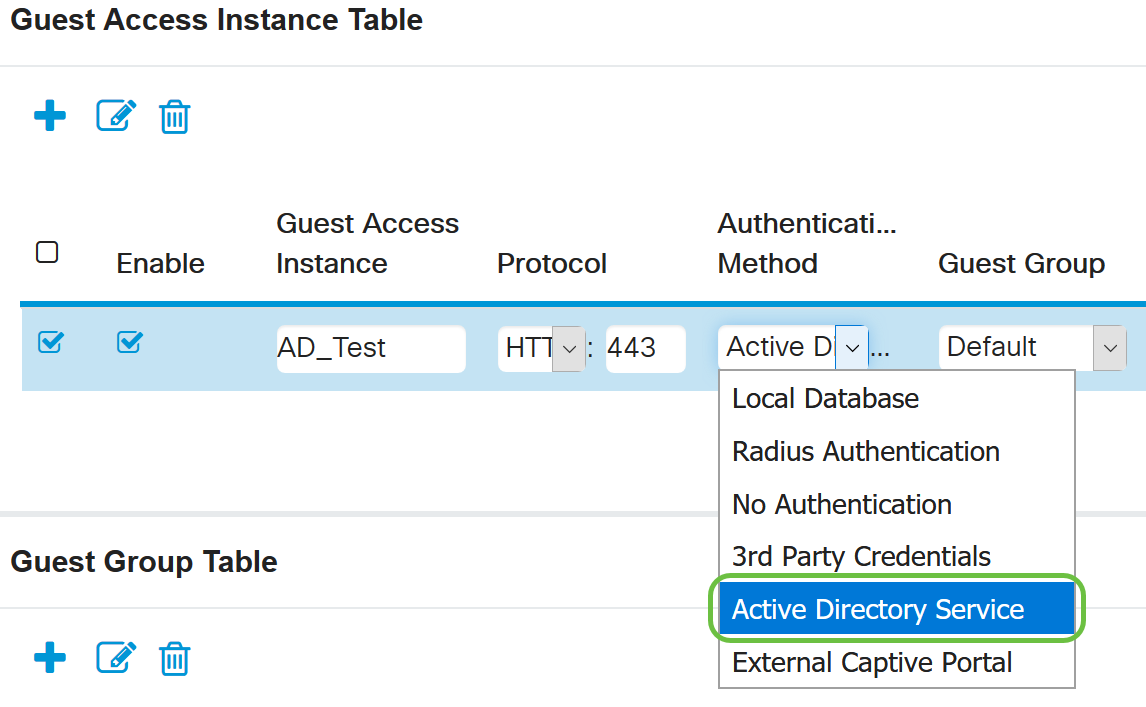
Step 6. Choose the Authentication Method as Active Directory Service.
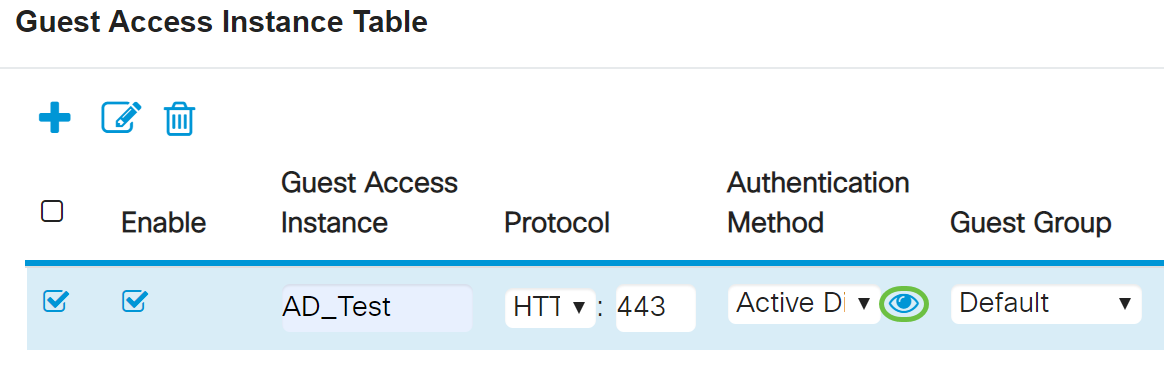
Step 7. Configure the IP address of the AD server by clicking the blue eye icon next to the Active Directory Service in the Authentication Method column.
Step 8. A new browser window will open up. Enter the IP address for the AD server. In this example, the Host IP address used is 172.16.1.35. Click OK.
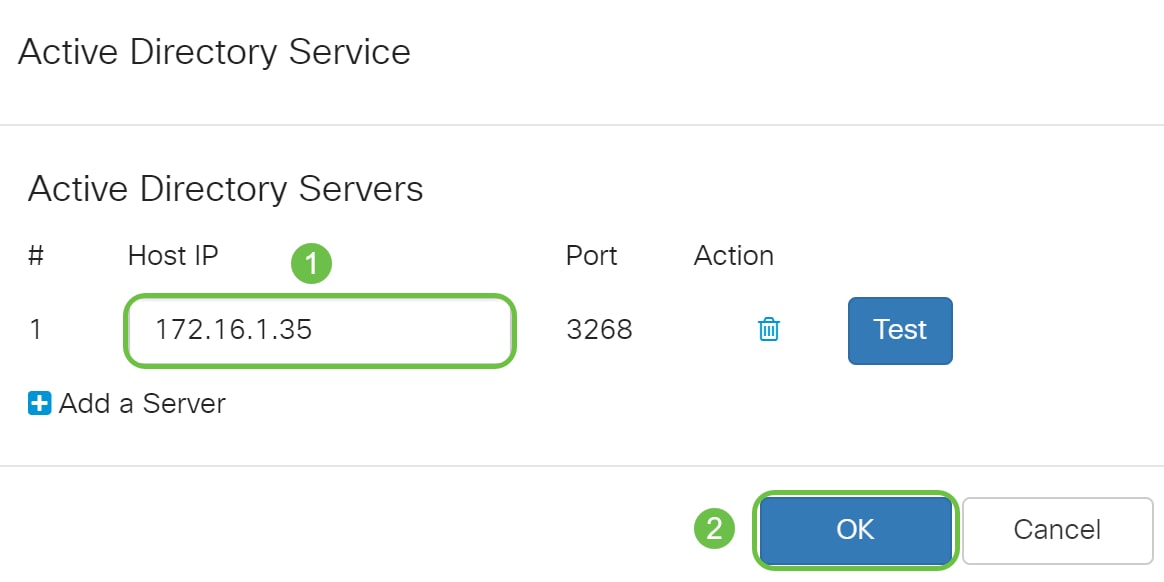
Note: As an optional step, you can click on Test to verify that the IP address for the AD server is valid. For more information regarding the verification steps, click here. You can add up to 3 AD servers.
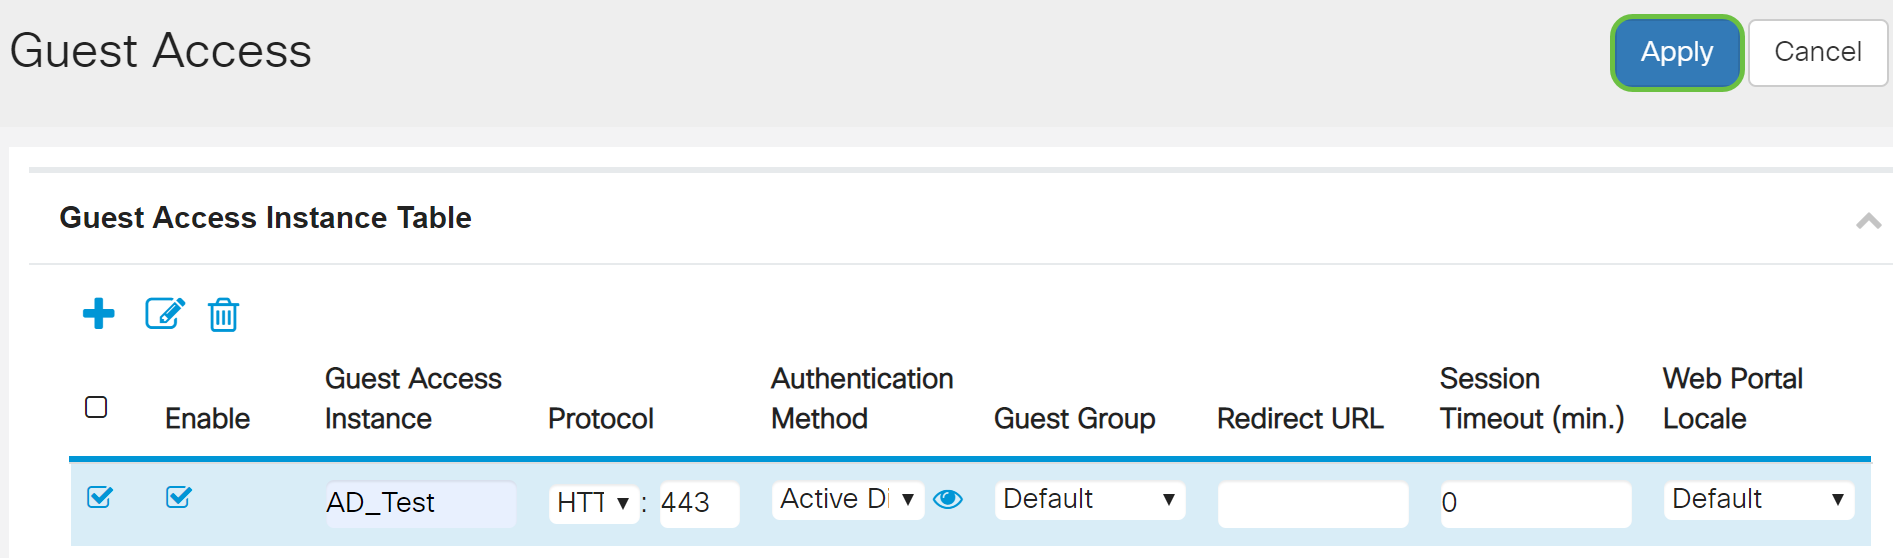
Step 9. Click Apply to save the changes.
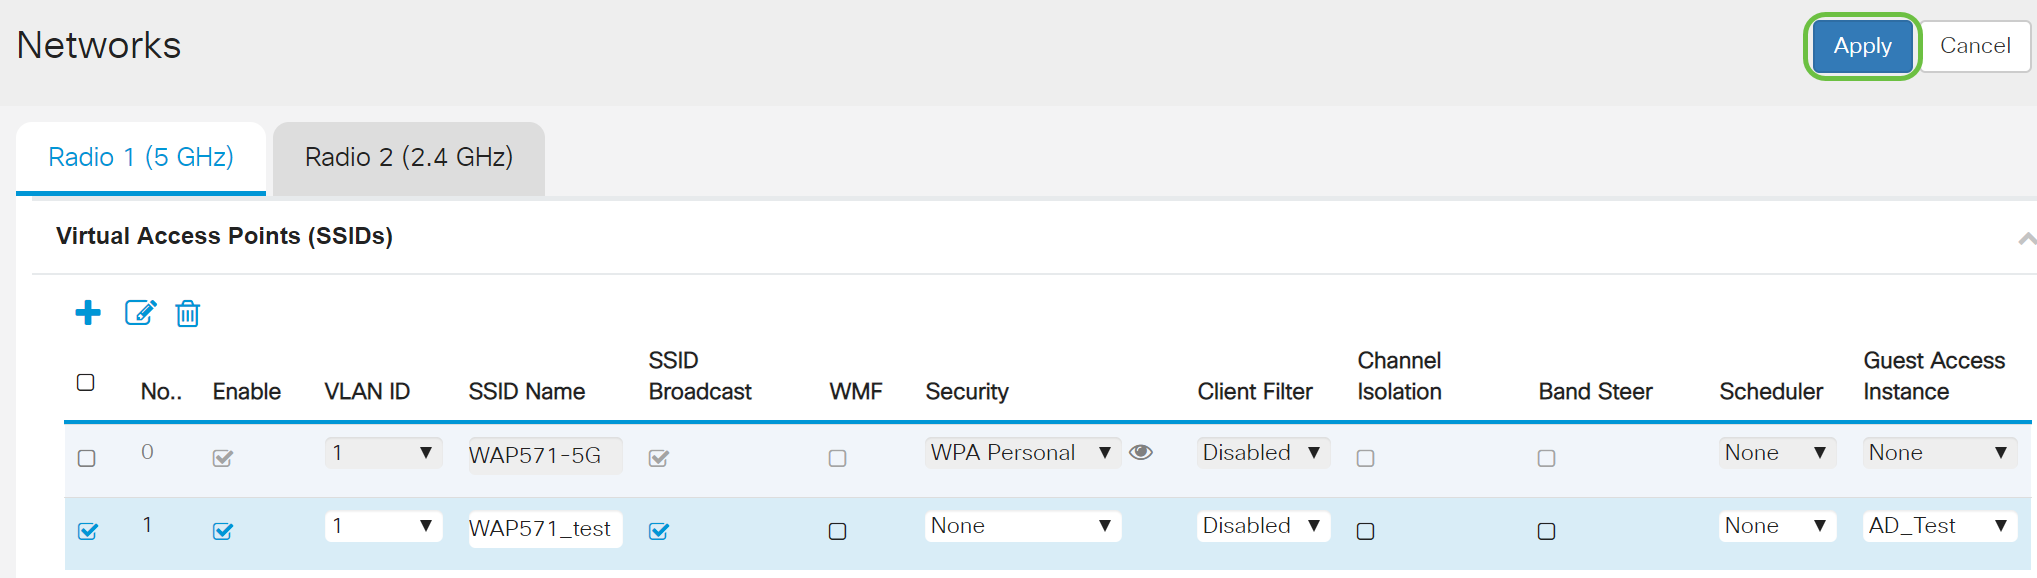
Step 10. Go to the Menu and choose Wireless > Networks.

Step 11. Choose the network and specify that it will choose AD as the Guest Access Instance for authentication. In this example, the network is WAP571_test.

Step 12. Click Apply.
Conclusion
You have now successfully configured the active directory guest authentication on the WAP571 or WAP571E.
For steps to connect to the guest wireless network using AD authentication and to verify its functionality,
please refer to the article on Configure
Active Directory Guest Authentication on WAP125 or WAP581.
 Feedback