Configure a MAC ACL on a WAP125 and WAP581
Available Languages
Introduction
Media Access Control (MAC) Access Control Lists (ACLs) are Layer 2 ACLs. Each ACL is a set of rules applied to traffic received by the Wireless Access Point (WAP). The rule specifies whether the contents of a given field should be used to allow or deny access to the network. The ACLs can be configured to inspect fields of a frame like the source or destination MAC address, the Virtual Local Area Network (VLAN) Identifier (ID), or the Class of Service (CoS). When a frame enters the WAP device port, it inspects the frame and checks the ACL rules against the content of the frame. If any of the rules match the content, a permit or deny action is taken on the frame. Configuring MAC ACLs is typically used to authorize access to network resources to select devices in the network.
Note: There is an implicit deny at the end of every rule created.
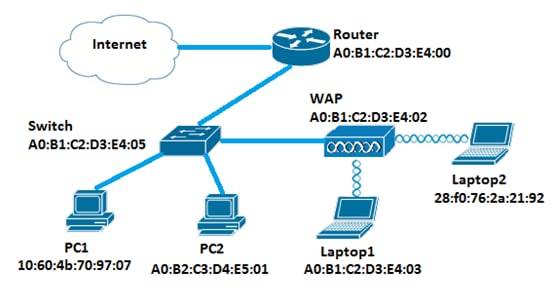
In this scenario, all devices in the network will be permitted to have access to Laptop2 behind the WAP except for PC1.
Objective
This article aims to show you how to configure a MAC-based ACL on a WAP125 or WAP581 Access Point in order to prevent PC1 from accessing Laptop2 behind the WAP.
Applicable Devices
- WAP125
- WAP581
Software Version
- 1.0.0.5 — WAP125
- 1.0.0.4 — WAP581
Configure a Client Filter List
Note: Menu options may vary depending on the exact model of the WAP that you are using. The images below are taken from the WAP125.
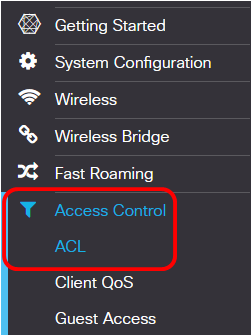
Step 1. Log in to the web-based utility of the WAP and choose Access Control > ACL.
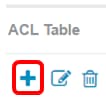
Step 2. Click the  button.
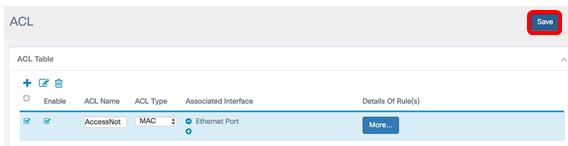
Step 3. Verify that the Enable checkbox is checked to ensure that the ACL is active. This option is checked by default.
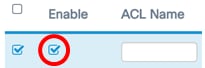
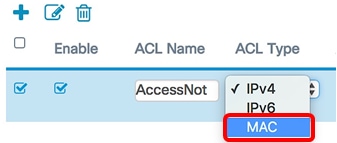
Step 4. Enter a name for the ACL in the ACL Name field to identify the ACL.

Note: In this example, AccessNot is entered.
Step 5. Choose MAC from the ACL Type drop-down list.
Step 6. Click the  button and choose an interface from the Associated Interface drop-down list. The options are:
- 2.4G VAP 0 (SSID Name) — This option will apply the MAC ACL to the 2.4 GHz Virtual Access Point (VAP). The SSID Name section may change depending on the SSID name configured on the WAP.
- 5G VAP0 (SSID Name) — This option will apply the MAC ACL to the 5 GHz VAP.
- Ethernet Port — This option will apply the MAC ACL to the Ethernet interface of the WAP.
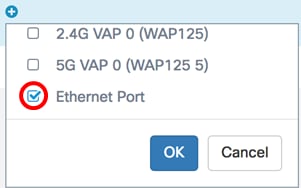
Note: Multiple interfaces can be associated to an ACL. Check the check box of the corresponding interface to associate the interface to the ACL. Uncheck the box to disassociate the interface from the ACL. In this example, Ethernet Port is being associated to the ACL.
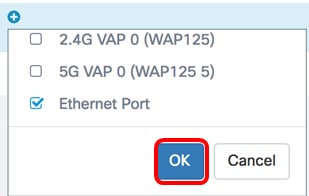
Step 7. Click OK.
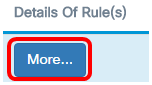
Step 8. Click the More… button to configure the parameters of the ACL.
Step 9. Click the  button to add a new rule.

Step 10. Choose an action from the Action drop-down list. The options are:
- Permit — This option will allow packets that match the ACL criteria to connect to the network.
- Deny — This option will prevent packets that match the ACL criteria from connecting to the network.
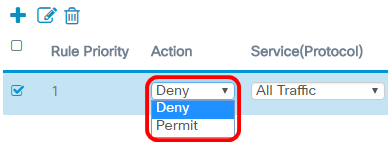
Note: In this example, Deny is chosen.
Step 11. Choose a service or protocol to be filtered from the Service (Protocol) drop-down list. The options are:
- All Traffic — This option will treat all packets as a match to the ACL filter.
- Select From List — This option will allow you to choose appletalk, arp, ipv4, ipv6, ipx, netbios, and pppoe as filters for the ACL. If you choose this option, skip to Step 12.
- Custom — This option will allow you to enter a custom protocol identifier as a filter for the packets. The value is a four-digit hexadecimal number. The range is 0600 to FFFF.
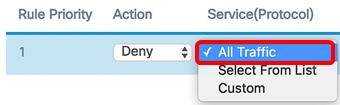
Note: In this example, All Traffic is chosen.
Step 12. (Optional) If you chose Select from list, choose any of the following options:
- appletalk — This option filters appletalk packets based on the statement of the ACL. Appletalk is a set of networking protocols developed by Apple for their Mac computers. One of the features allow Local Area Networks (LANs) to be connected without the need of a central router or server.
- arp — This option filters Address Resolution Protocol (ARP) packets based on the statement of the ACL. ARP maintains a table in which MAC addresses are mapped to IP addresses.
- ipv4 — This option filters ipv4 packets based on the statement of the ACL.
- ipv6 — This option filters ipv6 packets based on the statement of the ACL. IPv6 is the successor of IPv6 in network addressing.
- ipx — This option filters Internetwork Packet Exchange (IPX) packets based on the statement of the ACL. Like appletalk, IPX is also a proprietary networking protocol. It connects networks that utilize Novell clients and servers.
- netbios — This option filters Network Basic Input and Output System (NetBIOS) packets based on the statement of the ACL. NetBIOS allows applications on separate computers to communicate by providing the services for them to be able to communicate.
- pppoe — This option filters Point-to-Point Protocol over Ethernet (PPPoE) packets based on the statement of the ACL. It is mainly used in Digital Subscriber Line (DSL) services.
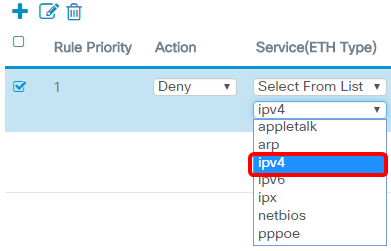
Note: In this example, ipv4 is chosen.
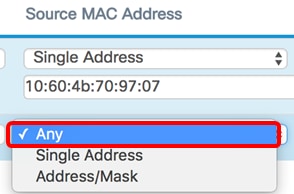
Step 13. Define the source MAC address from the Source MAC Address drop-down list. The options are:
- Any — This option will let the WAP apply the filter to packets from any MAC address.
- Single Address — This option will let the WAP apply the filter to packets from a specified MAC address.
- Address/Mask — This option will let the WAP apply the filter to packets to a MAC address and the mask of the WAP.
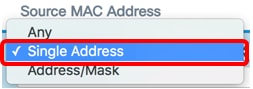
Note: In this example, Single Address is chosen.
Step 14. Enter the source MAC address in the Source MAC Address field.
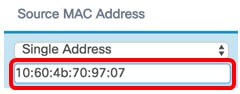
Note: In this example, 10:60:4b:70:97:07 is entered. This is the MAC Address of PC1.
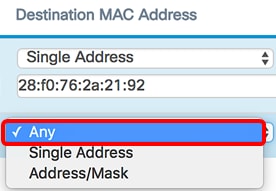
Step 15. Define the destination MAC address from the Destination MAC Address drop-down list. The options are:
- Any — This option will let the WAP apply the filter to packets from any MAC address.
- Single Address — This option will let the WAP apply the filter to packets from a specified MAC address.
- Address/Mask — This option will let the WAP apply the filter to packets to a MAC address and the mask of the WAP.
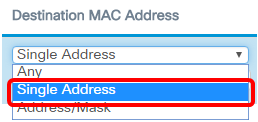
Note: In this example, Single Address is chosen.
Step 16. Enter the destination MAC address in the Destination MAC Address field.
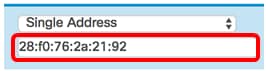
Note: In this example, 28:f0:76:2a:21:92 is entered. This is the MAC Address of Laptop2.
Step 17. Choose a VLAN ID from the drop-down list.
- Any — This option allows any VLAN ID through the network.
- Custom — This option will allow you to enter a specific VLAN ID. If you choose this option, skip to Step 18.
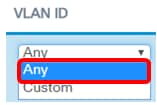
Note: In this example, Any is chosen.
Step 18. (Optional) If you chose Custom, enter the VLAN ID in the VLAN ID field.
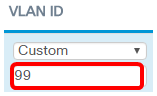
Note: In this example, 99 is entered.
Step 19. (Optional) Choose a Class of Service from the drop-down list. The options are:
- Any — This option allows packet with any priority level to connect to the network.
- Custom — This option will allow you to filter packets at a specific priority level.
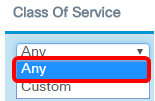
Note: In this example, Any is chosen. If you chose Custom, enter the Priority in the Class of Service field.
Step 20. Click the  button again to add a permit rule.
Note: Since there is an implicit deny at the end of every rule created, it is strongly recommended to add a permit rule to the ACL to allow traffic from other devices in the network.
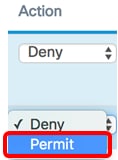
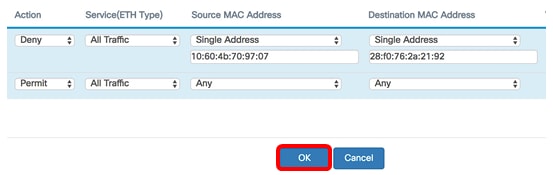
Step 21. Click the Action drop-down arrow and choose Permit.
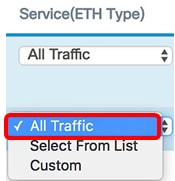
Step 22. Click the Service(ETH Type) drop-down arrow and choose All Traffic.
Step 23. Click the Source MAC Address drop-down menu and choose Any. This would allow traffic from any other MAC Addresses in the network except for the PC1 MAC Address indicated in the first rule.
Step 24. Click the Destination MAC Address drop-down menu and choose Any. This would allow traffic going to any MAC Addresses in the network.
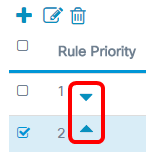
Step 25.(Optional) Change the priority of the rule by clicking the up and down arrows until the rule is in place.
Step 26. Click OK.
Step 27. Click Save.
You should now have configured MAC ACL on the WAP125 or WAP581 Access Point.
 Feedback