Configure the SNMPv2c Settings on the WAP125 and WAP581
Available Languages
Objective
Simple Network Management Protocol (SNMP) is used for network management, troubleshooting, and maintenance. SNMP records, stores, and shares information with the help of two key software: a network management system (NMS) that runs on manager devices and an agent that runs on managed devices.
SNMP v1 is the original version of SNMP which lacks certain functionality and only works on TCP/IP networks, while SNMP v2 is an improved iteration of v1. SNMP v1 and v2c should only be chosen for networks that utilize either SNMPv1 or SNMPv2c. SNMP v3 is the newest standard of SNMP and addresses many of the issues of SNMP v1 and v2c. In particular, it addresses many of the security vulnerabilities from v1 and v2c. SNMP v3 also allows administrators to move to one common SNMP standard.
Traps are messages alerting the SNMP manager to a condition on the network. Inform requests (informs) are traps that include a request for confirmation of receipt from the SNMP manager. Notifications can indicate improper user authentication, restarts, the closing of a connection, loss of connection to a neighbor router, Wireless Access Point, or other significant events.
This article explains how to configure SNMPv2c Settings on the WAP125.
Note: To learn how to configure the SNMPv3 settings, click here.
Applicable Devices
- WAP125
- WAP581
Software Version
- 1.0.0.5 — WAP125
- 1.0.0.4 — WAP581
Configure the SNMPv2c Settings
Configure SNMP Settings
Note: Menu options may vary depending on the exact model of the WAP that you are using. The images below are taken from the WAP125.
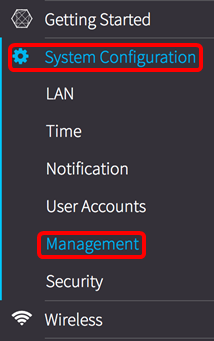
Step 1. Log in to the web-based utility of the Wireless Access Point and choose System Configuration > Management.
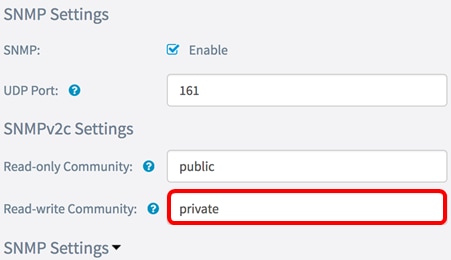
Step 2. Under SNMP Settings, check the SNMP Enable check box.
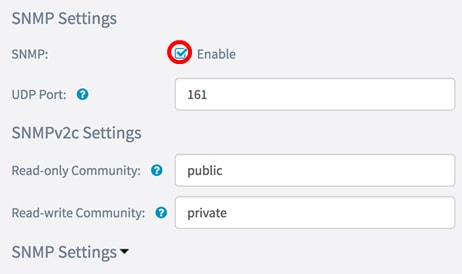
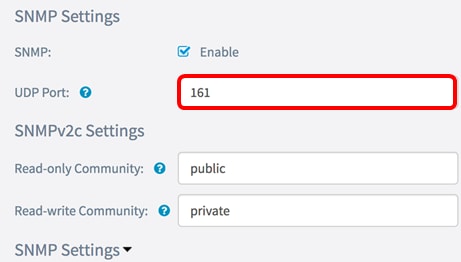
Step 3. Enter a User Datagram Protocol (UDP) port number in the UDP Port field. The SNMP agent checks this port for access requests. The default is 161. The valid range is from 1025 to 65535.
Note: For this example, 161 is used.
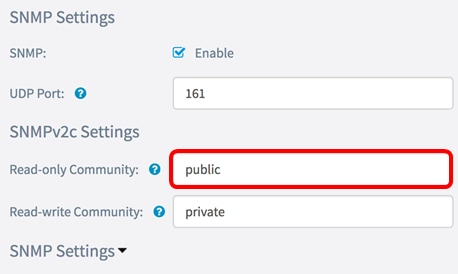
Step 4. Enter the SNMP community name in the Read-only Community field. It creates read-only community which is used to access the information for SNMP agent. The community string sent in the request packet sent by sender has to match the community string on the agent device. The default string for read-only is public.
Note: In this example, the default value is used. The read-only community name serves as a password, which gives authority to retrieve information only.
Step 5. In the Read-write Community field, enter an SNMP community name. It creates read-write community which is used to access the information for SNMP agent. Only requests from the devices that identify themselves with this community name are accepted. This is a user created name. The default is private.
Note: In this example, private is used. The read-write community name serves as a password, which gives authority to retrieve and change information. It is advisable to change the community name to something more customized in order to avoid security attack from outsiders.
Configure SNMPv2c Settings
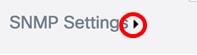
Step 6. Click the SNMP Settings right button.
Step 7. Click the SNMPv2c tab to further configure the SNMPv2c settings.
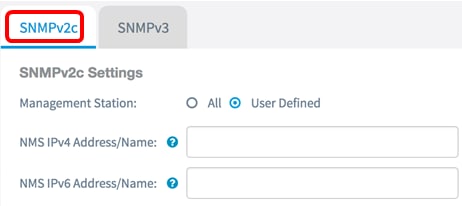
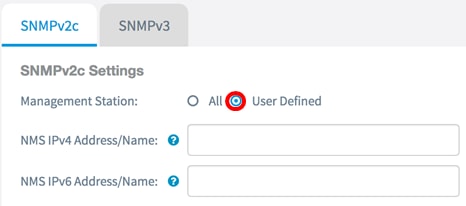
Step 8. In the Management Station area, choose a method in which stations can access the WAP through SNMP. The options are:
- All — All stations have access to the WAP through SNMP. If this is chosen, skip to Step 11.
- User Defined — A set of defined SNMP requests that are granted access. If this is chosen, proceed to the succeeding step.
Note: In this example, User Defined is used.
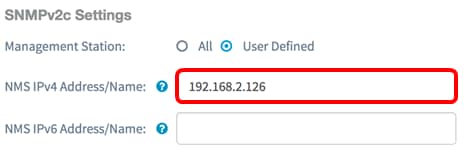
Step 9. In the NMS IPv4 Address/Name field, enter a Network Management System (NMS) address or a Domain Name System (DNS) server address that is in the IPv4 format (xxx.xxx.xxxx.xxx). This is the address that will execute, get, and set requests to the managed devices.
A DNS is a distributed database in which you can map hostnames to IP addresses through the DNS protocol from a DNS server. Each unique IP address can have an associated hostname. A DNS hostname can consist of multiple labels and each label is separated by a period.
An NMS is a tool or program used by an administrator to receive SNMP messages.
Note: In this example, an NMS of 192.168.2.126 is used.
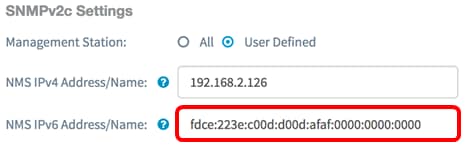
Step 10. In the NMS IPv6 Address/Name field, enter an NMS address or a DNS server address that is in the IPv6 format (xxxx:xxxx:xxxx:xxxx:xxxx:xxxx:xxxx:xxxx). This is the address that will execute, get, and set requests to the managed devices.
Note: In this example, fdce:223e:c00d:d00d:afaf:0000:0000:0000 is used.
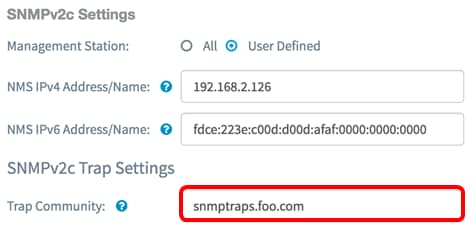
Step 11. In the Trap Community field under SNMPv2c Trap Settings, enter the community name for the trap.
Note: In this example, snmptraps.foo.com is used as the Trap Community name.
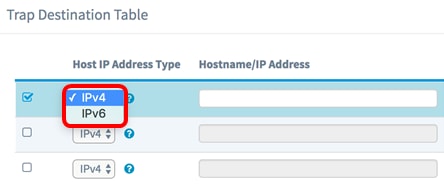
Step 12. Check the check box of a hostname entry in the Trap Destination Table to enable editing.
Note: You can configure up to three Hostname/IP Addresses.
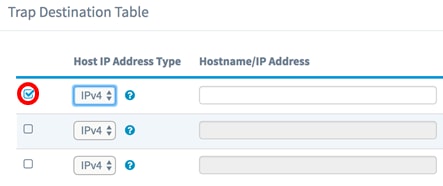
Step 13. From the Host IP Address Type drop-down list, choose an IP version. The options are:
- IPv4 — Fourth generation or version of the Internet Protocol (IP) addressing scheme that follows the xxx.xxx.xxx.xxx format.
- IPv6 — Sixth generation or version of the IP addressing scheme that follows the xxxx:xxxx:xxxx:xxxx:xxxx:xxxx:xxxx:xxxx format.
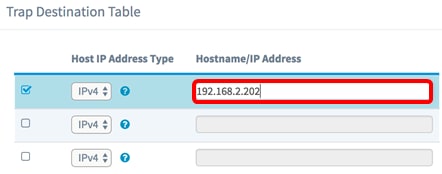
Step 14. In the Hostname/IP Address field, enter an IPv4 or an IPv6 IP address that will receive the SNMP traps.
Note: For this example, 192.168.2.202 is used.
Step 15. Click  .
.
You should now have successfully configured the SNMPv2c Settings on the WAP125 and WAP581.
 Feedback