Configure and View the System Logs (Syslogs) on the WAP125 and WAP581
Available Languages
Objective
System events are activities that may require attention and necessary actions to be taken to run the system smoothly and prevent failures. These events are recorded as logs. System Logs (Syslogs) enable the administrator to keep track of particular events that take place on the device.
Log settings define the logging rules and output destinations for messages, notifications, and other information as various events are recorded on the network. This feature notifies responsible personnel so that necessary action will be taken when an event occurs. Logs can be sent to a remote server where logs of all the network activity are recorded. To learn how to configure remote log settings, click here. Logs can also be sent to network administrators via email alerts. To learn how to configure email settings and customize email notifications, click here.
This article aims to show you how to manage the system log settings and export the log settings on the WAP125 and WAP581.
Applicable Devices
- WAP125
- WAP581
Software Version
- 1.0.0.4
Configure the Syslogs Settings
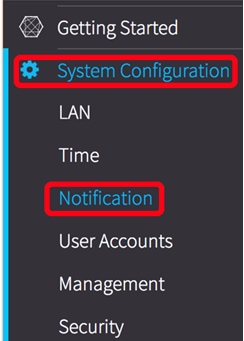
Step 1. Log in to the web-based utility of the WAP and choose System Configuration > Notification.
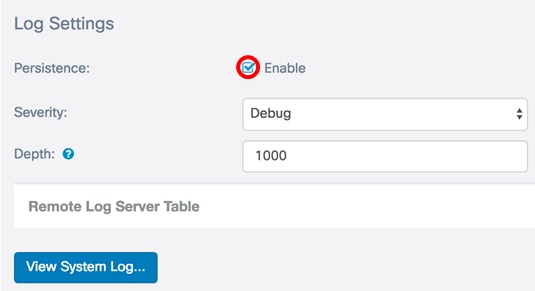
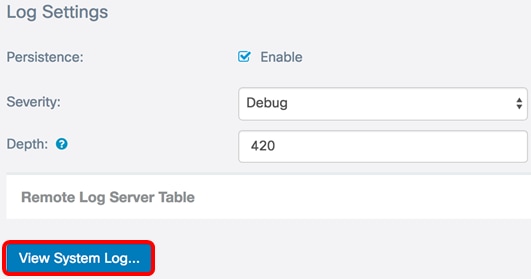
Step 2. Check the Enable Persistence check box to save system logs to non-volatile memory. This allows the logs to remain on the WAP after it reboots. A maximum of 1000 messages are saved in the non-volatile memory and when the limit is reached, the last message is overwritten.
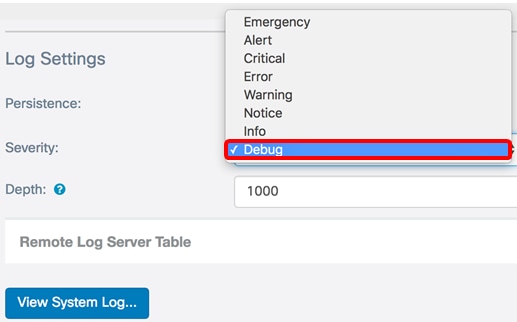
Step 3. Choose an option from the Severity drop-down list. The severity chosen is inclusive of all the higher levels, so logs are kept for all severity levels from the top level down to the chosen level.
- Emergency — This is level 0. System is unusable. This is normally broadcast to all processes.
- Alert — This is level 1. Immediate action needed.
- Critical — This is level 2. Critical conditions, such as a hardware device error.
- Error — This is level 3. Error conditions.
- Warning — This is level 4. Warning conditions.
- Notice — This is level 5. Normal but significant condition.
- Info — This is level 6. Informational messages only. A condition that is not an error condition, but that may require special handling.
- Debug — This is level 7. Debugging messages contains information normally of use only when debugging a program.
Note: In this example, Debug is chosen.
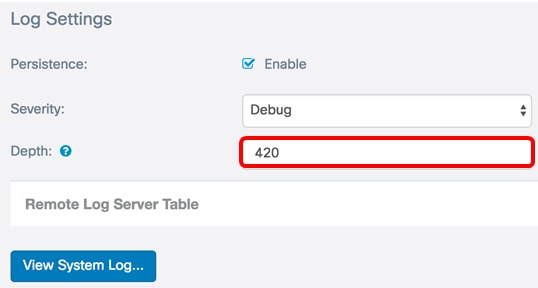
Step 4. In the Depth field, enter a value between 1 and 1000 to set the number of syslog messages that can be stored in the volatile memory. All logs in the volatile memory are deleted when the system reboots.
Note: In this example, 420 is used.
Step 5. Click  .
.
Step 6. Click the View System Log… button to view the logs.
The table displays the Time Stamp, Severity, Service, and Description. The definitions are as follows:
Time Stamp — The time that the syslog message was made. This displays the date in the format MM-DD-YYYY and the time in military format.
- Severity — Severity of the syslog message.
- Service — The service associated with the event.
- Description — The main message of the syslog.
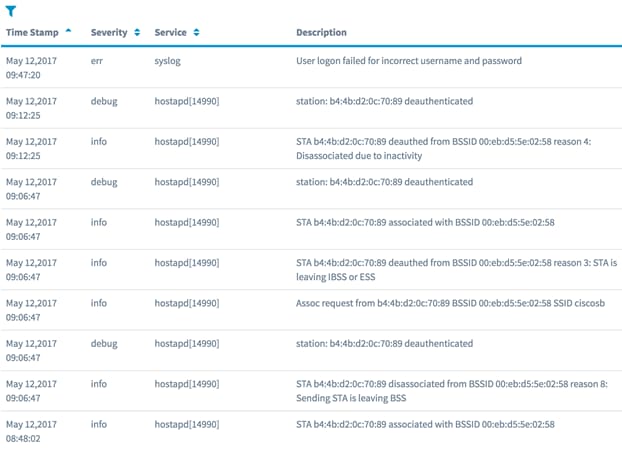
Step 7. (Optional) In the Header area of the System Log Table, click on the arrows to filter data in chronological or alphabetical order.
Note: In this example, Time Stamp is clicked to arrange the syslog entries from the latest to earliest.

Step 8. (Optional) To view more logs, click the page numbers to flip through the log pages.

Step 9. (Optional) Click the Refresh button to refresh the page to allow you to view newer and the most recent logs.

Step 10. (Optional) To clear or erase the logs from the table, click on Clear All.

Step 11. (Optional) To export and download the logs to a computer, click on Download. A download will begin in your browser.

Note: The file is saved in a .txt format.
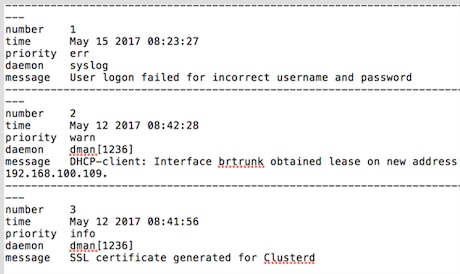
Step 12. Click Back to return to the Notification configuration page.

You now have successfully exported logs on the WAP125 and WAP581.
 Feedback