IPv6 Configuration on WAP121 and WAP321 Access Points
Available Languages
Objective
IPv6 is the next generation IP address standard intended to replace the IPv4 format. IPv6 solves the address scarcity problem with the use of 128-bit addressing instead of 32-bit addressing which was used in IPv4. The objective of this document is to configure IPv6 settings on access points with the use of Dynamic Host Configuration Protocol version 6 (DHCPv6) or static configurations. By default, the DHCP client on the WAP121/WAP321 automatically broadcasts requests for network information. If you want to use a static IPv6 address, you must disable the DHCPv6 client and manually configure the IPv6 address and other network information.
Applicable Devices
• WAP121
• WAP321
Software Version
• 1.0.3.4
Configuration of IPv6
Step 1. Log into the web configuration utility and choose LAN > IPv6 Addresses. The IPv6 Addresses page opens:
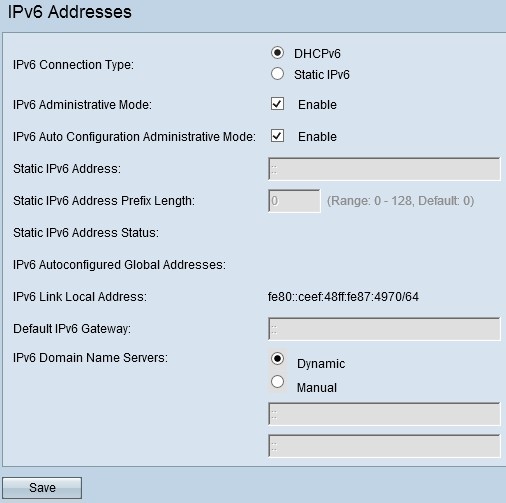
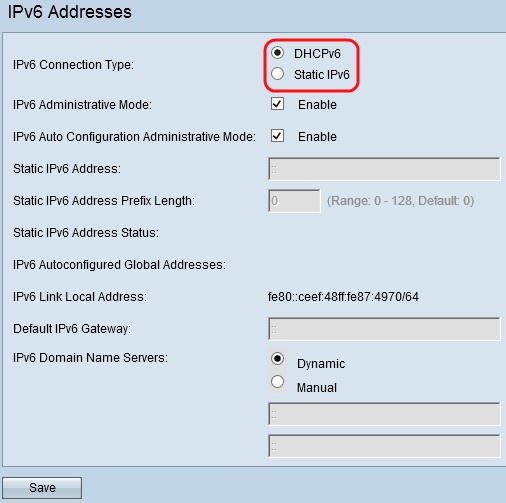
Step 2. Choose the desired IPv6 Connection Type. The IPv6 connection type tells the device how to obtain IPv6 address.
• DHCPv6 — The DHCPv6 server assigns the IPv6 address to the device. If you choose DHCPv6 option, then go to DHCPv6.
• Static IPv6 — If you want to assign the IPv6 address manually to the device. If you choose static IPv6, then go to Static IPv6.
Step 3. (Optional) If you want to permit IPv6 management access to the access point then check the Enable check box in the IPv6 Administrative Mode field.
Step 4. (Optional) If you want to learn its IPv6 addresses and gateway through router advertisements received on the LAN port then check the Enable check box in the IPv6 Auto Configuration Administrative Mode field. Access points can have multiple auto-configured IPv6 addresses.
DHCPv6

Step 1. Click DHCPv6 in the IPv6 connection Type field to receive the local IPv6 address, prefix length, and default gateway from the DHCP server.
Step 2. Choose the desired the IPv6 DNS Nameservers. Domain Name System (DNS) is a protocol that helps the devices reach other computers and private networks over the Internet because it translates domain names into their respective IP addresses.
• Dynamic — The DNS name server is assigned dynamically by the DHCPv6.
• Manual — Allows you to enter the DNS server addresses manually. Enter the DNS server address(es) in the IPv6 Domain Name Servers fields. You can configure up to two domain name servers.
Step 3. Click Save to save the configurations.
Static IPv6
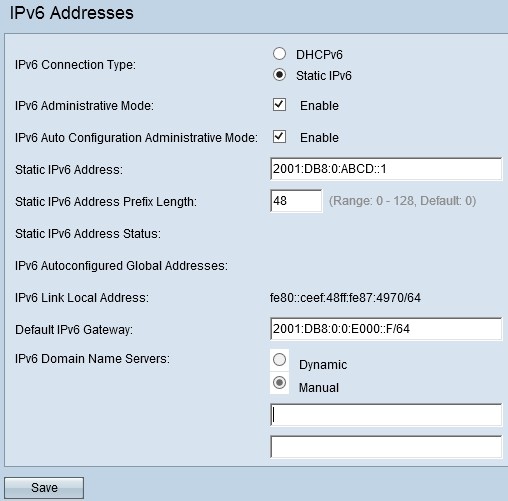
Step 1. Click Static IPv6 in the IPv6 connection Type field to assign an IPv6 address manually to the access point.
Step 2. Enter the desired IPv6 address of the access point in Static IPv6 Address field. This is a unique IPv6 address, and no other device in the network should use it. This is a global routable IPv6 address.
Step 3. Enter the prefix length of the static address in the Static IPv6 Address Prefix Length field. The prefix length is an integer in the range of 0 to 128 which specifies the network portion of the IPv6 IP address. This is similar to the subnet mask in IPv4. The default prefix length is 0.
Static IPv6 Address Status gives the status of the IPv6 address. The status of IPv6 address is divided into 3 categories as given below
• Operational — The IPv6 address are verified as unique address on the LAN interface and this can be used on the interface.
• Tentative — The IPv6 address cannot be used to transmit or receive ordinary traffic if it is in the tentative state. The device initiates a duplicate address detection (DAD) process automatically when a static IP address is assigned to the device.
• Blank (no value) — No IPv6 address is assigned.
The IPv6 Autoconfigured Global Addresses field displays if one or more IPv6 addresses are assigned automatically.
The IPv6 Link Local Address field displays only local physical addresses within a segment. The link-local address is a locally specific IPv6 unicast address that can be automatically configured on any interface that uses the link-local prefix FE80::/10.
Step 4. Enter the IPv6 address of the default gateway in the Default IPv6 Gateway field.
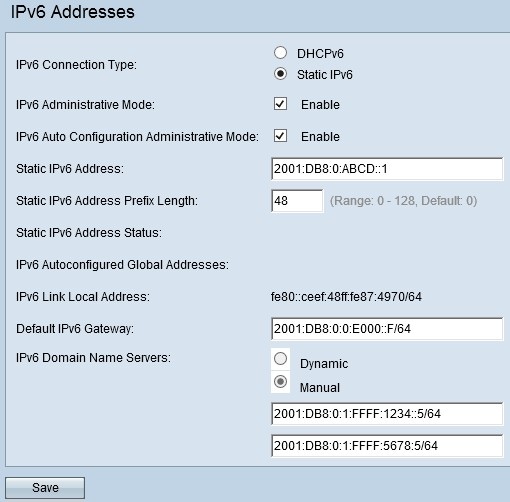
Step 5. Enter the DNS server address(es) in the IPv6 Domain Name Servers fields. You can configure up to two domain name servers. Domain Name System (DNS) is a protocol that helps the devices reach other computers and private networks over the Internet because it translates domain names into their respective IP addresses.
Step 6. Click Save to save the configurations made.
Revision History
| Revision | Publish Date | Comments |
|---|---|---|
1.0 |
11-Dec-2018
|
Initial Release |
 Feedback