Creation and Configuration of a Rule for IPv4 Based Access Control List (ACL) on the WAP121 and WAP321 Access Points
Available Languages
Objective
An Access Control List (ACL) is a list of network traffic filters and correlated actions used to improve security. An ACL contains the hosts that are allowed or denied access to the network device. The QoS feature contains Differentiated Services (DiffServ) support that allows traffic to be classified into streams and given certain QoS treatment in accordance with defined per-hop behaviors.
This article explains how to create and configure IPv4 based ACL on WAP121 and WAP321 Access Points (WAP).
Applicable Devices
• WAP121
• WAP321
Software Version
• v1.0.3.4
IPv4 Based ACL Configuration
IP ACLs classify traffic for Layers 3 in the IP stack. Each ACL is a set of up to 10 rules applied to traffic sent from a wireless client or to be received by a wireless client. Each rule specifies whether the contents of a given field should be used to permit or deny access to the network. Rules can be based on various criteria and may apply to one or more fields within a packet, such as the source or destination IP address, the source or destination port, or the protocol carried in the packet.
Creation of IPv4 ACL
Step 1. Log in to the Access Point Configuration Utility and choose Client QoS > ACL. The ACL page opens:
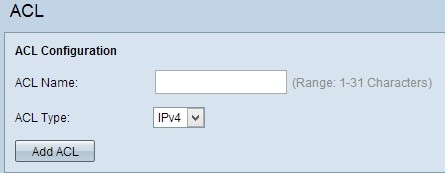
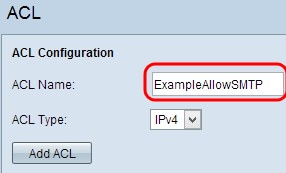
Step 2. Enter the name of the ACL in the ACL Name field.
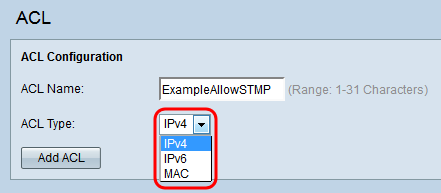
Step 3. Choose the IPv4 type for the ACL from the ACL Type drop-down list.
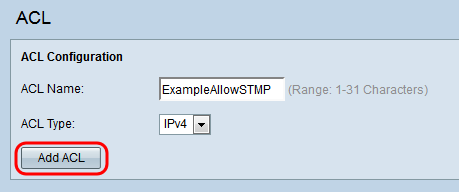
Step 4. Click Add ACL to create a new IPv4 ACL.
Configuration of a Rule for IPv4 ACL
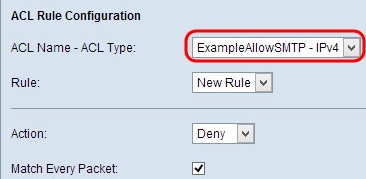
Step 1. Choose the ACL from the ACL Name-ACL Type drop-down list for which rules have to be configured.
Step 2. If a new rule has to be configured for the chosen ACL, choose New Rule from the Rule drop-down list; otherwise, choose one of the present rules from the Rule drop-down list.
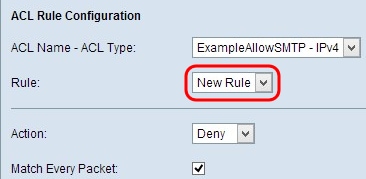
Note: A maximum of 10 rules can be created for a single ACL.
Step 3. Choose the action for the ACL rule from the Action drop-down list.
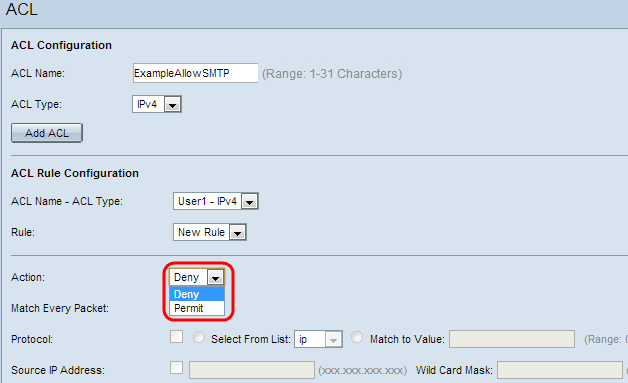
The available options are described as follows:
• Deny — Blocks all traffic that meets the rule criteria to enter or exit the WAP device.
• Permit — Allows all traffic that meets the rule criteria to enter or exit the WAP device.
Step 4. Check the Match Every Packet checkbox to match the rule for every frame or packet regardless of its contents. If you want to configure a specific match criteria, then uncheck the Match Every Packet checkbox.
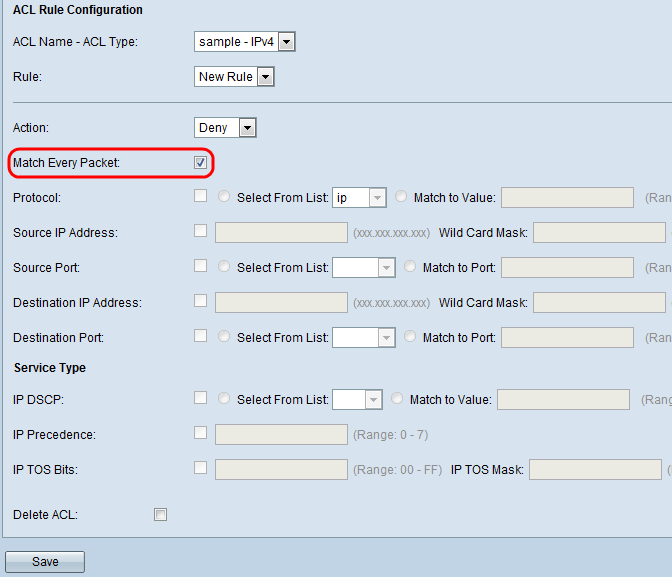
Timesaver: If you check Match Every Packet checkbox then skip to Step 13.
Step 5. (Optional) Check the Protocol checkbox for the L3 or L4 protocol match condition based on the value of the IP Protocol field in IPv4 packets. If the Protocol checkbox is checked, click one of these radio buttons.
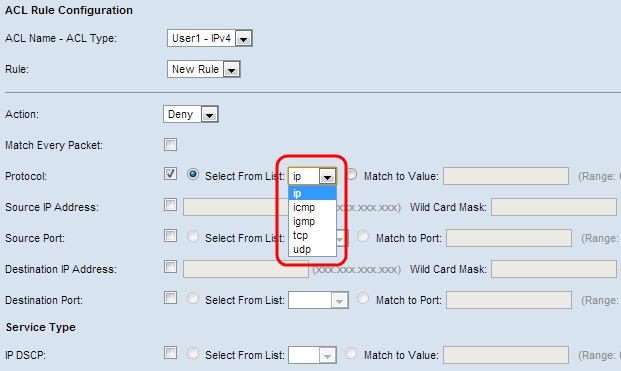
The options are described as follows:
• Select From List — Choose a protocol from the Select From List drop-down list. The drop-down list has ip, icmp, igmp, tcp, udp protocols.
• Match to Value — For protocol not presented in the list. Enter a standard IANA-assigned protocol ID raging from 0 to 255.
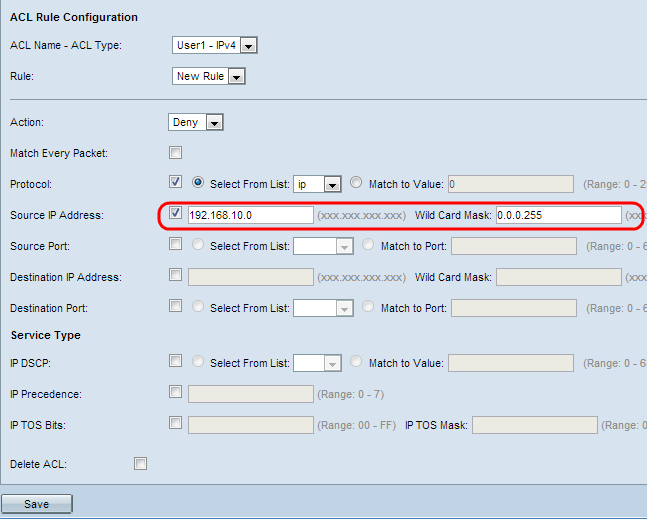
Step 6. (Optional) Check the Source IP Address checkbox to include an IP address of the source in the match condition. Enter the IP address and Wild Card Mask of the source in the respective fields. The wild card mask lets you specify to which host of the source IP address this access list is applied.
Step 7. (Optional) Check the Source Port check box to include a source port in the match condition. If the Source Port check box is checked, click one of these radio buttons.
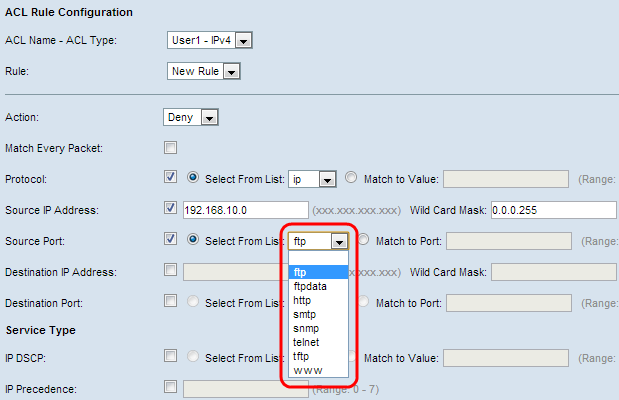
• Select From List — Choose a source port from the Select From List drop-down list. The drop-down list has ftp, ftpdata, http, smtp, snmp, telnet, tftp, www ports.
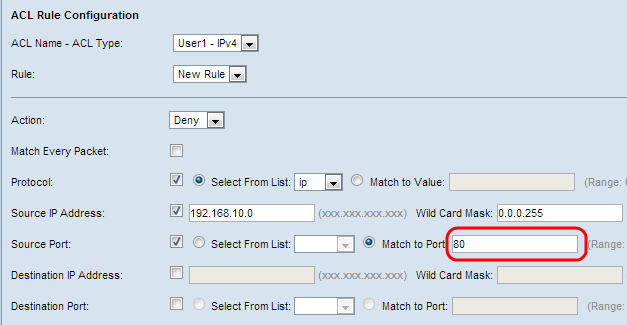
• Match to Port — For source port not presented in the list. Enter the port number which ranges 0 to 65535.
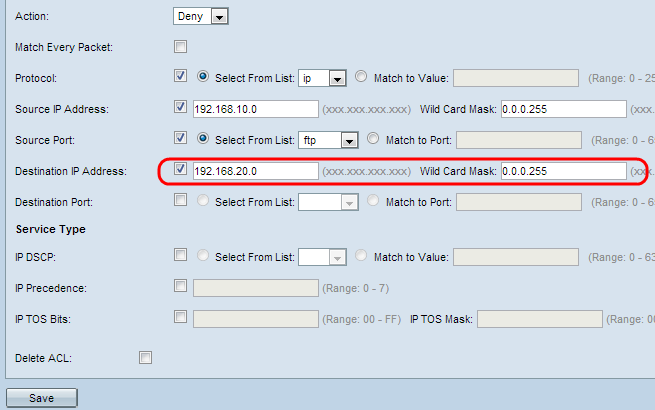
Step 8. (Optional) Check the Destination IP Address checkbox to include the IP address of the destination in the match condition. Enter the IP address and Wild Card Mask of the destination in their respective fields. The wild card mask lets you specify to which host of the destination IP address this access list is applied.
Step 9. (Optional) Check the Destination Port check box to include a destination port in the match condition. If the Destination Port check box is checked, click one of these radio buttons.
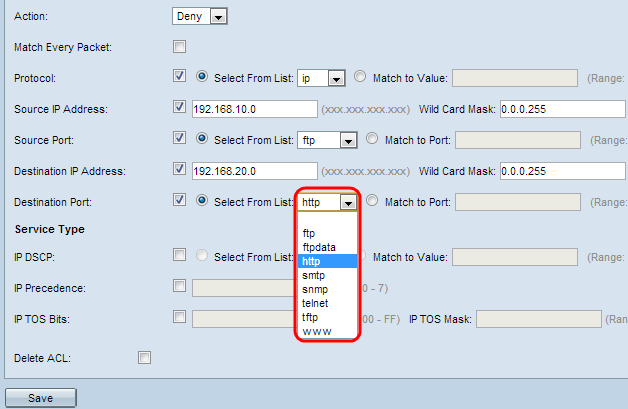
• Select From List — Choose a destination port from the Select From List drop-down list. The drop-down list has ftp, ftpdata, http, smtp, snmp, telnet, tftp, www ports.
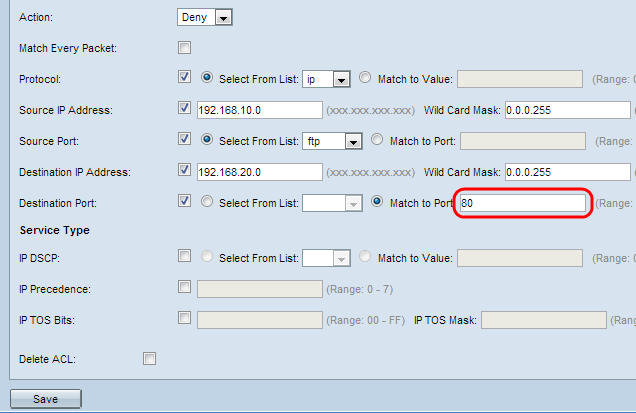
• Match to Port — For destination port not presented in the list. Enter the port number which ranges from 0 to 65535 in the Match to Port field.
Note: Only one of the services can be selected from the Service Type area and can be added for the match condition.
Step 10. (Optional) Check the IP DSCP checkbox to match the packets based on IP DSCP values. If the IP DSCP checkbox is checked, click one of these radio buttons. DSCP is used to specify the traffic priorities over the IP header of the frame. This categorizes all packets for the associated traffic stream with the IP DSCP value that you select from the list. For further details on DSCP, please refer here.
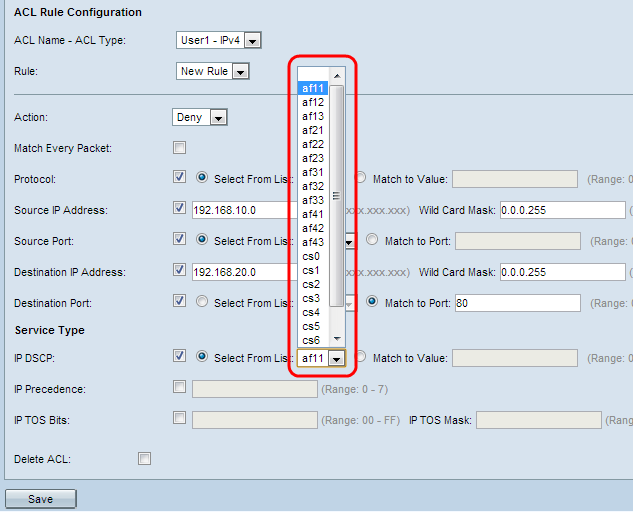
• Select From List — Choose a IP DSCP value from the Select From List drop-down list. The drop-down list has DSCP Assured Forwarding (AS), Class of Service (CS) or Expedited Forwarding (EF) values.
• Match to Value — To customize DSCP values. Enter the DSCP value which ranges from 0 to 63 in the Match to Value field.
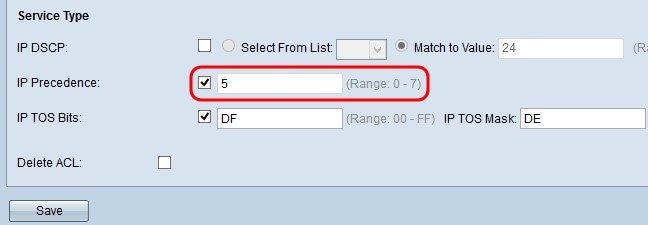
Step 11. (Optional) Check theIP Precedence checkbox to include a IP Precedence value in the match condition. If IP Precedence check box is checked, enter an IP precedence value which ranges from 0 to 7. For further details on IP Precedence, please refer here.
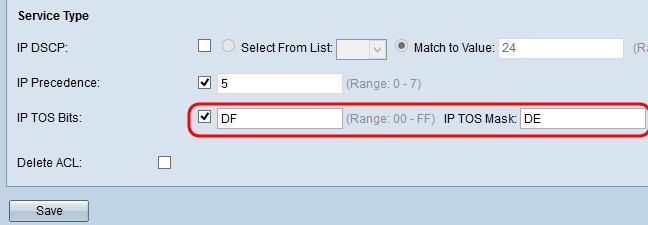
Step 12. (Optional) Check the IP TOS Bits checkbox to use the packet's Type of Service bits in the IP header as match criteria. If the IP TOS Bits check box is checked, enter the IP TOS bits which ranges from 00-FF and IP TOS mask which ranges from 00-FF in the respective fields.
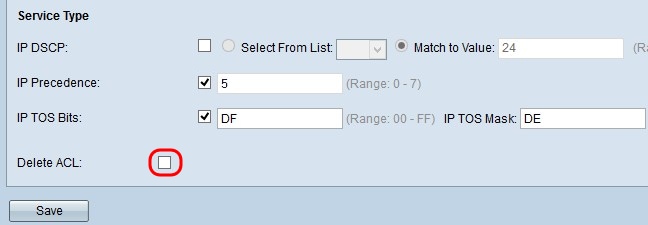
Step 13. (Optional) If you want to delete the configured ACL then, check the Delete ACL checkbox.
Step 14. Click Save to save the settings.
Revision History
| Revision | Publish Date | Comments |
|---|---|---|
1.0 |
11-Dec-2018
|
Initial Release |
 Feedback