Introduction
This document describes the process of backing up and restoring the configuration in Secure Web Appliance (SWA).
Prerequisites
Requirements
Cisco recommends knowledge of these topics:
- Access ToGraphic User Interface (GUI)of SWA.
- Access ToCommand Line Interface (CLI)of SWA.
Components Used
This document is not restricted to specific software and hardware versions.
The information in this document was created from the devices in a specific lab environment. All of the devices used in this document started with a cleared (default) configuration. If your network is live, ensure that you understand the potential impact of any command.
Generate Backup From GUI
Step 1. From the GUI, Navigate to System Administration and choose Configuration File.
Step 2. Make sure Download file to local computer to view or save is selected.
Step 3. Choose Encrypt passwords in the Configuration Files
Step 4. (Optional) Choose a name for the configuration file.
Step 5. Click Submit.
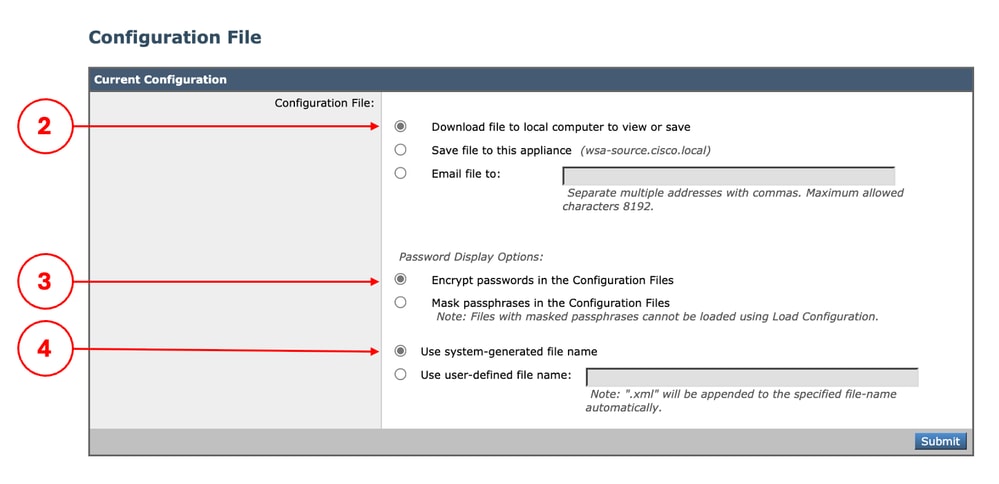 Image - Export the Configuration
Caution: If you generate the backup with a Mask Passpharase, you cannot import the file to SWA.
Automatic Backup in a Remote Location
You can configure SWA to save a copy of the current configuration in another location, while committing the new changes.
Step 1. From the GUI, Navigate to System Administration and choose Configuration File.
Step 2. In the Configuration Backup section, Select the check box to Enable Config Backup.
Step 3. To be able to import the configuration file to SWA, select Yes in Include Passphrase in Configuration File?
Step 4. Depend on your design, you can select File Transfer Protocol (FTP) or Secure Copy (SCP) as the desired protocol to save the configuration file.
Step 5. Click Submit and commit the changes.
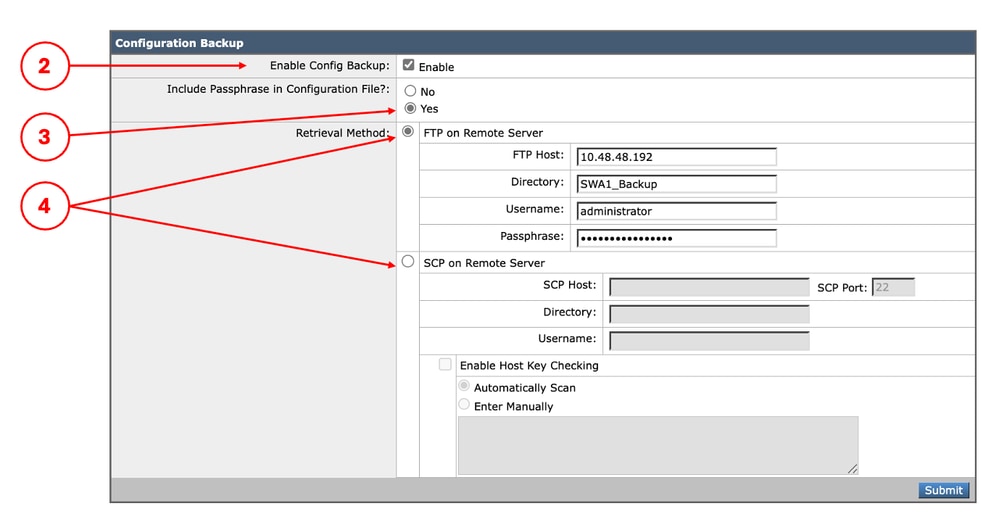 Image - Automatic Configuration Backup
Generate Backup From CLI
You can generate a configuration backup from the CLI, which stores the exported file locally on the SWA.
Step 1. Log in to the CLI.
Step 2. Run saveconfig.
Step 3. Type 2 to select the Encrypt passwords.
Step 4. (Optional) Type N if you want a Use user-defined file name for the exported file, else type Y for Do you want the system to generate a name for the configuration file? [Y]>.
SWA_CLI> saveconfig

Choose the password option:
1. Mask passwords (Files with masked passwords cannot be loaded using loadconfig command)
2. Encrypt passwords
[1]> 2

Do you want the system to generate a name for the configuration file? [Y]>

The file S1000V-4444444444444444-AAAAAAAAAAAAAA-BBBBBBBBBBBB.xml has been saved in the configuration directory on machine "SWA-source.cisco.local".
Tip: The generated configuration file is stored in the configuration directory on machine, that is accessible via FTP.
Importing the Configuration File to SWA
Step 1. From the GUI, Navigate to System Administration and choose Configuration File.
Step 2. In the Load Configuration section, Select Load a configuration file from local computer.
Step 3. Click Choose File and select the XML configuration file.
Step 4. (Optional) If you would like to import the Network configuration, Select the check box Load Network Settings.
Step 5. Click Load.
Step 6. Click Continue in the Confirm Load Configuration pop up.
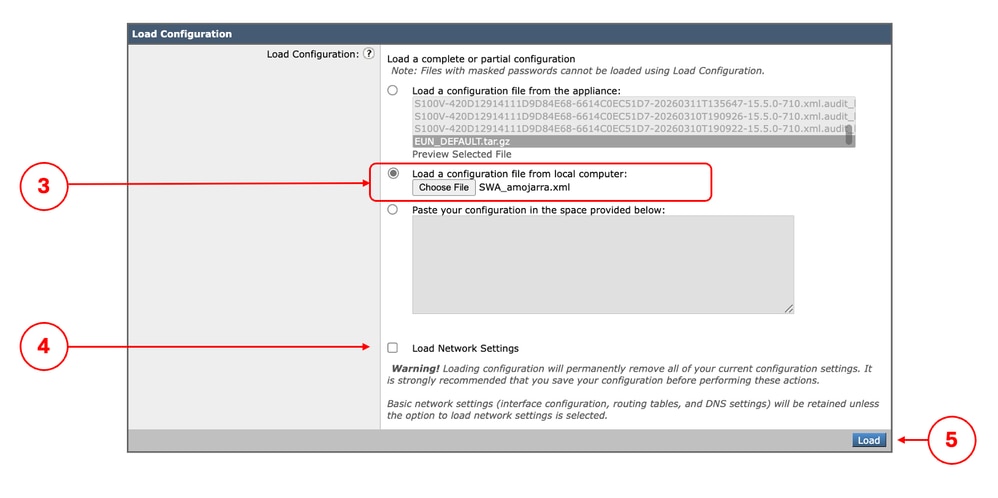 Image - Import Configuration
Related Information
 Feedback