Introduction
This document describes how to integrate Cisco Umbrella with NetIQ for Single Sign-on (SSO) with SAML.
Overview of Umbrella SAML Integration for NetIQ
Configuring SAML with NetIQ differs from our other SAML integrations as it is not a one or two click process in the wizard, but requires changes in NetIQ to work correctly. This document describes the detailed modifications you need to make in order to get SAML and NetIQ working together. As such, this information is provided "as is" and was developed in conjunction with existing customers. Available support for this solution is limited and Cisco Umbrella support is unable to assist beyond the general outline given here.
For more information on how SAML integration works with Umbrella, read our review here: Get Started with Single Sign-On.
 115000348788
Prerequisites
You can find steps to get through the initial SAML setup here: Identity Integrations: Prerequisites. Once you complete those steps which include downloading the Cisco Umbrella metadata, you can continue using these NetIQ specific instructions to complete the configuration.
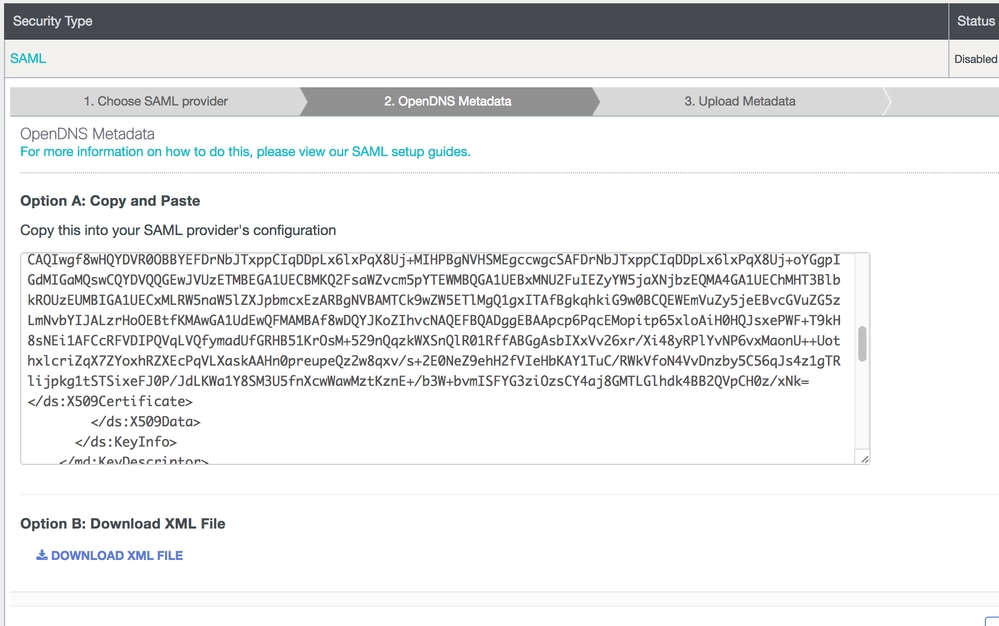
The metadata can be found in the Cisco Umbrella SAML setup wizard (Settings > Authentication > SAML).
 115001332488
Import Metadata and Cisco Umbrella Certificate
- Open the Cisco Umbrella metadata (downloaded in the prerequisites) in a text editor and extract the X509 certificate. The certificate begins with ds:X509Certificate and ends with /ds:X509Certificate - just copy from the very beginning to the end.
- Save this new file as CiscoUmbrella.cer.
- Convert the x509 certificate to PKCS7 / PEM. Methods for this vary, but this command does the trick:
openssl x509 -in CiscoUmbrella.cer -out CiscoUmbrella.pem -outform PEM
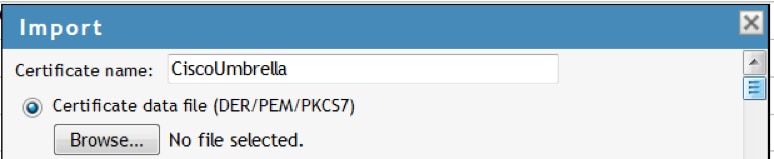
- In NetIQ, launch NAM under Trusted Roots.
- Select New > Browse and import CiscoUmbrella.pem.
 115000349367
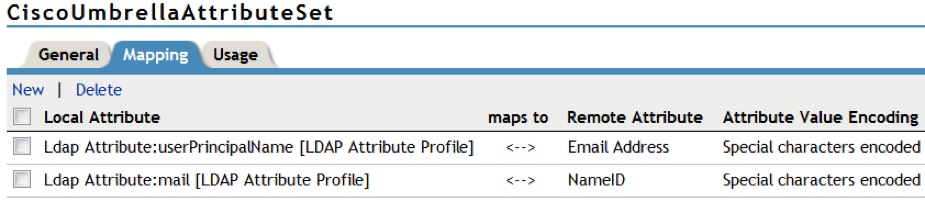
Create an Attribute Group
- Go to Identity Servers > NetIQ NAM.
- Click Attribute Sets.
- Select New and map the LDAP Attributes:
 115000349567
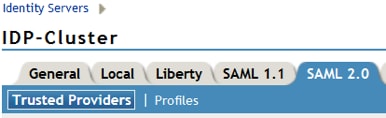
Create a New Trust Provider
- Go to the IDP General Tab and select SAML 2.0.
- Select Create New Trust Provider.
 115000348788
 115000349827
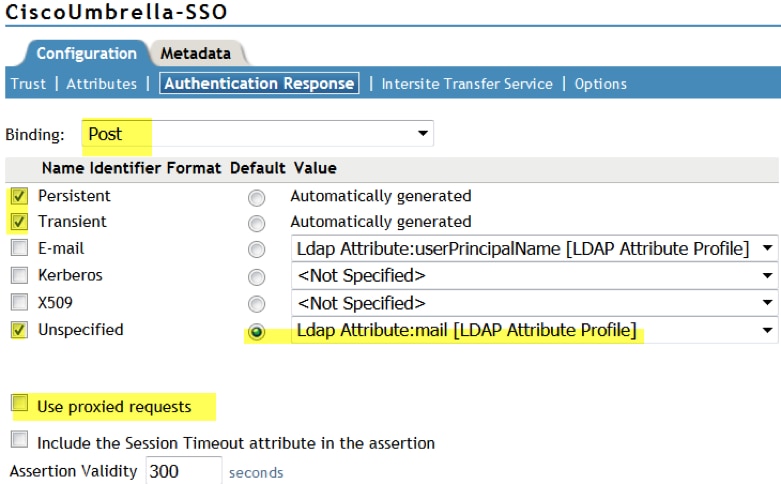
- Select the Attribute you just created and choose Send with Authentication. For Authentication Response choose Post Binding, Persistent, Transient, and Unspecified.
- Select LDAP Attribute: mail [LDAP Attribute Profile] and make it default.
 115000355688
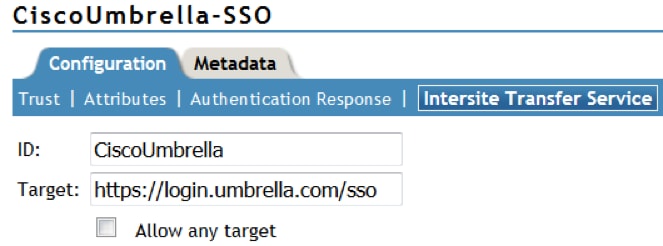
- Navigate to to Configuration > Intersite Transfer Service. Give it a name like Cisco Umbrella SAML and add the Cisco Umbrella SSO login URL as a Target (https://login.umbrella.com/sso).
 115000356827
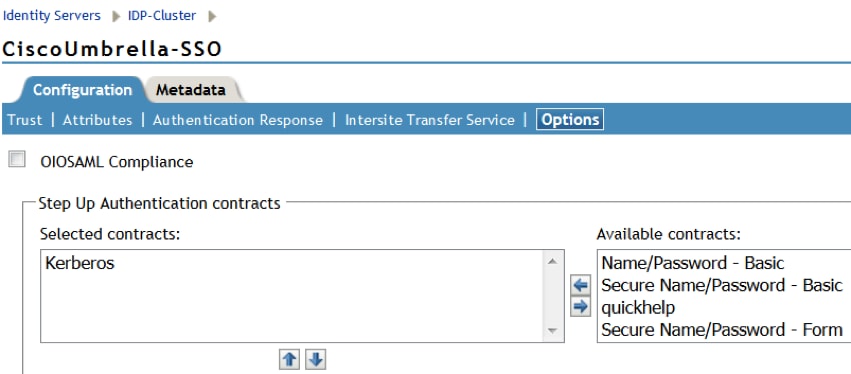
- Go to Configuration > Options and choose Kerberos as the Selected contracts:
 115000356068
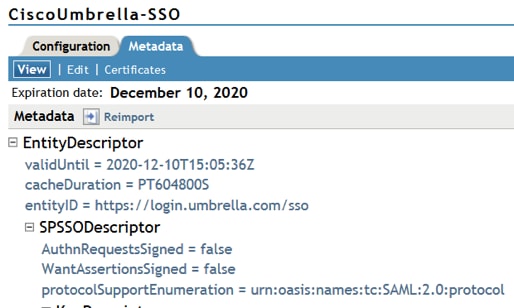
- Open the Cisco Umbrella Metadata file. Update the EntityDescription field vaildUntil date to a future data, such as 2020-12-10T20:50:59Z (as shown in the screenshot).
- Go back to NetIQ > Metadata and import the updated metadata file.
 115000357147
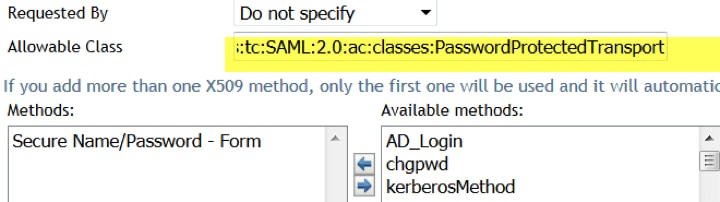
- Add a class to the assertion. The Cisco Umbrella assertion requires the class
urn:oasis:names:tc:SAML:2.0:ac:classes:PasswordProtectedTransport
- Go to Local > Contracts and select Secure Name/Password and add to Allowable Class field, then add the class above:
 115000357247
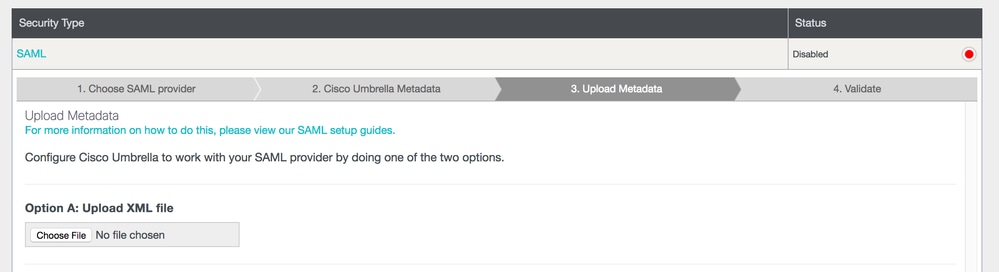
- Update Identity Services and Access Gateways to ensure they are valid and up to date, then download the NetIQ metadata.
- Use the downloaded metadata to run through the Cisco Umbrella "Other" SAML wizard. Step 3 is where you are asked to upload the metadata:
 115001186107
 Feedback