Configure Manager Access on FTD from Management to Data Interface
Available Languages
Contents
Introduction
This document describes the process for modifying the Manager Access on the Firepower Threat Defense (FTD) from a Management to a Data interface.
Prerequisites
Requirements
Cisco recommends that you have knowledge of these topics:
- Firepower Threat Defense (FTD)
- Firepower Management Center (FMC)
Components Used
- Firepower Threat Defense Virtual 7.2.5
- Firepower Management Center Virtual 7.4.1
The information in this document was created from the devices in a specific lab environment. All of the devices used in this document started with a cleared (default) configuration. If your network is live, ensure that you understand the potential impact of any command.
Background Information
Each device includes a single dedicated Management interface for communicating with the FMC. You can optionally configure the device to use a data interface for management instead of the dedicated Management interface. The FMC access on a data interface is useful if you want to manage the Firepower Threat Defense remotely from the outside interface, or you do not have a separate management network. This change must be performed on the Firepower Management Center for FTD managed by FMC.
The FMC access from a data interface has a few limitations:
- You can only enable manager access on one physical, data interface. You cannot use a subinterface or EtherChannel.
- Routed firewall mode only, using a routed interface.
- PPPoE is not supported. If your ISP requires PPPoE, you must include a router with PPPoE support between the Firepower Threat Defense and the WAN modem.
- You cannot use separate management and event only interfaces.
Configure
Proceed with Interface Migration

Note: It is strongly recommended to have the latest backup of both FTD and FMC before proceeding with any changes.
1. Navigate to Devices > Device Management page, click Edit for the device you are making changes.

2. Go to the section, and click the link for Manager Access Interface.

3. The Manager Access Interface field displays the existing Management interface. Click the link to select the new interface type, which is the Data Interface option in the Manage device by drop-down list and click Save.
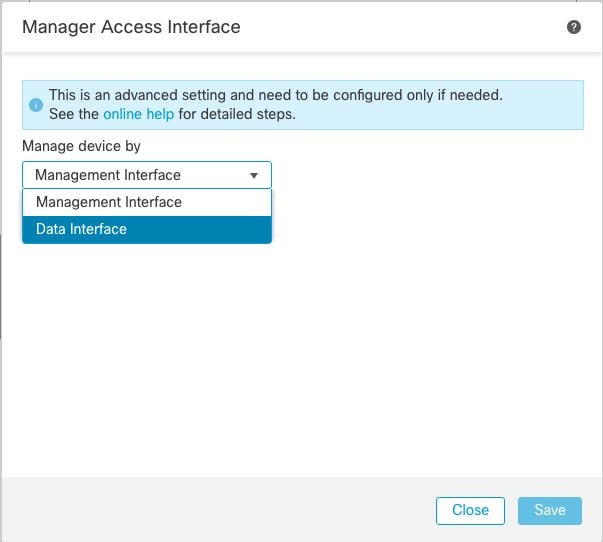
4. You must now proceed to Enable management access on a data interface, navigate to Devices > Device Management > Interfaces > Edit Physical Interface > Manager Access.
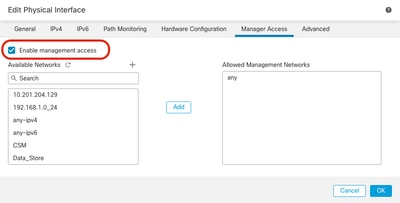
Optional: If you use a secondary interface for redundancy, ensure you enable the management access on the interface used for redundancy purpose. If you use DHCP for the interface, enable the web type DDNS method on the Devices > Device Management > DHCP > DDNS dialog. You can Configure DNS in a Platform Settings policy, and apply it to this device under Devices > Platform Settings > DNS.
5. Ensure the threat defense can route to the management center through the data interface; add a static route if necessary on .
a. Click IPv4 or IPv6 depending on the type of static route you are adding.
b. Choose the Interface where this static route applies.
c. In the Available Network list, choose the destination network.
d. In the Gateway or IPv6 Gateway field, enter or choose the gateway router which is the next hop for this route.
Optional: To monitor route availability, enter or choose the name of a Service Level Agreement (SLA) Monitor object that defines the monitoring policy in the Route Tracking field.

6. Deploy the configuration changes, as these updates are now deployed over the current Management interface.
7. At the FTD CLI, set the Management interface to use a static IP address and the gateway to be data-interfaces.
a. configure network {ipv4 | ipv6} manual ip_address netmask data-interfaces

Note: Although you do not plan to use the Management interface, you must set a static IP address. For example, a private address so you can set the gateway to data-interfaces. This management is used to forward the management traffic to data interface using tap_nlp interface.
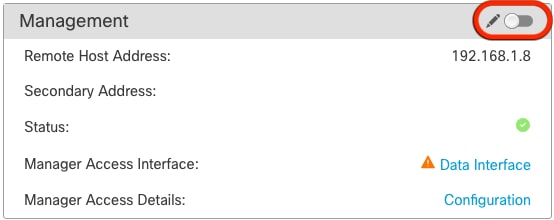
8. Disable the Management in the Management Center. Click Edit and update the Remote Host Address IP address and (Optional) Secondary Address for the threat defense in the section, and enable the Connection.
Enable SSH on Platform Settings
1. Enable SSH for the data interface in the Platform Settings Policy and apply it to the device at
3. The hosts or networks you are allowing to make SSH connections. Add the zones that contain the interfaces to allow SSH connections. For interfaces not in a zone, you can type the interface name into the field Selected Zones/Interfaces list and click Add.
4. Click OK. Deploy the changes.
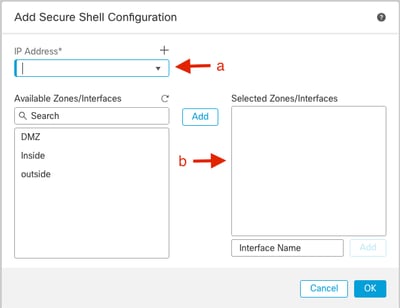
Note: SSH is not enabled by default on the data interfaces, so if you want to manage the threat defense using SSH, you need to explicitly allow it.
Verify
Ensure the management connection is established over the data interface.
Verify from FMC Graphical User Interface (GUI)
In the Management Center, check the management connection status on page.
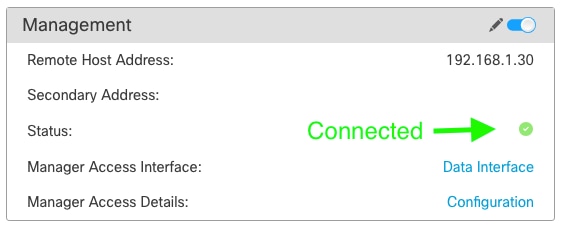
Verify from FTD Command Line Interface (CLI)
At the threat defense CLI, run the sftunnel-status-brief command to view the management connection status.
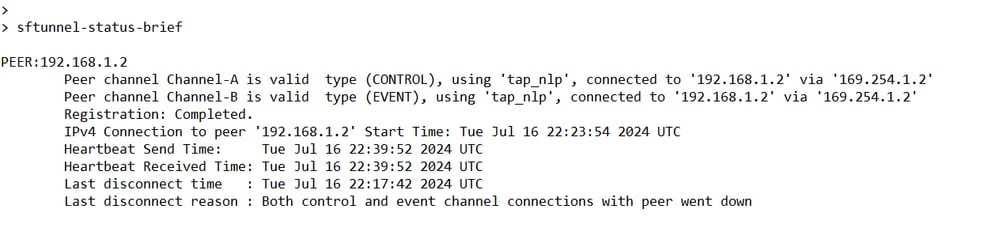
The status shows a successful connection for a data interface, showing the internal tap_nlp interface.
Troubleshoot
In the Management Center, check the management connection status on the page.
At the threat defense CLI, run the sftunnel-status-brief command to view the management connection status. You can also run sftunnel-status to view more complete information.
Management Connection Status
Working Scenario
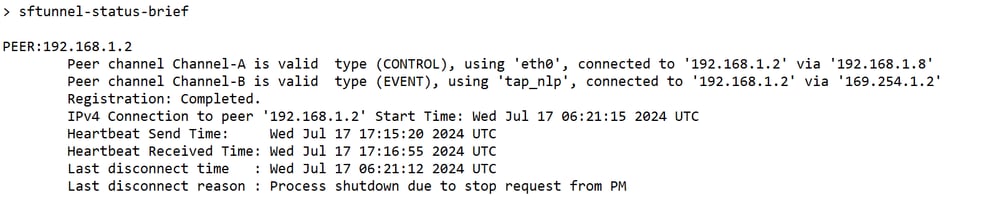
Non-Working Scenario

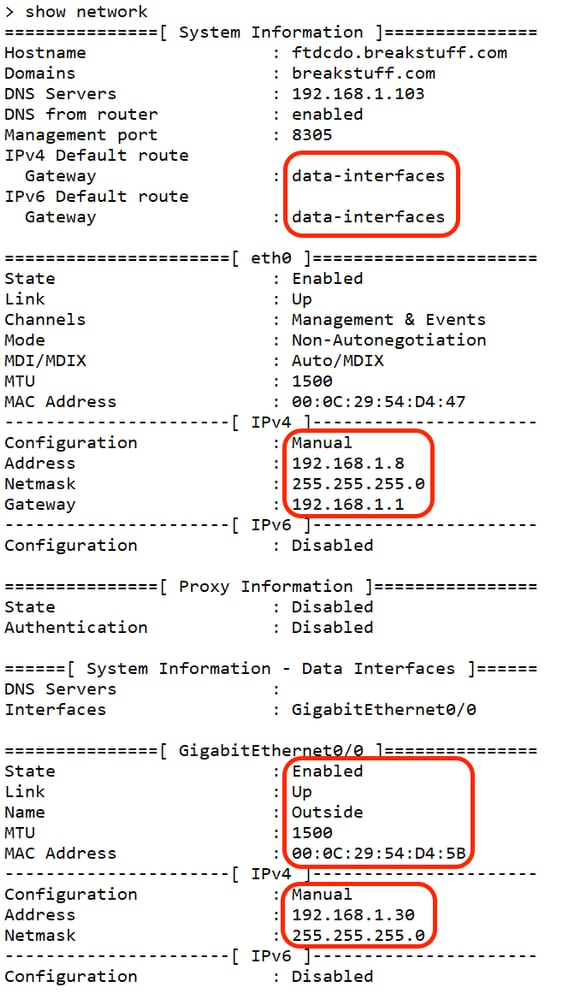
Validate the Network Information
At the threat defense CLI, view the Management and Manager access data interface network settings:
> show network
Validate the Manager State
At the threat defense CLI, validate that the management center registration was completed.
> show managers
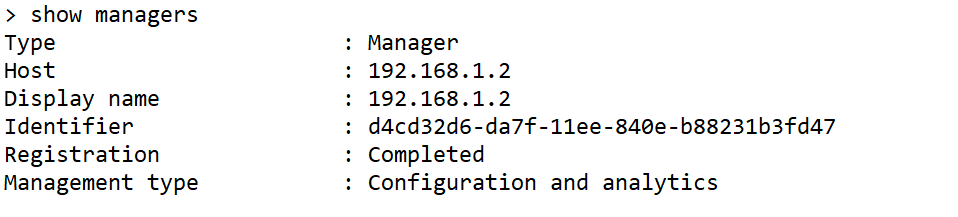
Note: This command does not show the current status of the management connection.
Validate Network Connectivity
Ping the Management Center
At the threat defense CLI, run the command to ping the management center from the data interfaces:
> ping fmc_ip

At the threat defense CLI, run the command to ping the management center from the Management Interface, which routes over the backplane to the data interfaces:
> ping system fmc_ip
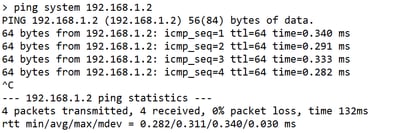
Check Interface Status, Statistics, and Packet Count
At the threat defense CLI, review the information on the internal backplane interface, nlp_int_tap:
> show interface detail
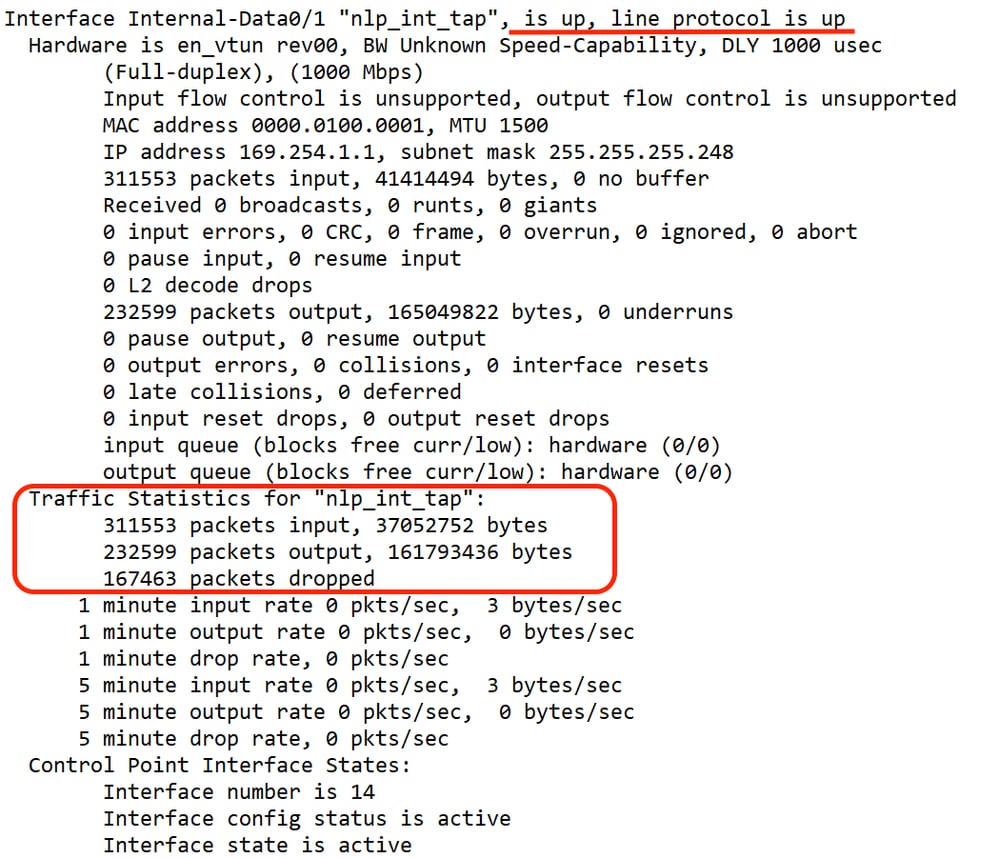
Validate Route on FTD to Reach FMC
At the threat defense CLI, check that the default route (S*) was added and the internal NAT rules exist for the Management Interface (nlp_int_tap).
> show route
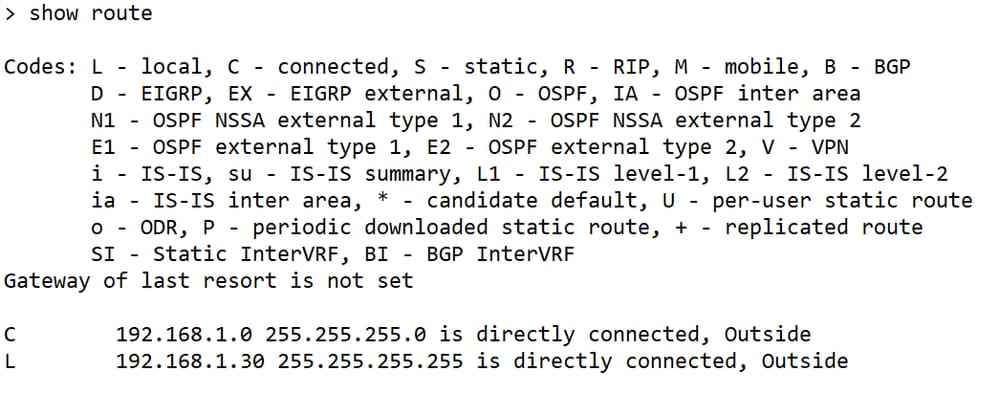
> show nat

Check Sftunnel and Connection Statistics
> show running-config sftunnel


Warning: Throughout the process of changing manager access, refrain from deleting the manager on the FTD or unregistering/force deleting the FTD from FMC.
Related Information
Revision History
| Revision | Publish Date | Comments |
|---|---|---|
3.0 |
05-Oct-2026
|
Updated spelling, grammar, inserted horizontal lines to separate sections for readability, fixed CCW alerts. |
2.0 |
12-Aug-2025
|
Updated Formatting. Recertification |
1.0 |
18-Jul-2024
|
Initial Release |

 Feedback
Contact Cisco
- Open a Support Case

- (Requires a Cisco Service Contract)